Custom properties are user-defined properties which provide
a means of extending or customizing a rulebase by allowing metadata to be
associated with any of the following elements: attributes, controls, entities, folders, relationships, rules,
screens and the project.
To set up a custom property you need to:
Specify the custom property definition in Oracle Policy Modeling. Each property can be a given a custom
name, default value, data type and can be customized in a number of ways.
Assign a value for the custom property for the element.
Custom
properties also require application support in order to work.
The first step towards setting up a custom property in your rulebase is to specify a custom property definition in Oracle Policy Modeling.
To specify a custom property definition:
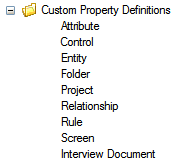
Select File | Project Properties from the main menu.
From the list view, select the type of project element for which you wish to define a custom property definition:
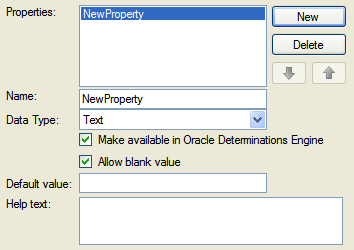
You can define a new definition for the property by clicking the New button. A template will be created for the new custom property.
Specify a Name for the custom property.
Select the Data Type from the drop-down list (Text, Boolean, Number or List).
If you don't want the custom property to be included at runtime, unselect the Make available in Oracle Determinations Engine check box.
If you want to enforce properties to contain at least some value, unselect the Allow blank value check box.
Enter a Default Value for the custom property if required.
Enter Help Text for the custom property if required.
Save your project to ensure that your custom property definitions are saved.
Assign a custom property to an attribute
To assign a custom property to an attribute:
Open the properties file for the project.
Right-click on the
attribute and select Edit Attribute
from the pop-up menu.
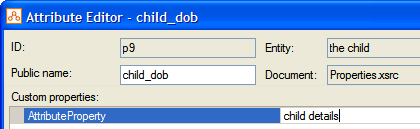
In the Attribute
Editor dialog, click the Custom
Properties tab.
Your defined attribute
custom properties will be displayed in the Custom
properties list. Select the property for which you wish to provide
a value and enter that value in the right hand text box.
Click OK to apply the
change and save the document.
NOTE: You cannot
define a custom property directly on a generated attribute. In order to
apply a custom property to an attribute, you must have an equivalent publicly named attribute in your properties file and assign the custom property to that attribute.
Some examples of how custom properties can be used on attributes are:
to format an attribute or an attribute value.
For example, to format an attribute value to be title case or an attribute
to appear in bold.
to identify attributes that are used in generated documents (for example, attributes used in a claim letter)
to link equivalent attributes in different rulebases
to map each attribute to a data item in an external
application
to group particular attributes together
NOTE: Custom property
names are case sensitive. If the case does not match the case in the definition
then the custom property will not work.
Assign a custom property to an entity
To assign a custom property to an entity:
Open the properties file for the project.
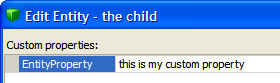
Double-click the entity and in the Edit Entity dialog box, click the Custom Properties tab.
Select the property for which you wish to provide
a value and enter that value in the right hand text box.
Click OK to apply the
change.
NOTE: Custom property
names are case sensitive. If the case does not match the case in the definition
then the custom property will not work. Also, in order for a custom property to be compiled out for an entity, the entity must have a public name.
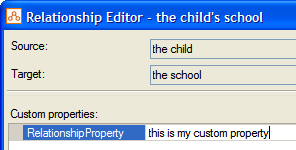
Assign a custom property to a relationship
To assign a custom property to a relationship:
Open the properties file for the project.
In the Relationships tab for the entity, right-click on the relationship and select Edit Relationship...
from the pop-up menu.
In the Relationship Editor dialog box, click the Custom Properties tab.
Select the property for which you wish to provide
a value and enter that value in the right hand text box.
Click OK to apply the
change.
NOTE: Custom property
names are case sensitive. If the case does not match the case in the definition
then the custom property will not work. Also, in order for a custom property to be compiled out for a relationship, the relationship must have a public name.
Assign a custom property to a rule
To assign a custom property to a rule:
In the Project Explorer in Oracle Policy Modeling, double-click on the rules file to open it in Microsoft Word.
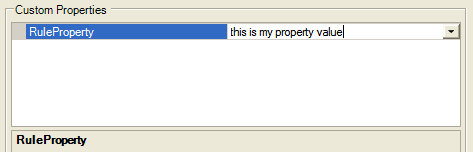
Place your cursor at some point in the rule and select the Rule Properties Editor button on the Oracle Policy Modeling toolbar.
Your defined rule custom properties will be displayed in the Custom
Properties list in the Rule Properties dialog box.
Select the property for which you wish to provide a value and enter
a value in the right-hand text box.
Click OK to apply the change. You will notice that the custom property now appears above your rule conclusion.
rule_property[RuleProperty:this is my property value]
the family is ready to go camping if
the camping equipment has been packed and
everyone is in the car
Some examples of how custom properties can be used on rules are:
identifying the owner of rules (eg rule_property[Maintenance:Business
Rule Team])
identifying the date the rule was last amended
(eg rule_property[Updated:2006-06-17])
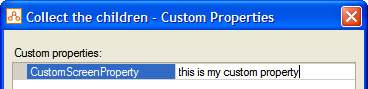
Open your screens file and right-click the name of the screen for
which you wish to add a custom property value.
Select Custom Properties
from the pop-up menu.
In the Custom Properties
dialog box, select the appropriate custom property and enter a value into
the right-hand text box.
Click OK to apply the change
and save your screen document.
An example of how custom properties can be used on screens is:
to make a whole screen display differently. For
example, to have a different watermark or size of font from other screens.
NOTE: Custom property
names are case sensitive. If the case does not match the case in the definition
then the custom property will not work.
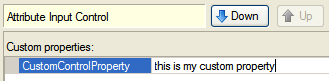
Assign a custom property to a control
To assign a custom property to a control (screen input):
Open the screen edit window for the screen on which your control
is defined.
Switch to the Custom Properties
tab.
Select the property for which you wish to provide a value and enter
a value in the right-hand text box.
Click OK to apply the change
and save your screen document.
Some examples of how custom properties can be used on controls are:
to control the appearance of inferred attributes
on screens
to make radio buttons appear down the page (rather
than the default position of across the page)
to change commentary based on answers to earlier
questions. For example, to substitute the claimant's name in the commentary
for a particular control.
to enable a question based on the answer to another
question on the same screen. For example, to only enable the question
'What is the dog's name?' if the user has already answered on that screen
that they have a dog.
NOTE: Custom property
names are case sensitive. If the case does not match the case in the definition
then the custom property will not work.
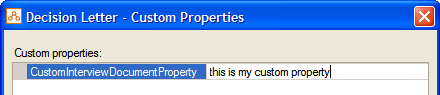
Assign a custom property to an interview document
To assign a custom property to an interview document:
Open your screens file and right-click the name of the interview document for
which you wish to add a custom property value.
Select Custom Properties
from the pop-up menu.
In the Custom Properties
dialog box, select the appropriate custom property and enter a value into
the right-hand text box.
Click OK to apply the change
and save your screen document.
NOTE: Custom property
names are case sensitive. If the case does not match the case in the definition
then the custom property will not work.
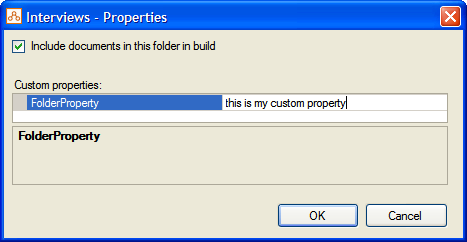
Assign a custom property to a folder
To assign a custom property to a folder:
Open the Project Explorer in Oracle Policy Modeling.
Select the folder you want to assign a custom property to. Right-click and select Properties...
Select the property for which you wish to provide a value and enter
a value in the right-hand text box.
Click OK to apply the change.
NOTE: Custom property
names are case sensitive. If the case does not match the case in the definition
then the custom property will not work.
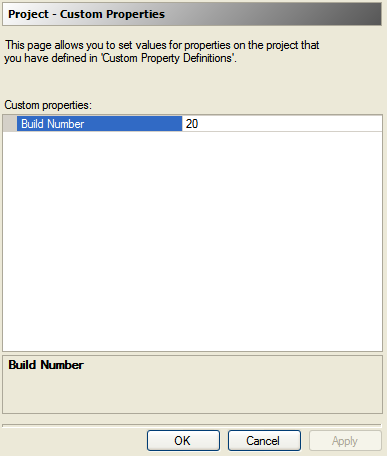
Your defined project custom properties will be displayed in the Custom
properties list.
Select the property for which you wish to provide a value and enter
a value in the right-hand text box.
Click OK to apply the change
and save your project.
Some examples of how custom properties can be used on the project are:
to specify the product version. For example, 'build
number 121'.
to specify the project's release status
NOTE: Custom property
names are case sensitive. If the case does not match the case in the definition
then the custom property will not work.
Implement a custom property using application support
The typical process for the implementation of custom properties is:
A requirement is identified that is not met by the standard properties and methods provided by the API (eg information on how to format an attribute value)
Rule developers and application developers agree on a design to meet that requirement that includes one or more custom properties.
Rule developers and application developers agree on the property names and value ranges.
Rule developers define the custom properties and set values for the properties, generally in Oracle Policy Modeling. (The exception is rule custom properties which are set in Microsoft Word).
Application developers write code to query the custom properties at runtime. They need to know the exact names of the properties to query for and the values to expect.
The code does something based on the property value (eg format an attribute value to be title case based on an attribute custom property 'format' having the value 'title_case').
TIP: It does not make sense to use custom properties when rules alone can do the work or when they would require replication of logic in the rulebase. Also, it is not advisable to use custom properties when a change is required globally and there is no likelihood in the future of it being changed again.
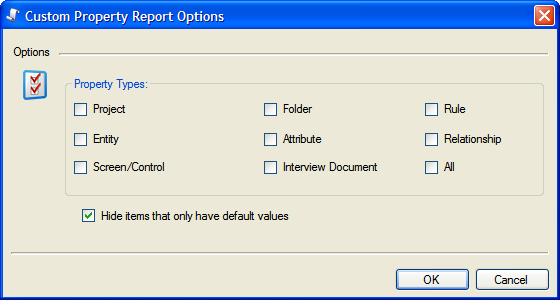
Generate a report of custom properties in a project
There is a Custom Properties report in Oracle Policy Modeling that you can use to generate a report of some or all of the custom properties used in the project.
To run a Custom Properties report:
In Oracle Policy Modeling, select Reports | Custom
Properties. A Custom Property Report Options dialog will be shown.
Select the property types to display. You also have the option to hide items that
only have default values from the report.