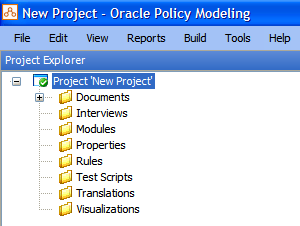
Folders are used in Oracle Policy Modeling to organize project files. When you create a new project you have the option to create a default folder structure which is the standard way of organizing your project files.
This folder structure is also physically created in the same location as your Oracle Policy Modeling project.
The folders are for assistance only. Documents may be contained in any folder.
If this folder structure is not suitable for your individual project, unselect the option to Create default folder structure in the New Project dialog.You will then need to manually create project folders (see below).
Create a new project folder
To create a folder in your Oracle Policy Modeling project:
Select the folder in the Project Explorer where you would like to create the folder. (If you want the folder created at the top level in your project, select the project name.)
Right-click and select Add New Folder.
Type a name for the folder, then press Enter.
Add an existing folder
To add an existing folder to a project:
In the Project Explorer in Oracle Policy Modeling, select the folder that you would like the existing folder to be placed in.
Right-click and select Add Existing Folder...
In the Add Existing Folder dialog box, select the folder/s that you want to add. NOTE: This dialog box will only display the folders that already exist in the project folder.
Use the check box to indicate whether you want
to include all files and sub folders, then click OK.
NOTE: When adding
sub-folders, hidden files and directories will be ignored. Hidden files/folders
can still be added manually using the respective Add
Existing [File/Folder] options.
Rename a project folder
To rename a folder in your project:
In the Project Explorer in Oracle Policy Modeling, right-click the folder that you want to rename and select Rename.
Type a new name for the file, then press Enter.
Remove a project folder
To remove a folder from a project:
In the Project Explorer in Oracle Policy Modeling, right-click the folder that you want to remove and select Remove from Project.
Move files between folders
To move a file to a different folder:
In the Project Explorer in Oracle Policy Modeling, select the file that you want to move.
Drag the file to the folder where you want to move it to (the folder will become highlighted) and release your mouse button.
You may be advised that moving the file may cause existing attribute links to break because the document is currently using an automatically generated Scope ID. Click Yes to persist the current Scope ID so as to avoid these broken links.
Sort folders and files
By default, folders, and files in folders will be sorted alphabetically. To turn this feature off (so that folders and files appear in the order that you added them):
Go to File | Project Properties | Common Properties | General.
Unselect the Sort project explorer checkbox.
Click OK.
Locate a rulebase file in Windows Explorer
You can locate any of your rulebase files in Windows Explorer from within Oracle Policy Modeling.
In the Project Explorer, right-click on the file you wish to open in Windows Explorer.
Select the Locate in Explorer option in the menu. A new Windows Explorer window will be opened showing the folder containing the rulebase file.