Burstable Instances for Jobs
Burstable Instances let you deploy your workloads on a virtual machine that constantly provides a baseline level of CPU performance with the ability to burst to higher levels in case of occasional spikes in usage.
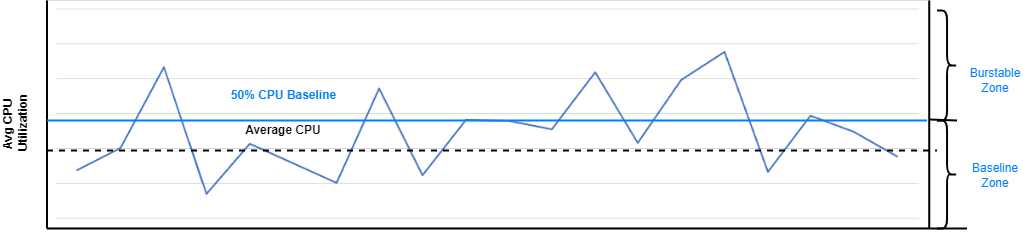
Traditional VM instances provide fixed CPU resources, while limited burstable instances provide a baseline level of CPU utilization with the ability to burst CPU utilization above the baseline level up to 100% of CPU cores provisioned. This ensures that you pay only for baseline CPU. The baseline utilization and ability to burst are governed by various factors such as burst pattern. The burst is limited to a maximum of one hour continuous burst to ensure that resources are managed fairly. Because burstable instances are oversubscribed compute resources, there's no guarantee that an instance can burst exactly when needed. Quota usage and metering are always based on the baseline core count, regardless of how often the VM bursts.
Billing
Burstable instances are billed according to the baseline OCPU selected when creating or updating a model deployment, notebook, ML job, or ML pipeline. The charge for a burstable instance is the same regardless of whether the actual CPU utilization is at the baseline, less than the baseline, or bursts more than the baseline.
For example, if you create a deployment with VM.Standard.E4.Flex instance using 1 OCPU and a 50% baseline, you're charged for 50% of a Standard E4 OCPU each hour, regardless of whether the actual CPU utilization is under 50% of an OCPU or bursts to the full OCPU.
For more information, see the Burstable Instances documentation.
Supported Shapes
The specific shapes supported for burstable instances are:
- VM.Standard3.Flex
- VM.Standard.E3.Flex
- VM.Standard.E4.Flex
- VM.Standard.E5.Flex
For more information on the supported shapes, see the Compute documentation.
Current Limitations
These are the limitations of burstable VMs.
- The burst is limited to a maximum one hour continuous burst
- Memory doesn't burst.
- If the underlying host is oversubscribed, it's not guaranteed that an instance can burst exactly when needed.
Creating a Job with a Burstable Instance
Follow these steps to create a job with a burstable instance.
When creating the job, in the step for selecting the compute shape (under 2. Configuration), select Enable Burstable Shape. For Baseline utilization per OCPU, optionally select the percentage of OCPUs that you usually want to use. The supported values are 12.5% and 50%. (For model deployments, only the value of 50% is supported.)
After the job is in an active state, you can use job runs to repeatedly run the job.
These environment variables control the job.
Use the Data Science CLI to create a job as in this example:
Run the CreateJob operation to create a job and CreateJobRun to start a job.