Create an Integration Task to Configure and Run a Data Flow

In Data Integration, an integration task lets you to prepare your data flows for execution.

You can add parameters to a data flow, so that it can be used with different values each time you run the task. Default parameter values can be updated within an integration task. You can then validate the data flow with the updated parameters, before you publish the task to an Application.

In this tutorial, you:

  1. Create an integration task to configure runtime context for a data flow.
  2. Create an Application to contain and run published tasks.
  3. Publish a task to an Application.
  4. Create and monitor a task run.

1. Creating an Integration Task

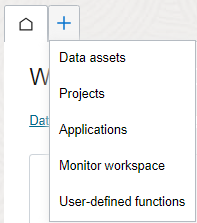
  1. In the tab bar, click Open tab (plus icon), and then select Projects.

    Open tab

  2. On the Projects page, click DI_Lab.
  3. On the DI_Lab project details page, click Tasks in the left submenu.
  4. On the Tasks page, click Create task and select Integration.

    The Create integration task page opens in a new tab.

  5. On the Create integration task page, change the Name to Load Customers Lab.

    The value in the Identifier field is auto-generated based on the value you enter for Name. You can change the auto-generated value, but once you save the task, you cannot update it again.

    Entering a Description for the task is optional.

  6. In the Data Flow section, click Select.
  7. In the Select a data flow panel, select Load Customers and Revenue Data, and then click Select.
  8. Click Create and close.

2. Creating an Application

An Application is a container for published tasks, data flows, and their dependencies. You can run published tasks in an Application for testing, or roll them out into production.

  1. On the workspace Home page, in the Quick actions tile, click Create application.
  2. On the main Create application page, click Create blank application.
  3. Enter Lab Application for the Name.
  4. Verify or change the Compartment in which this Application is to be created.
  5. Click Create.

    The Application details page for Lab Application opens in a new tab.

3. Publishing a Task to an Application

  1. On the DI_Lab project details page, click Tasks in the submenu.
  2. In the Tasks list, click the Actions icon (three dots) for Load Customers Lab and then select Publish to application.
  3. In the Publish to application dialog, select Lab Application.
  4. Click Publish.

    A notification message displays. When you publish a task, a patch is created in the Application.

    You can still modify the task or edit its data flow without impacting the published task. This enables you to test a version of your data flow, while working on some new changes.

  5. Go to the Lab Application details page, and click Patches on the left submenu to view details of the task patch.

    A patch contains updates to a published task in an Application.When you publish a task, a publish patch is created. When you unpublish a task, an unpublish patch is created. You can find a list of patches and their status on the Application details page. Learn more about Patches.

  6. Click Refresh to get the latest status updates.

    When the status of the patch changes to Success, a published task entry is created on the Tasks list of the Application details page.

  7. Click Tasks on the Lab Application details page.

    The Tasks page shows the list of tasks you have published to the Application. You run published tasks from the Tasks page.

4. Creating and Monitoring a Task Run

  1. On the Lab Application details page, click Tasks in the submenu on the left.
  2. In the Tasks list, click the Actions icon (three dots) for Load Customers Lab and then select Run.

    A success message appears. Running a task creates a task run on the Runs page of the Application. You're automatically brought to the Runs page, where you can view all task runs and their status. The initial status of a run is Not started.

  3. Click Refresh to get the latest task run status updates.

    Learn more about task runs

    When the run status turns to Success, you can see the values for Data read and Rows written.