H End User Actions
This appendix describes the actions end users perform while using a Fusion web application and integrated Excel workbook, such as installing ADF Desktop Integration, importing data from non-integrated Excel workbooks, making changes in the workbook at runtime, and handling time zone conversion of date-time values in the workbook.
The audience for this appendix are end users of integrated Excel workbooks at runtime. References to "you" in this appendix are directed to these end users.
This appendix includes the following sections:
H.1 Installing, Upgrading, and Removing ADF Desktop Integration
You can install ADF Desktop Integration by downloading the installer file from the Fusion web application. Your system administrator can make this installer available as described in the "Installing and Upgrading ADF Desktop Integration" section of Administrator's Guide for Oracle Application Development Framework). When the installer runs, it verifies whether the required software is installed on the your system. For more information about the required software, see the following:
-
Section 3.2, "Required Oracle ADF Modules and Third-Party Software"
-
Section 3.3, "Configuring Excel to work with ADF Desktop Integration"
Note:
You do not require JDeveloper to install ADF Desktop Integration.H.1.1 How to Install ADF Desktop Integration on Your System
You can install ADF Desktop Integration using an installer that you download from an ADF Desktop Integration-enabled Fusion web application. If you cannot locate the URL, ask your system administrator. The URL is similar to the following:
To install ADF Desktop Integration:
-
After downloading the
adfdi-excel-addin-installer.exefile, run it. -
In the installation wizard, click Install.
Follow the instructions that appear in the dialog boxes to successfully install the required components. If you encounter an error during the installation process, an error message with a description appears, and installation is rolled back. For more details, check the
adfdi-installer-log.txterror log file in thetempdirectory of the user profile. -
Click Close.
-
Configure Excel as described in Section 3.3, "Configuring Excel to work with ADF Desktop Integration."
H.1.2 How to Remove ADF Desktop Integration
Use the Microsoft Windows Control Panel to remove ADF Desktop Integration from the system.
To remove the ADF Desktop Integration add-in:
-
Click the Windows Start button, and then choose Control Panel.
-
In the Control Panel, select and open Programs and Features.
-
Select Oracle ADF 11g Desktop Integration Add-in for Excel in the Uninstall or change a program window, and click Uninstall.
Note:
The specific steps may vary depending on the version of Windows used. Please refer to the Windows documentation for more details.H.1.3 How to Upgrade ADF Desktop Integration On a Local System
When you establish a connection with the Fusion web application from the runtime integrated workbook, ADF Desktop Integration verifies whether the client and the server versions are same. If the versions do not match, a message appears asking you to upgrade to the client version that matches the server version.
You may check for a newer version of the client at any time. To do this, you establish a session with the Fusion web application and then click the Check for updates link in the About dialog of the integrated Excel workbook, as shown in Figure H-1. A dialog then appears that shows you the current client and server versions. The dialog also allows you to install a newer client version if the versions do not match.
Note:
Using a client version that matches the server version is highly recommended to avoid unexpected behavior or errors in integrated Excel workbooks.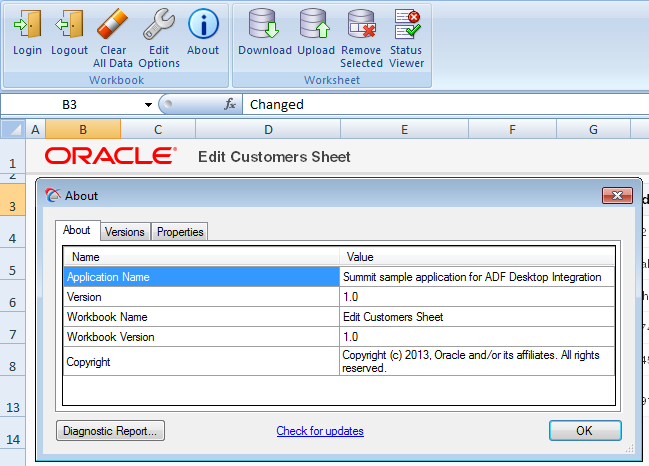
For more information about the upgrade process, see the "Verifying the Client Version of ADF Desktop Integration" section in Administrator's Guide for Oracle Application Development Framework.
H.2 Removing Personal Information
If the Fusion web application that the application developer integrated an Excel workbook with uses a security mechanism, such as single sign-on, personally identifying information may be stored in cookies on the system where you access the integrated Excel workbook. You can remove this information using Microsoft Internet Explorer. You must log out and close all integrated Excel workbooks to invalidate all active cookie-based web sessions.
For information about removing personal information, see Microsoft Internet Explorer documentation.
H.3 Limitations of an Integrated Excel Workbook at Runtime
There are some known limitations on changing ADF Desktop Integration components at runtime.
-
Avoid this operation because using Excel cut-insert operations on worksheet columns that render in an ADF Table component may produce unexpected results during subsequent interaction with the component.
-
Avoid moving or deleting columns that render in an ADF Table component's group of columns as this may produce unexpected results and/or affect the grouping of columns.
-
Excel's Conditional Formatting feature cannot be used effectively with ADF Desktop Integration table components.
-
The ADF Button components are disabled when you zoom in or out on an integrated Excel worksheet. The ADF Button components are active at 100% zoom only.
-
You should not sort tables containing dependent lists of values.
-
You cannot use Microsoft Excel's Undo or Redo commands to undo or redo changes made while using ADF Desktop Integration.
-
Excel's Track Changes and Share Workbook features are not compatible with ADF Desktop Integration. You cannot use these Excel features with integrated Excel workbooks.
-
If you see a message while viewing a web page in a popup dialog that your session or page has timed out or expired, close the popup dialog without completing the action and then retry the action.
H.4 Using an Integrated Excel Workbook
If you are new to the ADF Desktop Integration technology and integrated Excel workbooks, please be aware of the following common actions:
-
Before uploading the changes, ensure that the Changed column of all modified rows is marked with an upward pointing triangle. A double-click on the upward pointing triangle character removes it, and the data of the relevant row is not uploaded.
-
Do not delete, edit, or clear any cells in the Key column of the table. Any change to these values can lead to upload failures and data corruption.
-
Do not change Excel's settings for Protect Sheet or Protect Workbook. These settings are available in the Changes group of the Review tab.
-
To erase a value from a cell that is integrated with the web application, clear the cell value instead of deleting the Excel cell.
-
If the Fusion web application is running on the
httpsprotocol and you have not installed the security certificate on the client, the integrated Excel workbook gives an error on login and the connection is not established. To establish a connection, you must install the security certificate. If you cannot install the certificate from Excel, open Internet Explorer and navigate to the same website. You will be prompted to install the certificate. -
Some ADF components may have cells that are configured to respond to a double-click to perform some action. For example, the Status column cells of the ADF Table component. You can also right-click in these cells and select Invoke Action.
-
To have Excel retain the format of a numeric or date value in a cell formatted with a text style while uploading data, add an apostrophe symbol (') before entering the value. The apostrophe symbol acts as an escape character and is not displayed with the value.
-
When you try to close the integrated Excel workbook, Microsoft Excel prompts you with a dialog to save the workbook even if you have not modified it after opening it. This behavior is expected because ADF Desktop Integration modifies an integrated Excel workbook each time you open it.
Some common actions, such as inserting or deleting a row, and sorting data in ADF Table, are described in the subsequent sections.
H.4.1 How to Insert or Paste Rows in an ADF Table Component
To insert rows in the middle of an ADF Table component, insert a full row or rows in the worksheet, and add data in all mandatory columns. For more information, see Section 7.7, "Inserting Data in an ADF Table Component."
Data that you manage in another Excel workbook (for example, a non-integrated Excel workbook) can also be pasted into an ADF Table component.
To paste data from another worksheet into ADF Table component rows:
-
Arrange the data in the Excel workbook from which you plan to copy the data to match the layout of the ADF Table component in the integrated Excel workbook.
For example, if the first column in the ADF Table component where you want to enter data is Column D, make Column D the first column where you arrange data in the Excel workbook. Also, make sure to provide data for all mandatory columns that the ADF Table component specifies.
-
In the Excel workbook, copy the rows of data.
-
To paste the copied rows into the middle of an ADF Table component:
-
Select the entire row above which you want to paste the data from the Excel workbook.
-
With the row selected, right-click and choose Insert Copied Cells.
-
In the Insert Paste dialog that appears, select Shift cells down.
-
-
To paste the copied rows after the last row of an ADF Table component:
-
Select the entire row above which you want to paste the data from the Excel workbook.
-
With the row selected, right-click and choose Insert Copied Cells.
-
To insert a row in an ADF Table component between the header and last row:
-
In the ADF Table component, select the entire row above which you want to insert the new row.
-
With the row selected, right-click and choose Insert.
A new row is inserted above the selected row.
To insert rows in an ADF Table component after the last row:
-
Type data in an empty row immediately after the last row in the ADF Table component.
The ADF Table component automatically converts the edited row to a row in the ADF Table component.
Notes:
-
If the ADF Table has no data rows, the first row under the column header row acts as a placeholder data row.
-
You cannot enter data directly under the table's data rows if ADF Desktop Integration worksheet protection is enabled (
Protection.Modeproperty set toAutomatic), as described in Section 10.7, "Using Worksheet Protection." You can disable this protection for individual cells or rows by clearing the Locked checkbox in the Protection page of Excel's Format Cells dialog that you access from the Format Cells context menu.
H.4.2 How to Sort ADF Table Data in an Integrated Excel Workbook
To sort table data, choose Excel's Sort and Filter command.
To sort ADF Table data based on a particular column:
-
Select the header, or any cell, of the column you want to sort.
-
In the Editing group of the Home tab, click Sort and Filter. Choose the desired sort order from the dropdown list options.
To sort table data based on multiple columns:
-
Select any cell of the table.
-
In the Editing group of the Home tab, click Sort and Filter, and choose Custom Sort.
-
In the Sort dialog, add the columns, and their order preference. Ensure that the My data has headers checkbox is enabled.
-
Click OK.
Note:
While sorting the columns in an ADF Table component, ensure that you always choose Expand the selection in the Sort Warning dialog, when prompted, in order to maintain the integrity of the data in all the table rows.H.4.3 How to Delete a Row in ADF Table of an Integrated Excel Workbook
Clearing the cell values of a row does not remove the row, and deleting the row from the Excel worksheet does not delete the row from the web application.
To delete a row in an ADF Table component, flag the row by double-clicking the respective cell of the Flagged column, and click the respective delete button. For more information about row flagging, see Section 7.12.1, "Row Flagging in an ADF Table Component."
Note:
If your table does not contain a Flagged column, you will not be able to delete rows from that table.H.5 Handling Time Zone Conversion
Integrated Excel workbooks can be configured to retrieve, edit, and submit data values that represent dates and times. As Excel does not provide native support for managing date or time data when the system time zone changes, ADF Desktop Integration tracks and detects the time zone changes for a workbook. It informs you about the time zone update when the workbook is opened, and then converts the date-time data of the workbook to the current time zone setting of the system.
For example, assume you are in Arizona (GMT -07:00) and you download data from the server to the integrated Excel workbook, edit the date-time data in the workbook, save the data, but do not upload it. Later, you travel to Seoul and change the time zone preference of your computer to GMT +09:00. When you open the workbook after changing to the Seoul time zone, you receive a message, and then all date-time data values in the ADF components are converted from GMT -07:00 (Arizona) to GMT +09:00 (Seoul).