12 Upgrading Oracle Identity Federation High Availability Environments
This chapter describes how to upgrade Oracle Identity Federation in a high availability environment.
This chapter contains the following sections:
-
Task 1: Understand the Oracle Identity Federation High Availability Upgrade
-
Task 2: Install the Oracle Identity Federation Schema in the Database
-
Task 3: Install Oracle WebLogic Server and Create the Middleware Home
-
Task 4: Install Oracle Identity Federation 11g Release 1 (11.1.1.9.0)
-
Task 6: Extend the Domain and Create the First Oracle Identity Federation 11g Oracle Instance
-
Task 7: Use the Upgrade Assistant to Upgrade the First Oracle Identity Federation Oracle Instance
-
Task 8: Install Oracle WebLogic Server and Create the Middleware Home on IDMHOST2
-
Task 9: Deinstall the Oracle Identity Federation 10g Instance on IDMHOST2
-
Task 11: Configure the Oracle WebLogic Server Domain on IDMHOST2
-
Task 12: Copy the Oracle Identity Federation Application from IDMHOST1 to IDMHOST2
-
Task 15: Verify the Oracle Identity Federation High Availability Upgrade
12.1 Task 1: Understand the Oracle Identity Federation High Availability Upgrade
Refer to the following sections to prepare for the Oracle Identity Federation high availability upgrade:
12.1.1 Prerequisites for Oracle Identity Federation High Availability Upgrade
Before you begin this upgrade procedure, it is assumed that:
-
The 10g source topology is equivalent to the 11g destination topology.
In other words, the Oracle Identity Federation topology that you are planning to install should be similar in its design to the 10g environment. For example, it is assumed that you will be running the same number hosts and the same number Oracle Identity Federation instances in the 11g environment.
-
For each Oracle Identity Federation instance you are upgrading, the target Oracle Identity Federation 11g Oracle Home must be on the same host as the source Oracle Identity Federation 10g Oracle home.
-
The database that will be used to host the Oracle Identity Federation schema has been upgraded to a version supported by Oracle Fusion Middleware 11g.
For more information, see "Upgrading and Preparing Your Databases" in the Oracle Fusion Middleware Upgrade Planning Guide.
-
If you are also upgrading the associated Oracle HTTP Server, stop all processes for any additional Oracle Identity Federation 10g installations on other hosts, prior to beginning the upgrade process.
For more information about upgrading the Oracle HTTP Server associated with your Oracle Identity Federation 10g installations, see Section 12.6.2, "About Selecting and Configuring Oracle HTTP Server with Oracle Identity Federation".
12.1.2 Conventions Used in This Chapter
The examples in this chapter assume you are upgrading two Oracle Identity Federation instances running on two separate host computers. These are referred to as IDMHOST1 and IDMHOST2.
In addition, the examples assume you have two database servers, also running two separate hosts, DBHOST1 and DBHOST2.
12.2 Task 2: Install the Oracle Identity Federation Schema in the Database
Before you can install Oracle Identity Federation 11g in preparation for upgrade, you must install the Oracle Identity Federation 11g schema in a supported database.
You use the Repository Creation Utility to create the schema and select the Oracle Identity Federation component on the Select Components screen of the Repository Creation Utility.
For more information, refer to Section 7.2, "Task 2: Use the Repository Creation Utility to Install the Oracle Identity Federation Schema in the Database".
12.3 Task 3: Install Oracle WebLogic Server and Create the Middleware Home
For information on installing the Oracle WebLogic Server, see "Preparing for Installation" and "Running the Installation Program in Graphical Mode" in the Oracle Fusion Middleware Installation Guide for Oracle WebLogic Server.
12.4 Task 4: Install Oracle Identity Federation 11g Release 1 (11.1.1.9.0)
To install and configure Oracle Identity Federation 11g, refer to the chapter "Installing and Configuring Oracle Identity Management (11.1.1.9.0)" in the Oracle Fusion Middleware Installation Guide for Oracle Identity Management.
12.5 Task 5: Configure the Oracle WebLogic Server Domain with Only Oracle Enterprise Manager Fusion Middleware Control
Use the Oracle Fusion Middleware Configuration Wizard to configure Oracle Virtual Directory. For more information, see the "Creating a WebLogic Domain in Graphical Mode" topic in the Oracle Fusion Middleware Creating Domains Using the Configuration Wizard guide.
Note:
Make sure that the port numbers7001 and 5556 are not in use by any service on the computer.
For example, on UNIX systems, enter the following commands. If a port is not in use, no output is returned from the command:
netstat -an | grep "7001"
netstat -an | grep "5556"
On the Windows operating system:
netstat -an | findstr "LISTEN" | findstr "7001"
netstat -an | findstr "LISTEN" | findstr "5556"
If the ports are in use (if the command returns output identifying the port), you must free them.
For example, on UNIX systems, if the port is in use by one or more services, remove the entries for ports 7001 and 5556 in the /etc/services file and restart the services, or restart the computer.
12.6 Task 6: Extend the Domain and Create the First Oracle Identity Federation 11g Oracle Instance
Now that you have configured an Oracle WebLogic Server domain, you can extend the domain and create the first Oracle Identity Federation component Oracle instance. Refer to the following sections for more information:
-
Extending the Domain and Configuring Oracle Identity Federation
-
About Selecting and Configuring Oracle HTTP Server with Oracle Identity Federation
12.6.1 Extending the Domain and Configuring Oracle Identity Federation
To extend the domain and configure Oracle Identity Federation:
-
Review the first four chapters of the Oracle Fusion Middleware Installation Guide for Oracle Identity Management.
These chapters include important pre-installation information, such as system requirements and prerequisite tasks.
-
Make sure that the port number
7499is not in use by any service on the computer.On the UNIX operating system:
netstat -an | grep "7499"
On the Windows operating system:
netstat -an | findstr "LISTEN" | findstr "7499"
If the ports are in use (if the command returns output identifying the port), you must free them.
For example, on UNIX systems, if the port is in use by a service, remove the entry for port
7499inthe /etc/servicesfile and restart the service, or restart the computer. -
Locate the Oracle Identity Management CD–ROM.
Alternatively, you can download and unpack the installation kit from the Oracle Technology Network:
http://www.oracle.com/technology
-
Copy the
staticports.inifile from the following directory on the CD–ROM, or from the directory where you downloaded and unpacked the software download, to a temporary directory:Disk1/stage/Response
-
Edit the
staticports.inifile that you copied to the temporary directory and assign the following custom ports:[OIF] # The OIF Server Port OIF Server Port = 7499
You will need to reference the location of this file later in the installation procedure of the first Oracle Identity Federation instance.
-
Start Oracle Identity Management configuration tool by running the following command:
OIF_ORACLE_HOME/bin/config.shFor example:
/u01/app/oracle/product/fmw/idm/bin/config.sh
-
Follow the instructions in the configuration wizard to extend the existing domain.
Refer to the following resources during the installation and configuration:
-
Table 12-1, which provides information on specific instructions required when installing and configuring the software for an Oracle Identity Federation high availability upgrade.
-
Oracle Fusion Middleware Installation Guide for Oracle Identity Management or click Help for general information about the prerequisites and other prompts required during an Oracle Identity Federation installation.
-
-
When the installation and configuration is complete, exit from the configuration tool.
Table 12-1 Summary of the Configuration Screens When Configuring the First Oracle Identity Federation Oracle Instance
| Screen | Description and Actions to Take |
|---|---|
|
Welcome |
Click Next to start configuring the Oracle Identity Federation |
|
Select Domain |
|
|
Specify Installation Locations |
For more information, click Help or refer to the Oracle Fusion Middleware Installation Guide for Oracle Identity Management. For more information about the Middleware home, see "Understanding Oracle Fusion Middleware Concepts" in the Oracle Fusion Middleware Administrator's Guide. |
|
Specify Email for Security Updates |
Choose how you want to be notified about security issues:
|
|
Configure Components |
This screen identifies the components to configure during this installation and configuration session. For the purposes of this procedure:
|
|
Configure Ports |
Select Specify Ports using Configuration file and enter the full path to |
|
Specify OIF Details |
For this example, enter the following in the fields on this screen:
|
|
OIF Advanced Flow Attributes |
Enter the following for each field on this screen: Authentication Type: JAAS User Store: NONE Federation Store: NONE User Session Store: RDBMS (default selection, which cannot be changed for a cluster) Message Store: RDBMS (default selection, which cannot be changed for a cluster. Configuration Store: RDBMS (default selection, which cannot be changed for a cluster. |
|
Transient Store Database Details |
Enter the following information on this screen:
|
|
Installation Summary |
Review the review the choices you made. If you need to make any changes click Back. If you made the correct selections, click Install. |
|
Installation Progress |
Monitor the progress of the installation of the files onto disk. |
|
oracleRoot.sh script dialog box |
During installation on UNIX platforms, this dialog box prompts you to log in as the root user and run the You must log in as the root user because the script creates files, edits files, and changes the permissions of certain Oracle executable files in the |
|
Configuration progress |
Monitor the progress of the software configuration. |
|
Installation Complete |
Click Finish to finish the installation and quit the installer. |
12.6.2 About Selecting and Configuring Oracle HTTP Server with Oracle Identity Federation
Oracle Identity Federation requires an Oracle HTTP Server instance. However, you can choose to install and configure the Oracle HTTP Server instance on the same host as Oracle Identity Federation, or you can install it on a separate host as part of a Web tier installation.
Note the following when deciding whether or not to install Oracle HTTP Server on the same host or not:
-
If you install Oracle HTTP Server on the same host as Oracle Identity Federation, you can use the Oracle Fusion Middleware Upgrade Assistant to upgrade the Oracle HTTP Server instance at the same time you are upgrading Oracle Identity Federation.
This means that the Upgrade Assistant can then migrate all your SSL certificates, OSSO integration configuration from the source Oracle Identity Federation 10g source topology to the Oracle Identity Federation 11g destination topology.
-
If you install Oracle HTTP Server on a separate host, the Upgrade Assistant will not migrate the SSL certificates and OSSO integration configuration. These artifacts will have to be migrated manually post upgrade.
12.7 Task 7: Use the Upgrade Assistant to Upgrade the First Oracle Identity Federation Oracle Instance
The Oracle Fusion Middleware Upgrade Assistant automates the upgrade of many aspects of your Oracle Application Server 10g environment.
The Upgrade Assistant is installed automatically into the bin directory of your Oracle Fusion Middleware Oracle home.
The following sections provide more information:
12.7.1 Task 7a: Start the Upgrade Assistant for an Oracle Identity Federation Upgrade
To start the Upgrade Assistant using the graphical user interface:
Note:
You can also use the Upgrade Assistant command-line interface to upgrade your Oracle Application Server 10g Oracle homes. For more information, see "Using the Upgrade Assistant Command-Line Interface" in the Oracle Fusion Middleware Upgrade Planning Guide.-
Change directory the
ORACLE_HOME/bindirectory of the Oracle Fusion Middleware installation. -
Enter the following command to start the Upgrade Assistant.
On UNIX system:
./ua
On Windows systems:
ua.bat
The Upgrade Assistant displays the Welcome screen as shown in Figure 12-1
Figure 12-1 Upgrade Assistant Welcome Screen
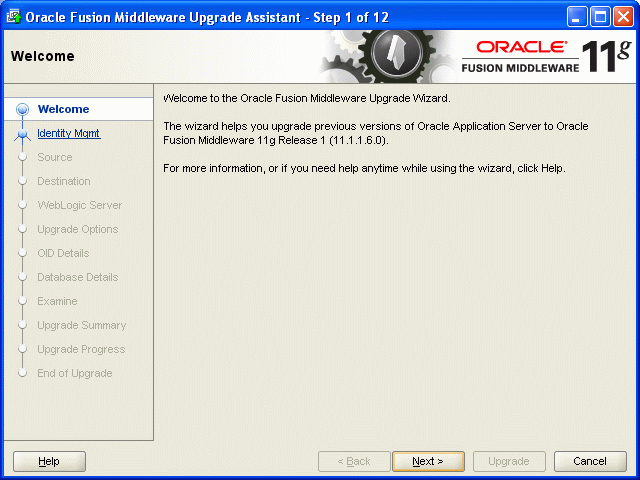
Description of "Figure 12-1 Upgrade Assistant Welcome Screen"
-
Click Next to display the Specify Operation screen (Figure 12-2).
The options available in the Upgrade Assistant are specific to the Oracle home from which it started. When you start Upgrade Assistant from an Oracle Application Server Identity Management Oracle home, the options shown on the Specify Operation screen are the valid options for an Oracle Application Server Identity Management Oracle home.
Figure 12-2 Upgrade Assistant Specify Operation Screen for an Oracle Identity Federation Upgrade
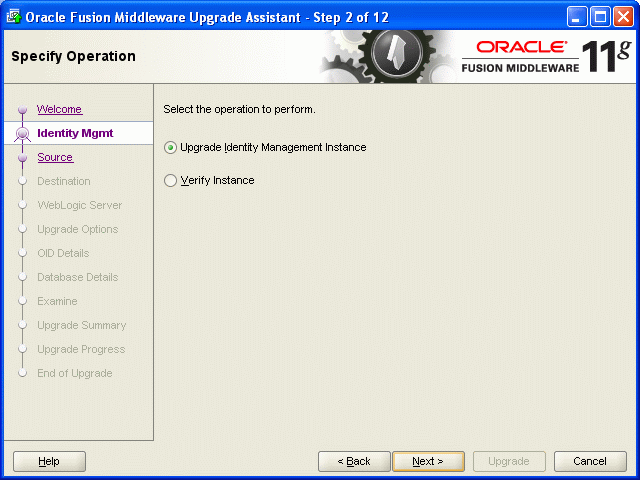
Description of "Figure 12-2 Upgrade Assistant Specify Operation Screen for an Oracle Identity Federation Upgrade"
12.7.2 Task 7b: Upgrade Oracle Identity Federation
When you upgrade Oracle Identity Federation, the Upgrade Assistant upgrades the configuration files in the Oracle Identity Federation middle tier.
To upgrade Oracle Identity Federation when they reside in the same Oracle instance:
-
Start the Upgrade Assistant as described in Task 7a: Start the Upgrade Assistant for an Oracle Identity Federation Upgrade.
-
Select Upgrade Identity Management Instance on the Specify Operation screen (Figure 12-2).
-
Refer to Table 12-2 for a description of the Upgrade Assistant screens that require input from you during an Oracle Identity Federation upgrade.
-
After the Specify Upgrade Options screen, the Upgrade Assistant performs the following tasks and provides the progress on each task:
-
Examines the components and schemas to be upgraded and verifies that they can be upgraded successfully.
-
Provides a summary of the components to be upgraded so you can verify that Upgrade Assistant is upgrading the components and schemas you expect.
-
Provides a progress screen so you can see the status of the upgrade as it proceeds.
-
Alerts you of any errors or problems that occur during the upgrade.
See Also:
"Troubleshooting Your Upgrade" in the Oracle Fusion Middleware Upgrade Planning Guide for specific instructions for troubleshooting problems that occur while running the Upgrade Assistant -
Displays the End of Upgrade screen, which confirms that the upgrade was complete.
-
-
Exit the Upgrade Assistant.
Table 12-2 Upgrade Assistant Screens That Require Input During an Oracle Internet Directory and Oracle Directory Integration Platform Upgrade
| Upgrade Assistant Screen | Description |
|---|---|
|
Specify Source Home |
Select the 10g (10.1.4.0.1) source Oracle home. If the Oracle home you want to upgrade does not appear in the drop-down lists, see "Source Oracle Home Not Listed by OracleAS Upgrade Assistant" in the Oracle Fusion Middleware Upgrade Planning Guide. |
|
Specify Destination Instance |
Enter the complete path to the destination 11g Oracle home that you installed inside the middleware home. This is the Oracle home that contains the Oracle Identity Federation software. Alternatively, click Browse to select the directory. |
|
Specify WebLogic Server |
Enter the host, Administration Server port, and administration user credentials for the Oracle WebLogic Server domain you configured in Section 12.5, "Task 5: Configure the Oracle WebLogic Server Domain with Only Oracle Enterprise Manager Fusion Middleware Control". |
|
Warning Dialog Box |
The Upgrade Assistant displays this warning dialog box if the source Oracle home contains Oracle Application Server components that are not installed and configured in the destination Oracle instance. This warning appears, for example, if the source Oracle home contains an instance of Oracle HTTP Server, which is not available in the 11g Oracle home. If the information in the dialog box is accurate and you understand which components will be upgraded, click Yes to continue. Otherwise, click No and verify which components are installed and configured in each 11g Oracle instance. |
|
Specify Upgrade Options |
This screen offers these upgrade options:
For the purposes of this example, select both of these upgrade options. |
12.8 Task 8: Install Oracle WebLogic Server and Create the Middleware Home on IDMHOST2
Before you can expand the Oracle WebLogic Server cluster you created on IDMHOST1 to include IDMHOST2, you must install the Oracle WebLogic Server binary files on IDMHOST2 and create Middleware home on IDMHOST2.
For information on installing the Oracle WebLogic Server, see "Preparing for Installation" and "Running the Installation Program in Graphical Mode" in the Oracle Fusion Middleware Installation Guide for Oracle WebLogic Server.
When you install Oracle WebLogic Server, make a note of the complete path to the Middleware home. You will need this information later in the upgrade procedure.
12.9 Task 9: Deinstall the Oracle Identity Federation 10g Instance on IDMHOST2
Before you install Oracle Identity Federation 11g on the second host in your Oracle Identity Federation high availability environment, Oracle recommends that you remove (deinstall) the Oracle Identity Federation 10g instance that is currently running on the second host.
This step is necessary to avoid port conflicts between the existing Oracle Identity Federation 10g instance and the new Oracle Identity Federation 11g instance.
For more information, see the following topics:
12.9.1 Procedure for Deinstalling the Oracle Identity Federation 10g Instance
For instructions on deinstalling Oracle Identity Federation 10g, refer to Section 5.4, "Un-installing Oracle Identity Federation" in the Oracle Identity Federation Administrator's Guide, which is available in the Oracle Application Server 10g (10.1.4.0.1) documentation library on the Oracle Technology Network (OTN):
http://www.oracle.com/technology/documentation/oim1014.html
12.9.2 Alternative Procedure to Avoid Port Conflicts
If deinstalling Oracle Identity Federation 10g is not an option for your organization, you can consider the following alternative solution, which involves modifying Oracle HTTP Server 10g configuration files.
To modify the Oracle HTTP Server 10g instance to avoid port conflicts during the Oracle Identity Federation 11g installation:
-
Change directory to the Oracle HTTP Server configuration directory:
10g_ORACLE_HOME\Apache\Apache\conf\ -
Create a backup copy of the files following files in this directory:
httpd.conf
ssl.conf
-
Edit the file
httpd.conf, and search for any occurrence of the HTTP Non-SSL Port that you need to reuse during the Oracle Identity Federation 11g installation. -
For each occurrence, edit or remove the value from the
httpd.conffile.For example, if the HTTP Non-SSL port is
7786, remove the value, or change the value from7786to77861. -
In a similar manner, edit the file
ssl.conffile and search for any occurrence of the HTTP SSL Port that you need to reuse. -
For each occurrence, edit or remove the value from the
ssl.conffile.
12.10 Task 10: Install Oracle Identity Federation 11g Release 1 (11.1.1.9.0) on the Second Instance IDMHOST2
To install and configure Oracle Identity Federation 11g on IDMHOST2, refer to the chapter "Installing and Configuring Oracle Identity Management (11.1.1.9.0)" in the Oracle Fusion Middleware Installation Guide for Oracle Identity Management.
12.11 Task 11: Configure the Oracle WebLogic Server Domain on IDMHOST2
Use the Oracle Fusion Middleware Configuration Wizard to configure Oracle Virtual Directory. For more information, see the "Creating a WebLogic Domain in Graphical Mode" topic in the Oracle Fusion Middleware Creating Domains Using the Configuration Wizard guide.
Note:
Make sure that the port numbers 7499 is not in use by any service on the computer.For example, on UNIX systems, enter the following commands. If a port is not in use, no output is returned from the command:
netstat -an | grep "7499"
On the Windows operating system:
netstat -an | findstr "LISTEN" | findstr "7499"
If the port is in use (if the command returns output identifying the port), you must free them.
For example, on UNIX systems, if the port is in use by one or more services, remove the entries for port 7499 in the /etc/services file and restart the services, or restart the computer.
12.12 Task 12: Copy the Oracle Identity Federation Application from IDMHOST1 to IDMHOST2
The Oracle Directory Integration Platform application is deployed on IDMHOST1 as an externally staged application. The application must be copied from IDMHOST1 to OIFHOST2; otherwise the managed server on IDMHOST2 is listed in the Oracle WebLogic Server administration console as being in an "unknown" state:
-
Locate the
applicationsdirectory in the Oracle WebLogic Server domain directory on IDMHOST1:MW_HOME/user_projects/domains/OIFDomain/config/fmwconfig/servers /wls_oif1/applications -
Copy the
applicationsdirectory on and its contents on IDMHOST1 to the same location in the domain directory on IDMHOST2.For example:
scp -rp MW_HOME/user_projects/domains/OIFDomain/config/fmwconfig/servers
               /wls_oif1/applications
     user@IDMHOST2:MW_HOME/user_projects/domains/OIFDomain/config/fmwconfig
               /servers/wls_oif2/applications
12.13 Task 13: Start the Managed Server on IDMHOST2
Follow these steps to start the wls_ods2 managed server in a cluster:
-
Open a browser and navigate to the WebLogic Administration Console at:
http://idmhost1.mycompany.com:port/console
-
Log in to the WebLogic Administration Console using the administrator credentials.
-
In the left pane of the WebLogic Administration Console, expand Environment and select Clusters.
-
Select the cluster (
cluster_oif) containing the managed server (wls_oif2) you want to start. -
Select Control.
-
Under Managed Server Instances in this Cluster, select the check box next to the managed server (
wls_ods2) you want to start and click Start. -
On the Server Life Cycle Assistant page, click Yes to confirm.
Note:
Node Manager starts the server on the target machine. When the Node Manager finishes its start sequence, the server's state is indicated in the State column in the Server Status table.12.14 Task 14: Complete Post-Upgrade Procedures
Refer to the following sections for information about important post-upgrade Oracle Identity Federation high availability procedures:
12.14.1 Configuring Routing Between Oracle Identity Federation and Oracle HTTP Server
Follow the steps shown below to create a new Oracle HTTP Server instance and to enable communication between the Oracle HTTP Server instance and the Oracle Identity Federation server instance on IDMHOST1 and IDMHOST2.
When you install and configure Oracle Identity Federation, the Oracle HTTP Server software is installed in the Oracle home, but an Oracle HTTP Server instance is not configured by default:
-
Create an Oracle HTTP Server instance to configure with Oracle Identity Federation:
INSTANCE_HOME/bin/opmnctl createcomponent -componentType OHS -componentName ohs1 -
On IDMHOST2, edit the following configuration file:
INSTANCE_HOME/config/OHS/ohs_name/moduleconf/oif.conf
In this example, ohs_name is the name of the Oracle HTTP Server component; for example:
ohs1 -
Uncomment and set the
WebLogicClustervariable to reference the managed servers running the Oracle Identity Federation Server instances.For example, if the host and port of each managed server is as follows:
idmhost1.mycompany.com:7499
idmhost2.mycompany.com:7499
Then update the file to contain the following entry:
<Location /fed> WebLogicCluster idmhost1.mycompany.com:7499,idmhost2.mycompany.com:7499 SetHandler weblogic-handler </Location> -
Save the
oif.conffile. -
Start the Oracle HTTP Server as shown below:
INSTANCE_HOME /bin/opmnctl startproc process-type=OHS
12.14.2 Configuring the Load Balancer
Oracle Identity Federation topologies deployed in high availability configurations are front-ended by an external load balancer, which provides load balancing of the HTTP requests between the various OIF instances.
After upgrading the Oracle Identity Federation high availability environment, configure your load balancer to listen to the Oracle HTTP Server instances on IDMHOST1 and IDMHOST2.Refer to the documentation provided by the load balancer vendor to accomplish this task.
12.14.3 Set Oracle Identity Federation Configuration Properties
Follow the steps below to enable the Oracle Identity Federation instances on IDMHOST1 and IDMHOST2 to recognize the Load Balancer Virtual Hostname.
Use Oracle Enterprise Manager Fusion Middleware Control to complete this task.
-
Log in to Fusion Middleware Control and locate the Oracle Identity Federation instance home page.
-
Modify the server properties as follows:
-
From the Oracle Identity Federation menu, select Administration, and then Server Properties.
-
Change the Host field to reflect the virtual host name of the load balancer.
-
Change the Port and SSL Enabled, as well as the SOAP Port and SSL Enabled options to reflect the ports used by the load balancer.
-
Save the changes.
-
-
Modify the Identity Provider properties as follows:
-
From the Administration menu, select Identity Provider.
-
In the Provider ID field, enter the URL for the load balancer virtual host name and port.
For example:
http://load_balancer_host:port
-
-
Modify the Service Provider properties as follows:
-
From the Administration menu, select Service Provider.
-
In the Provider ID field, enter the URL for the load balancer virtual host name and port.
For example:
http://load_balancer_host:port
-
-
Repeat Steps 2 through 4 for the subsequent Oracle Identity Federation instances in the high availability environment.
-
Because the Oracle Identity Federation metadata will have changed, redistribute the metadata to any remote partners to notify them of the configuration changes you just made.
12.14.4 Additional High Availability Tasks Associated
In addition to this tasks listed in this section, be sure to review any additional tasks required to configure the Oracle Identity Federation 11g high availability environment.
For more information about the configuring high availability for Oracle Identity Management components, see "Configuring High Availability for Identity Management Components" in the Oracle Fusion Middleware High Availability Guide:
12.15 Task 15: Verify the Oracle Identity Federation High Availability Upgrade
Follow the steps below to validate the upgraded Oracle Identity Federation high availability upgrade:
-
Use a web browser to access the URL's shown below:
http://<LoadBalancerHost>:<LoadBalancerPort>/fed/sp/metadata
http://<LoadBalancerHost>:<LoadBalancerPort>/fed/idp/metadata
-
Follow the instructions in the following sections of the Oracle Fusion Middleware Administrator's Guide for Oracle Identity Federation to import metadata from the SP into the IdP and the IDP metadata into the SP:
-
Go to the following URL and do a Single Sign-On operation:
http://Loadbalancer_SP_Host:Loadbalancer SP_port/fed/user/testspsso
-
During the upgrade, the single sign-on configurations from your 10g environment should have been migrated to the upgraded instances. As a result, you should be able to access those URLs, if the upgrade process completed successfully.