3 Integrating with Oracle Access Manager
This chapter describes how to configure an Oracle WebLogic Server 12.1.x installation to authenticate Oracle Enterprise Data Quality (EDQ) using Oracle Access Manager (OAM).
This chapter includes the following sections:
3.1 Overview of Configuring WebLogic to use OAM Authentication
You can perform all the required Oracle WebLogic Server configuration under the Security Realms/Providers section.
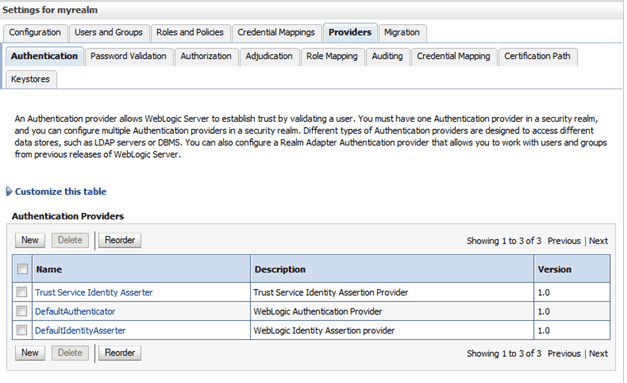
After you initially configure a domain, the Providers tab has the following contents:
To configure Oracle Access Manager (OAM), you must set up two additional providers - for LDAP and OAM.
3.2 Configuring an LDAP Provider
To configure an LDAP provider:
-
Click New to create a new authentication provider.
-
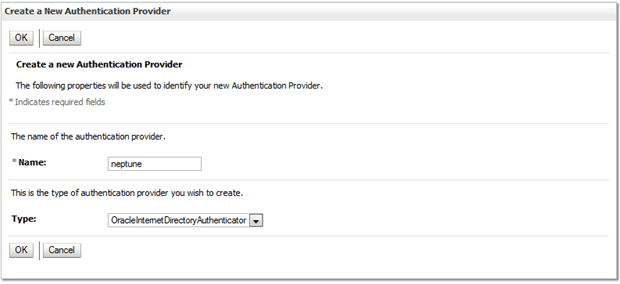
Enter a Name for the authentication provider.
-
Select
OracleInternetDirectoryAuthenticatoras the Type: -
Click OK.
-
Select the name of the newly created provider from the list and set the Control Flag to
SUFFICIENT. -
Click Save.
-
Select the Provider Specific tab.
-
Set the following fields, leaving the remaining fields with default values:
Field Value Host
hostname of the provider
Port
port on the provider
Principal
cn=netuser,cn=users,dc=<provider_name>,dc=local
Credential
credential for the host
User Base DN
dc=<provider_name>,dc=local
Group Base DN
dc=<provider_name>,dc=local
-
Restart the admin server.
-
On the Security Realm/Users and Groups/Groups tabs, verify that you can see the EDQ groups such as
dnadmins.
3.3 Configuring an Oracle Access Manager Provider
To configure an Oracle Access Manager (OAM) provider:
-
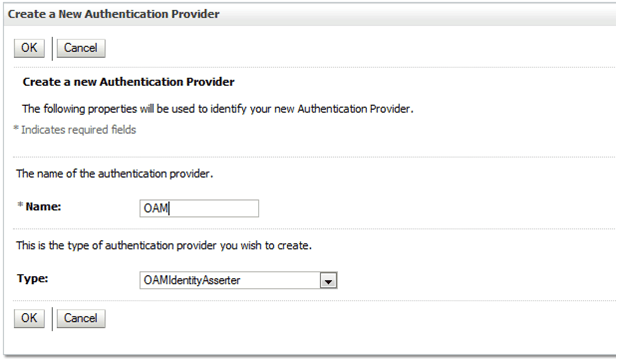
On the providers list, click New and enter
OAMas the name andOAMIdentityAsserteras the type: -
Click OK.
-
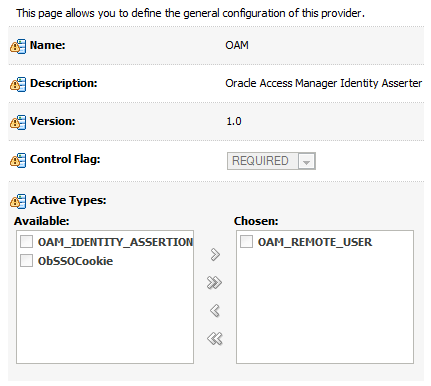
Select OAM from the list and select the Common tab.
-
Set the control flag to
REQUIRED: -
Select the Provider Specific tab.
-
Set the following fields, leaving the remaining fields with default values:
Field Value Access gate name
The host name that you configured when you created the authentication provider. Use the plain host name without domain.
Primary Access Server
The primary Access Server, configured as
host:port. -
Click Save to complete the provider definition.
3.4 Setting Provider Priorities
To set the provider priorities:
-
On the Providers list, select
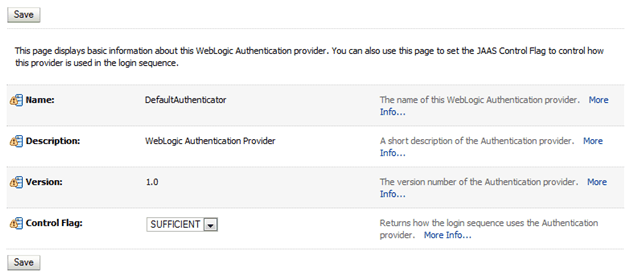
DefaultAuthenticatorand change the Control Flag toSUFFICIENT: -
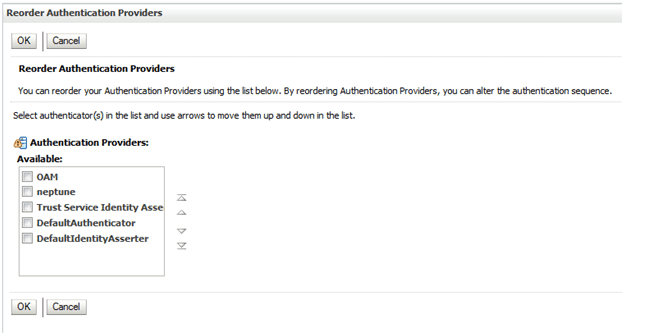
On the Providers list, click Reorder and move OAM to the top with the
<provider_name>second:
Once the server is restarted, WebLogic is ready for OAM use. EDQ now gets all information from the LDAP provider, and the original user weblogic no longer works in EDQ. Instead, log in as user edqadmin with password welcome1.
3.5 Installing Oracle HTTP Server
Install Oracle HTTP Server (OHS) 11 or 12 and the WebGate extension. A WebGate is a Web server plug-in that is shipped out-of-the-box with Oracle Access Manager. The WebGate intercepts HTTP requests from users for Web resources and forwards them to the Access Server for authentication and authorization.
If you use OHS 12, the WebGate software is bundled and you do not need a separate download. For more information, see Installing the WebGate in Oracle Access Manager Installation Guide.
Configure the WebLogic plugin to forward /edq to WebLogic:
<Location /edq>
  SetHandler weblogic-handler
</Location>
Finally install the WebGate artifacts, and restart OHS to complete the installation.
