14 Provisioning Users
This chapter discusses how to provision users by providing them roles using the Oracle Healthcare console.
The chapter contains the following topics:
14.1 Creating Users
The Oracle Healthcare administrator (the default login username-password combination) can add additional users (registered users in the Weblogic default store) by using the Oracle Healthcare console. These users can log in to Oracle Healthcare and only view endpoint.
The following roles are available:
-
Administrator role—Provides access to all Oracle Healthcare functionality
-
Monitor role—Provides read access to reporting and metrics functionality only (use of the Reports link)
Users with the administrator role can access all Oracle Healthcare functions. Users with the monitor role have only read access to reports.
You can create users by using the Identity Store (in the Oracle Weblogic Server console), and then you can provision those users with specific roles in the console.
See "Task 1 Create a New User in the Identity Store" in the "Adding Trading Partner Users" in Oracle Fusion Middleware User's Guide for Oracle B2B for more information on creating users.
14.2 Adding Users
After you have created the registered users in the Oracle Weblogic Server console, you can add users to Oracle Healthcare by using the User Provisioning link under Administration in the Designer tab.
Note:
Due to security concerns, only registered users belonging to the WebLogic Administrators group are allowed to access the User Provisioning functionality in the Oracle Healthcare console. The User Provisioning link is not available for other users.-
Log on to the Oracle SOA Suite for healthcare integration console.
-
In the Designer tab, click Administration and then double-click User Provisioning on the left-hand panel.
-
In the User Provisioning pane on the right, click Add New User Provisioning for Healthcare UI (+ icon) under the Users table. This adds a blank row in the table.
-
Click the new row to select it.
-
Clear the existing prompt in the Name field and to select or provision a registered user, do one of the following:
-
Type the first few characters (case-insensitive by default) of the registered user name, and either click the Browse button (the magnifying glass icon) or press the Tab key.
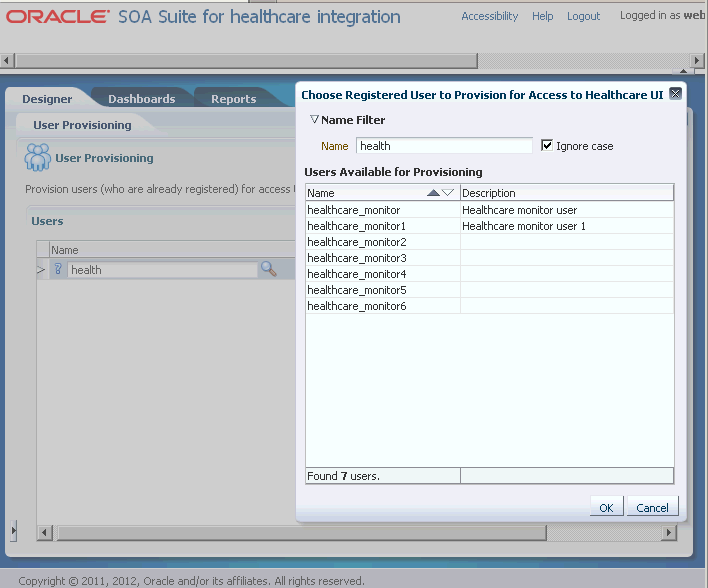
If there is only one match, it is automatically selected and the user name is populated in the Name field. If there are zero or more than one match, then the Choose Registered User to Provision for Access to Healthcare UI dialog box is displayed where you can refine the search, select one of the results, or both. Figure 14-1 displays the Choose Registered User to Provision for Access to Healthcare UI dialog box.
Figure 14-1 Selecting Users from a List of All Matching Users
Description of "Figure 14-1 Selecting Users from a List of All Matching Users"
-
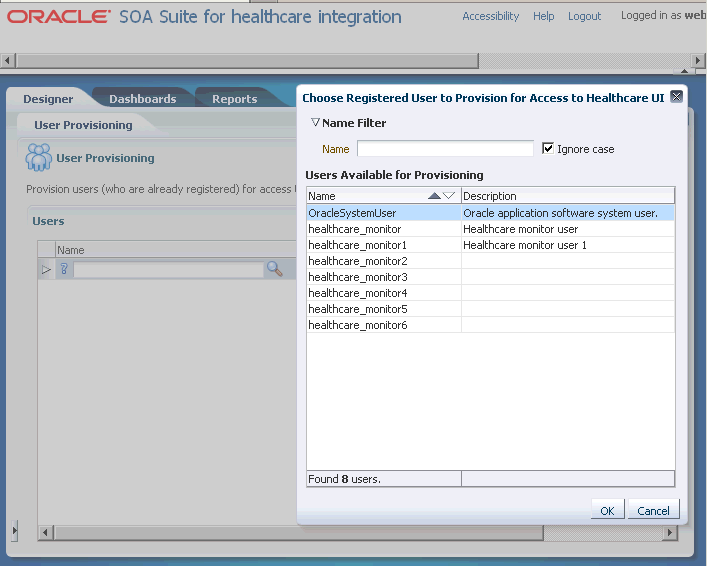
In case you are not sure about the user name that you want to select, click Browse or press Tab to display the Choose Registered User to Provision for Access to Healthcare UI dialog box that lists all the users available for provisioning as displayed in Figure 14-2.
Figure 14-2 Displaying a List of All Registered Users
Description of "Figure 14-2 Displaying a List of All Registered Users"
If the required user name is not listed in the dialog box, start typing the first few characters of the registered user name in the Name field of the dialog box, and the results table will be automatically populated accordingly. Select the Ignore Case check box if you need to perform a case-insensitive search. You can also clear the input field and press Tab to browse all available users for provisioning.
Note:
Once you have selected a registered user, the Description field is automatically populated with the description that you have provided for the user in the WebLogic Administration Console. You cannot modify the description in the Oracle Healthcare console.Note:
If you try to search for a user that is a part of the Oracle Weblogic Administrator group in the Choose Registered User to Provision for Access to Healthcare UI dialog box, an error message is displayed stating that users belonging to the Weblogic Administrators group do not need to be provisioned, as displayed in the following graphic.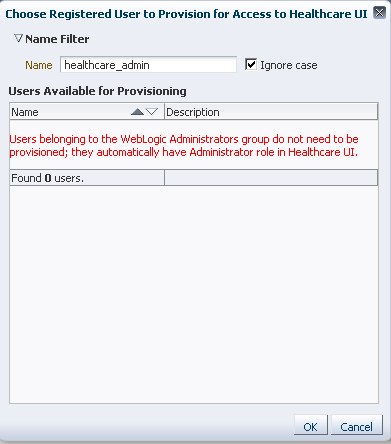
Description of the illustration prov_user_3.gif
-
-
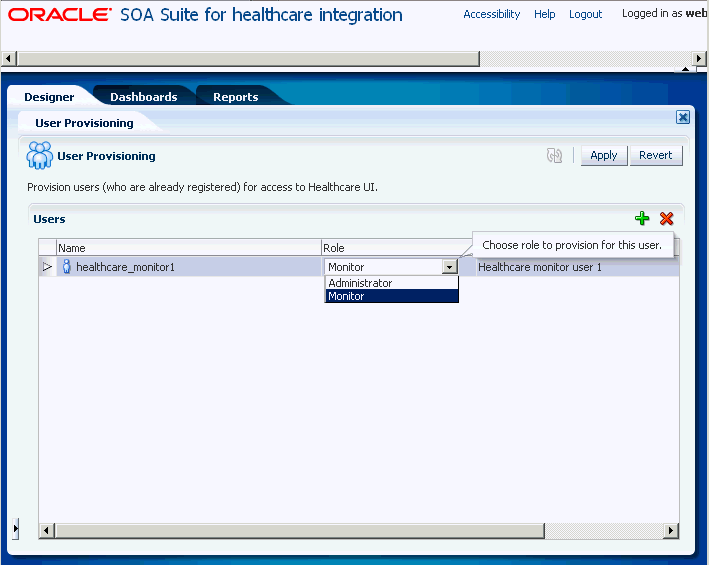
Select the role that you want to grant to the user from the Role list. The available values are Administrator and Monitor as shown in Figure 14-3.
Figure 14-3 Selecting the Role for the User
Description of "Figure 14-3 Selecting the Role for the User"
By default, all new users added are initially provisioned for the Monitor role in the Oracle Healthcare console, unless the user belongs to the WebLogic Administrators group, in which case the user will not be available for provisioning (already added to the Administrators group).
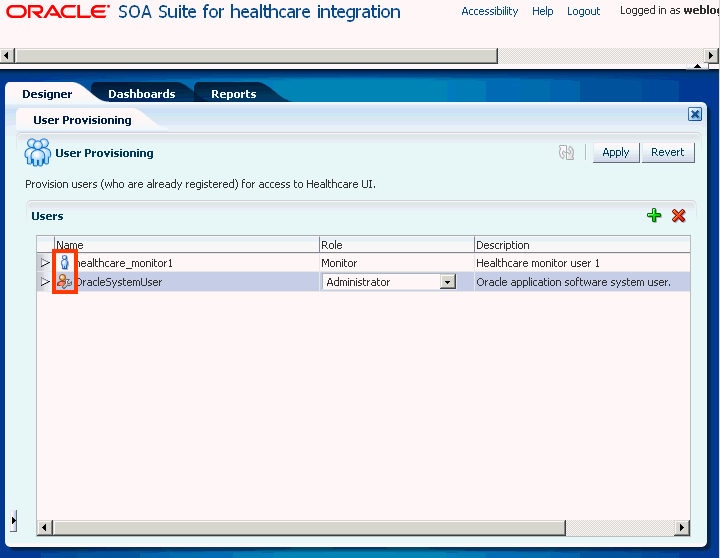
Based on the role selected for the user, the user icon changes as shown in Figure 14-4.
-
Click Apply to save the changes and complete the user provisioning.
Note:
After you have provisioned all the registered users for the Oracle Healthcare console, if you click Add New User Provisioning for Healthcare UI (+ icon), the following window stating that no more users are available for provisioning is displayed.
Description of the illustration prov_user_5.gif
14.3 Editing, Viewing, and Deleting User Provisioning
You can edit, delete, and view user provisioning by using the Oracle Healthcare console.
To edit an existing user provisioning:
-
Log on to the Oracle SOA Suite for healthcare integration console.
-
In the Designer tab, click Administration and then User Provisioning on the left-hand panel.
-
Click the required user row in the Users table. This enables the Role list for editing.
-
Select the required role from the Role list.
-
Log on to the Oracle SOA Suite for healthcare integration console.
-
In the Designer tab, click Administration and then User Provisioning on the left-hand panel.
-
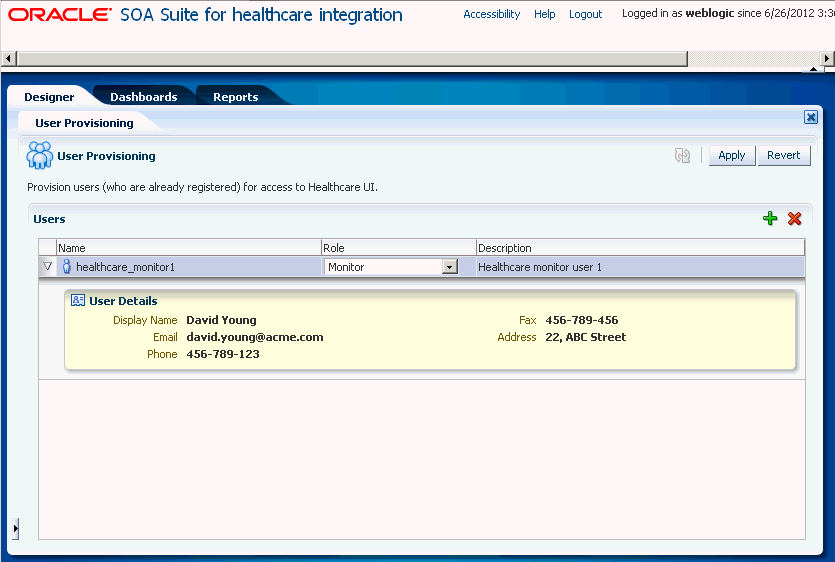
Click the Expand (down arrowhead) icon to the left of the required user in the Users table to display the user details as shown in Figure 14-5.
Note:
The user details are fetched from the Oracle WebLogic Security Realm that you have used when creating the user.
To delete an existing user provisioning:
-
Log on to the Oracle SOA Suite for healthcare integration console.
-
In the Designer tab, click Administration and then User Provisioning on the left-hand panel.
-
Click the corresponding row for the required user name in the Users table and click the Delete Selected User Provisioning (X) icon. No confirmation is required, because you can easily revert the deletion.
Note:
Deleting a user provisioning deletes the provisioning for the registered user's access to Oracle Healthcare console only; it does not delete the user from the default Oracle WebLogic Security Realm.
14.4 Provisioning Users for Payload Viewing
Oracle Healthcare user provisioning for payload viewing adheres to the following principles:
-
Users who belong to WLS Administrators group can always view any document type payload and do not need any provisioning in the Oracle Healthcare console.
-
Users who have been provisioned for Oracle Healthcare Administrator or Monitor role with no specific document type provisioning, can view all document type payloads.
-
Users who have the Oracle Healthcare Administrator or Monitor role with Foot 1 specific document type provisioning can only view those particular document type payloads.
Footnote Legend
Footnote 1: Please refer to the Oracle Healthcare Known Issues athttp://www.oracle.com/technetwork/middleware/docs/aiasoarelnotesps6-1866030.html#hcfp for more information.