2 Tasks
This chapter describes how to perform tasks in the Oracle Service Bus IDE, such as working with projects and resources, business and proxy services, Split-Joins, message flows, and global resources.
This chapter includes the following sections:
-
Section 2.1, "Working with Projects, Folders, Resources, and Configurations"
-
Section 2.7, "Working with Oracle Enterprise Repository and Harvester."
2.1 Working with Projects, Folders, Resources, and Configurations
This section tells how to perform the following tasks:
-
Section 2.1.3, "Cloning Oracle Service Bus Projects and Folders"
-
Section 2.1.4, "Creating Oracle Service Bus Configuration Projects"
-
Section 2.1.8, "Creating and Editing JNDI Provider Resources"
2.1.1 Resource Naming Restrictions
When naming any directory or resource in an Oracle Service Bus configuration, the following characters are allowed:
-
All Java identifier characters, including Java keywords, as described in the "Identifiers" and "Keywords" sections of the Java Language Specification at
http://docs.oracle.com/javase/specs/jls/se5.0/html/lexical.html -
Blanks, periods, and hyphens within the names (not leading or trailing)
Characters such as / \ * : " < > ? | are not allowed.
2.1.2 Editing Resources
Edit resources using the built-in editors. For example, to edit a proxy service you click its name in the Project Explorer and the proxy service editor appears.
Do not manually edit resource files as text or XML files. This can result in unpredictable behavior. Do not manually edit these resource types:
-
Alert Destination
-
Business Service
-
Custom Resources
-
Proxy Service
-
Service Account
-
Service Key Provider
-
Split-Join
-
JNDI Provider
-
SMTP Server
-
Proxy Server
-
UDDI Registry
2.1.3 Cloning Oracle Service Bus Projects and Folders
To clone Oracle Service Bus projects and folders:
-
In the Project Explorer, right-click the Oracle Service Bus project or folder you want to clone.
-
From the menu, select Oracle Service Bus > Clone to display the Select Clone Target Dialog.
2.1.4 Creating Oracle Service Bus Configuration Projects
In the Oracle Service Bus perspective, select File > New > Oracle Service Bus Configuration Project to display the New Oracle Service Bus Configuration Project Wizard.
See Section 2.1.1, "Resource Naming Restrictions" for naming guidance.
For configuration details, see Section 4.4.3, "Oracle Service Bus Configuration Page."
2.1.5 Creating Oracle Service Bus Projects
In the Oracle Service Bus perspective, select File > New > Oracle Service Bus Project to display the New Oracle Service Bus Project Wizard.
See Section 2.1.1, "Resource Naming Restrictions" for naming guidance.
Note:
You can create an Oracle Service Bus project in an Oracle Service Bus configuration project only.For configuration details, see Section 4.4.4, "New Oracle Service Bus Project."
2.1.6 Creating Servers
You can deploy (publish) and test your Oracle Service Bus configuration on a running server in Eclipse. When connected to a running server in development, you can also connect to resources in the runtime environment such as JNDI resources and remote EJBs.
If you have an existing Oracle WebLogic Server you want to connect to, the server creation process simply involves you pointing at the existing server domain. You can also create a new server using the Oracle Fusion Middleware Configuration Wizard.
To Create a Server in Eclipse
-
In the Oracle Service Bus perspective, select File > New > Server. The New Server wizard appears.
-
Select the server type/version you want to create or connect to.
-
For Server's host name, enter localhost for a local server or enter the name or IP address of the remote computer hosting an existing server.
-
The Server name is for display purposes in Eclipse.
-
Click Next.
-
For WebLogic home, click Browse and select the WL_HOME in the Oracle Fusion Middleware installation where the server domain is to reside (or already resides). For example, if you are creating a new server in MW_HOME_1, select the MW_HOME_1/WL_HOME; or if you are connecting to an existing server domain in MW_HOME_2, select the MW_HOME_2/WL_HOME.
Note:
You cannot reference a WL_HOME that is outside of the server's installation MW_HOME, even if the external MW_HOME is the same product version. -
The Java home should be populated automatically. To use a different JRE, such as the default Oracle JRockit JRE, click Browse and select the JRE under the same MW_HOME as the server.
-
Click Next.
-
Select whether the server is Local or Remote. Remote implies an existing remote server.
-
If Local, either select an existing server in the Domain Directory field or click the link to create a new domain. After creating a new domain, select it in the Domain Directory field.
Set other options as desired, such as automatic publishing and debug mode.
For information on creating a new Oracle Service Bus domain, see "Installing and Configuring Oracle Service Bus 11g" in the Oracle Fusion Middleware Installation Guide for Oracle Service Bus Installation Guide.
-
If Remote, enter the connection settings to an existing remote server.
-
-
Click Next.
-
Move any Oracle Service Bus configuration(s) you want to publish on the server to the Configured pane.
To modify this targeting after you create the server, right-click the server and select Add and Remove. -
Click Finish. The new server appears in the Servers view in Eclipse, where you can start, stop, and publish to the server.
For information on running a server in debug mode, for which the Oracle Service Bus plug-ins for Eclipse provide special functionality, see Section 2.10, "Using the Oracle Service Bus Debugger."
2.1.7 Creating Custom Resources
In the Oracle Service Bus perspective, select File > New > Custom Resource to display New Custom Resource Wizard.
See Section 2.1.1, "Resource Naming Restrictions" for naming guidance.
Note:
You can create a custom resource in an Oracle Service Bus project only.For configuration details, see Section 4.5, "Custom Resources."
2.1.8 Creating and Editing JNDI Provider Resources
In the Oracle Service Bus perspective, select File > New > JNDI Provider to display the New JNDI Provider Resource Wizard.
See Section 2.1.1, "Resource Naming Restrictions" for naming guidance.
Note:
You can create a JNDI provider resource in an Oracle Service Bus configuration project only.To edit JNDI provider resources:
-
In the Project Explorer, find the Oracle Service Bus configuration project containing the JNDI provider resource you want to edit.
-
Double-click the name of the JNDI provider to display the JNDI Provider Editor.
For configuration details, see Section 4.8, "JNDI Providers."
2.1.9 Creating Proxy Server Resources
In the Oracle Service Bus perspective, select File > New > Proxy Server to display the New Proxy Server Resource wizard.
See Section 2.1.1, "Resource Naming Restrictions" for naming guidance.
Note:
You can create a proxy server resource in an Oracle Service Bus configuration project only.To edit proxy server resources:
-
In the Project Explorer, find the Oracle Service Bus configuration project containing the proxy server resource you want to edit.
-
Double-click the name of the proxy server to display the Proxy Server Editor.
For configuration details, see Section 4.9, "Proxy Servers."
2.1.10 Creating Message Format Files
In the Oracle Service Bus perspective, select File > New > MFL to display the New Message Format File wizard.
See Section 2.1.1, "Resource Naming Restrictions" for naming guidance.
Note:
You can create a message format file in an Oracle Service Bus project only.For configuration details, see Section 4.11.16, "MFL Transform Action Properties."
2.1.11 Exporting Resources
This section describes different ways to export Oracle Service Bus resources from Eclipse.
Since these procedures require an Eclipse installation, you can only perform these procedures on platforms that support the Oracle Service Bus plug-ins for Oracle Enterprise Pack for Eclipse. For unsupported platforms, export using the Oracle Service Bus Administration Console. See "Import/Export" in the Oracle Fusion Middleware Administrator's Guide for Oracle Service Bus.
This section includes the following topics:
-
Section 2.1.11.2, "Using the Command Line or a Script to Export an Oracle Service Bus Configuration"
Note:
XML files, which are a type of Oracle Service Bus resource, are automatically exported from Eclipse when you use any of the following export procedures. If you do not want to export XML files, exclude them using the Eclipse Resource Filter feature on a project or folder. The Export Wizard also lets you exclude files and resources from export.2.1.11.1 Using the Export Wizard
In the Oracle Service Bus perspective, select File > Export to display the Export wizard. See the following topics for more information:
2.1.11.2 Using the Command Line or a Script to Export an Oracle Service Bus Configuration
This section describes scripting and command-line options for exporting an Oracle Service Bus configuration:
2.1.11.2.1 Before You Begin
Make sure the following prerequisites are in place before you begin.
-
OSB_ORACLE_HOME/lib/sb-kernel-api.jar is in your classpath.
-
The resource JAR names in your scripts contain the correct version numbers.
-
The correct version of Java is installed. This should be Oracle JDK 1.6.0_35 or later, or Oracle JDK 1.7.0_07 or later.
-
Oracle Service Bus 10gR3 MP1 or later and Eclipse is installed.
-
See Section 2.1.1, "Resource Naming Restrictions" for JAR naming guidance.
When performing the export, you might see exception stack traces in the output or the workspace log file if workspace files are read-only. An exit value of 0 means the export succeeded.
2.1.11.2.2 Exporting a Configuration Using the Command Line
Oracle Service Bus provides a ConfigExport class that you can configure and launch using the following command line arguments. Command line export is for more advanced users who need more flexibility.
Exporting from the command line generates an Oracle Service Bus configuration JAR from the Eclipse workspace.
java -Xms384m -Xmx768m
-Dmiddleware.home=FMW_HOME
-Dosgi.bundlefile.limit=500
-Dosgi.nl=en_US
-Dosb.home=OSB_ORACLE_HOME
-Dweblogic.home=WEBLOGIC_HOME
-Dharvester.home=${osb.home}/HARVESTER_HOME
-Dsun.lang.ClassLoader.allowArraySyntax=true
-jar ECLIPSE_HOME/eclipse/plugins/org.eclipse.equinox.launcher_launcher_version.jar
-data WORKSPACE_DIR
-application com.bea.alsb.core.ConfigExport
-configProject PROJECT_NAME
-configJar config_filename.jar
-configSubProjects projects_to_export
-includeDependencies true/false
-includeSystemResources true/false
where
-
FMW_HOME is the Oracle Fusion Middleware home directory. Make sure this is the first argument you enter.
-
OSB_ORACLE_HOME is the top-level Oracle Service Bus directory in the Oracle Fusion Middleware home.
-
WEBLOGIC_HOME is the location of the installed Oracle WebLogic Server.
-
HARVESTER_HOME is the location of Harvester, an Oracle Enterprise Repository tool that lets you harvest enterprise artifacts into Oracle Enterprise Repository from multiple sources, including Oracle Service Bus. An Oracle Service Bus installation includes Harvester.
-
ECLIPSE_HOME is the location of the installed Eclipse that is linked to the Oracle Service Bus IDE plug-ins.
-
launcher_version is the version of the Eclipse launcher JAR.
-
WORKSPACE_DIR is the location that contains Oracle Service Bus artifacts to be exported. For example, c:/oracle/user_projects/workspaces/default. If this location contains an Eclipse workspace, the workspace is used and the configuration jar is exported from the workspace projects. If this location does not contain a workspace, but instead contains only Eclipse Oracle Service Bus projects, the utility imports the projects into a temporary workspace for the configuration JAR export.
-
PROJECT_NAME is the name of the Oracle Service Bus Configuration project to be exported. For example, "OSB Configuration." If you do not specify this argument, the first Oracle Service Bus Configuration Project found in the workspace is exported.
-
config_filename.jar is the name and location of the Oracle Service Bus Configuration JAR to be exported. For example, c:/sbconfig.jar.
-
configSubProjects projects_to_export is one or more specific projects within a configuration to export. If you do not specify configSubProjects, all projects in the configuration are exported.
-
includeDependencies true/false determines whether configuration-level dependencies such as JNDI Providers and Proxy Servers are included in the export.
-
includeSystemResources true/false determines whether system resources are included in the export. In order to include system resources, both
includeSystemResourcesandincludeDependenciesmust be true.
Following is an example of exporting an Oracle Service Bus Configuration from the command line.
Note:
Following is a sample command line operation. If you use this sample, be sure to check paths and file names against your current installation for accuracy.
java -Xms384m -Xmx768m
-Dosgi.bundlefile.limit=500
-Dosgi.nl=en_US
-Dosb.home=D:/oracle/Oracle_OSB1
-Dweblogic.home=D:/oracle/wlserver_10.3
-Dharvester.home=${osb.home}/harvester
-Dsun.lang.ClassLoader.allowArraySyntax=true
-jar D:/oracle/oepe_11gR1PS1/eclipse/plugins/org.eclipse.equinox.launcher_1.0.201.R35x_v20090715.jar
-data D:/oracle/user_projects/myWorkspace
-application com.bea.alsb.core.ConfigExport
-configProject config
-configJar sbconfig.jar
-configSubProjects OSB Project 1,OSB Project 2
-includeDependencies true
-includeSystemResources true
2.1.11.2.3 Exporting a Configuration Using Ant
You can export an Oracle Service Bus configuration using an Apache Ant buildfile. Exporting with Ant generates an Oracle Service Bus configuration JAR from the Eclipse workspace. If you use a source code control repository to store Service Bus projects and resources, you can use Ant to check out projects from the source repository, generate a configuration .jar file, start Service Bus, and import the configuration to Service Bus.
Following is a sample Ant buildfile with an accompanying properties file.
Note:
Following is a sample script. If you use this sample script, be sure to check paths and file names against your current installation for accuracy.Ant Buildfile Example
<project name="ConfigExport">
    <property file="./build.properties"/>
    <property name="eclipse.home" value="${oracle.home}/oepe_11gR1PS2"/>
    <property name="weblogic.home" value= "${oracle.home}/wlserver_10.3"/>
    <property name="metadata.dir" value="${workspace.dir}/.metadata"/>
    <target name="export">
        <available file="${metadata.dir}" type="dir"
         property="metadata.dir.exists"/>
        <java dir="${eclipse.home}"
jar="${eclipse.home}/plugins/org.eclipse.equinox.launcher_1.0.201.R35x_v20090715.jar"
          fork="true"
          failonerror="true"
          maxmemory="768m">
           <arg line="-data ${workspace.dir}"/>
           <arg line="-application com.bea.alsb.core.ConfigExport"/>
           <arg line="-configProject ${config.project}"/>
           <arg line="-configJar ${config.jar}"/>
           <arg line="-configSubProjects ${config.subprojects}"/>
           <arg line="-includeDependencies ${config.includeDependencies}"/>
           <sysproperty key="weblogic.home" value="${weblogic.home}"/>
           <sysproperty key="osb.home" value="${osb.home}"/>
           <sysproperty key="osgi.bundlefile.limit" value="500"/>
           <sysproperty key="harvester.home" value="${osb.home}/harvester"/>
           <sysproperty key="osgi.nl" value="en_US"/>
           <sysproperty key="sun.lang.ClassLoader.allowArraySyntax" value="true"/>
        </java>
<antcall target="deleteMetadata"/>
    </target>
<target name="deleteMetadata" unless="metadata.dir.exists">
         <delete failonerror="false" includeemptydirs="true"
          dir="${metadata.dir}"/>
</target>
</project>
build.properties Example
oracle.home=c:/oracle
workspace.dir=c:/oracle/user_projects/workspaces/default
config.project="OSB Configuration"
config.jar=c:/sbconfig.jar
config.subprojects="OSB Project 1,OSB Project 2"
config.includeDependencies=true
Running "ant export" (after you run the setDomainEnv script) results in exporting the project "OSB Configuration" from the default workspace to c:\sbconfig.jar.
2.1.11.2.4 Exporting a Configuration Using WLST
You can export an Oracle Service Bus configuration using the WebLogic Scripting Tool (WLST). Exporting with WLST generates an Oracle Service Bus configuration JAR from a running Oracle Service Bus server.
For more information, see "WLST scripts to import/export and customize OSB configuration jar" on the Oracle Service Bus Samples page at http://www.oracle.com/technetwork/middleware/service-bus/learnmore/index.html.
2.1.12 Generating an Effective WSDL
To generate an effective WSDL:
-
In the Project Explorer, find the proxy service or business service from which you want to generate the effective WSDL.
-
Right-click the name of the service and select Oracle Service Bus > Generate Effective WSDL from the menu.
-
Select a location and save the file.
See Section 2.1.1, "Resource Naming Restrictions" for naming guidance.
2.1.13 Modifying JAR Dependencies
To modify JAR dependencies:
-
In the Project Explorer, find the JAR file whose dependencies you want to modify.
-
Right-click the name of the file and select Oracle Service Bus > Modify JAR Dependencies from the menu.
-
Make modifications in the Modify JAR Dependencies Dialog.
2.1.14 Importing Resources
This section describes different ways to import resources into Oracle Service Bus.
Since these procedures require an Eclipse installation, you can only perform these procedures on platforms that support the Oracle Service Bus plug-ins for Oracle Enterprise Pack for Eclipse. For unsupported platforms, import using the Oracle Service Bus Administration Console. See "Import/Export" in the Oracle Fusion Middleware Administrator's Guide for Oracle Service Bus.
This section includes the following topics:
-
Section 2.1.14.2, "Using the Command Line or a Script to Import an Oracle Service Bus Configuration"
2.1.14.1 Using the Import Wizard
In the Oracle Service Bus perspective, select File > Import to display the Import wizard. See:
-
Section 4.7.1, "Import Wizard - Config JAR Import - Load Resources Page"
-
Section 4.7.2, "Import Wizard - Config JAR Import - Review Resources Page"
-
Section 4.7.3, "Import Wizard - Config ZIP Import - Load Resources Page"
-
Section 4.7.4, "Import Wizard - Config ZIP Import - Review Resources Page"
-
Section 4.7.5, "Import Wizard - URL Import - Load Resources Page"
-
Section 4.7.6, "Import Wizard - URL Import - Review Resources Page"
2.1.14.2 Using the Command Line or a Script to Import an Oracle Service Bus Configuration
You can use scripting or the command line to importing an Oracle Service Bus configuration. Importing from the command line or with an Ant script imports an Oracle Service Bus configuration JAR into an Eclipse workspace. Use the examples in Section 2.1.11.2.3, "Exporting a Configuration Using Ant" and Section 2.1.11.2.2, "Exporting a Configuration Using the Command Line" for guidance on importing.
You can also import an Oracle Service Bus configuration using the WebLogic Scripting Tool (WLST). Importing with WLST imports an Oracle Service Bus configuration JAR into the Oracle Service Bus runtime environment. For more information, see "WLST scripts to import/export and customize OSB configuration jar" on the Oracle Service Bus Samples page at http://www.oracle.com/technetwork/middleware/service-bus/learnmore/index.html.
2.1.15 Creating Service Account Resources
In the Oracle Service Bus perspective, select File > New > Service Account to display the New Service Account Resource Wizard.
See Section 2.1.1, "Resource Naming Restrictions" for naming guidance.
Note:
You can create a service account resource in an Oracle Service Bus project only.For configuration details, see Section 4.19, "Service Accounts."
2.1.16 Creating Service Key Provider Resources
In the Oracle Service Bus perspective, select File > New > Service Key Provider to display the New Service Key Provider Resource Wizard.
See Section 2.1.1, "Resource Naming Restrictions" for naming guidance.
Note:
You can create a service key provider resource in an Oracle Service Bus project only.For configuration details, see Section 4.17, "New Service Key Provider Resource."
2.1.17 Creating SMTP Server Resources
In the Oracle Service Bus perspective, select File > New > SMTP Server to display the New SMTP Server Resource Wizard.
See Section 2.1.1, "Resource Naming Restrictions" for naming guidance.
Note:
You can create an SMTP server resource in an Oracle Service Bus configuration project only.For configuration details, see Section 4.13, "SMTP Servers."
2.1.18 Creating XQuery Transformations
In the Oracle Service Bus perspective, select File > New > XQuery Transformation to display the XQuery/XSLT Expression Editor. For more information, see Part I, "XQuery Mapper".
See Section 2.1.1, "Resource Naming Restrictions" for naming guidance.
Note:
You can create an XQuery transformation resource in an Oracle Service Bus project only.2.1.19 Creating XSL Transformations
In the Oracle Service Bus perspective, select File > New > XSL Transformation to display the XPath Expression Editor.
See Section 2.1.1, "Resource Naming Restrictions" for naming guidance.
Note:
You can create an XSL transformation resource in an Oracle Service Bus project only.For configuration details, see Section 4.20, "Expression Editors."
2.2 Working with Business Services
The following topics describe how to create and work with business services in the Oracle Service Bus plug-ins.
-
Appendix P, "Generating a JCA Business Service from an Outbound JCA File"
-
Section 2.2.3, "Generating a Business Service from Oracle Enterprise Repository"
2.2.1 Creating Business Services
In the Oracle Service Bus perspective, select File > New > Business Service to display the New Business Service wizard.
See Section 2.1.1, "Resource Naming Restrictions" for naming guidance.
For information on business service configuration, see:
-
Section 4.2.1, "Business Service General Configuration Page"
-
Section 4.2.2, "Business Service Message Type Configuration Page"
-
Section 4.2.6, "Business Service - Service Policy Configuration Page"
-
Section 4.2.3, "Business Service SOAP Binding Configuration Page"
-
Section 4.2.4, "Business Service Transport Configuration Page"
Note:
You can create a business service in an Oracle Service Bus project only.
2.2.2 Generating a JCA Business Service from an Outbound JCA File
Oracle Service Bus lets you generate business services from outbound JCA files. JCA services, which use the Oracle Service Bus JCA transport, communicate with back-end Enterprise Information Systems (EIS) through a JCA adapter framework and JCA-compliant adapters. For example, you could update back-end database records using an Oracle Service Bus JCA business service that communicates with the Oracle Database Adapter.
To create a JCA business service in Oracle Service Bus:
-
In Oracle JDeveloper, create a JCA file, its associated abstract WSDL, and any other required resources, such as a TopLink mapping file. For more information, see the Oracle Fusion Middleware User's Guide for Technology Adapters.
-
Import the JCA resource files into an Oracle Service Bus project so all references to dependencies are maintained. For more information, see Section 2.1.14, "Importing Resources."
-
In Eclipse, right-click the outbound JCA file and choose Oracle Service Bus > Generate Service.
-
In the JCA Generate Business Service window, select the folder location for the new service, and, if desired, change the default service name.
See Section 2.1.1, "Resource Naming Restrictions" for naming guidance.
-
Click OK. Oracle Service Bus generates the business service and the concrete WSDL that is used by the business service.
For more information on the Oracle Service Bus JCA transport, see "JCA Transport" in the Oracle Fusion Middleware Developer's Guide for Oracle Service Bus.
2.2.3 Generating a Business Service from Oracle Enterprise Repository
You can generate business services from service artifacts in Oracle Enterprise Repository. For more information, see Section 2.7.1, "Generating Business Services from Oracle Enterprise Repository."
You can also upload Oracle Service Bus projects to Oracle Enterprise Repository with Harvester, described in Section 2.7, "Working with Oracle Enterprise Repository and Harvester."
2.2.3.1 Re-generating an Existing Business Service from Oracle Enterprise Repository
You can regenerate a business service you previously generated from Oracle Enterprise Repository by following the same process described in Section 2.2.3, "Generating a Business Service from Oracle Enterprise Repository." Re-generating lets you pick up service updates in your development environment.
When you regenerate a service, Oracle Service Bus merges the service definitions, updating the existing service with changes in the Oracle Enterprise Repository but retaining service account and large message support configurations you have made in the development environment.
2.2.4 Editing Business Services
To edit business services:
-
In the Project Explorer, find the business service you want to edit.
-
Double-click the name of the service.
-
Select the page containing the options you want to edit. See:
-
Section 4.2.1, "Business Service General Configuration Page"
-
Section 4.2.2, "Business Service Message Type Configuration Page"
-
Section 4.2.6, "Business Service - Service Policy Configuration Page"
-
Section 4.2.3, "Business Service SOAP Binding Configuration Page"
-
Section 4.2.4, "Business Service Transport Configuration Page"
-
Section 4.2.5, "Business Service Message Handling Configuration Page"
-
2.3 Working with Proxy Services
The following topics describe how to create and work with proxy services in the Oracle Service Bus plug-ins.
-
Section 2.3.2, "Generating a JCA Proxy Service from an Inbound JCA File"
-
Section 2.3.3, "Consuming Oracle Service Bus Proxy Services in Oracle JDeveloper with WSIL"
2.3.1 Creating Proxy Services
In the Oracle Service Bus perspective, select File > New > Proxy Service to display the New Proxy Service wizard.
See Section 2.1.1, "Resource Naming Restrictions" for naming guidance.
Do not use the following characters in your service names: leading space, trailing space, / \ * : " < > ? |
For information on proxy service configuration, see:
-
Section 4.3.2, "Proxy Service Message Type Configuration Page"
-
Section 4.3.3, "Proxy Service Operation Selection Configuration Page"
-
Section 4.3.4, "Proxy Service Message Handling Configuration Page"
-
Section 4.3.7, "Proxy Service - Service Policy Configuration Page"
-
Section 4.3.5, "Proxy Service SOAP Binding Configuration Page"
-
Section 4.3.6, "Proxy Service Transport Configuration Page"
Note:
You can create a proxy service in an Oracle Service Bus project only.
2.3.1.1 Generating a Proxy Service from an Existing Service
To generate a proxy service from an existing business or proxy service:
-
In the Project Explorer, right-click the existing service and select Oracle Service Bus > Generate Proxy Service.
-
Name and configure the service.
For a proxy services generated from a business service, the message flow automatically includes a route node to the business service.
2.3.2 Generating a JCA Proxy Service from an Inbound JCA File
Oracle Service Bus lets you generate proxy services from inbound JCA files. JCA services, which use the Oracle Service Bus JCA transport, communicate with Enterprise Information Systems (EIS) through a JCA adapter framework and JCA-compliant adapters. For example, you could invoke an external service from an EIS application through Oracle Service Bus using JCA.
To create a JCA proxy service in Oracle Service Bus:
-
In Oracle JDeveloper, create a JCA file, its associated abstract WSDL, and any other required resources, such as a TopLink mapping file. For more information, see the Oracle Fusion Middleware User's Guide for Technology Adapters.
-
Import the JCA resource files into an Oracle Service Bus project so that all references to dependencies are maintained. For more information, see Section 2.1.14, "Importing Resources."
-
In Eclipse, right-click the inbound JCA file and choose Oracle Service Bus > Generate Service.
-
In the JCA Generate Proxy Service window, select the folder location for the new service, and, if desired, change the default service name.
See Section 2.1.1, "Resource Naming Restrictions" for naming guidance.
-
Click OK. Oracle Service Bus generates the proxy service and the concrete WSDL that is used by the proxy service.
For more information on the Oracle Service Bus JCA transport, see "JCA Transport" in the Oracle Fusion Middleware Developer's Guide for Oracle Service Bus.
2.3.3 Consuming Oracle Service Bus Proxy Services in Oracle JDeveloper with WSIL
Oracle Service Bus makes its WSDL-based proxy services available through the Web Services Inspection Language (WSIL), letting you consume Oracle Service Bus WSDL proxy services in Oracle JDeveloper for service orchestration in Oracle SOA Suite.
The Oracle Service Bus WSIL servlet automatically registers WSDL-based proxy services deployed in the Oracle Service Bus runtime environment. By creating a WSIL connection in JDeveloper, you can access those proxy services through different URL patterns that map to different hierarchy levels, such as project, folder, and individual service. For example, when you connect to the Oracle Service Bus WSIL servlet with a project-level URL, you can see all the child folders and WSDL-based proxy services in that project in Oracle JDeveloper.
The following procedure guides you through the process of creating a WSIL connection in JDeveloper and generating Web service references out of Oracle Service Bus WSDL proxy services for use in SOA applications.
-
In Oracle JDeveloper, open or create a SOA application.
-
Create a new WSIL connection.
In the Resource Palette, click the New icon and choose New Connection > WSIL.
In the Create WSIL Connection window:
-
Enter the connection name.
See Section 2.1.1, "Resource Naming Restrictions" for naming guidance.
-
Enter the credentials for one of the following Oracle Service Bus roles: IntegrationAdmin, IntegrationDeployer, IntegrationOperator, or IntegrationMonitor.
-
Enter the URL to the Oracle Service Bus WSIL in one of the following formats:
-
Domain (gets all projects, folders, and WSDL proxy services) – http://host:port/sbinspection.wsil
-
Project (gets all child folders and WSDL proxy services) – http://host:port/sbinspection.wsil?refpath=project_name
-
Folder (in a project, gets the folder, all child folders, and WSDL proxy services) – http://host:port/sbinspection.wsil?refpath=project_name/folder_path. For example: http://localhost:7021/sbinspection.wsil?refpath=MortgageBroker/ProxyServices
-
Proxy Service (gets an individual WSDL proxy service) – http://host:port/sbinspection.wsil?refpath=project_name/folder_path/wsdl_proxy_service. For example: http://localhost:7021/sbinspection.wsil?refpath=MortgageBroker/ProxyServices/loanGateway1
In a cluster, the WSIL servlet is deployed on Managed Servers and not the Admin Server. Use a Managed Server host name and port in the URL.
-
When finished, click OK. The WSIL connection is displayed in the Resource Palette in the hierarchy determined by the URL you entered.
-
-
To use an Oracle Service Bus WSDL proxy service in your SOA application, create a Web service reference to it.
In the Component Palette, create a new Web service. In the Create Web Service window, click the WSDL URL browse icon.
In the SOA Resource Browser, select Resource Palette, and select the Oracle Service Bus WSDL proxy service in the WSIL connection created in the previous step.
When you create the Web service reference to an Oracle Service Bus WSDL proxy service, you can use it as an external reference in your SOA application.
The Oracle Service Bus WSIL servlet leverages the SBResource servlet. If the SBResource is undeployed, the WSIL connection is not available.
2.3.4 Editing Proxy Services
To edit proxy services:
-
In the Project Explorer, find the proxy service you want to edit.
-
Double-click the name of the service.
-
Select the page containing the options you want to edit. See:
-
Section 4.3.2, "Proxy Service Message Type Configuration Page"
-
Section 4.3.3, "Proxy Service Operation Selection Configuration Page"
-
Section 4.3.4, "Proxy Service Message Handling Configuration Page"
-
Section 4.3.7, "Proxy Service - Service Policy Configuration Page"
-
Section 4.3.5, "Proxy Service SOAP Binding Configuration Page"
2.4 Working with Proxy Service Message Flows
The following topics describe how to add and configure nodes and actions to proxy service message flows.
-
Section 2.4.2, "Adding and Configuring Alert Actions in Message Flows"
-
Section 2.4.3, "Adding and Configuring Assign Actions in Message Flows"
-
Section 2.4.4, "Adding and Configuring Conditional Branch Nodes in Message Flows"
-
Section 2.4.6, "Adding and Configuring Dynamic Publish Actions in Message Flows"
-
Section 2.4.7, "Adding and Configuring Dynamic Routing Actions in Message Flows"
-
Section 2.4.8, "Adding and Configuring Error Handlers in Message Flows"
-
Section 2.4.9, "Adding and Configuring For-Each Actions in Message Flows"
-
Section 2.4.10, "Adding and Configuring If-Then Actions in Message Flows"
-
Section 2.4.11, "Adding and Configuring Insert Actions in Message Flows"
-
Section 2.4.12, "Adding and Configuring Java Callout Actions in Message Flows"
-
Section 2.4.13, "Adding and Configuring Log Actions in Message Flows"
-
Section 2.4.14, "Adding and Configuring MFL Transform Actions in Message Flows"
-
Section 2.4.15, "Adding and Configuring Operational Branch Nodes in Message Flows"
-
Section 2.4.16, "Adding and Configuring Pipeline Pair Nodes in Message Flows"
-
Section 2.4.17, "Adding and Configuring Publish Actions in Message Flows"
-
Section 2.4.18, "Adding and Configuring Publish Table Actions in Message Flows"
-
Section 2.4.19, "Adding and Configuring Raise Error Actions in Message Flows"
-
Section 2.4.20, "Adding and Configuring Rename Actions in Message Flows"
-
Section 2.4.21, "Adding and Configuring Replace Actions in Message Flows"
-
Section 2.4.23, "Adding and Configuring Report Actions in Message Flows"
-
Section 2.4.21, "Adding and Configuring Replace Actions in Message Flows"
-
Section 2.4.22, "Adding and Configuring Reply Actions in Message Flows"
-
Section 2.4.24, "Adding and Configuring Resume Actions in Message Flows"
-
Section 2.4.25, "Adding and Configuring Route Nodes in Message Flows"
-
Section 2.4.26, "Adding and Configuring Routing Actions in Message Flows"
-
Section 2.4.27, "Adding and Configuring Routing Options Actions in Message Flows"
-
Section 2.4.28, "Adding and Configuring Routing Table Actions in Message Flows"
-
Section 2.4.29, "Adding and Configuring Service Callout Actions in Message Flows"
-
Section 2.4.30, "Adding and Configuring Skip Actions in Message Flows"
-
Section 2.4.31, "Adding and Configuring Stages in Message Flows"
-
Section 2.4.32, "Adding and Configuring Transport Headers Actions in Message Flows"
-
Section 2.4.33, "Adding and Configuring Validate Actions in Message Flows"
2.4.1 Constructing Proxy Service Message Flows
When you create a proxy service, a message flow is created by default, with an empty starting node. The process for constructing the message flow follows this general pattern:
-
Open the Message Flow Editor for the proxy service. To open the proxy service, double-click its name in Project Explorer. The Message Flow Editor appears as a tab in the proxy service view.
-
Open the Message Flow Design Palette. To open the palette, in the Oracle Service Bus perspective, select Window > Show View > Design Palette.
-
Open the Properties view, if it is not already open:
-
In the Oracle Service Bus perspective, select Window > Show View > Other.
-
In the Show View dialog, select General > Properties.
-
-
Drag nodes and actions from the Message Flow Design Palette to the Message Flow Editor.
Alternatively, you can right-click a node or action in the Message Flow Editor to display menus of nodes and actions that can be inserted in that location. The menu contains one or more the following:
-
Insert > (list of nodes and actions)
-
Insert Into > (list of nodes and actions)
-
Insert After > (list of nodes and actions)
-
Add Error Handler
-
-
Configure nodes and actions:
-
In the Proxy Service Editor, select the node or action.
Alternatively, you can select a node or an action from the Outline view. To open the Outline view, in the Oracle Service Bus perspective, select Window > Show View > Outline.
-
In the Properties view, set the properties for the selected node or action. For instructions on how to configure the nodes and actions, click the Properties view for a node or action, and press F1 for help.
-
2.4.2 Adding and Configuring Alert Actions in Message Flows
Use the alert action to generate alerts based on message context in a pipeline, to send to an alert destination.
Before you begin
Display the message flow for the desired proxy service. See Section 2.4.1, "Constructing Proxy Service Message Flows."
To add an alert action
-
In the Message Flow Design Palette, open the Stage Actions > Reporting list, if it is not already open.
-
Drag the alert action to the desired location in the message flow.
To configure the alert action
-
In the Message Flow Editor, click the alert action, if it is not already selected.
-
On the Alert Action Properties page, edit properties.
For configuration details, see Section 4.11.1, "Alert Action Properties."
2.4.3 Adding and Configuring Assign Actions in Message Flows
Use an assign action to assign the result of an XQuery expression to a context variable.
Before you begin
Display the message flow for the desired proxy service. See Section 2.4.1, "Constructing Proxy Service Message Flows".
To add an assign action
-
In the Message Flow Design Palette, open the Stage Actions > Message Processing list, if it is not already open.
-
Drag the assign action to the desired location in the message flow.
To configure the assign action
-
In the Message Flow Editor, click the assign action, if it is not already selected.
-
On the Assign Action Properties page, edit the desired properties.
For configuration details, see Section 4.11.2, "Assign Action Properties."
2.4.4 Adding and Configuring Conditional Branch Nodes in Message Flows
Use a conditional branch node to specify that message processing is to proceed along exactly one of several possible paths, based on a result returned by an XPath condition.
Before you begin
Display the message flow for the desired proxy service. See Section 2.4.1, "Constructing Proxy Service Message Flows."
To add a conditional branch node
-
In the Message Flow Design Palette, open the Oracle Service Bus Message Flow > Nodes list, if it is not already open.
-
Drag the conditional branch node to the desired location in the message flow.
To configure the conditional branch node
-
In the Message Flow Editor, click the conditional branch node, if it is not already selected.
-
On the Conditional Branch Node Properties page, edit the desired properties.
For configuration details, see Section 4.11.3, "Conditional Branch Node Properties."
2.4.5 Adding and Configuring Delete Actions in Message Flows
Use a delete action to delete a context variable or a set of nodes specified by an XPath expression.
Before you begin
Display the message flow for the desired proxy service. See Section 2.4.1, "Constructing Proxy Service Message Flows."
To add a delete action
-
In the Message Flow Design Palette, open the Stage Actions > Message Processing list, if it is not already open.
-
Drag the delete action to the desired location in a stage action in the message flow.
To configure the delete action
-
In the Message Flow Editor, click the delete action, if it is not already selected.
-
On the Delete Action Properties page, edit the desired properties.
For configuration details, see Section 4.11.4, "Delete Action Properties."
2.4.6 Adding and Configuring Dynamic Publish Actions in Message Flows
Use a dynamic publish action to publish a message to a service specified by an XQuery expression.
For more information on publish behavior, see "Performing Transformations in Message Flows" in the Oracle Fusion Middleware Administrator's Guide for Oracle Service Bus.
Before you begin
Display the message flow for the desired proxy service. See Section 2.4.1, "Constructing Proxy Service Message Flows."
To add a dynamic publish action
-
In the Message Flow Design Palette, open the Stage Actions > Communication list, if it is not already open.
-
Drag the dynamic publish action to the desired location in the message flow.
To configure the dynamic publish action
-
In the Message Flow Editor, click the dynamic publish action, if it is not already selected.
-
On the Dynamic Publish Action Properties page, edit the desired properties.
For configuration details, see Section 4.11.5, "Dynamic Publish Action Properties."
2.4.7 Adding and Configuring Dynamic Routing Actions in Message Flows
Use a dynamic routing action to assign a route for a message based on routing information available in an XQuery resource.
For more information on routing, see "Modeling Message Flow in Oracle Service Bus" in the Oracle Fusion Middleware Administrator's Guide for Oracle Service Bus.
Before you begin
Display the message flow for the desired proxy service. See Section 2.4.1, "Constructing Proxy Service Message Flows."
To add a dynamic routing action
-
In the Message Flow Design Palette, open the Route Actions > Communication list, if it is not already open.
-
Drag the dynamic routing action to the route action in the message flow.
To configure the dynamic routing action
-
In the Message Flow Editor, click the dynamic routing action, if it is not already selected.
-
On the Dynamic Routing Action Properties page, edit the desired properties.
For configuration details, see Section 4.11.6, "Dynamic Routing Action Properties."
2.4.8 Adding and Configuring Error Handlers in Message Flows
Use an error handler to specify what should happen if an error occurs in a specific location in the message flow.
Before you begin
Display the message flow for the desired proxy service. See Section 2.4.1, "Constructing Proxy Service Message Flows."
To add an error handler
-
In the Message Flow Design Palette, open the Oracle Service Bus Message Flow > Nodes list, if it is not already open.
-
Drag the error handler to the desired location in the message flow.
-
Drag a stage node to the error handler.
-
Add actions to the stage to define the error handler.
To configure the error handler
-
In the Message Flow Editor, click the error handler, if it is not already selected.
-
On the Error Handler Node Properties page, edit the properties.
-
Click the stage node, if it is not already selected.
-
On the Stage Node Properties page, edit the properties.
-
Select and edit any desired actions contained by the stage.
For configuration details, see Section 4.11.7, "Error Handler Node Properties."
2.4.9 Adding and Configuring For-Each Actions in Message Flows
Use the for-each action to iterate over a sequence of values and execute a block of actions.
Before you begin
Display the message flow for the desired proxy service. See Section 2.4.1, "Constructing Proxy Service Message Flows."
To add a for-each action
-
In the Message Flow Design Palette, open the Stage Actions > Flow Control list, if it is not already open.
-
Drag the for-each action to the desired stage action in the message flow.
To configure the for-each action
-
In the Message Flow Editor, click the for-each action, if it is not already selected.
-
On the For-Each Action Properties page, edit the desired properties.
For configuration details, see Section 4.11.8, "For-Each Action Properties."
2.4.10 Adding and Configuring If-Then Actions in Message Flows
Use an if-then action to perform an action or a set of actions conditionally, based on the Boolean result of an XQuery expression.
Before you begin
Display the message flow for the desired proxy service. See Section 2.4.1, "Constructing Proxy Service Message Flows."
To add an if-then action
-
In the Message Flow Design Palette, do one of the following:
-
For an if-then action in a route node, open the Route Actions > Flow Control list, if it is not already open.
-
For an if-then action in a stage node, open the Stage Actions > Flow Control list, if it is not already open.
-
-
Drag the if-then action to the route node or to the desired stage action in the message flow.
To configure the if-then action
In the Message Flow Editor, click each if condition and else-if condition contained by the if-then action, and define the conditions in the Condition Editor, as described in Section 4.11.9, "If-Then Action Properties."
2.4.11 Adding and Configuring Insert Actions in Message Flows
Use an insert action to insert the result of an XQuery expression at an identified place relative to nodes selected by an XPath expression.
Before you begin
Display the message flow for the desired proxy service. See Section 2.4.1, "Constructing Proxy Service Message Flows."
To add an insert action
-
In the Message Flow Design Palette, open the Stage Actions > Message Processing list, if it is not already open.
-
Drag the insert action to the desired location in the message flow.
To configure the insert action
-
In the Message Flow Editor, click the insert action, if it is not already selected.
-
On the Insert Action Properties page, edit the desired properties.
For configuration details, see Section 4.11.10, "Insert Action Properties."
2.4.12 Adding and Configuring Java Callout Actions in Message Flows
Use a Java callout action to invoke a Java method or an EJB business service from within the message flow.
Before you begin
Display the message flow for the desired proxy service. See Section 2.4.1, "Constructing Proxy Service Message Flows."
To add an Java callout action
-
In the Message Flow Design Palette, open the Stage Actions > Message Processing list, if it is not already open.
-
Drag the Java callout action to the desired location in the message flow.
To configure the Java callout action
-
In the Message Flow Editor, click the Java callout action, if it is not already selected.
-
On the Java Callout Action Properties page, edit the desired properties.
For configuration details, see Section 4.11.11, "Java Callout Action Properties."
2.4.13 Adding and Configuring Log Actions in Message Flows
Use the log action to construct a message to be logged and to define a set of attributes with which it will be logged.
Before you begin
Display the message flow for the desired proxy service. See Section 2.4.1, "Constructing Proxy Service Message Flows."
To add a log action
-
In the Message Flow Design Palette, open the Stage Actions > Reporting list, if it is not already open.
-
Drag the log action to the desired location in the message flow.
To configure the log action
-
In the Message Flow Editor, click the log action, if it is not already selected.
-
On the Log Action Properties page, edit the desired properties.
For configuration details, see Section 4.11.12, "Log Action Properties."
2.4.14 Adding and Configuring MFL Transform Actions in Message Flows
Use a MFL (Message Format Language) transform action to convert message content from XML to non-XML, or vice versa, in the message pipeline.
Before you begin
Display the message flow for the desired proxy service. See Section 2.4.1, "Constructing Proxy Service Message Flows."
To add a MFL transform action
-
In the Message Flow Design Palette, open the Stage Actions > Message Processing list, if it is not already open.
-
Drag the MFL transform action to the desired location in the message flow.
To configure the MFL transform action
-
In the Message Flow Editor, click the MFL transform action, if it is not already selected.
-
On the MFL Transform Action Properties page, edit the desired properties.
For configuration details, see Section 4.11.16, "MFL Transform Action Properties."
2.4.15 Adding and Configuring Operational Branch Nodes in Message Flows
Use an operational branch node to configure branching based on operations defined in a WSDL.
Before you begin
Display the message flow for the desired proxy service. See Section 2.4.1, "Constructing Proxy Service Message Flows."
To add an operational branch node
-
In the Message Flow Design Palette, open the Oracle Service Bus Message Flow > Nodes list, if it is not already open.
-
Drag the operational branch node to the desired location in the message flow.
To configure the operational branch node
-
In the Message Flow Editor, click the operational branch node, if it is not already selected.
-
On the Operational Branch Node Properties page, edit the desired properties.
For configuration details, see Section 4.11.17, "Operational Branch Node Properties."
2.4.16 Adding and Configuring Pipeline Pair Nodes in Message Flows
Use a pipeline pair node to define request and response processing.
Before you begin
Display the message flow for the desired proxy service. See Section 2.4.1, "Constructing Proxy Service Message Flows."
To add a pipeline pair node
-
In the Message Flow Design Palette, open the Oracle Service Bus Message Flow > Nodes list, if it is not already open.
-
Drag the pipeline pair node to the desired location in the message flow.
To configure the pipeline pair node
-
In the Message Flow Editor, click the pipeline pair node, if it is not already selected.
-
On the Pipeline Pair Node Properties page, edit the desired properties.
For configuration details, see Section 4.11.18, "Pipeline Pair Node Properties."
2.4.17 Adding and Configuring Publish Actions in Message Flows
Use a publish action to identify a statically specified target service for a message and to configure how the message is packaged and sent to that service.
For more information on publish behavior, see "Performing Transformations in Message Flows" in the Oracle Fusion Middleware Administrator's Guide for Oracle Service Bus.
Before you begin
Display the message flow for the desired proxy service. See Section 2.4.1, "Constructing Proxy Service Message Flows."
To add a publish action
-
In the Message Flow Design Palette, open the Stage Actions > Communication list, if it is not already open.
-
Drag the publish action to the desired location in the message flow.
To configure the publish action
-
In the Message Flow Editor, click the publish action, if it is not already selected.
-
On the Publish Action Properties page, edit the desired properties.
For configuration details, see Section 4.11.19, "Publish Action Properties."
2.4.18 Adding and Configuring Publish Table Actions in Message Flows
Use a publish table action to publish a message to zero or more statically specified services.
For more information on publish behavior, see "Performing Transformations in Message Flows" in the Oracle Fusion Middleware Administrator's Guide for Oracle Service Bus.
Before you begin
Display the message flow for the desired proxy service. See Section 2.4.1, "Constructing Proxy Service Message Flows."
To add a publish table action
-
In the Message Flow Design Palette, open the Stage Actions > Communication list, if it is not already open.
-
Drag the publish table action to the desired location in the message flow.
To configure the publish table action
-
In the Message Flow Editor, click the publish table action, if it is not already selected.
-
On the Publish Table Action Properties page, click <Expression> to display the XQuery/XSLT Expression Editor. Create an XQuery expression, which at runtime returns the value upon which the routing decision will be made.
-
In the Message Flow Editor, select a case action.
-
From the Operator list on the Publish Table Action Properties page, select a comparison operator. Then, in the Value field, enter a value against which the value returned from the XQuery expression will be evaluated.
-
In the Message Flow Editor, click one of the publish table's publish actions to select it.
-
On the Publish Action Properties page, click Browse to select a service. Select the service to which messages are to be published if the expression evaluates true for the value you specified. The Select a Service Resource dialog is displayed.
-
Select a service from the list, then click OK. This is the target service for the message.
-
If the service has operations defined, you can specify the operation to be invoked by selecting it from the invoking list.
-
If you want the outbound operation to be the same as the inbound operation, select the Use inbound operation for outbound check box.
-
In the Request Actions field, to configure how the message is packaged and sent to the service, click Add an Action, then select one or more actions that you want to associate with the service.
-
To insert a new case, click the Case icon, then select Insert New Case.
-
Repeat steps 4-8 for the new case.
-
Add additional cases as dictated by your business logic.
-
Click the Case icon of the last case you define in the sequence, then select Insert Default Case to add a default case at the end.
-
Configure the default case—the configuration of this case specifies the routing behavior in the event that none of the preceding cases is satisfied.
For more information, see Section 4.11.20, "Publish Table Action Properties."
2.4.19 Adding and Configuring Raise Error Actions in Message Flows
Use the raise error action to raise an exception with a specified error code (a string) and description.
Before you begin
Display the message flow for the desired proxy service. See Section 2.4.1, "Constructing Proxy Service Message Flows."
To add a raise error action
-
In the Message Flow Design Palette, open the Stage Actions > Flow Control list, if it is not already open.
-
Drag the raise error action to the desired location in the message flow.
To configure the raise error action
-
In the Message Flow Editor, click the raise error action, if it is not already selected.
-
On the Raise Error Action Properties page, edit the desired properties.
For configuration details, see Section 4.11.21, "Raise Error Action Properties."
2.4.20 Adding and Configuring Rename Actions in Message Flows
Use the rename action to rename elements selected by an XPath expression without modifying the contents of the element.
Before you begin
Display the message flow for the desired proxy service. See Section 2.4.1, "Constructing Proxy Service Message Flows."
To add an rename action
-
In the Message Flow Design Palette, open the Stage Actions > Message Processing list, if it is not already open.
-
Drag the rename action to the desired location in the message flow.
To configure the rename action
-
In the Message Flow Editor, click the rename action, if it is not already selected.
-
On the Rename Action Properties page, edit the desired properties.
For configuration details, see Section 4.11.22, "Rename Action Properties."
2.4.21 Adding and Configuring Replace Actions in Message Flows
Use a replace action to replace a node or the contents of a node specified by an XPath expression. The node or its contents are replaced with the value returned by an XQuery expression.
Before you begin
Display the message flow for the desired proxy service. See Section 2.4.1, "Constructing Proxy Service Message Flows."
To add a replace action
-
In the Message Flow Design Palette, open the Stage Actions > Message Processing list, if it is not already open.
-
Drag the replace action to the desired location in the message flow.
To configure the replace action
-
In the Message Flow Editor, click the replace action, if it is not already selected.
-
On the Replace Action Properties page, edit the desired properties.
For configuration details, see Section 4.11.23, "Replace Action Properties."
2.4.22 Adding and Configuring Reply Actions in Message Flows
Use the reply action to specify that an immediate reply be sent to the invoker.
Before you begin
Display the message flow for the desired proxy service. See Section 2.4.1, "Constructing Proxy Service Message Flows."
To add a reply action
-
In the Message Flow Design Palette, open the Stage Actions > Flow Control list, if it is not already open.
-
Drag the reply action to the desired location in the message flow.
To configure the reply action
-
In the Message Flow Editor, click the reply action, if it is not already selected.
-
On the Reply Action Properties page, edit the desired properties.
For configuration details, see Section 4.11.24, "Reply Action Properties."
2.4.23 Adding and Configuring Report Actions in Message Flows
Use the report action to enable message reporting for a proxy service.
Before you begin
Display the message flow for the desired proxy service. See Section 2.4.1, "Constructing Proxy Service Message Flows."
To add a report action
-
In the Message Flow Design Palette, open the Stage Actions > Reporting list, if it is not already open.
-
Drag the report action to the desired location in the message flow.
To configure the report action
-
In the Message Flow Editor, click the report action, if it is not already selected.
-
On the Report Action Properties page, edit the desired properties.
For configuration details, see Section 4.11.25, "Report Action Properties."
2.4.24 Adding and Configuring Resume Actions in Message Flows
Use the resume action to resume message flow after an error is handled by an error handler. This action has no parameters and can only be used in error pipelines.
Before you begin
Display the message flow for the desired proxy service. See Section 2.4.1, "Constructing Proxy Service Message Flows."
To add a resume action
-
In the Message Flow Design Palette, open the Stage Actions > Flow Control list, if it is not already open.
-
Drag the resume action to the desired location in the message flow.
To configure the resume action
-
In the Message Flow Editor, click the resume action, if it is not already selected.
-
On the Resume Action Properties page, edit the desired properties.
For configuration details, see Section 4.11.26, "Resume Action Properties."
2.4.25 Adding and Configuring Route Nodes in Message Flows
Use the route node to handle request and response dispatching of messages to and from business services.
Before you begin
Display the message flow for the desired proxy service. See Section 2.4.1, "Constructing Proxy Service Message Flows."
To add a route node
-
In the Message Flow Design Palette, open the Oracle Service Bus Message Flow > Nodes list, if it is not already open.
-
Drag the route node to the desired location in the message flow.
To configure the route node
-
In the Message Flow Editor, click the route node action, if it is not already selected.
-
On the Route Node Properties page, edit the desired properties.
For configuration details, see Section 4.11.27, "Route Node Properties."
2.4.26 Adding and Configuring Routing Actions in Message Flows
Use a routing action to identify a target service for the message and configure how the message is routed to that service.
For more information on routing, see "Modeling Message Flow in Oracle Service Bus" in the Oracle Fusion Middleware Administrator's Guide for Oracle Service Bus.
Before you begin
Display the message flow for the desired proxy service. See Section 2.4.1, "Constructing Proxy Service Message Flows."
To add a routing action
-
In the Message Flow Design Palette, open the Route Actions > Communication list, if it is not already open.
-
Drag the routing action to the desired location in the message flow.
To configure the routing action
-
In the Message Flow Editor, click the routing action, if it is not already selected.
-
On the Routing Action Properties page, edit the desired properties.
For configuration details, see Section 4.11.28, "Routing Action Properties."
2.4.27 Adding and Configuring Routing Options Actions in Message Flows
Use a routing options action to modify any or all of the following properties in the outbound request: URI, Quality of Service, Mode, Retry parameters, message Priority.
For more information on routing, see "Modeling Message Flow in Oracle Service Bus" in the Oracle Fusion Middleware Administrator's Guide for Oracle Service Bus.
Before you begin
Display the message flow for the desired proxy service. See Section 2.4.1, "Constructing Proxy Service Message Flows."
To add a routing options action
-
In the Message Flow Design Palette, open the Stage Actions > Communication list, if it is not already open.
-
Drag the routing options action to the desired location in the message flow.
To configure the routing options action
-
In the Message Flow Editor, click the routing options action, if it is not already selected.
-
On the Routing Options Action Properties page, edit the desired properties.
For configuration details, see Section 4.11.29, "Routing Options Action Properties."
2.4.28 Adding and Configuring Routing Table Actions in Message Flows
Use a routing table to select different routes based upon the results of a single XQuery expression. A routing table action contains a set of routes wrapped in a switch-style condition table.
For more information on routing, see "Modeling Message Flow in Oracle Service Bus" in the Oracle Fusion Middleware Administrator's Guide for Oracle Service Bus.
Before you begin
Display the message flow for the desired proxy service. See Section 2.4.1, "Constructing Proxy Service Message Flows."
To add a routing table action
-
In the Message Flow Design Palette, open the Route Actions > Communication list, if it is not already open.
-
Drag the routing table action to the desired location in the message flow.
To configure the routing table action
-
In the Message Flow Editor, click the routing table action, if it is not already selected.
-
On the Routing Table Action Properties page, edit the desired properties.
For configuration details, see Section 4.11.30, "Routing Table Action Properties."
2.4.29 Adding and Configuring Service Callout Actions in Message Flows
Use a service callout action to configure a synchronous (blocking) callout to an Oracle Service Bus-registered proxy or business service.
For more information on service callout actions, see "Constructing Service Callout Messages" in the Oracle Fusion Middleware Administrator's Guide for Oracle Service Bus.
Before you begin
Display the message flow for the desired proxy service. See Section 2.4.1, "Constructing Proxy Service Message Flows."
To add a service callout action
-
In the Message Flow Design Palette, open the Stage Actions > Communication list, if it is not already open.
-
Drag the service callout action to the desired location in the message flow.
To configure the service callout action
-
In the Message Flow Editor, click the service callout action, if it is not already selected.
-
On the Service Callout Action Properties page, edit the desired properties.
For configuration details, see Section 4.11.31, "Service Callout Action Properties."
2.4.30 Adding and Configuring Skip Actions in Message Flows
Use the skip action to specify that at runtime, the execution of the current stage is skipped and the processing proceeds to the next stage in the message flow.
Before you begin
Display the message flow for the desired proxy service. See Section 2.4.1, "Constructing Proxy Service Message Flows."
To add a skip action
-
In the Message Flow Design Palette, open the Stage Actions > Flow Control list, if it is not already open.
-
Drag the skip action to the desired location in the message flow.
To configure the skip action
-
In the Message Flow Editor, click the skip action, if it is not already selected.
-
On the Skip Action Properties page, edit the desired properties.
For configuration details, see Section 4.11.32, "Skip Action Properties."
2.4.31 Adding and Configuring Stages in Message Flows
Use a stage node as a container for actions in a message flow.
Before you begin
Display the message flow for the desired proxy service. See Section 2.4.1, "Constructing Proxy Service Message Flows."
To add a stage
-
In the Message Flow Design Palette, open the Oracle Service Bus Message Flow > Nodes list, if it is not already open.
-
Drag the stage to the desired location in the message flow.
-
Add actions to the stage for your configuration.
To configure the stage
-
In the Message Flow Editor, click the stage, if it is not already selected.
-
On the Stage Node Properties page, edit the desired properties.
For configuration details, see Section 4.11.33, "Stage Node Properties."
2.4.32 Adding and Configuring Transport Headers Actions in Message Flows
Use a transport header action to set header values in messages.
Before you begin
Display the message flow for the desired proxy service. See Section 2.4.1, "Constructing Proxy Service Message Flows."
To add a transport headers action
-
In the Message Flow Design Palette, open the Stage Actions > Communication list, if it is not already open.
-
Drag the transport headers action to the desired location in the message flow.
To configure the transport headers action
-
In the Message Flow Editor, click the transport headers action, if it is not already selected.
-
On the Transport Headers Action Properties page, edit the desired properties.
For configuration details, see Section 4.11.34, "Transport Headers Action Properties."
2.4.33 Adding and Configuring Validate Actions in Message Flows
Use a validate action to validate elements selected by an XPath expression against an XML schema element or a WSDL resource.
Before you begin
Display the message flow for the desired proxy service. See Section 2.4.1, "Constructing Proxy Service Message Flows."
To add a validate action
-
In the Message Flow Design Palette, open the Stage Actions > Message Processing list, if it is not already open.
-
Drag the validate action to the desired location in the message flow.
To configure the validate action
-
In the Message Flow Editor, click the validate action, if it is not already selected.
-
On the Validate Action Properties page, edit the desired properties.
For configuration details, see Section 4.11.35, "Validate Action Properties."
2.5 Working with Alert Destinations
The following topics describe how to create and work with alert destinations in the Oracle Service Bus plug-ins.
-
Section 2.5.2, "Adding Email Recipients to Alert Destinations"
-
Section 2.5.3, "Adding JMS Destinations to Alert Destinations"
2.5.1 Creating and Editing Alert Destinations
To create alert destinations:
-
In the Project Explorer in the Oracle Service Bus perspective, right-click a project or folder in which you want to create an alert destination.
-
From the menu, select File > New > Alert Destination to display the New Alert Destination Resource wizard.
See Section 2.1.1, "Resource Naming Restrictions" for naming guidance.
Note:
You can create an alert destination in an Oracle Service Bus project only.
To edit alert destinations:
-
In the Project Explorer, find the project folder containing the alert destination you want to edit.
-
Double-click the name of the alert destination to display the Alert Destination Editor. Edit information, as desired.
For configuration details, see Section 4.1.1, "Alert Destination Editor."
2.5.2 Adding Email Recipients to Alert Destinations
To add email recipients to alert destinations:
-
Create or edit an alert destination, as described in Section 2.5.1, "Creating and Editing Alert Destinations."
-
In the Email Recipients field of the Alert Destination Editor, click Add to display the Edit Email Recipient Page.
2.5.3 Adding JMS Destinations to Alert Destinations
To add JMS destinations to alert destinations:
-
Create or edit an alert destination, as described in Section 2.5.1, "Creating and Editing Alert Destinations."
-
In the JMS Destinations field of the Alert Destination Editor, click Add to display the Edit JMS Destination Page.
2.6 Working with MQ Connections
MQ connections are sharable resources that can be reused across multiple MQ proxy and business services. MQ proxy and business services must connect to a MQ queue manager before accessing an MQ queue. MQ Connection resources provide the connection required for connecting to an MQ queue manager.
Each MQ Connection resource has a connection pool. Every business or proxy service using a given MQ Connection resource to get a connection to a given queue manager uses the same connection pool that was created for that resource. Thus, multiple business services and proxy services using the same queue manager share a connection pool.
To learn more about Oracle Service Bus MQ Connection resources and the native MQ transport, see "MQ Transport" in the Oracle Fusion Middleware Developer's Guide for Oracle Service Bus.
To learn more about WebSphere MQ Fundamentals, see http://www.redbooks.ibm.com/redbooks/SG247128/wwhelp/wwhimpl/java/html/wwhelp.htm.
2.6.1 Adding and Editing MQ Connections
In Oracle Service Bus, MQ connections are created as custom resources. Therefore, to add an MQ connection, you must create it as a custom resource, as follows:
-
In the Oracle Service Bus perspective, select File > New > Custom Resource to display New Custom Resource Wizard.
See Section 2.1.1, "Resource Naming Restrictions" for naming guidance.
-
On the Create a New Custom Resource page, in the Resource Type field, select MQ Connection.
-
Enter configuration information, on the Custom MQ Resource Configuration Page.
Note:
Do not include spaces in the MQ Connection resource name.
To edit MQ connections:
-
In the Project Explorer, find the Oracle Service Bus configuration folder containing the MQ connection resource you want to edit.
-
Double-click the name of the MQ connection to display the Custom MQ Resource Configuration Page.
For configuration details, see Section 4.5.4, "Custom MQ Resource Configuration Page."
2.7 Working with Oracle Enterprise Repository and Harvester
Oracle Enterprise Repository is an enterprise metadata repository for application resources and services. Using Oracle Enterprise Repository in conjunction with Oracle Service Registry, Oracle's UDDI solution, is a best-practice approach to locating, using, synchronizing, and governing enterprise-wide services through Oracle Service Bus.
Harvester is an Oracle Enterprise Repository tool that lets you harvest enterprise artifacts into Oracle Enterprise Repository from multiple sources, including Oracle Service Bus.
Oracle Service Bus provides native connectivity to Oracle Enterprise Repository and Harvester in the development environment, letting you both generate business services from the repository and harvest Oracle Service Bus projects to the repository. Harvester also provides command-line scripting for harvesting Oracle Service Bus projects in the runtime environment.
For more information on Oracle Enterprise Repository, see the Oracle Fusion Middleware Quick Start Guide for Oracle Enterprise Repository.
This section includes the following topics:
-
Section 2.7.1, "Generating Business Services from Oracle Enterprise Repository"
-
Section 2.7.3, "Performing Queries in Oracle Enterprise Repository from Eclipse"
2.7.1 Generating Business Services from Oracle Enterprise Repository
You can generate business services in the Oracle Service Bus development environment from service assets in Oracle Enterprise Repository.
In a best-practices deployment scenario, service assets in Oracle Enterprise Repository have associated services stored in Oracle Service Registry. When you generate business services from Oracle Enterprise Repository assets, those services can be synchronized with the associated services stored in the registry through Oracle Service Bus UDDI resources.
This section provides instructions on using the development environment to generate business services from service assets in Oracle Enterprise Repository.
Note:
To generate business services in Oracle Service Bus, Oracle Enterprise Repository assets must be SOAP/XML WSDL-based services using HTTP.-
Perform a query in Oracle Enterprise Repository to locate the service from which you want to generate a business service. See Section 2.7.3, "Performing Queries in Oracle Enterprise Repository from Eclipse."
-
Right-click the service asset from which you want to generate the new business service, and choose Oracle Service Bus > Generate Business Service.
-
In the Generate Business Service window, select a location in Eclipse for the new business service, and select an endpoint.
See Section 2.1.1, "Resource Naming Restrictions" for naming guidance.
Note:
Service assets must have an endpoint in order to generate business services in Oracle Service Bus. -
If the Oracle Enterprise Repository asset is associated with Oracle Service Registry, you can click Next to configure an Oracle Service Bus UDDI Registry resource that at runtime connects to Oracle Service Registry (otherwise, skip to the next step). The Oracle Enterprise Repository asset automatically provides the Inquiry URL to Oracle Service Registry.
The Configure UDDI Registry window provides the following options: Select a matching UDDI Registry Resource, select a non-matching UDDI Registry resource or create a new one, or not use UDDI.
If you select the option to create a new UDDI Registry resource, see Section 4.14, "UDDI Registry Configuration Page" for guidance.
-
Click Finish to generate the business service.
A new HTTP business service and its associated WSDL and XSD are added to your development environment.
If the Oracle Enterprise Repository asset endpoint is associated with a service in Oracle Service Registry, the business service configuration contains UDDI connection details to the Oracle Service Registry instance.
-
If the Oracle Enterprise Repository asset references an Oracle Web Services Manager policy or a WS-Policy, the generated business services does not automatically include the policy. You must manually add Oracle Web Services Manager policies and WS-Policies. WSDL-based policies, however, are automatically included.
In the development environment, you do not establish a subscription to Oracle Service Registry. The subscription and service synchronization to Oracle Service Registry occurs when you deploy the business service to the Oracle Service Bus runtime environment. Service synchronization is determined by the UDDI Registry resource's Auto-Import setting.
For more information on UDDI, see "UDDI" in the Oracle Fusion Middleware Administrator's Guide for Oracle Service Bus.
2.7.2 Using Harvester
Harvester lets you submit Oracle Service Bus projects to Oracle Enterprise Repository from Eclipse, the command line, with an Ant task, or with a WLST script).
Two concepts in harvesting are local harvesting and remote harvesting. Local harvesting, performed from Eclipse and from specific command-line scripts, submits projects from the file system to the repository. Remote harvesting, performed from command-line scripts, submits projects from a runtime environment.
When you harvest resources, the dependency relationships are maintained in Oracle Enterprise Repository.
Table 2-1 describes differences between harvesting scenarios to help you decide which scenario is appropriate.
Table 2-1 Differences in Harvesting Scenarios
| Eclipse Harvests | Local Harvests | Remote Harvests |
|---|---|---|
|
You can harvest a single project or an Oracle Service Bus configuration containing multiple projects. |
You can use the command-line scripts to harvest Oracle Service Bus artifacts from a configuration JAR on the file system. You can harvest all the projects in the configuration jar or selected projects. |
You can use the command-line scripts to harvest Oracle Service Bus artifacts from a configuration JAR in the runtime environment. You can harvest all the projects in the configuration jar or selected projects. |
|
Proxy service endpoint assets are not created in the repository. |
Proxy service endpoint assets are not created in the repository. |
Proxy service endpoint assets are created in the repository. If you perform a remote harvest on the same services you harvested from Eclipse or a local harvest, the newly created service endpoints are added to the same services that were harvested locally. |
|
Service WSDLs (effective WSDLs) are generated in the repository with a local addresses, such as localhost:7001. |
Service WSDLs (effective WSDLs) are generated in the repository with a local addresses, such as localhost:7001. |
Service WSDLs (effective WSDLs) are generated in the repository with the server runtime address. |
Before using Oracle Service Bus with Harvester, be sure to install the Harvester Solution Pack, as described in "Configuring and Using Automated Harvesting in Design-time and Runtime Environments" in the Oracle Fusion Middleware Configuration Guide for Oracle Enterprise Repository.
The following sections describe Eclipse, local, and remote harvesting.
2.7.2.1 Using Harvester from Eclipse
The Oracle Service Bus plug-ins for Eclipse provide built-in functionality for Harvesting projects to Oracle Enterprise Repository.
For information on how the assets are harvested from Eclipse, see Table 2-1.
To Harvest an Oracle Service Bus project from Eclipse:
-
In Project Explorer view, right-click the project you want to harvest and select Submit Project to Enterprise Repository.
You can also right-click an Oracle Service Bus configuration project to harvest all projects in the configuration.
-
In the Submit window, enter the connection details to the repository, including the repository URI and login credentials.
If you have previously configured a connection to Oracle Enterprise Repository, as described in Section 2.7.3, "Performing Queries in Oracle Enterprise Repository from Eclipse," those connection details appear by default.
Optionally:
-
Enter a namespace for the project and its artifacts. The namespace prepends the name of service assets in Oracle Enterprise Repository query results.
-
Select a Registration Status for the artifacts. For example, if you are harvesting the artifacts for testing, select an appropriate status, such as Unsubmitted.
-
Modify the default connection timeout in milliseconds.
-
Modify the default description of the project(s).
-
-
Click Submit. An activity bar scrolls while the upload proceeds. When the upload finishes, click Close.
-
To see your harvested resources, perform a query in Oracle Enterprise Repository, described in Section 2.7.3, "Performing Queries in Oracle Enterprise Repository from Eclipse."
2.7.2.2 Using Harvester from the Command Line or a Script
Oracle Service Bus provides built-in Harvester resources necessary to harvest Oracle Service Bus projects from the command line, using Ant tasks, or using WLST scripts. These resources are located at:
OSB_ORACLE_HOME/harvester
The main configuration file in the directory is HarvesterSettings.xml, which contains placeholder configurations for the connection to Oracle Enterprise Repository, local harvest settings, and remote harvest settings. Command-line Harvester uses the configuration details in that file to perform harvests in conjunction with any override configuration switches you provide.
Following are basic descriptions of local and remote harvesting:
-
Local Harvesting – A local harvest involves generating an Oracle Service Bus configuration JAR on the file system and targeting that JAR for harvest. All projects in the JAR are harvested.
For information on generating an Oracle Service Bus configuration JAR, see Section 2.1.11, "Exporting Resources" or "Exporting Resources" in the Oracle Fusion Middleware Administrator's Guide for Oracle Service Bus.
-
Remote Harvesting – A remote harvest involves pointing the script at a running Oracle Service Bus instance and targeting a single project or a full Oracle Service Bus configuration for harvest.
To help you decide which harvesting option you want to use, see Table 2-1.
Oracle Service Bus provides guidance and resource files for command-line, Ant, and WLST harvesting. For details, see the OSB_ORACLE_HOME/harvester/README.TXT file.
The README.TXT file provides Oracle Service Bus-specific guidance. Use that information and the Oracle Service Bus Harvester resources in conjunction with the full set of command-line and scripting instructions in "Configuring and Using Automated Harvesting in Design-time and Runtime Environments" in the Oracle Fusion Middleware Configuration Guide for Oracle Enterprise Repository. Use only the options mentioned in the README.TXT file, as those are the only supported options with Oracle Service Bus.
After you harvest projects, you can query Oracle Enterprise Repository in Eclipse to view the harvested resources. See Section 2.7.3, "Performing Queries in Oracle Enterprise Repository from Eclipse."
Note:
Besides the Oracle Service Bus harvester, which harvests full projects, the command-line framework also supports built-in harvesters for individual resources such as WSDLs, XSDs, XSLTs, and WS-Policies. However, Oracle Service Bus does not support the use of those harvesters for Oracle Service Bus 11g and later resources.For harvesting individual resources, such as those in Oracle SOA Suite, Oracle WebLogic Server, or plain WSDLs, download and use the Harvester Base Data Pack.
2.7.3 Performing Queries in Oracle Enterprise Repository from Eclipse
The following steps show you how to connect to and query Oracle Enterprise Repository in Eclipse. Querying lets you locate service assets from which you can generate business services, browse assets in the repository, and view asset details and relationships.
-
In Eclipse, choose Window > Show View > Other, then choose Oracle Enterprise Repository > Enterprise Repository Access.
-
In Enterprise Repository Access view, click the Connect to enterprise repository icon.
-
In the Enterprise Repository Connection window, enter the repository URL and login credentials, and click Establish Connection.
-
On successful connection, click Finish.
-
When connected to Oracle Enterprise Repository, you can query the repository to locate the services and assets you want. For example, to find service assets, select Service in the All Types field of the Query screen, then click the Perform query icon.
The Enterprise Repository Access view switches to the Results screen to display query results.
You can also open the Enterprise Repository Asset Relationships view in Eclipse to see graphical relationships among selected assets: Window > Show View > Other, then choose Oracle Enterprise Repository > Enterprise Repository Asset Relationships.
For more information on working with Oracle Enterprise Repository in Eclipse, see the Oracle Fusion Middleware Integration Guide for Oracle Enterprise Repository.
2.8 Working with UDDI Registries
Universal Description, Discovery and Integration (UDDI) registries are used in an enterprise to share Web Services. UDDI provides a framework in which to classify your business, its services, and the technical details about the services you want to expose.
Publishing a service to a registry requires knowledge of the service type and the data structure representing that service in the registry. A registry entry has certain properties associated with it and these property types are defined when the registry is created. You can publish your service to a registry and make it available for other organizations to discover and use. Proxy services developed in Oracle Service Bus can be published to a UDDI registry. Oracle Service Bus can interact with any UDDI version 3.0-compliant registry.
See also "UDDI" in the Oracle Fusion Middleware Administrator's Guide for Oracle Service Bus.
2.8.1 Adding and Configuring UDDI Registries
To add UDDI registries:
-
In the Oracle Service Bus perspective, select File > New > UDDI Registry to display the New UDDI Resource wizard.
See Section 2.1.1, "Resource Naming Restrictions" for naming guidance.
Note:
You can add a UDDI registry only to an Oracle Service Bus configuration project only. -
After choosing a location and entering a name, configure the registry on the UDDI Registry Configuration Page.
Note:
You can add a UDDI registry in an Oracle Service Bus configuration project only.
To configure UDDI registries:
-
In the Project Explorer, find the UDDI registry you want to configure.
-
Double-click the name of the registry.
-
Set configure options on the UDDI Registry Configuration Page.
For configuration details, see Section 4.14, "UDDI Registry Configuration Page."
2.8.2 Importing Business Services From a UDDI Registry
Note:
In addition to importing business services directly from a UDDI registry, you can generate business services from Oracle Enterprise Repository. For more information see Section 2.2.3, "Generating a Business Service from Oracle Enterprise Repository."To import business services from a UDDI registry:
-
Create a business service, as described in Section 2.2.1, "Creating Business Services."
-
In the New Business Service wizard Business Service General Configuration Page, select WSDL Web Service. then click Browse.
-
In the Select a WSDL dialog, click Consume.
-
In the Service Consumption dialog, select UDDI.
2.9 Working with Split-Join
This section provides instructions for creating and configuring Split-Joins. Following are the primary topics in this section:
For specific configuration details, see Section 4.22, "Split-Join User Interface Reference."
2.9.1 Introduction to Split-Join
The Split-Join is a mediation pattern that can be used by a transport typed business service in an Oracle Service Bus message flow. Split-Join lets you send message requests to multiple services concurrently, thus enhancing performance in comparison to sending them sequentially. Split-Join achieves this task by splitting an input message into individual messages, routing them concurrently to their destinations, and then aggregating the responses into one overall message.
You design a Split-Join in the Eclipse Split-Join editor, then export it to the Oracle Service Bus Administration Console for testing and production.
Note:
In the Oracle Service Bus Administration Console, a Split-Join is associated with a business service using the Flow transport protocol. Therefore, the Split-Join has a .flow file name extension in Eclipse even though it is always referred to simply as a "Split-Join" in this document.There are two types of Split-Join pattern: static Split-Join and dynamic Split-Join, as described in Section 2.9.2, "Designing a Split-Join."
For more information on invoking a business service from an Oracle Service Bus message flow, see "Proxy Services: Message Flow" in the Oracle Fusion Middleware Administrator's Guide for Oracle Service Bus.
2.9.1.1 Using Split-Join with Content in SOAP Headers
You can use Split-Join to enhance the performance of services that put message content in the SOAP header. Proxy services can pass SOAP headers into Split-Joins, and Split-Joins can pass SOAP headers to proxy and business services as an invocation or response.
To enable this capability, you must declare the header parts along with the body parts in a single request/response message in the Split-Join WSDL and in the WSDL of the proxy or business services invoked by the Split-Join. With the message parts declared in the WSDLs, SOAP header content is available to Split-Joins in the request/response message variables.
Following is an example of the message and binding definitions in the WSDL.
Message
<wsdl:message name="retrieveCustomerOverviewByIdRequestMessage">
    <wsdl:part name="retrieveCustomerOverviewByIdRequest"
     element="co:retrieveCustomerOverviewByIdRequest"/>
    <wsdl:part name="serviceContext" element="sc:serviceContext"/>
</wsdl:message>
Binding
<wsdl:input>
<soap:body use="literal" parts="retrieveCustomerOverviewByIdRequest"/>
    <soap:header message="tns:retrieveCustomerOverviewByIdRequestMessage"
     part="serviceContext" use="literal"/>
</wsdl:input>
2.9.1.2 Transaction Support
Split-Joins provide support for propagating transactions. Many Split-Join operations provide an option for setting a specific quality of service (QoS) values, which control transaction support. The QoS value of Exactly Once on a Split-Join operation ensures the operation executes in the context of a transaction if one exists.
Setting QoS on individual operations gives you the flexibility to execute multiple operations in the context of a transaction and execute other operations outside of a transaction in a single Split-Join. Operations set with a QoS of Exactly Once are executed in the transaction. Operations set with a QoS of Best Effort do not execute in the context of a transaction.
Split-Joins do not handle transaction rollback in the case of exceptions. It is the responsibility service component that called the Split-Join to handle transaction exceptions and rollback.
The following Split-Join operations support transaction propagation:
-
Invoke Service
-
Assign
-
Delete
-
Insert
-
Java Callout
-
Replace
2.9.1.3 Security with Split-Joins
Split-Joins do not enforce security policies, which means you cannot create a Split-Join with a WSDL that includes policies, and from a Split-Join you cannot call a WSDL-based business service that contains WSDL policies.
To ensure security enforcement when using Split-Joins, use proxy services to handle security enforcement in the following ways:
-
Use the inbound proxy, which invokes the Split-Join, to enforce policies.
-
If the Split-Join needs to invoke a WSDL business service that contains policies, have the Split-Join call a local proxy (configured without the security policies), which in turn invokes the business service with the required policies.
2.9.2 Designing a Split-Join
There are two Split-Join patterns, the Static Split-Join and the Dynamic Split Join.
The Static Split-Join can be used to create a fixed number of message requests (as opposed to an unknown number). For instance, a customer places an order for a cable package that includes three separate services: internet service, TV service, and telephone service. In the Static use case, you could execute all three requests in separate parallel branches to improve performance time over the standard sequential execution.
The Dynamic Split-Join can be used to create a variable number of message requests. For instance, a retailer places a batch order containing a variable number of individual purchase orders. In the Dynamic use case, you could parse the batch order and create a separate message request for each purchase. Like the Static use case, these messages can then be executed in parallel for improved performance.
2.9.2.1 Initial Setup
Split-Joins potentially include the following tasks as part of their initial setup:
2.9.2.1.1 Creating/Importing a WSDL Containing the Base Operation
Every Split-Join is based upon a WSDL operation. When you first create a Split-Join, you will be asked to browse to the appropriate WSDL file and to select this operation as part of the creation process. You can create this WSDL file in Eclipse.
2.9.2.1.2 Creating/Importing a Business Service to Use the Split-Join
Every Split-Join will be used by a transport typed business service, which, in turn, is invoked by a proxy service. You cannot export or test your Split-Join until you have created this business service. If it already exists, you can import it into Eclipse, or, if it does not exist, you can create it in Eclipse or the Oracle Service Bus Administration Console. To get started on your Split-Join before you create the business service, you can generate the business service automatically after you create the Split-Join.
2.9.3 Designing a Static Split-Join
Suppose you want to design a new Split-Join called Service Availability that handles orders for a telco's cable service package including TV, phone, and internet service. The idea is for the Split-Join to receive an incoming package order and to reply with an order acknowledgment for each type of service. In this case, Service Availability is designed as a Static Split-Join because there are three message requests per order, one for each type of service. In this particular example the customer requests only TV and DSL service.
Creating the Service Availability Split-Join may include the following tasks:
Section 2.9.3.1, "1. Creating a New Split-Join"
Section 2.9.3.2, "2. Adding an Assign"
Section 2.9.3.3, "3. Adding a Parallel Node"
Section 2.9.3.4, "4. Adding an Assign for Each Branch"
Section 2.9.3.5, "5. Adding an Invoke Service"
Section 2.9.3.6, "6. Adding an Assign for Each Branch"
Section 2.9.3.7, "7. Exporting and Testing the Split-Join"
2.9.3.1 1. Creating a New Split-Join
Create a new Split Join based on the WSDL operation you want to use for placing the order. In this case the WSDL operation we want is called "telecom."
See Section 2.1.1, "Resource Naming Restrictions" for naming guidance.
After you select the WSDL operation, a skeleton of the newly created Split-Join appears in the Split-Join editor, as shown in the following figure. It consists of a Start Node, a Receive, a Reply. The labels are then edited in the general properties tab to better reflect the specific function of each node in this particular Split-Join.
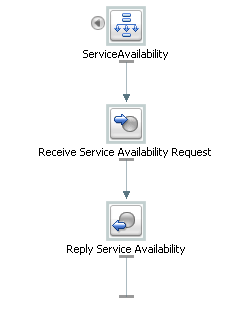
The Start Node contains both a Request Variable and a Response Variable that have been determined by the WSDL operation initially selected. The Receive receives the incoming request message (in this case for the three or fewer different kinds of cable service), and the Reply generates a response message and sends it back to the client.
Note:
The Receive node requires no further configuration. Similarly the Reply requires no further configuration, unless to generate an error fault, which is not the case in this scenario (see Section 2.9.15, "Configuring a Reply"for more information on generating faults).2.9.3.2 2. Adding an Assign
The first Assign, Prepare Output Message, contains an Assign operation that prepares the Response Variable in a form such that the later nodes can work on the data within it (that is, Copy/Insert/Assign/Replace/Delete/Java Callout/Log the data). This output message is relayed to the final Reply node in the Split-Join and, in turn, returned to the original client.
2.9.3.3 3. Adding a Parallel Node
The Parallel Node contains two main branches, one to check cable TV availability and one to check DSL availability. Each branch is composed of a number of actions, the sequence and general configuration being the same for both branches.
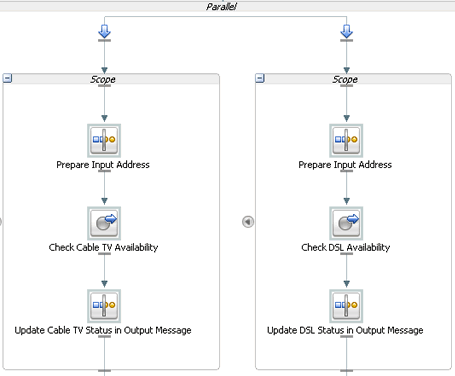
2.9.3.4 4. Adding an Assign for Each Branch
The first Assign in each Parallel Branch, Prepare Input Address, copies the incoming customer address data into a Variable that is referenced to check the availability of the service at that location. The Assigns are the same for each branch and would be for additional branches as well.
2.9.3.5 5. Adding an Invoke Service
An External Service is then invoked to check whether the requested service type is available at the customer's location. Each branch contains one Invoke Service, Check Cable TV Availability and Check DSL Availability. Each invocation calls an External Service, which compares the customer's address (stored in the Variable initialized in the previous step) to the availability of the service at that location. The result is then stored in an output Variable that is passed on to the final Assign in the Branch below.
2.9.3.6 6. Adding an Assign for Each Branch
The final two Assigns, Update Cable TV Status in Output Message and Update DSL Status in Output Message, take the results of the external service invocations and put them into the output message using a Replace operation. The aggregated response are then sent to the original client in the final Reply node, which requires no further configuration.
2.9.3.7 7. Exporting and Testing the Split-Join
After you design the Split-Join, you can export it to the Oracle Service Bus Administration Console for testing and production.
Figure 2-3 Completed Split-Join Ready for Testing
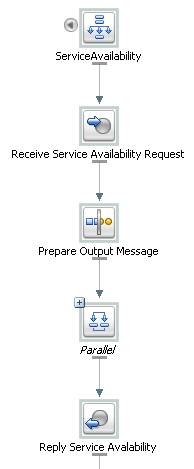
Description of "Figure 2-3 Completed Split-Join Ready for Testing"
Related Topics
2.9.4 Designing a Dynamic Split-Join
Suppose that you want to design a Split-Join that handles a batch order from a retailer containing a variable number of individual purchase orders (as opposed to a fixed number of orders). The idea is for the Split-Join to receive the batch order and to reply with an order acknowledgment for each order within. This would be a Dynamic Split-Join because the number of individual purchase order requests is variable and unknown at design time.
Creating this Split-Join may include the following tasks:
Section 2.9.4.1, "1. Creating a New Split-Join"
Section 2.9.4.2, "2. Adding an Assign"
Section 2.9.4.3, "3. Adding a For Each"
Section 2.9.4.4, "4. Adding an Assign"
Section 2.9.4.5, "5. Adding an Invoke Service"
Section 2.9.4.6, "6. Adding an Assign"
Section 2.9.4.7, "7. Adding an Error Handler"
Section 2.9.4.8, "8. Exporting and Testing the Split-Join"
2.9.4.1 1. Creating a New Split-Join
Create a new Split Join based off of the WSDL operation you want to use for placing the order. In this case the WSDL operation we want is called "batchOrders."
See Section 2.1.1, "Resource Naming Restrictions" for naming guidance.
After the operation is selected, a skeleton of the newly created Split-Join appears in the Split-Join editor consisting of a Start Node, a Receive, a Reply. The labels are then edited in the general properties tab to better reflect the specific function of each node in this particular Split-Join.
Figure 2-4 New Split-Join With Edited Labels
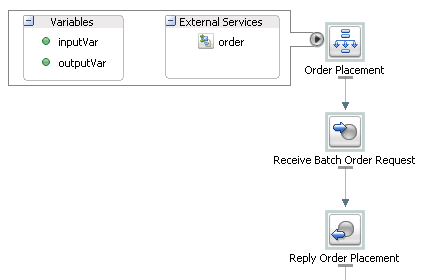
Description of "Figure 2-4 New Split-Join With Edited Labels"
The Start Node, Order Placement, contains both a request variable, inputVar, and an response variable, outputVar. The Receive, Receive Batch Order Request, will initialize the contents of the Request Variable (in this case purchase orders), and the Reply, Reply Order Placement, will send a response, based on the order acknowledgments aggregated into the Response Variable, back to the client. In this example Order Placement also contains a callout to an External Service, "Order" that will be invoked to approve individual orders.
Note:
The Receive node requires no further configuration. Similarly, the Reply requires no further configuration, unless you would like to generate an error fault—which is not the case in this scenario (see Section 2.9.15, "Configuring a Reply"for more information on generating faults).2.9.4.2 2. Adding an Assign
The first Assign, Prepare Output Message, contains an Assign operation that prepares the response variable (here labeled an "Output Message" for readability) in a form such that the later nodes can work on the data captured within it (that is, Copy/Insert/Assign/Replace/Delete into the Variable). In this case, that data would consist of order acknowledgments and/or errors.This Output Message is relayed to the final Reply node in the Split-Join and, in turn, returned to the original client.
2.9.4.3 3. Adding a For Each
The For Each, Iterate Through Orders, contains logic that will parse through each order in the batch, send it to an external proxy for approval, and capture an order acknowledgment in response. If there is a problem with an order, an error is sent from the invoked proxy and captured in the Error Handler. The following figure depicts the entire scope of the For Each logic.
Figure 2-5 For Each Node Labeled "Iterate Through Orders"
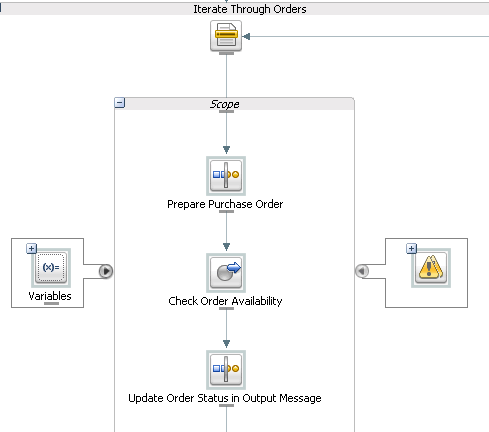
Description of "Figure 2-5 For Each Node Labeled "Iterate Through Orders""
2.9.4.4 4. Adding an Assign
The Assign, Prepare Purchase Order, copies the incoming purchase order requests into a variable that is referenced to check approval of the order in the next step.
2.9.4.5 5. Adding an Invoke Service
An external service, Check Order Availability, is then invoked to approve each individual purchase order. If the order is accepted, the service responds with an order acknowledgment. If the order is not accepted, the service responds with an error.The result is then stored in an output variable that is passed on to the final Assign in the next step.
2.9.4.6 6. Adding an Assign
The final Assign, Update Order Status in Output Message, takes the results of the external service invocation and copies them into the output message using an Insert operation. The aggregated response is then sent to the original client in the final Reply node, which requires no further configuration.
2.9.4.7 7. Adding an Error Handler
The Error Handler captures any Errors returned by the invoked service. It takes these errors and inserts them into the output message using an Assign operation.
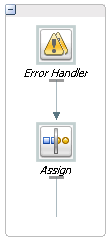
2.9.4.8 8. Exporting and Testing the Split-Join
After you design the Split-Join, you can export it to the Oracle Service Bus Administration Console for testing and production.
Figure 2-7 Completed Split-Join Ready for Testing
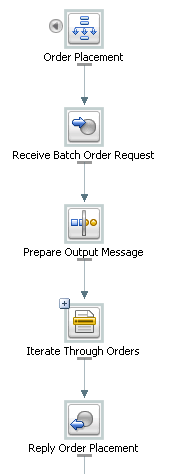
Description of "Figure 2-7 Completed Split-Join Ready for Testing"
Related Topics
2.9.5 Creating a New Split-Join
In order to create a new Split/Join, you must have access to a WSDL containing the operation upon which to base the Split-Join. The Split Join must be created in an existing Oracle Service Bus project within an existing Oracle Service Bus configuration project.
To create a new Split-Join:
-
In the Oracle Service Bus perspective, select File > New > Split-Join. This opens the New Split-Join Wizard.
See Section 2.1.1, "Resource Naming Restrictions" for naming guidance.
-
In the New Split-Join Wizard, type or select an Oracle Service Bus project location and enter a file name for the new Split-Join. When you have finished, click Next.
-
In the next screen, you must select a binding and then an operation on which to implement the Split-Join. There are two ways to make your selection:
-
Choose your operation from one of the WSDLs displayed in the Select Operation tree. All of the WSDLs in your current Oracle Service Bus configuration project are available.
-
Import your WSDL into the Oracle Service Bus configuration project using the Consume button. Consumption imports a new WSDL into your configuration from an outside source, as described in the following step.
-
-
If you choose to consume the base WSDL, go through the following steps:
-
Click Consume.
-
Browse for the location, or "Artifact Folder," where you want to generate the consumed WSDL. The default artifact folder is your current Oracle Service Bus project.
-
To overwrite existing local files, select the check box.
-
Choose the service resource in which the WSDL to be consumed resides: Enterprise Repository, File System, UDDI, URI, or Workspace.
-
Select The WSDL that you want to consume from that Service Resource. After you have made your selection the workspace will rebuild momentarily and the Service Consumption Status dialog will appear depicting the status of your consume. If it was successful, click OK to close the dialog.
-
The consumed WSDL is now in your Oracle Service Bus configuration project, and you can select an operation from it upon which to base your Split-Join.
-
-
Click Finish.
A basic Split-Join is created and visually represented as a diagram in the Design View. By default, it consists of a Start Node, a Receive, and a Reply. The Start Node contains the Request and Response Variables introspected from the WSDL operation. The Receive is used to receive incoming request messages. The Reply is used to send response messages.
Related Topics
2.9.6 Configuring the Start Node
The Start Node is generated automatically whenever you create a new Split-Join. It is the starting point from which all the other nodes proceed. Configuring a Start Node can include the following tasks:
-
Add General Information
-
Define Global Variables
-
View External Services
Related Topics
2.9.6.1 Adding General Information
General information is useful for making a node more legible. It includes the ability to add a unique identifier, or Label, to the node and to supplement it with notes, or Documentation. General information is optional.
-
To add a Label to a node, select the General tab in the Properties view and enter a unique, identifying string in the Label field. The Label that you enter appears underneath the node in the Split-Join editor.
-
In the Documentation field enter any notes that you think are important.
2.9.6.2 Defining Global Variables
Variables in the Start Node store data that can be referenced globally, that is by any node in the Split-Join. By default, every Start Node is assigned both a request and a response variable when the Split-Join is initially created. From the Start Node, you can either create a new global variable or edit an existing global variable.
For information on the relationship between global and local variables, see Section 2.9.16.1, "Scope and Variables."
To create a new global variable
-
Right-click the Start Node and select Create Variable to open the Create Variable Dialog.
-
Enter a name for the variable.
-
Select the Variable Type (Builtin, Schema, or Message).
-
Choose a Variable.
Note:
You may need to drill down into the hierarchy to select a Schema or Message Type variable. -
Click OK.
If it is not already open, click the arrow to the left of the Start Node icon to expand the content area. The newly created variable appears in the Variables field along with any other global variables. To view the details of any variable, simply select it and its structure will appear in the Properties view.
To edit an existing global Variable
-
Open the Edit Variable Dialog in one of the following ways:
-
Right-click the selected variable and select Edit Variable from the context menu.
-
Select a variable and click Edit in the variable Properties view.
-
-
Enter a name for the Variable.
-
Select the Variable Type: Builtin, Schema, or Message.
-
Choose a variable.
Note:
You may need to drill down into the hierarchy to select a Schema or Message Type variable. -
Click OK.
If it is not already open, expand the content area to the left of the Start Node icon. The newly created variable appears in the Variables field along with any other global variables. To view the details of any variable, simply select it and its structure will appear in the Properties view.
2.9.6.3 Viewing External Services
The External Services listed in the Start Node are those invoked outside of the context of the Split-Join. They are specified in an Invoke Service but listed here for convenience.
To view External Services, click the arrow to the left of the Start Node icon to expand the content area. When an External Service is selected, a dashed blue arrow appears pointing to the Invoke Service associated with the service, and the service's location appears in the Properties view.
2.9.7 Configuring a Receive
A Receive is generated automatically whenever you create a new Split-Join. The purpose of the Receive is to place incoming request data in a variable and make the contents available for later nodes to use. Configuring a Receive can include the following tasks:
-
View the Operation
-
Define the Receive Variable
-
Add General Information
Related Topics
Section 4.22.24, "Receive Properties"
2.9.7.1 Viewing the Operation
The Operation is based upon the initial WSDL selection for the overall Split-Join. It is displayed in the Properties View for reference.
2.9.7.2 Defining the Receive Variable
You must define the Incoming Message Variable the Receive will initialize.
-
Select the Receive operation.
-
Create a new Message Variable (following steps).
Note:
If there are no available Message Variables associated with the previously chosen Operation, you must create a new Message Variable.To create a new Message Variable, select Create Message Variable from the Message Variable menu, enter a variable name in the Create Variable dialog, and click OK.
Message Type Namespace and Message Type are displayed automatically on the Properties page once the variable is defined.
2.9.7.3 Adding General Information
General information is useful for making a node more legible. It includes the ability to add a unique identifier, or Label, to the node and to supplement it with notes, or Documentation. General information is optional.
-
To add a Label to a node, select the General tab in the Properties view and enter a unique, identifying string in the Label field. The Label that you enter appears underneath the node in the Split-Join editor.
-
In the Documentation field enter any notes that you think are important.
2.9.8 Creating an Assign
The Assign is used for data-manipulation including initializing and updating a variable. It is composed of a set of one or more operations that can be added from the Assign toolbar. Configuring an Assign can include the following tasks:
-
Add and Configure Assign Operations
-
Add General Information
Related Topics
Section 4.22.17, "Assign Properties"
2.9.8.1 Adding and Configuring Assign Operations
Assign operations include Assign, Copy, Delete, Insert, Java Callout, Log, and Replace. Every Assign is composed of one or more of these operations, which you can add to the Assign using the Design Palette view.
Note:
The Assign operations in the Split-Join editor are essentially the same as the corresponding actions in the Eclipse Message Flow editor. However, one important difference is that when you are using the XQuery\XSLT or XPath Editors to edit expressions in the Split-Join context, only variables and namespaces internal to the Split-Join are available.A brief explanation of each operation follows:
-
Assign the result of an XQuery Expression to a Variable.
For more information on configuring the Assign, see Section 4.22.17, "Assign Properties".
-
Copy the information specified by an XPath expression from a source document to a destination document. (This operation is unique to Split-Join and has no corresponding Action in the Eclipse Message Flow editor, as described in Section 2.9.8.1.2, "Adding a Copy Operation").
-
Delete a set of nodes specified by an XPath expression.
Note:
Unlike the Oracle Service Bus delete, only an XPath expression may be deleted in a Split-Join, not the entire variable.For more information on configuring the Delete operation, see Section 4.22.19, "Delete Properties."
-
Insert the result of an XQuery Expression at an identified place relative to nodes selected by an XPath expression.
For more information on configuring the Insert operation, see Section 4.22.20, "Insert Properties."
-
Java Callout lets you invoke a Java method for processing such as validation, transformation, and logging.
For more information on configuring the Java Callout operation, see Section 4.22.21, "Java Callout Properties."
-
Log lets you log Split-Join data at a specified severity to the server log file.
For more information on configuring the Log operation, see Section 4.22.22, "Log Properties."
-
Replace a node or the contents of a node specified by an XPath expression.
For more information on configuring the Replace operation, see Section 4.22.23, "Replace Properties."
2.9.8.1.1 Adding an Operation to an Assign
Adding an operation to the Assign involves the following steps:
-
Drag the operation from the Design Palette into the Assign node in the Split-Join editor.
-
Configure the operation in the Properties view.
-
Save the Split-Join.
You can edit an operation by selecting it and modifying the properties in the Properties view.
2.9.8.1.2 Adding a Copy Operation
The Copy operation lets you copy the information specified by an XPath expression from a source document to a destination document. It is an operation unique to the Split-Join editor. Adding a Copy operation to the Assign involves the following steps:
-
Add a Copy to the Assign from the Design Palette.
-
In the Properties view, select a Copy From type and a Copy To type.
-
If the type is an expression, enter the expression manually or click Browse to launch the XQuery Expression Builder.
-
In the type is a variable, drill down to and select the desired element. The resulting query will be displayed in the Query field below.
-
If the Copy From type is a Literal, enter the literal in the text field.
-
If the Copy From type is an XML fragment, enter [or paste] the fragment in the text field.
2.9.8.2 Adding General Information
General information is useful for making a node more legible. It includes the ability to add a unique identifier, or Label, to the node and to supplement it with notes, or Documentation. General information is optional.
-
To add a Label to a node, select the General tab in the Properties view and enter a unique, identifying string in the Label field. The Label that you enter appears underneath the node in the Split-Join editor.
-
In the Documentation field enter any notes that you think are important.
2.9.9 Invoking a Service
The Invoke Service is used to invoke external, WSDL-based business services, WSDL-based proxy services, and Split-Joins. Configuring an Invoke Service can include the following tasks:
-
Select an Operation
-
Define Input and Output Variables
-
Add General Information
Related Topics
2.9.9.1 Selecting an Operation
An operation must be selected upon which to base the Invoke Service. You must select this operation before you can configure Input and Output variables. To select an operation:
-
Add an Invoke Service operation to the Split-Join from the Design Palette.
-
From the Operations tab in the Properties view, click Browse to launch the Service Browser.
-
In the Service Browser, drill down to the desired service and select a Binding, then an operation.
-
Click OK. The selected operation and its Service Location appear in the Properties view.
Note:
You can click a Service Location in the Properties view to open the external service file.
2.9.9.2 Defining Input and Output Variables
An Invoke Service requires both an Input Variable and an Output Variable, unless it is a one-way invocation. The procedure to configure these variables is essentially the same. Either type of variable can be global (that is, available within the entire Split-Join) or local (that is, available within a particular context Scope.) To define either an Input or Output variable:
In the Input Variable and Output Variable tabs in the Properties view, define the Message Variable for each. This can be done in two ways:
-
Select a pre-existing variable from the Message Variable menu.
-
Create a new Message Variable (following steps).
Note:
If there are no available Message Variables associated with the previously chosen operation, you must create a new Message Variable.To create a new Message Variable
-
Select Create Message Variable from the Message Variable menu. The Create Message Variable Dialog appears.
-
Provide a name for the variable.
-
Make the variable either global or local. Global variables are accessible within the entire Split-Join, whereas local variables are restricted to the current Scope.
Message Type Namespace and Message Type are displayed automatically on the Properties view once a variable is defined.
2.9.9.3 Adding General Information
General information is useful for making a node more legible. It includes the ability to add a unique identifier, or Label, to the node and to supplement it with notes, or Documentation. General information is optional.
-
To add a Label to a node, select the General tab in the Properties view and enter a unique, identifying string in the Label field. The Label that you enter appears underneath the node in the Split-Join editor.
-
In the Documentation field enter any notes that you think are important.
2.9.10 Creating a Parallel
The Parallel creates a fixed number of configured parallel branches. Each branch has its own Scope which in turn can contain any number of nodes. Configuring a Parallel can include the following tasks:
-
Add Nodes
-
Add General Information
Related Topics
2.9.10.1 Adding Nodes
The Parallel is essentially a placeholder for a fixed number of processing branches, each with its own scope. Two branches are automatically generated by default. An individual scope may contain unique processing logic according to your construction; simply drag the appropriate nodes into the Scope. You may add additional branches with the Add Scope button.
2.9.10.2 Adding General Information
General information is useful for making a node more legible. It includes the ability to add a unique identifier, or Label, to the node and to supplement it with notes, or Documentation. General information is optional.
-
To add a Label to a node, select the General tab in the Properties view and enter a unique, identifying string in the Label field. The Label that you enter appears underneath the node in the Split-Join editor.
-
In the Documentation field enter any notes that you think are important.
2.9.11 Creating a For Each
The For Each is used to create conditional logic for iterating through a variable number of requests. It is primarily used to create dynamic Split-Joins. Configuring a For Each can include the following tasks:
-
Define the For Each Logic
-
Add General Information
Related Topics
2.9.11.1 Defining the For Each Logic
To define the For Each logic:
-
Add a For Each node to the Split-Join, and select it.
-
In the Properties view, select the Counter Variables tab, and set the Parallel property to yes or no. If you choose yes, individual branches will be processed in parallel. If you select no, they are processed sequentially.
-
Click the Counter Name link to define the Counter Variable Name.
-
Enter the Start Counter Value. If necessary, use the browse button to create a new value in the XPath Expression Builder.
Note:
The lowest possible starting counter value is "1." -
Enter the Final Counter Value. If necessary, use the browse button to create a new value in the XPath Expression Builder.
Note:
The lowest possible starting counter value is "1."
2.9.11.2 Adding General Information
General information is useful for making a node more legible. It includes the ability to add a unique identifier, or Label, to the node and to supplement it with notes, or Documentation. General information is optional.
-
To add a Label to a node, select the General tab in the Properties view and enter a unique, identifying string in the Label field. The Label that you enter appears underneath the node in the Split-Join editor.
-
In the Documentation field enter any notes that you think are important.
2.9.12 Creating an If Activity
The If Activity is used to provide conditional logic within a Split-Join. It is composed of a number of nodes that determine the behavior for the overall If activity. Each node must be individually configured. When you create an If activity, an If and an Else are automatically generated within it. You can add an unlimited number of Else If nodes with the Add Else If button.
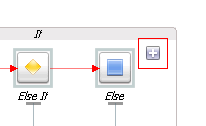
Configuring an If Activity can include the following tasks:
-
Configure the If
-
Add and Configure Else If
-
Configure the Else
Related Topics
2.9.12.1 Configuring the If
The If provides a unit of conditional logic within the overall If activity. It is automatically generated when you create an If activity. Configuring an If can include the following tasks:
-
Write the logic of the condition
-
Add resulting nodes
-
Add General Information
Related Topics
2.9.12.1.1 Writing the logic of the condition
The If Activity executes conditional logic defined by an XPath expression. Enter this condition in the Condition text field of the Condition tab, or click the browse button to launch and write the expression in the expression builder.
2.9.12.1.2 Adding resulting nodes
If the condition in the If logic is met, a subsequent node or string of nodes will result. Add and configure any resulting nodes by dragging them in sequential order to a drop point beneath the If icon.
2.9.12.1.3 Adding General Information
General information is useful for making a node more legible. It includes the ability to add a unique identifier, or Label, to the node and to supplement it with notes, or Documentation. General information is optional.
-
To add a Label to a node, select the General tab in the Properties view and enter a unique, identifying string in the Label field. The Label that you enter appears underneath the node in the Split-Join editor.
-
In the Documentation field enter any notes that you think are important.
2.9.12.2 Adding and Configuring Else If
The Else If is used to provide additional logic within the context of an overall If. You can add an Else If every time you press the "Add Else If" button.
Configuring an Else If can include the following tasks:
-
Write the Logic of the Condition
-
Add Resulting Nodes
-
Add General Information
Related Topics
2.9.12.2.1 Writing the Logic of the Condition
The Else If uses conditional logic defined by an XPath expression. Enter this condition in the Condition text field of the Condition tab or click the browse button to launch and write the expression in the expression builder.
2.9.12.2.2 Adding Resulting Nodes
If the condition in the Else If logic is met, a subsequent node or string of nodes will result. Add and configure any resulting nodes by dragging them in sequential order to a drop point beneath the Else If icon.
2.9.12.2.3 Adding General Information
General information is useful for making a node more legible. It includes the ability to add a unique identifier, or Label, to the node and to supplement it with notes, or Documentation. General information is optional.
-
To add a Label to a node, select the General tab in the Properties view and enter a unique, identifying string in the Label field. The Label that you enter appears underneath the node in the Split-Join editor.
-
In the Documentation field enter any notes that you think are important.
2.9.12.3 Configuring the Else
The Else provides a final case of logic within the context of an overall If. It is automatically generated when an If is created. Configuring an Else can include the following tasks:
-
Add Resulting Nodes
-
Add General Information
Related Topics
2.9.12.3.1 Adding Resulting Nodes
As the final case in the If's logic, the Else requires no conditions to be met in order to execute. It will automatically execute resulting activities when invoked. Add and configure any resulting nodes by dragging them in sequential order to a drop point beneath the Else icon.
2.9.12.4 Adding General Information
General information is useful for making a node more legible. It includes the ability to add a unique identifier, or Label, to the node and to supplement it with notes, or Documentation. General information is optional.
-
To add a Label to a node, select the General tab in the Properties view and enter a unique, identifying string in the Label field. The Label that you enter appears underneath the node in the Split-Join editor.
-
In the Documentation field enter any notes that you think are important.
2.9.13 Creating an Error Handler
The Error Handler receives and handles errors. If it is attached to a Start Node, it is a "global" Error Handler and serves as a catch-all for the output of all local Raise Error nodes. If it is attached to a Scope, it only handles errors raised locally. To create an Error Handler:
-
Select the start node or Scope node to which the Error Handler will be added.
-
Right-click the selected icon and select Add Catch or Add CatchAll.
-
If you are invoking a SOAP Fault, in the Catch All tab of the Properties View, select SOAP Fault Variable Name to define a SOAP Fault variable associated with the Error Handler.
The basic Error Handler is now configured, but you may need to add additional Assign, If, and/or Reply nodes to it depending on whether you want to execute logic upon the received faults before sending a response.
Related Topics
2.9.14 Creating a Raise Error
The Raise Error generates an error that causes the Split-Join to stop normal processing. If the error is not handled using an Error Handler, the Split-Join will terminate and a Fault will be sent to the Oracle Service Bus message flow. Configuring a Raise Error can optionally include documenting the nature of the error in the General Information tab.
You can also add a Re-Raise Error operation to an Error Handler. Configuration involves modifying Label and adding Documentation.
Related Topics
Section 4.22.11, "Raise Error Properties"
General information is useful for making a node more legible. It includes the ability to add a unique identifier, or Label, to the node and to supplement it with developer notes, or Documentation. General information is optional.
-
To add a Label to an node, open the Properties view and enter a unique, identifying string in the Label field. The Label that you enter appears underneath the node Icon in the Canvas area.
-
In the Documentation field enter any notes that you think are important.
2.9.15 Configuring a Reply
A global Reply is generated automatically whenever you create a new Split-Join. The purpose of the global Reply is to send a response back to the invoking Oracle Service Bus message flow. However, you may also create a Reply elsewhere in the Split-Join, including within Error Handlers. Configuring the Reply can include the following tasks:
-
View the Operation
-
Define the Reply Variable
-
Add General Information
Related Topics
Section 4.22.6, "Reply Properties"
2.9.15.1 Viewing the Operation
The operation is based upon the initial WSDL selection for the overall Split-Join. It is displayed in the Properties view for reference.
2.9.15.2 Defining the Reply Variable
The Reply can either send a Response or a Fault back to the client depending on how you configure the variable. The Fault options available vary depending upon whether the Reply is global or local.
-
A global Reply (that is, a Reply in a Split-Join outside of an Error Handler) can never have a SOAP Fault but can have a WSDL Fault. This is why the SOAP Fault option is always disabled.
-
A local Reply (that is, a Reply attached to an Error Handler) can have either a WSDL Fault or a SOAP Fault. WSDL Faults will be available only if they were defined in the WSDL upon which the Split-Join is based. The SOAP Fault option will always be available provided one has been previously defined in the Error Handler.
Note:
Switching back and forth between the Response and Fault buttons will clear either configuration. For instance, if you have previously selected "Propagate SOAP Fault" for Fault configuration and you then switch to the "Response" configuration, "Propagate SOAP Fault" will be deselected.
Given the available options as outlined above, select either a Response or a Fault for your Reply Variable.
If you select Response, you must define the Message Variable the Response will be assigned to. This can be done in two ways:
-
Select the Reply, and in the Properties view, select the Variable tab.
-
Select a pre-existing variable from the Message Variable menu.
-
Create a new Message Variable (following steps).
Note:
If there are no available Message Variables associated with the previously chosen operation, you must create a new Message Variable.
To create a new Message Variable, select Create Message Variable from the Message Variable menu. The Create Message Variable Dialog appears:
-
Provide a name for the variable.
-
Click OK.
Message Type Namespace and Message Type are displayed automatically in the Properties view once the variable is defined.
If you select Fault, you must specify either a WSDL Fault or propagate a SOAP Fault.
Note:
In some circumstances, no Faults or only a SOAP Fault will be available. See previous notes.If you select a WSDL Fault, you must specify the Fault by name and define the Message Variable that it will be assigned to.
-
Select WSDL Fault Name and choose a name from those available.
Note:
There may only be one name available in which case no choice is necessary. -
Define a Message Variable. This can be done in two ways:
-
Select a pre-existing variable from the Message Variable menu.
-
Create a new Message Variable (following steps).
Note:
If there are no available Message Variables associated with the previously chosen operation, you must create a new Message Variable.
-
To create a new Message Variable, select Create Message Variable from the Message Variable menu. The Create Message Variable Dialog opens:
-
Provide a name for the variable.
-
Click OK.
Message Type Namespace and Message Type are displayed automatically on the properties page once a variable is defined.
If you select Propagate SOAP Fault, the SOAP Fault specified in the parent Error Handler will automatically be propagated in the Reply. There is nothing else to configure.
2.9.15.3 Adding General Information
General information is useful for making a node more legible. It includes the ability to add a unique identifier, or Label, to the node and to supplement it with notes, or Documentation. General information is optional.
-
To add a Label to a node, select the General tab in the Properties view and enter a unique, identifying string in the Label field. The Label that you enter appears underneath the node in the Split-Join editor.
-
In the Documentation field enter any notes that you think are important.
2.9.16 About Scope
A Scope is a container that groups various elements together. The container creates a context that influences the behavior of its enclosed elements. Local Variables and the Error Handler defined within the Scope are restricted to this context. However, some nodes within the scope may operate both locally (that is, within the Scope) and globally (that is, outside of the Scope.) For instance, an Invoke Service within a certain Scope might call upon an service external to the Scope's context.
2.9.16.1 Scope and Variables
Although variables are visible in the scope in which they are defined and in all scopes nested within that scope, a variable declared in an outer scope is hidden when you declare a variable with an identical name in an inner scope. For example, if you define variable myVar in an outer scope (So) and then define variable myVar again in an inner scope (Si) which is contained by scope So, then you can only access the myVar you defined in the inner scope Si. This myVar overrides the myVar you defined in scope So.
Related Topics
2.9.17 Exporting and Testing a Split-Join
You can export and test a Split-Join on an Oracle Service Bus server provided that it is associated with a transport typed business service. Exporting and testing a Split-Join can include the following tasks:
-
Creating a Transport Typed Business Service
-
Exporting the Split-Join Files
-
Testing the Split-Join in the Test Console
2.9.17.1 Creating a Transport Typed Business Service
A Split-Join is used by a particular transport typed business service. If you do not have an appropriate business service, you must create one before you can export or test your Split-Join. There are two ways to create a business service:
-
Create the business service manually in Eclipse or the Oracle Service Bus Administration Console.
-
Generate the business service automatically from the Split-Join (.flow) menu:
-
Right-click the Split-Join (.flow) file in the Project Explorer to open the Split-Join menu.
-
Select Oracle Service Bus.
-
Select Generate Business Service.
-
Name and save the new service in a project.
See Section 2.1.1, "Resource Naming Restrictions" for naming guidance.
-
After you create the business service, you can export the Split-Join provided that it has no errors.
Note:
It is a helpful practice to place the associated business service in the same Oracle Service Bus project as the Split-Join. It can also be useful to give the business service the same name as the Split-Join so that they are easily correlated.2.9.17.2 Exporting the Split-Join Files
Split-Joins without errors can be exported to an Oracle Service Bus server.
Note:
Errors appear in the Problems view of the Split-Join editor. If you try to export a Split-Join with errors, the export fails.There are three ways to export a Split-Join:
-
Export from the Business Service Menu
-
Auto-export
-
Manual export
2.9.17.2.1 Exporting from the Business Service Menu
It is possible to export a Split-Join directly from the Business Service menu. However, because exporting by this method automatically launches the Oracle Service Bus Test Console, it is useful if you want to both export and test. Exporting from the Business Service menu involves the following steps:
-
In the Project Explorer, right-click the Business Service (.biz file) to be exported/tested.
-
Select Run as.
-
Select Run on server. The Run on Server Dialog opens.
-
Select an existing server or define a new one and go to the next step.
-
In the Add and Remove Projects window, the Oracle Service Bus project containing the business service and any other dependent files have been pre-selected for configuration/export. They can not be removed because the business service can not be tested without its dependent files. The entire Split-Join will therefore be exported.
-
Select Finish, and the Oracle Service Bus Test Console will launch. You can now test the business service.
2.9.17.2.2 Auto-export
A Split-Join can be auto-exported to an Oracle Service Bus server. If you use this method, you must manually launch the Oracle Service Bus Administration Console in order to test the exported files. Auto-exporting involves the following steps:
-
Select File > Export.
-
Select Oracle Service Bus.
-
Select Resources to Oracle Service Bus Server. This will export the resources to the Oracle Service Bus server, but it will not launch the Oracle Service Bus Test Console. You must launch the Test Console manually within the Oracle Service Bus Administration Console application.
2.9.17.2.3 Manual export
A Split-Join can be manually exported to an Oracle Service Bus server. If you use this method, you must manually launch the Oracle Service Bus Administration Console to test the exported files. Manually exporting involves the following steps:
-
Select File > Export.
-
Select Oracle Service Bus.
-
Select Resources as Configuration JAR and go to the next step.
-
In the Oracle Service Bus Configuration JAR Export window, configure the following options:
-
Select the Oracle Service Bus Configuration file containing the files to be exported.
-
Set the Export Level to Project or Resource depending upon whether you want to export entire projects or individual files. The selection available in the tree below will change based upon the Export Level.
-
Select the projects and/or resources to be exported in the configuration JAR.
-
To export any file dependencies associated with the selected files, select Include Dependencies.
-
Browse to a destination for the exported JAR file.
-
Click Finish to export the JAR file.
-
-
Import the JAR file using the Oracle Service Bus Administration Console.
Note:
A quick way to access the Oracle Service Bus Administration Console from Eclipse is to right-click the server and select Launch Service Bus Console.
2.9.17.3 Testing the Split-Join in the Test Console
You can test a Split-Join by executing the business service that uses it in the Oracle Service Bus Test Console. This can either be done within the Split-Join editor or by exporting the Split-Join to an Oracle Service Bus server. To test the Split-Join within the IDE, you need to export the files using the menu for the business service that uses the Split-Join.
2.9.17.3.1 Exporting from the Business Service Menu
You can export and test a Split-Join directly from the Business Service menu. If you use this method, the export happens in the background while the Oracle Service Bus Test Console launches. Exporting from the Business Service menu involves the following steps:
-
In the Project Explorer, right-click the Business Service (.biz file) to be exported/tested.
-
Select Run as.
-
Select Run on server. The Run on Server Dialog appears.
-
Select an existing server or define a new one and go to the next step.
-
In the Add and Remove Projects window, the Oracle Service Bus project containing the business service and any other dependent files have been pre-selected for configuration/export. The dependent files cannot be removed because the business service cannot be tested without its dependent files.
Click Finish, and the Oracle Service Bus Test Console will launch. You can now test the business service.
Note:
Although only the Oracle Service Bus Test Console is displayed at this point, the entire Split-Join has been exported to the Oracle Service Bus server.2.10 Using the Oracle Service Bus Debugger
Oracle Service Bus extends the Eclipse debugging framework to provide debugging functionality for proxy service message flows and Split-Joins.
The Oracle Service Bus Debugger can handle Java callouts and supports multi-threaded debugging on Split-Joins that use parallel processing. You can also perform debugging on remote servers.
You can use the Oracle Service Bus Debugger in two different ways:
-
Section 2.10.2, "Using Standard Debugging" – Provides automated service debugging features for debugging on a local computer.
-
Section 2.10.3, "Using the Oracle Service Bus Debugger Launch Configuration" – Provides more manual control of the Oracle Service Bus Debugger environment.
2.10.1 Enabling Debugging
Oracle Service Bus debugging is enabled automatically on a server running in development mode. When you create a new domain, the following entries are included in the <domain>/bin/setDomainEnv script:
set ALSB_DEBUG_FLAG=true
set ALSB_DEBUG_PORT=7453
To turn Oracle Service Bus debugging functionality off, set ALSB_DEBUG_FLAG=false.
If you start the server in production mode, Oracle Service Bus debugging is automatically disabled.
2.10.2 Using Standard Debugging
To debug a proxy service or a Split-Join, you must execute it while in debug mode (unless you are using the debugger launch configuration described in Section 2.10.3, "Using the Oracle Service Bus Debugger Launch Configuration".)
To debug a proxy service or Split-Join:
-
Set breakpoints in your message flow or Split-Join to automatically pause the test execution at those points. Right-click an action in the flow editor and choose Toggle Breakpoint.
-
Start the server in debug mode. On server startup, Eclipse automatically switches to the Debug perspective, shown in Figure 2-11.
-
With the proxy or business service file open and active, select Run > Debug As > Debug on Server in Eclipse.
In the Debug on Server window, select the server on which your Oracle Service Bus configuration is deployed, or is to be deployed, and complete the steps in the wizard.
The Debug As option automatically enables the Java debugger in order to handle Java callouts in services.
-
The Oracle Service Bus Test Console appears. Execute your test, looking at and interacting with the execution threads in the Debug view. As you move through the test, the debugger highlights the current stage of the test in the service's flow view, as shown in Figure 2-11.
You are not required to use the Test Console to execute a service test and use the debugger. You can also execute your service in other ways, such as posting a JMS message or dropping a file in the directory of a file proxy service.
For debugging on remote servers, execute the service on the remote server and step through the test in Debug view. If the remote server is running in normal mode rather than debug mode, use the debugger launch configuration, as described in Section 2.10.3, "Using the Oracle Service Bus Debugger Launch Configuration."
See the Section 2.10.2.1, "Debug Views" section for descriptions of different debug views for Oracle Service Bus Debugger.
2.10.2.1 Debug Views
This section describes the different views you can use while debugging a service, illustrated in Figure 2-11.

The Debug perspective provides the following key views for debugging a service:
-
Debug view – The Debug view shows the Oracle Service Bus call stack, displaying the current execution thread. The Debug view also provides a toolbar that lets you resume the test from its current location or perform step actions (Step Into, Step Over, Step Return). As you step through a test, if you are testing a local service, the current operation is highlighted in the service's flow view. Errors appear in the Console view.
-
Console view – The Console view, which displays server messages, shows any runtime errors that occur as your service runs.
-
Variables view – The Variables view shows the variable names and values in your service at each stage of the test. Variables are read-only while debugging. Select the call stack at a specific breakpoint to see the current variables and values.
-
Breakpoints view – The Breakpoints view lists the breakpoints you have manually inserted into your service's flow. The test stops at each breakpoint, letting you view the state of the service at that point. You can enable and disable breakpoints in the Breakpoints view. Disabling a breakpoint by deselecting it keeps the breakpoint in place, but the debugger ignores it.
-
Service editor, flow view – As the test runs, if you are testing a local service, the test progress is graphically highlighted in the service's flow view. The flow view also shows the breakpoints you have set. To view breakpoints, right-click actions in the service's flow view editor and click Toggle Breakpoint).
-
Oracle Service Bus Test Console – The Test Console lets you execute local proxy and business services. For more detailed information on using the Test Console, see "Using the Test Console" in the Oracle Fusion Middleware Administrator's Guide for Oracle Service Bus.
2.10.2.2 Step Actions and Breakpoints
The Eclipse debugging framework lets you debug incrementally by performing step actions to debug code. See "Execution Control Commands" in the Eclipse help system (Java Development User Guide).
If you use step actions to debug, the Oracle Service Bus Debugger still stops at each breakpoint you have set, ignoring the current step action being performed.
2.10.3 Using the Oracle Service Bus Debugger Launch Configuration
If you want more manual control of the Oracle Service Bus Debugger environment, use the Oracle Service Bus Debugger launch configuration. Launch configurations are an Eclipse feature. The Oracle Service Bus Debugger launch configuration removes the automation of running the debugger with the Debug As option (Debug perspective launching, server restarting in debug mode, Java debugger starting), letting you connect and disconnect the debugger as needed on a server running in either normal or debug mode.
To use the Java debugger in conjunction with the Oracle Service Bus Debugger to handle Java callouts, the server must be running in debug mode.
To use the Oracle Service Bus Debugger launch configuration:
-
Set breakpoints in your proxy service message flow or Split-Join.
-
You can start the server in normal or debug mode or, to use the Java debugger to handle Java callouts from your flow, start the server in debug mode.
-
In the Eclipse menu, select Run > Debug Configurations.
-
Double-click Oracle Service Bus Debugger. A "New_configuration" sub-item appears. You need only perform this step once for each debug configuration you want to create.
The right pane displays the default server and port. Make sure the port matches the value of the ALSB_DEBUG_PORT in your domain's setDomainEnv script.
You can also rename the launch configuration in the right pane, as well as add the debug configuration to the Debug toolbar item as a shortcut.
If your services use Java callouts, enable the Java debugger by double-clicking Remote Java Application and configuring the "New_configuration."
-
With your launch configuration selected, click Debug in the Debug dialog. The debugger is connected. If you are using the Java debugger as well, select it and click Debug.
-
Open the Debug perspective or the debug views you want, such as Debug, Breakpoints, and Variables.
-
Run the service.
-
To execute the service in the Test Console, use Run As > Run on Server.
-
You can also execute your service in other ways, such as through a custom test client.
-
-
Step through the test.
To disconnect the debugger, click the Disconnect icon in the Debug view. Reconnect the debugger in the Debug dialog by selecting the launch configuration and clicking Debug, or by creating a shortcut in the Debug toolbar item as described in the previous steps.
2.10.3.1 Remote Debugging
If you are debugging remote services, you can select a remote server in the server configuration window (for Debug As) or set the remote server and port in the launch configuration. After you connect the debugger to the remote server, execute the services on the remote server and step through the test in your local Debug perspective.
2.10.3.2 Debugging Oracle Service Bus Running Stand-Alone on a Managed Server
To debug on an Oracle Service Bus instance that is running stand-alone on a Managed Server in a non-clustered environment, follow these steps:
-
In Eclipse, in Servers view, add a server for the domain to which the Oracle Service Bus Managed Server belongs.
-
Make sure that both the domain's Admin Server and the Oracle Service Bus Managed Server are running.
The Admin Server must be running in normal mode, not debug mode.
-
Follow the debug configuration and debug steps Section 2.10.3, "Using the Oracle Service Bus Debugger Launch Configuration."
If you set up a Remove Java Application configuration to test Java callouts, be sure to target the configuration to the Managed Server.