4 Post-Installation Tasks
This chapter describes tasks you can perform after installing an instance of Oracle Data Service Integrator, including verifying the installation, starting development of applications, and exploring Windows shortcuts and UNIX paths.
The chapter includes the following sections:
4.1 Verifying the Installation
After you complete the installation, you can verify it by successfully completing the following tasks:
4.1.1 Reviewing Installation Log Files
Review the contents of the installation log files to make sure that no problems were encountered. The installation and configuration log files can contain useful information to help troubleshoot any issues you may encounter. For more information about these log files and their contents, see "Configuring Installation and Configuration Log Files" in Installing Software with the Oracle Universal Installer.
4.1.2 Checking the Directory Structure
The contents of your Oracle Data Service Integrator installation vary based on the options you selected during the installation.
For more information about the directory structure you should see after installation, see "What are the Key Oracle Fusion Middleware Directories?" in Understanding Oracle Fusion Middleware.
4.2 Creating a Sample Domain in WebLogic Server
This section describes the two modes in which you can configure Oracle Data Service Integrator to work with a sample WebLogic Server domain. It also describes how to start the WebLogic Servers.
-
Create a Sample Domain in Compact Mode—In this configuration, the sample domain contains only an administration server.
-
Create a Sample Domain in Expanded Mode—In this configuration, the sample domain contains an administration server and a managed server.
Note:
-
Managed Servers should always be assigned to the server-group
ODSI-MGD-SVRSto get the Oracle Data Service Integrator specific domain configurations. -
For a detailed description of WebLogic Server domains and the domain configuration script, see Creating WebLogic Domains Using the Configuration Wizard. For more information on starting WebLogic Servers, see "Starting and Stopping Servers" in Administering Server Startup and Shutdown for Oracle WebLogic Server.
4.2.1 Create a Sample Domain in Compact Mode
In Compact Mode, the sample domain contains only an administration server. In this case, you can use the WebLogic Server Quickstart domain configuration scripts. The Quickstart scripts can be found under $ODSI_HOME/common/bin. Run the create_sample_domain.sh script for the Linux or UNIX platform; create_sample_domain.cmd for Windows platforms.
The create_sample_domain script invokes the Configuration wizard. In the wizard, specify the domain location, the port, and the WebLogic Server user name and password. The create_sample_domain script will also inherit the samples domain template and create a pre-configured samples domain in the location you specify.
To create an Oracle Data Service Integrator sample domain using the Quickstart configuration scripts, follow these steps:
-
Ensure that you have set the Middleware home (
MW_HOME) environment variable. -
Navigate to the
odsi/common/binfolder, for example:cd $MW_HOME/odsi/common/bin
-
Run the
create_sample_domanscript, for example:./create_sample_domain.sh(Linux or UNIX) or,create_sample_domain.cmd(Windows)This script launches the Weblogic Server Domain Configuration Wizard. For a detailed description of WebLogic Server domains and the domain configuration script, see Creating WebLogic Domains Using the Configuration Wizard.
-
Once you have completed the wizard and created the domain, start the domain by invoking the
startWebLogicscript under<DOMAIN_HOME>/bin. -
Deploy the sample dataspace to the newly created domain.
Use the odsiconsole to import the sample dataspace,
MediatorSamples.jar, from the$MW_HOME/odsi/samples/wlstscriptsfolder.
4.2.2 Create a Sample Domain in Expanded Mode
In Expanded Mode, the sample domain contains an administration server on port 7001 and a managed server (Oracle Data Service Integrator server) on port 15501.
These instructions require the Repository Creation Utility (RCU). RCU is a Fusion Middleware tool which creates database-based repositories. Oracle Data Service Integrator does not have a repository by itself, but it relies on some Fusion Middleware schemas for WebLogic Server and JCF when using a full domain.
-
Run the RCU utility to create a JRF schema (this is required because Oracle Data Service Integrator depends on the JRF feature set).
-
Navigate to the
oracle_common/binfolder, for example:cd $MW_HOME/oracle_common/bin
-
Run the RCU utility, for example:
./rcu
-
-
Run Oracle Data Service Integrator configuration wizard.
-
Navigate to the WebLogic Server
wlserver/common/binfolder, for example:cd $MW_HOME/wlserver/common/bin
-
Run the WebLogic Server Configuration Wizard, for example:
./config.sh
-
Select Oracle Data Service Integrator base template from the list of available domain templates.
-
For RCU, provide the RCU schema details created in Step 1.
-
Accept the provided defaults for the Administration Server, Managed Server, Node Manager, and so on.
-
Once you have created the Oracle Data Service Integrator domain, follow these steps to start the Administration and Managed servers.
To Start the Administration Server:
-
Navigate to the
$DOMAIN_HOME/binfolder, for example:cd $DOMAIN_HOME/bin
-
Run the
startWeblogicscript to start the WebLogic Server Administration Server, for example:-
./startWeblogic.cmd(Windows) -
./startWeblogic.sh(Linux, UNIX)
The Administration Server starts in foreground mode with the default port
7001(http://hostname:7001/console). -
-
Open another web browser and connect to the Oracle Data Service Integrator Console by using the URL
http://hostname:7001/odsiconsole.
To Start a Managed Server:
Note:
If the WebLogic Server domain is created in Expanded Mode, then a managed server is required. Otherwise, this is optional.
-
Navigate to the
$DOMAIN_HOME/binfolder, for example:cd $DOMAIN_HOME/bin
-
Run the
startManagedWebLogicscript to start the managed Oracle Data Service Integrator server, for example:-
./startManagedWebLogic.sh ODSI_server1(Windows) -
./startManagedWebLogic.sh ODSI_server1(Linux, UNIX)
In this example,
ODSI_server1is the name given to the managed Oracle Data Service Integrator server. The managed server starts in foreground mode with the default port15501(http://hostname:15501/ODSI_server1) with the associated administration server port7001(http://hostname:7001/console).After startup, no dataspaces are deployed on the Oracle Data Service Integrator server. However, you can deploy dataspaces on the administration and managed servers. For example, for dataspaces deployed on managed servers that are Web Service enabled, you can access the endpoints from the managed server port.
-
4.3 Post-Installation Tasks for Oracle Eclipse
If you have installed the Developer version of Oracle Data Service Integrator, then you can integrate it as a plugin with Eclipse. To integrate with Eclipse, Oracle Data Service Integrator provides a script in the $MW_HOME/odsi/bin/directory to guide you through the integration process. The file is named:
-
odsiconfig.cmd(Windows) -
odsiconfig.sh(Linux and UNIX)
-
Open a command prompt and run the
odsiconfigexecutable for your platform.The command starts a wizard to guide you through the integration process.
-
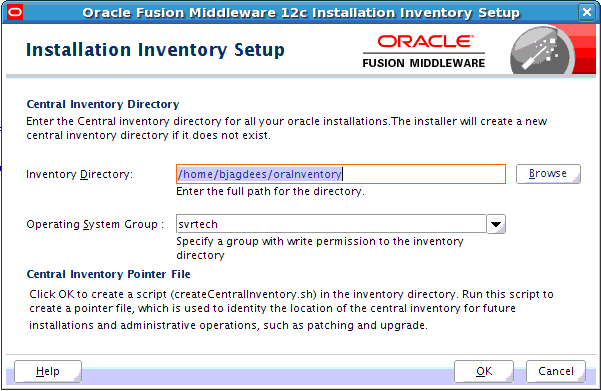
If the system detects that you do not have an Oracle inventory file, then the Installation Inventory Setup screen will appear. If your system detects that you do have an inventory file, then this screen will not appear and you can skip this step.
Enter (or browse for) the location of the directory where Oracle inventory files will be stored in the Inventory Directory field. Also, enter the name of the group that will have write permission to the inventory directory in the Operating System Group field. Click OK to start the Oracle Data Service Integrator Configuration Wizard.
Figure 4-1 Installation Inventory Setup Page

Description of "Figure 4-1 Installation Inventory Setup Page"
-
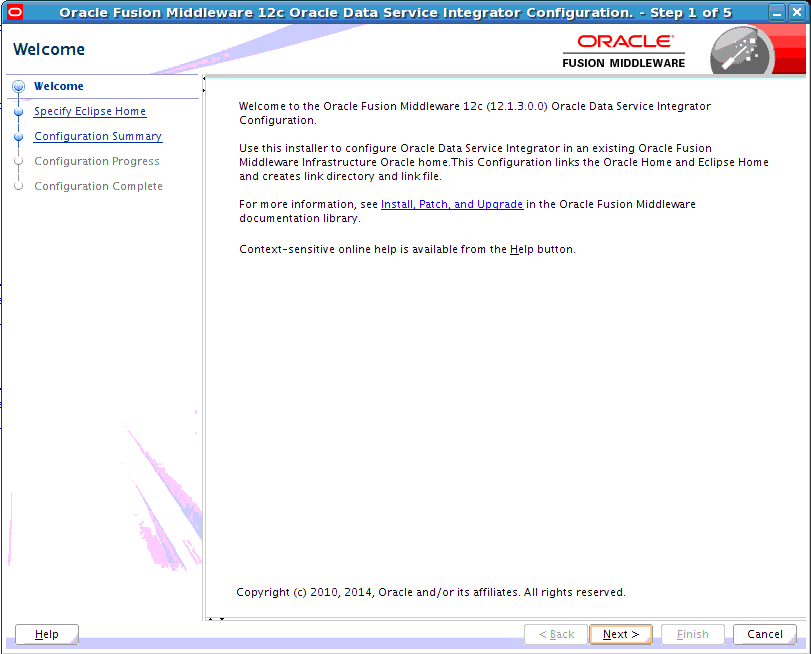
Click Next in the Oracle Data Service Integrator Configuration wizard Welcome page.
-
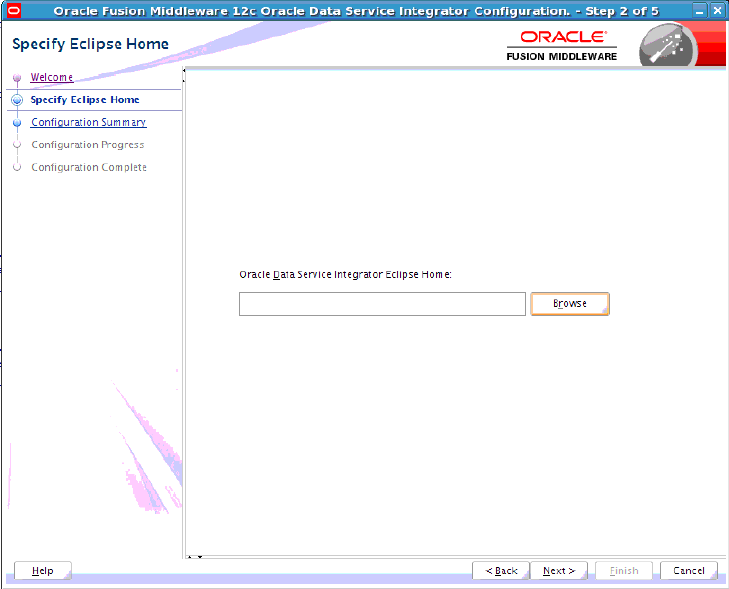
Browse for the location of the Oracle Data Service Integrator Eclipse home in the Specify Eclipse Home page. Click Next.
-
Review the configuration in the Configuration Summary screen.
If the Eclipse plugin is configured as you want it, click Next.If you need to make changes to the configuration, click Previous to return to the appropriate screen for the settings you want to change.
-
View the progress of the Eclipse plugin installation in the Configuration Progress screen.
When the process completes, click Next.
-
Review the Eclipse plugin installation results in the Configuration Complete screen. Click Finish.
You can use the Eclipse IDE to import the MediatorSamples.jar sample dataspace into your workspace. For more information, see "Sample Static Mediator Application" in Developing Data Service Integrator Applications.
4.4 Starting the Development of a Data Integration Solution
Developing your own data integration solution consists of a design phase and an implementation phase.
-
When you are ready to start setting up and configuring your own data sources, refer to Administering Data Service Integrator.
-
When you are ready to start mapping source and target XML schemas and constructing queries using WebLogic Server, refer to Data Service Integrator Developer's Guide.
-
When your application developer is ready to access data services, see Developing Data Service Integrator Applications.
-
For information on the XQuery engine, functions and the XQSE language see Using Data Service Integrator XQuery Engine.

