19 Using Whole Server Migration and Service Migration in an Enterprise Deployment
This chapter describes Oracle WebLogic Server whole server migration and Oracle WebLogic Server service migration and explains how it can be used in an Oracle Fusion Middleware enterprise topology.
This chapter contains the following sections:
-
About Whole Server Migration and Service Migration in an Enterprise Deployment
-
Configuring Whole Server Migration for Products in an Enterprise Deployment
-
Configuring Automatic Service Migration for Products in an Enterprise Deployment
19.1 About Whole Server Migration and Service Migration in an Enterprise Deployment
Oracle WebLogic Server provides a migration framework that is integral part of any highly available environment. The following sections provide more information about how this framework can be used effectively in an enterprise deployment:
19.1.1 Understanding the Difference Between Whole Server and Service Migration
The Oracle WebLogic Server migration framework supports two distinct types of automatic migration:
-
Whole Server Migration, where the Managed Server instance is migrated to a different physical system upon failure.
Whole server migration provides for the automatic restart of a server instance, with all of its services, on a different physical machine. When a failure occurs in a server that is part of a cluster that is configured with server migration, the server is restarted on any of the other machines that host members of the cluster.
For this to happen, the servers need to use a a floating IP as listen address and the required resources (transactions logs and JMS persistent stores) must be available on the candidate machines.
For more information, see "Whole Server Migration" in Administering Clusters for Oracle WebLogic Server.
-
Service Migration, where specific services are moved to a different Managed Server within the cluster.
To understand service migration, it's important to understand pinned services.
In a WebLogic Server cluster, most subsystem services are hosted homogeneously on all server instances in the cluster, enabling transparent failover from one server to another. In contrast, pinned services, such as JMS-related services, the JTA Transaction Recovery Service, and user-defined singleton services, are hosted on individual server instances within a cluster—for these services, the WebLogic Server migration framework supports failure recovery with service migration, as opposed to failover.
For more information, see "Understanding the Service Migration Framework" in Administering Clusters for Oracle WebLogic Server.
19.1.2 Implications of Using Whole Service Migration or Service Migration in an Enterprise Deployment
When a server or service is started in another system, the required resources (such as services data and logs) must be available to both the original system and to the failover system; otherwise, the service cannot resume the same operations successfully on the failover system.
For this reason, both whole server and service migration require that all members of the cluster have access to the same transaction and JMS persistent stores (whether the persistent store is file-based or database-based).
This is another reason why shared storage is important in an enterprise deployment. When you properly configure shared storage, you ensure that in the event of a manual failover (Administration Server failover) or an automatic failover (whole server migration or service migration), both the original machine and the failover machine can access the same file store with no change in service.
In the case of an automatic service migration, when a pinned service needs to be resumed, the JMS and JTA logs that it was using before failover need to be accessible.
In addition to shared storage, Whole Server Migration requires the procurement and assignment of a virtual IP address (VIP). When a Managed Server fails over to another machine, the VIP is automatically reassigned to the new machine. For an example, this is the purpose of the SOAHOST1VHN1, SOAHOST2VHN1 virtual IPs that you procure in Chapter 5.
Note that service migration does not require a VIP.
19.1.3 Understanding Which Products and Components Require Whole Server Migration and Service Migration
Most products and components in an Oracle SOA Suite enterprise deployment use pinned services. However, some of the components do not support transparent failover of these services by automatic service migration. In some cases, the software that is using the JMS and JTA resources cannot failover invocations of the service when the pinned service is moved to a different server.
As a result, some type of components are configured with Server Migration for failover and zero data loss.
Table 19-1 summarizes the Oracle SOA Suite products and components you should configure for whole server migration and which you should configure for Automatic Service Migration.
Table 19-1 Server Migration Requirements for an Oracle SOA Suite Enterprise Deployment
| Component | Whole Server Migration (WSM) | Automatic Server Migration (ASM) |
|---|---|---|
|
Oracle Web Services Manager (OWSM) |
NO |
NO |
|
Oracle SOA Suite |
YES |
NO |
|
Oracle Service Bus |
YES |
NO |
|
Oracle Business Process Management |
YES |
NO |
|
Enterprise Enterprise Scheduler |
NO |
NO |
|
Oracle Business Activity Monitoring |
NO |
YES |
|
Oracle B2B |
YES |
NO |
19.2 Configuring Whole Server Migration for Products in an Enterprise Deployment
The following sections describe how to configure whole server migration for the products that support it in an enterprise deployment:
-
Section 19.2.1, "Setting Up a User and Tablespace for the Server Migration Leasing Table"
-
Section 19.2.2, "Creating a GridLink Data Source for Leasing Using the Administration Console"
-
Section 19.2.3, "Editing the Node Manager's Properties File to Enable Whole Server Migration"
-
Section 19.2.4, "Setting Environment and Superuser Privileges for the wlsifconfig.sh Script"
19.2.1 Setting Up a User and Tablespace for the Server Migration Leasing Table
Set up a user and tablespace for the server migration Leasing table using the create tablespace leasing command. The leasing table can be shared by multiple clusters configured with server migration as long as the domain names, cluster names and server names do not clash. The leasing table is used to keep the time stamps and live messages from the servers, so it is important that the database used is highly available and that the nodes in the database use synced clocks.
Use the following procedure to set up a user and leasing tablespace in a highly available database. A leasing table is required to enable automatic whole server migration. For more information, see "Leasing" in Administering Clusters for Oracle WebLogic Server.
-
Create a tablespace called
Leasing.For example, log in to SQL*Plus as the
sysdbauser and run the following command:SQL> create tablespace Leasing logging datafile 'DB_HOME/oradata/orcl/leasing.dbf' size 32m autoextend on next 32m maxsize 2048m extent management local; -
Create a user named
Leasingand assign to it the Leasing tablespace.SQL> create user Leasing identified by password; SQL> grant create table to Leasing; SQL> grant create session to Leasing; SQL> alter user Leasing default tablespace Leasing; SQL> alter user Leasing quota unlimited on Leasing; -
Create the Leasing table using the
leasing.ddlscript.-
Copy the
leasing.ddlfile located in either of the following directories to your database host:WL_HOME/server/db/oracle/db_version/In this example, replace db_version with the version number of the Oracle database.
-
Connect to the database as the
Leasinguser.Note:
You must connect as theleasinguser; otherwise, if you connect assysdbaor a different user account, then the schema will be created incorrectly. -
Run the
leasing.ddlscript in SQL*Plus.SQL> @script_location/leasing.ddl;
-
19.2.2 Creating a GridLink Data Source for Leasing Using the Administration Console
After you create the leasing table, you must create a data source for the Leasing table from the Oracle WebLogic Server Administration Console.
For the purposes of an enterprise deployment, you should use a GridLink data source:
-
Log in to the Oracle WebLogic Server Administration Console.
-
If you have not already done so, in the Change Center, click Lock & Edit.
-
In the Domain Structure tree, expand Services, then select Data Sources.
-
On the Summary of Data Sources page, click New and select GridLink Data Source, and enter the following:
-
Enter a logical name for the data source in the Name field. For example, Leasing.
-
Enter a name for JNDI. For example, jdbc/leasing.
-
For the Database Driver, select Oracle's Driver (Thin) for GridLink Connections Versions: Any.
-
Click Next.
-
-
In the Transaction Options page, clear the Supports Global Transactions check box, and then click Next.

-
In the GridLink Data Source Connection Properties Options screen, select Enter individual listener information and click Next.
-
Enter the following connection properties:
-
Service Name: Enter the service name of the database with lowercase characters. For a GridLink data source, you must enter the Oracle RAC service name. For example:
soaedg.example.com
-
Host Name and Port: Enter the SCAN address and port for the RAC database, separated by a colon. For example:
db-scan.example.com:1521
Click Add to add the host name and port to the list box below the field.
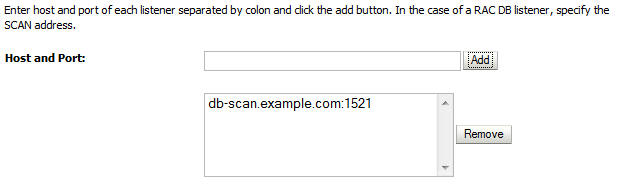
Description of the illustration ''admincons_gridlink_hostport.jpg''
You can identify the SCAN address by querying the appropriate parameter in the database using the TCP Protocol:
SQL>show parameter remote_listener;

NAME                 TYPE        VALUE

--------------------------------------------------

remote_listener     string      db-scan.example.com
Note:
For Oracle Database 11g Release 1 (11.1), use the virtual IP and port of each database instance listener, for example:dbhost1-vip.mycompany.com (port 1521)
and
dbhost2-vip.mycompany.com (1521)
For Oracle Database 10g, use multi data sources to connect to an Oracle RAC database. For information about configuring multi data sources see Appendix A, "Using Multi Data Sources with Oracle RAC."
-
Database User Name: Leasing
-
Password: For example: welcome1
-
Confirm Password: Enter the password again and click Next.
-
-
On the Test GridLink Database Connection page, review the connection parameters and click Test All Listeners.
Here is an example of a successful connection notification:
Connection test for jdbc:oracle:thin:@(DESCRIPTION=(ADDRESS_LIST=(ADDRESS=(PROTOCOL=TCP)(HOST=db-scan.mycompany.com)
(PORT=1521)))(CONNECT_DATA=(SERVICE_NAME=soaedg.example.com))) succeeded.
Click Next.
-
In the ONS Client Configuration page, do the following:
-
Select FAN Enabled to subscribe to and process Oracle FAN events.
-
Enter here also the SCAN address: ONS remote port for the RAC database and the ONS remote port as reported by the database (example below) and click Add:
[orcl@db-scan1 ~]$ srvctl config nodeapps -s

ONS exists: Local port 6100, remote port 6200, EM port 2016
-
Click Next.
Note:
For Oracle Database 11g Release 1 (11.1), use the hostname and port of each database's ONS service, for example:custdbhost1.mycompany.com (port 6200)
and
custdbhost2.mycompany.com (6200)
-
-
On the Test ONS Client Configuration page, review the connection parameters and click Test All ONS Nodes.
Here is an example of a successful connection notification:
Connection test for db-scan.mycompany.com:6200 succeeded.
Click Next.
-
In the Select Targets page, select the cluster where server migration is being configured as target, and then select All Servers in the cluster.
For example, if you are configuring whole server migration for the Oracle SOA Suite cluster, then select SOA_Cluster. For the components that support whole server migration, see Section 19.1.3, "Understanding Which Products and Components Require Whole Server Migration and Service Migration".
-
Click Finish.
-
Click Activate Changes.
19.2.3 Editing the Node Manager's Properties File to Enable Whole Server Migration
Use the section to edit the Node Manager properties file on the two nodes where the servers are running.
-
Locate and open the following file with a text editor:
MSERVER_HOME/nodemanager/nodmeanager.properties -
If not done already, set the
StartScriptEnabledproperty in thenodemanager.propertiesfile to true.This is required to enable Node Manager to start the managed servers.
-
Add the following properties to the
nodemanager.propertiesfile to enable server migration to work properly:-
InterfaceInterface=eth0
This property specifies the interface name for the floating IP (
eth0, for example).Note:
Do not specify the sub interface, such aseth0:1oreth0:2. This interface is to be used without the:0, or:1.The Node Manager's scripts traverse the different
:Xenabled IPs to determine which to add or remove. For example, the valid values in Linux environments areeth0,eth1, or,eth2,eth3,ethn, depending on the number of interfaces configured. -
NetMaskNetMask=255.255.255.0
This property specifies the net mask for the interface for the floating IP.
-
UseMACBroadcastUseMACBroadcast=true
This property specifies whether or not to use a node's MAC address when sending ARP packets, that is, whether or not to use the
-bflag in the arping command.
-
-
Restart the Node Manager.
-
Verify in the output of Node Manager (the shell where the Node Manager is started) that these properties are in use. Otherwise, problems may occur during migration. The output should be similar to the following:
...
SecureListener=true
LogCount=1
eth0=*,NetMask=255.255.255.0
...
19.2.4 Setting Environment and Superuser Privileges for the wlsifconfig.sh Script
Use this section to set the environment and superuser privileges for the wlsifconfig.sh script, which is used to transfer IP addresses from one machine to another during migration. It must be able to run ifconfig, which is generally only available to superusers.
For more information about the wlisconfig.sh script, see "Configuring Automatic Whole Server Migration" in Administering Clusters for Oracle WebLogic Server.
Refer to the following sections for instructions on preparing your system to run the wlsifconfig.sh script:
-
Section 19.2.4.1, "Setting the PATH Environment Variable for the wlsisconfig.sh Script"
-
Section 19.2.4.2, "Granting Privileges to the wlsisconfig.sh Script"
19.2.4.1 Setting the PATH Environment Variable for the wlsisconfig.sh Script
Ensure that the command listed in Table 19-2 are included in the PATH environment variable for each host computers.
19.2.4.2 Granting Privileges to the wlsisconfig.sh Script
Grant sudo privilege to the WebLogic user ('oracle') with no password restriction, and grant execute privilege on the /sbin/ifconfig and /sbin/arping binaries.
Note:
For security reasons,sudo should be restricted to the subset of commands required to run the wlsifconfig.sh script.
Ask the system administrator for the sudo and system rights as appropriate to perform this required configuration task.
The following is an example of an entry inside /etc/sudoers granting sudo execution privilege for oracle to run ifconfig and arping:
Defaults:oracle !requiretty
oracle ALL=NOPASSWD: /sbin/ifconfig,/sbin/arping
19.2.5 Configuring Server Migration Targets
To configure migration in a cluster:
-
Log in to the Oracle WebLogic Server Administration Console.
-
In the Domain Structure window, expand Environment and select Clusters. The Summary of Clusters page appears.
-
Click the cluster for which you want to configure migration in the Name column of the table.
-
Click the Migration tab.
-
Click Lock & Edit.
-
Under Candidate Machines For Migratable Server, in the Available filed, select SOAHOST1 and SOAHOST2 and click right arrow to move to Chosen.
-
Select the data source to be used for automatic migration. In this case, select the Leasing data source.
-
Click Save.
-
Set the Candidate Machines for Server Migration. You must perform this task for all of the managed servers as follows:
-
In Domain Structure window of the Oracle WebLogic Server Administration Console, expand Environment and select Servers.
-
Select the server for which you want to configure migration.
-
Click the Migration tab.
-
Select Automatic Server Migration Enabled and click Save.
This enables the Node Manager to start a failed server on the target node automatically.
For information on targeting applications and resources, see Appendix A, "Using Multi Data Sources with Oracle RAC."
-
In the Available field, located in the Migration Configuration section, select the machines to which to allow migration and click the right arrow. For WLS_SOA1, select SOAHOST2. For WLS_SOA2, select SOAHOST1.
Tip:
Click Customize this table in the Summary of Servers page, move Current Machine from the Available Window to the Chosen window to view the machine on which the server is running. This is different from the configuration if the server is migrated automatically. -
-
Click Activate Changes.
-
Restart the Administration Server and the servers for which server migration has been configured.
19.2.6 Testing Whole Server Migration
Perform the steps in this section to verify that automatic whole server migration is working properly.
-
Stop the managed server process.
kill -9 pidpid specifies the process ID of the managed server. You can identify the pid in the node by running this command:
ps -ef | grep WLS_SOA1
-
Watch the Node Manager console (the terminal window where you performed the kill command): you should see a message indicating that the managed server's floating IP has been disabled.
-
Wait for the Node Manager to try a second restart of the Managed Server. Node Manager waits for a period of 30 seconds before trying this restart.
-
After node manager restarts the server and before it reaches "RUNNING" state, kill the associated process again.
Node Manager should log a message indicating that the server will not be restarted again locally.
Note:
The number of restarts required is determined by theRestartMaxparameter in the following configuration file:MSERVER_HOME/servers/WLS_SOA1/data/nodemanager/startup.propertiesThe default value is
RestartMax=2.
-
Watch the local Node Manager console. After 30 seconds since the last try to restart the managed server on Node 1, Node Manager on Node 2 should prompt that the floating IP for the managed server is being brought up and that the server is being restarted in this node.
-
Access the soa-infra console in the same IP.
Verification From the Administration Console
You can also verify migration using the Oracle WebLogic Server Administration Console:
-
Log in to the Administration Console.
-
Click Domain on the left console.
-
Click the Monitoring tab and then the Migration subtab.
The Migration Status table provides information on the status of the migration.
Note:
After a server is migrated, to fail it back to its original machine, stop the managed server from the Oracle WebLogic Administration Console and then start it again. The appropriate Node Manager starts the managed server on the machine to which it was originally assigned.19.3 Configuring Automatic Service Migration for Products in an Enterprise Deployment
In a typical Oracle SOA Suite enterprise deployment, only the Oracle BAM software should be configured for automatic service migration.
For more information, see Section 16.8, "Configuring Automatic Service Migration for the Oracle BAM Servers".