A Using the User Messaging Service Sample Applications
This appendix describes how to create a client application that uses Oracle User Messaging Service (UMS) Java API.
This appendix includes the following sections:
-
Section A.1, "Using the UMS Client API to Build a Client Application"
-
Section A.2, "Using the UMS Client API to Build a Client Echo Application"
-
Section A.4, "Sample Chat Application with Web Services APIs"
Note:
To learn more about the code samples for Oracle User Messaging Service, or to run the samples yourself, refer to the samples at:
http://www.oracle.com/technetwork/indexes/samplecode/sample-ums-1454424.html.
A.1 Using the UMS Client API to Build a Client Application
This section describes how to create an application called usermessagingsample, a web client application that uses the UMS Client API for both outbound messaging and the synchronous retrieval of message status. usermessagingsample also supports inbound messaging. Once you have deployed and configured usermessagingsample, you can use it to send a message to an email client.
This sample focuses on a Web Application Module (WAR), which defines some HTML forms and servlets. You can examine the code and corresponding XML files for the web application module from the provided usermessagingsample-src.zip source. The servlets uses the UMS Client API to create an UMS Client instance (which in turn registers the application's information) and sends messages.
This application, which is packaged as a Enterprise ARchive file (EAR) called usermessagingsample.ear, has the following structure:
-
usermessagingsample.ear-
META-INF-
application.xml-- Descriptor file for all of the application modules. -
weblogic-application.xml-- Descriptor file that contains theimportof theoracle.sdp.messagingshared library.
-
-
usermessagingsample-web.ear-- Contains the web-based front-end and servlets.-
WEB-INF
-
web.xml -
weblogic.xml
-
-
The prebuilt sample application, and the source code (usermessagingsample-src.zip) are available on OTN.
A.1.1 Overview of Development
The following steps describe the process of building an application capable of outbound messaging using usermessagingsample.ear as an example:
A.1.2 Configuring the Email Driver
To enable the Oracle User Messaging Service's email driver to perform outbound messaging and status retrieval, when you configure the email driver, enter the name of the SMTP mail server as the value for the OutgoingMailServer property.
For more information about configuring the email driver, see Administering Oracle User Messaging Service.
Note:
This sample application is generic and can support outbound messaging through other channels when the appropriate messaging drivers are deployed and configured.
A.1.3 Using JDeveloper 12c to Build the Application
This section describes using a Windows-based build of JDeveloper to build, compile, and deploy usermessagingsample through the following steps:
A.1.3.1 Opening the Project
-
Open
usermessagingsample.jws(contained in the usermessagingsample-src.zip file) in Oracle JDeveloper.Figure A-1 Oracle JDeveloper Open Application Window
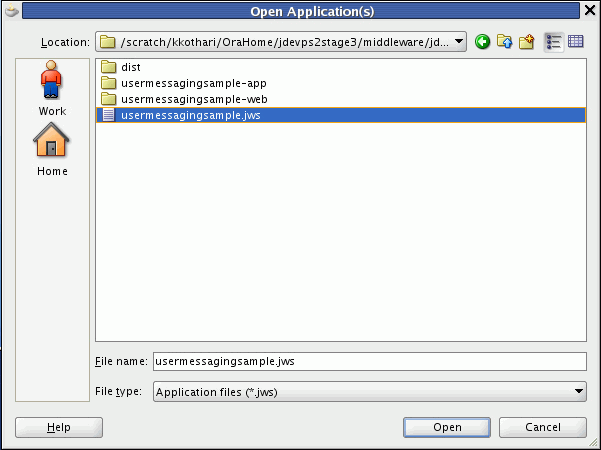
Description of "Figure A-1 Oracle JDeveloper Open Application Window "
In the Oracle JDeveloper main window, the project appears.
-
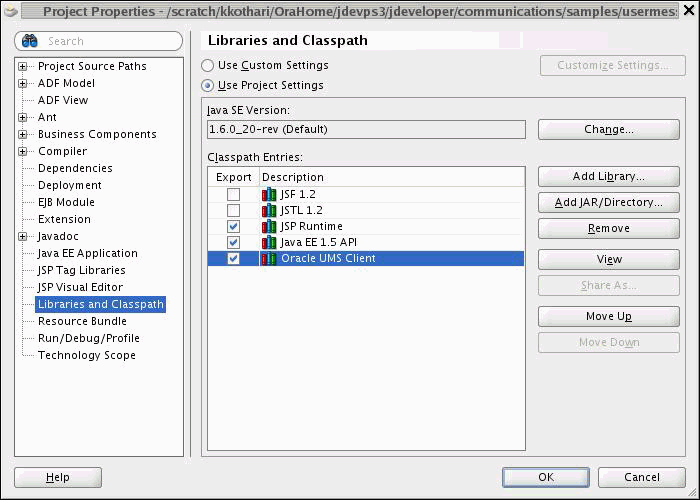
To build the sample application, the web module should include the "Oracle UMS Client" library.
-
In the Application Navigator, right-click web module usermessagingsample-web, and select Project Properties.
-
In the left pane, select Libraries and Classpath.
-
Click OK.
-
-
Explore the Java files under the usermessagingsample-web project to see how the messaging client APIs are used to send messages, get statuses, and synchronously receive messages. The MessagingClient instance is created in
SampleUtils.javain the project.
A.1.4 Deploying the Application
Perform the following steps to deploy the application:
-
Create an Application Server Connection by right-clicking the application in the navigation pane and selecting New. Follow the instructions in Section A.3, "Creating a New Application Server Connection."
-
Deploy the application by selecting the usermessagingsample application, Deploy, usermessagingsample, to, and ums_server.
-
Verify that the message
Build Successfulappears in the log. -
Verify that the message
Deployment Finishedappears in the deployment log.You have successfully deployed the application.
Before you can run the sample, you must configure any additional drivers in Oracle User Messaging Service and optionally configure a default device for the user receiving the message in User Communication Preferences.
Note:
Refer to Administering Oracle User Messaging Service for more information.
A.1.5 Testing the Application
Once usermessagingsample has been deployed to a running instance of Oracle WebLogic Server, perform the following:
-
Launch a web browser and enter the address of the sample application as follows:
http://host:http-port/usermessagingsample/. For example, enterhttp://localhost:7001/usermessagingsample/into the browser's navigation bar.When prompted, enter login credentials. For example, username
weblogic. The browser page for testing messaging samples appears (Figure A-3).Figure A-3 Testing the Sample Application
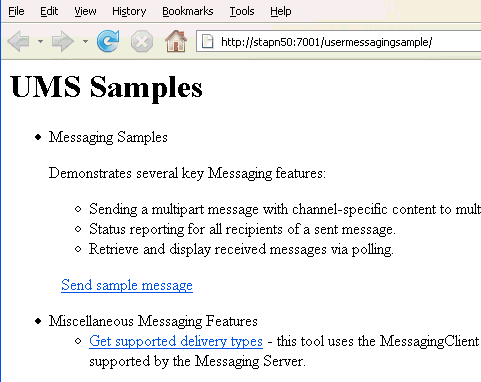
Description of "Figure A-3 Testing the Sample Application"
-
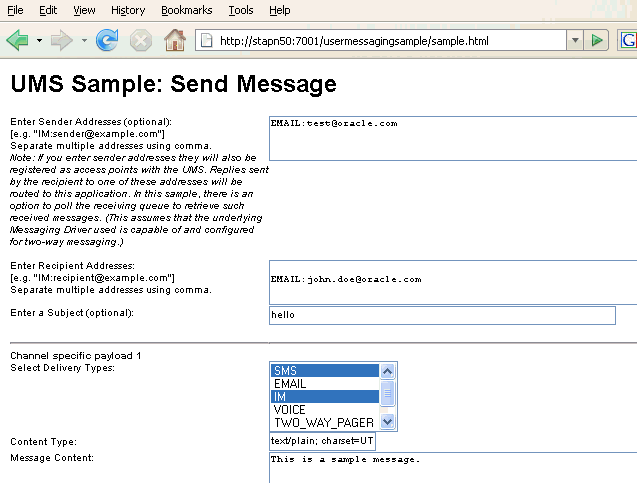
Click Send sample message. The Send Message page appears (Figure A-4).
-
As an optional step, enter the sender address in the following format:
Email:sender_address.For example, enter
Email:sender@example.com. -
Enter one or more recipient addresses. For example, enter
Email:recipient@example.com. Enter multiple addresses as a comma-separated list as follows:Email:recipient_address1,Email:recipient_address2.If you have configured User Communication Preferences, you can address the message simply to
User:username. For example,User:weblogic. -
As an optional step, enter a subject line or content for the email.
-
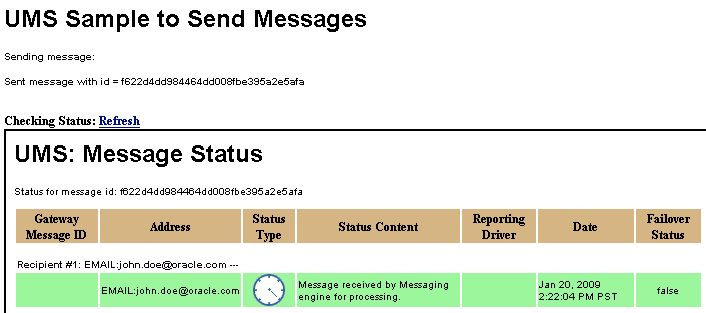
Click Send. The Message Status page appears, showing the progress of transaction (Message received by Messaging engine for processing in Figure A-5).
-
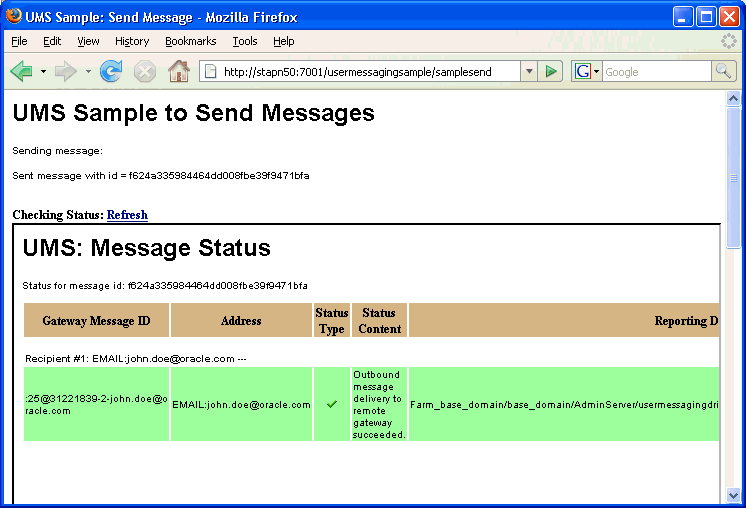
Click Refresh to update the status. When the email message has been delivered to the email server, the Status Content field displays Outbound message delivery to remote gateway succeeded., as illustrated in Figure A-6.
A.2 Using the UMS Client API to Build a Client Echo Application
This section describes how to create an application called usermessagingsample-echo, a demo client application that uses the UMS Client API to asynchronously receive messages from an email address and echo a reply back to the sender.
Note:
To learn more about the code samples for Oracle User Messaging Service, or to run the samples yourself, refer to the Oracle User Messaging Service samples at http://www.oracle.com/technetwork/indexes/samplecode/sample-ums-1454424.html.
This application, which is packaged as a Enterprise Archive file (EAR) called usermessagingsample-echo.ear, has the following structure:
-
usermessagingsample-echo.ear-
META-INF-
application.xml-- Descriptor file for all of the application modules. -
weblogic-application.xml-- Descriptor file that contains theimportof theoracle.sdp.messagingshared library.
-
-
usermessagingsample-echo-web.war-- Contains the web-based front-end and servlets. It also contains the listener that processes a received message and returns an echo response-
WEB-INF
-
web.xml -
weblogic.xml
-
-
The prebuilt sample application, and the source code (usermessagingsample-echo-src.zip) are available on OTN.
A.2.1 Overview of Development
The following steps describe the process of building an application capable of asynchronous inbound and outbound messaging using usermessagingsample-echo.ear as an example:
A.2.2 Configuring the Email Driver
To enable the Oracle User Messaging Service's email driver to perform inbound and outbound messaging and status retrieval, configure the email driver as follows:
-
Enter the name of the SMTP mail server as the value for the OutgoingMailServer property.
-
Enter the name of the IMAP4/POP3 mail server as the value for the IncomingMailServer property. Also, configure the incoming user name, and password.
For more information about configuring the Email driver, refer to section Configuring the Email Driver in Oracle Fusion Middleware Administering Oracle User Messaging Service.
Note:
This sample application is generic and can support inbound and outbound messaging through other channels when the appropriate messaging drivers are deployed and configured.
A.2.3 Using Oracle JDeveloper 12c to Build the Application
This section describes using a Windows-based build of JDeveloper to build, compile, and deploy usermessagingsample-echo through the following steps:
A.2.3.1 Opening the Project
-
Unzip
usermessagingsample-echo-src.zip, to theJDEV_HOME/communications/
samples/directory. This directory must be used for the shared library references to be valid in the project.Note:
If you choose to use a different directory, you must update the
oracle.sdp.messaginglibrary source path toJDEV_HOME/
communications/modules/oracle.sdp.messaging_12.1.3/
sdpmessaging.jar. -
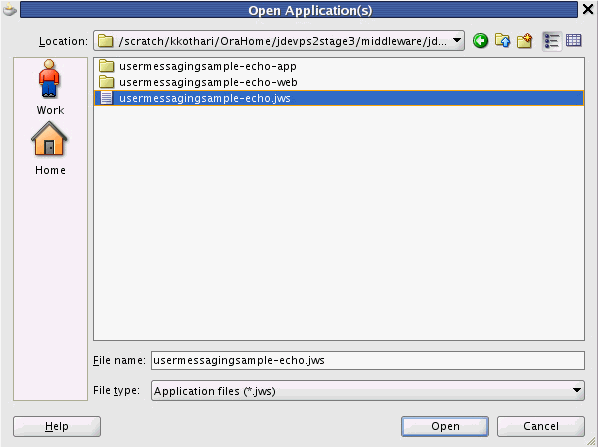
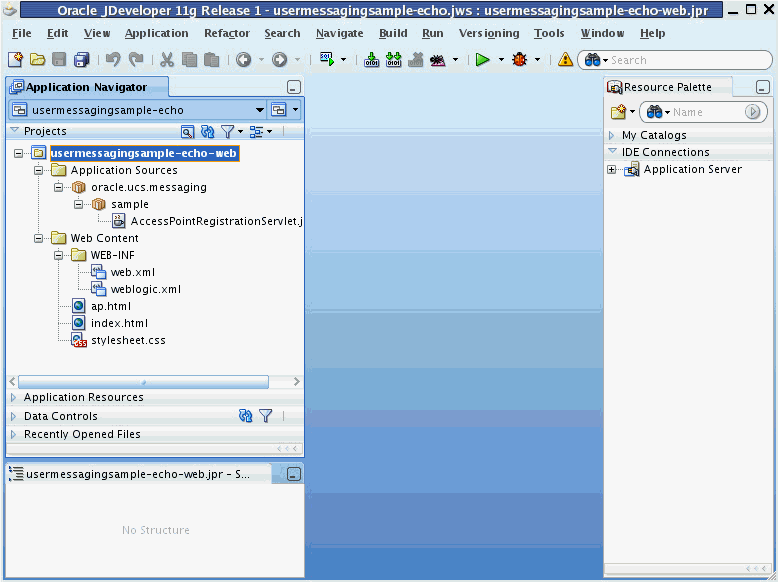
Open
usermessagingsample-echo.jws(contained in the .zip file) in Oracle JDeveloper (Figure A-7).In the Oracle JDeveloper main window the project appears (Figure A-8).
-
Verify that the build dependencies for the sample application have been satisfied by checking that the following library has been added to the
usermessagingsample-echo-webmodule.-
Library: oracle.sdp.messaging, Classpath:
JDEV_HOME/
communications/modules/oracle.sdp.messaging_12.1.3/
sdpmessaging.jar. This is the Java library used by UMS and applications that use UMS to send and receive messages.
Perform the following steps for each module:
-
In the Application Navigator, right-click the module and select Project Properties.
-
In the left pane, select Libraries and Classpath (Figure A-9).
-
Click OK.
-
-
Explore the Java files under the usermessagingsample-echo-web project to see how the messaging client APIs are used to register and unregister access s, and how the
EchoListeneris used to asynchronously receive messages.
A.2.4 Deploying the Application
Perform the following steps to deploy the application:
-
Create an Application Server Connection by right-clicking the application in the navigation pane and selecting New. Follow the instructions in Section A.3, "Creating a New Application Server Connection."
-
Deploy the application by selecting the usermessagingsample-echo application, Deploy, usermessagingsample-echo, to, and ums_server.
-
Verify that the message
Build Successfulappears in the log. -
Verify that the message
Deployment Finishedappears in the deployment log.You have successfully deployed the application.
Before you can run the sample you must configure any additional drivers in Oracle User Messaging Service and optionally configure a default device for the user receiving the message in User Communication Preferences.
Note:
Refer to Developing Applications with Oracle User Messaging Service for more information.
A.2.5 Testing the Application
Once usermessagingsample-echo has been deployed to a running instance of Oracle WebLogic Server, perform the following:
-
Launch a web browser and enter the address of the sample application as follows:
http://host:http-port/usermessagingsample-echo/. For example, enterhttp://localhost:7001/usermessagingsample-echo/into the browser's navigation bar.When prompted, enter login credentials. For example, username
weblogic. The browser page for testing messaging samples appears (Figure A-10).Figure A-10 Testing the Sample Application
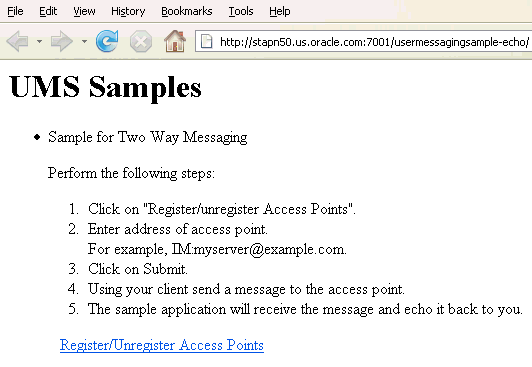
Description of "Figure A-10 Testing the Sample Application"
-
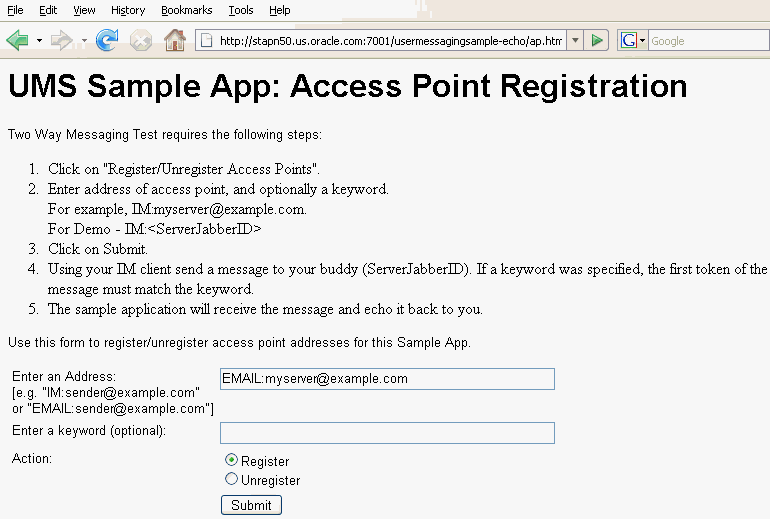
Click Register/Unregister Access s. The Access Registration page appears (Figure A-11).
-
Enter the access address in the following format:
EMAIL:server_address.For example, enter
EMAIL:myserver@example.com. -
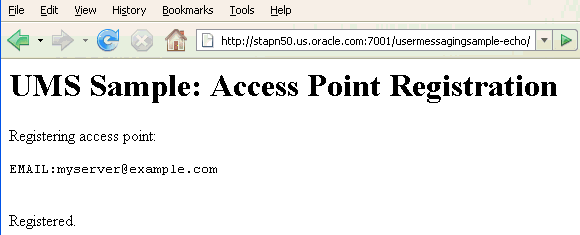
Select the Action Register and Click Submit. The registration status page appears, showing "Registered" in Figure A-12).
-
Send a message from your messaging client (for email, your email client) to the address you just registered as an access in the previous step.
If the UMS messaging driver for that channel is configured correctly, you should expect to receive an echo message back from the usermessagingsample-echo application.
A.3 Creating a New Application Server Connection
You define an application server connection in Oracle JDeveloper, and deploy and run the application. Perform the following steps to create an Application Server Connection.
-
Right-click the project and select New. From the context menu, select From Gallery. In the New Gallery window, navigate to Connections in the left pane, and select Application Server Connection from list of items.
Click OK.
-
In the Connection Name field, enter your server connection name, for example, SOA_server, and click Next.
-
Select WebLogic 12.x from the Connection Type drop-down list.
-
In the Authentication screen, enter your application server's admin Username and Password. Click Next.
-
In the Configuration screen, enter the WebLogic Server host name, port, and SSL port, and domain name. Click Next.
-
On the Test screen, verify your connection by clicking Test Connection. If the test is successful, then you will see a confirmation message. Click Finish.
The Application Server Connection has been created.
A.4 Sample Chat Application with Web Services APIs
This section describes how to create, deploy and run the sample chat application with the Web Services APIs provided with Oracle User Messaging Service on OTN.
Note:
To learn more about the code samples for Oracle User Messaging Service, or to run the samples yourself, see the samples at:
http://www.oracle.com/technetwork/indexes/samplecode/sample-ums-1454424.html.
This section describes the following topics:
A.4.1 Overview
This sample demonstrates how to create a web-based chat application to send and receive messages through email, SMS, or IM. The sample uses the Web Service APIs to interact with a User Messaging server. You define an application server connection in Oracle JDeveloper, and deploy and run the application.
The application is provided as a pre-built Oracle JDeveloper project that includes a simple web chat interface.
Note:
For this sample to work, a UMS Server must be available and properly configured with the required drivers.
A.4.2 Running the Pre-Built Sample
Perform the following steps to run and deploy the pre-built sample application:
-
Extract
usermessagingsample-ws-src.zipand open usermessagingsample-ws.jws in Oracle JDeveloper.Figure A-13 Opening the Project in Oracle JDeveloper
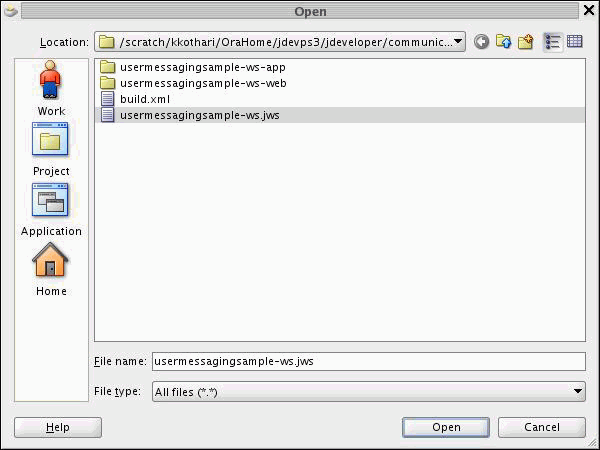
Description of "Figure A-13 Opening the Project in Oracle JDeveloper"
In the Oracle JDeveloper main window the project appears.
Figure A-14 Oracle JDeveloper Main Window
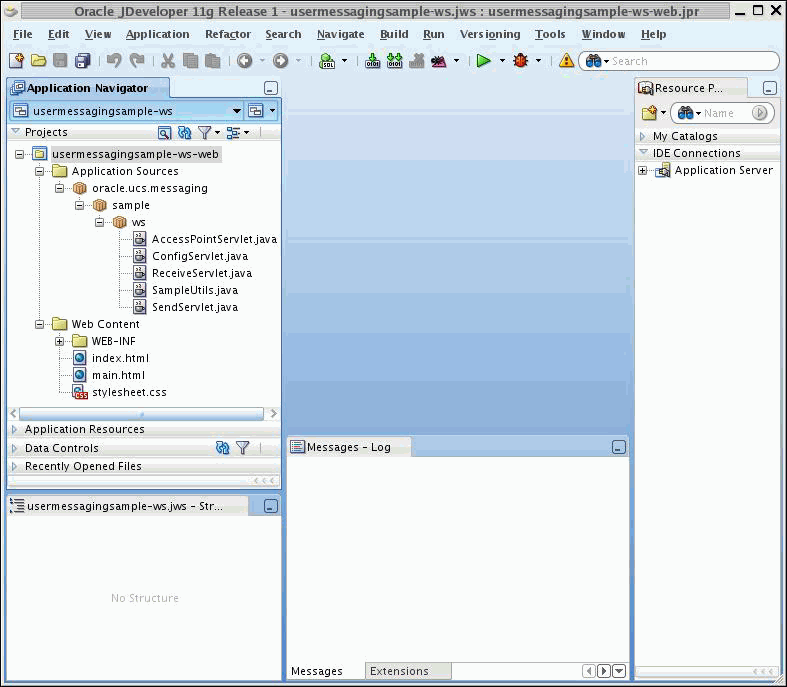
Description of "Figure A-14 Oracle JDeveloper Main Window"
The application contains one web module. All of the source code for the application is in place.
-
Satisfy the build dependencies for the sample application by ensuring the
Oracle UMS Clientlibrary is used by the web module.-
In the Application Navigator, right-click web module
usermessagingsample-ws-war, and select Project Properties. -
In the left pane, select Libraries and Classpath.
-
Click OK.
-
-
Create an Application Server Connection by right-clicking the project in the navigation pane and selecting New. Follow the instructions in Section A.4.4, "Creating a New Application Server Connection".
-
Deploy the project by selecting the usermessasgingsample-ws project, Deploy, usermessasgingsample-ws, to, and ums_server.
-
Verify that the message
Build Successfulappears in the log. -
Verify that the message
Deployment Finishedappears in the deployment log.You have successfully deployed the application.
A.4.3 Testing the Sample
Perform the following steps to run and test the sample:
-
Open a web browser.
-
Navigate to the URL of the application as follows, and log in:
http://host:port/usermessagingsample-ws/The Messaging Web Services sample web page appears (Figure A-16). This page contains navigation tabs and instructions for the application.
Figure A-16 Messaging Web Services Sample Web Page
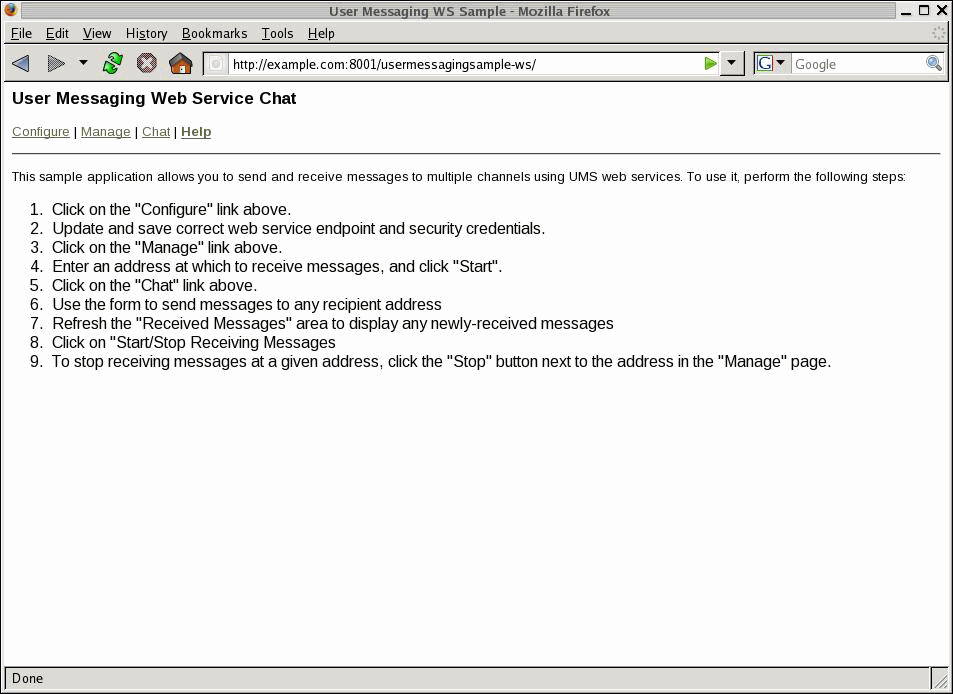
Description of "Figure A-16 Messaging Web Services Sample Web Page"
-
Click Configure and enter the following values (Figure A-17):
-
Specify the web service endpoint. For example,
http://example.com:8001/ucs/messaging/webservice -
Specify the Username and Password.
-
Specify a Policy (required if the User Messaging Service instance has WS security enabled).
-
Figure A-17 Configuring the Web Service Endpoints and Credentials
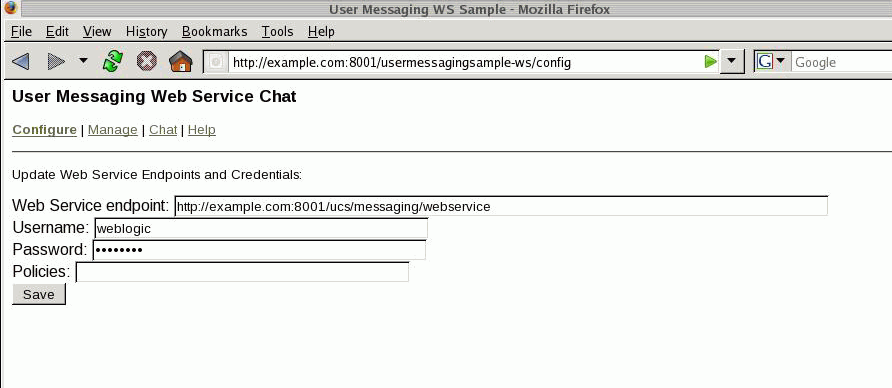
Description of "Figure A-17 Configuring the Web Service Endpoints and Credentials"
-
-
Click Save.
-
Click Manage.
-
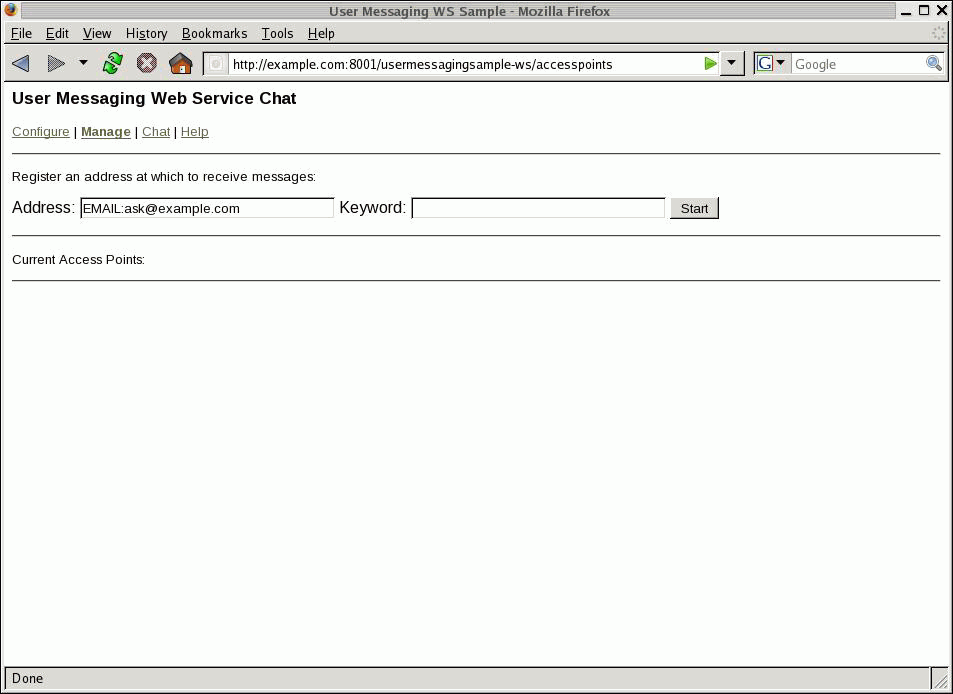
Enter an address and optional keyword at which to receive messages (Figure A-18).
-
Click Start.
Verify that the message
Registration operation succeededappears. -
Click Chat.
-
Enter recipients in the To: field.
-
Enter a message.
-
Click Send.
-
Verify that the message is received.
A.4.4 Creating a New Application Server Connection
You define an application server connection in Oracle JDeveloper, and deploy and run the application. Perform the steps in Section A.3, "Creating a New Application Server Connection" to create an Application Server Connection.
