8 Debugging Integration Processes
This chapter describes how to use the Oracle Data Integrator debugger to solve problems with your integration processes.
This chapter includes the following sections:
8.1 About Sessions and Blueprints
Oracle Data Integrator Studio provides a graphical debugger that allows you to manually step through the steps and tasks of a session. You can use the debugger to identify problems with mappings, procedures, packages, or scenarios. Debugging is performed in the blueprint of an active session.
The blueprint of a session can only be viewed in a tab of the session in Oracle Data Integrator Studio. You will see the same blueprint in different sessions if the mapping/scenario has the same version and timestamp.
Once you edit a mapping, new sessions run based on it will not use a previously cached blueprint: instead, a new blueprint is generated. Every time a mapping is executed, a new blueprint is generated afresh. Only in the case of scenarios do you retain the same blueprint for multiple runs as long as the scenario is not modified. Once the scenario is modified, then a new blueprint is generated for the subsequent sessions.
8.1.1 Blueprint Source and Target Code
The blueprint cannot be edited directly. However, you can edit the Source/Target code for the task that the debugger is currently on in the Session Editor. The edited code is used for all sessions run from a mapping. Even if you delete all of the sessions, the cached blueprint survives and will be reused when you next start a session from the unchanged mapping.
8.2 Introduction to Debugging in the Session Editor
In the blueprint in the Session Editor, you can debug a running session or restart a completed session, by manually stepping through the steps and tasks of the session. The blueprint includes a Steps Hierarchy table, which identifies steps and tasks by an ID. The debugger tasks that you can perform include:
-
Setting breakpoints for steps and tasks. Breakpoints are shown graphically in the blueprint, and listed in the Debug Breakpoints view.
-
Viewing and updating/editing source and target code for any task within the session, and running queries to view data.
-
Viewing the values of variables as well as uncommitted data, if the connection is not an Autocommit connection.
-
Viewing all active debug sessions, and disconnecting or connecting to debuggable sessions.
-
Viewing all threads for the connected session.
8.2.1 Icons
The debug execution can be controlled by the debug commands in the debug toolbar:
| Icon | Command | Description |
|---|---|---|
| Add Breakpoint | Toggles a breakpoint at the currently selected line in the blueprint, currently selected task in the procedure, or currently selected step in a package. | |
| Start Debug Session | Starts a debugging session for the editor in focus. In a Session Editor, this command can be used to restart a session. | |
| Connect To Debug Session | Connects to a debugging session running on an agent. This opens the currently running session and allow to step through the execution. It is not possible to connect to a local agent. | |
| Disconnect Debug Session | Disconnects the current debugging session. After the debugging session is disconnected, the execution continues and any breakpoint is ignored.
It is possible to reconnect to a disconnected session. |
|
| Current Cursor | Highlights the current cursor in the blueprint, and opens the Session Editor, if not already open. | |
| Get Data | Inserts the SQL code of the currently selected task into the SQL command field of the Debug Data window. Both Source Task Data and Target Task Data windows are populated. | |
| Step into | Steps to the beginning of the first child node of the currently selected node. If the currently selected node does not have a child, this is disabled. | |
| Run to Task End | Runs to the end of the currently selected task. If the task has children, execute all children until the end of the task is reached.
This is disabled if it is not at the beginning of a task. |
|
| Run to Next Task | Runs to the beginning of the next task. If at the last task in a list of tasks, go to the end of the parent task. | |
| Run to Step End | Runs to the end of the current step. Executes all tasks until the end of the step is reached. | |
| Run to Next Step | Runs to the beginning of the next step. | |
| Pause | Suspends the current execution. The execution can be continued by stepping through the steps/tasks, or by resuming execution. | |
| Resume | Resumes execution at the current cursor and continues until the session is finished or a breakpoint is reached. |
8.2.2 Differences between Debugging Packages, Mappings, and Procedures
There are differences in where you can set breakpoints when debugging packages, mappings, and procedures:
-
Breakpoints cannot be set on a mapping.
-
In a procedure, breakpoints can be set on tasks
-
In a package, you can set breakpoints on a step.
8.3 Starting a Debugging Session
You can start a debug session for an object by accessing a Debug command in the context menu or toolbar. Starting a debug session launches the Start Debug Session Dialog. See "Debug Session Options".
Starting a Session from the Toolbar
To start a debug session from the toolbar in Oracle Data Integrator Studio:
-
In the Projects view, select a mapping, package, procedure, or scenario.
-
From the toolbar, select Start Debug Session.
-
In the Debug window, configure options described in "Debug Session Options".
-
Click OK.
An information message indicates that the session is started.
Starting a Session from the Navigator Tree
To start a debug session from the navigator tree in Oracle Data Integrator Studio:
-
In the navigator tree, select a mapping, package, procedure, or scenario.
-
Right-click and select Debug.
-
In the Debug window, configure options described in "Debug Session Options".
-
Click OK.
An information message indicates that the session has started.
Starting a Session from the Main Menu
To start a debug session from the main menu of Oracle Data Integrator Studio:
-
Select Run > Debug > Start Debug Session.
-
In the Debug window, configure options described in "Debug Session Options".
-
Click OK.
An information message indicates that the session has started.
Starting a Session for a Scenario
To start a debug session for a scenario:
-
Locate the scenario using one of the following methods:
-
In the Designer Navigator, expand the Load Plans and Scenarios tree and locate the scenario.
-
In the Designer Navigator, expand the Projects tree, and locate the scenario under the Scenarios node of the source.
-
In the Scenarios tab of the Mapping Editor, locate the scenario in the list of scenarios for the object.
-
-
Right-click the scenario and select Debug.
-
In the Debug window, configure options described in "Debug Session Options".
-
Click OK.
An information message indicates that the session has started.
8.3.1 Connecting to a Running Debugging Session
You can connect the debugger to a debuggable session on an agent registered with the current repository. The session that the debugger connects to has to be a debuggable session and started prior to opening the Connect to Debug Session dialog box. It is not possible to connect to sessions running locally without an agent.
To connect to a session:
-
Select Run > Debug > Connect to Debug Session.
-
In the Connect Debug Session window, enter the following connection parameters:
-
Agent: Select the agent that the debuggable session runs on. The Any Agent choice shows all debuggable sessions from all configured agents in the session list.
-
Session: Shows all debuggable sessions available for connection from the agent chosen in the agent list.
-
-
Click OK.
8.3.1.1 Built-in Agents and External Agents
A debugging session is executed on a context and an agent. You can select the name of the agent that is to execute the debugging session. By selecting Local (No Agent), you select to use the built-in agent in Oracle Data Integrator Studio.
8.3.1.2 Debug Session Lifecycle
A session is shown as running in the Operator navigator regardless of whether it is a normal or debugging session. There is no indication that the session is paused. You can get back to a stopped session run in a local agent through the Debug Sessions window.
For more information on the lifecycle of a session, see "Understanding ODI Executions".
8.3.2 Debug Session Options
Before launching, you can configure options for the debugger session.
8.3.2.1 Suspend Before the First Task
Check Suspend Before the First Task, to cause the debugger to suspend the execution before the first task, even if no client is connected to the debuggable session.
If unchecked, the debug session proceeds to completion if it is not connected to a debugging client. If the debug session is connected to a debugging client, it stops at the first breakpoint, if any.
The setting is checked by default.
8.3.2.2 Associate to Current Client
Check Associate to Current Client to set the debugger to start a session in debug mode and open the blueprint to debug the session.
If unchecked, the debugger starts a session in debug mode but not open the blueprint for debugging. The session can later be associated by this or other clients.
The setting is checked by default.
8.3.2.3 Delay Before Connect
Set Delay Before Connect to define the number of seconds before the debugger attempts a connection to the started session.
The default is 5 seconds.
8.3.2.4 Debug Descendant Sessions
Check Debug Descendant Sessions to prompt you to start a new debugging session whenever a Start command is executed. This setting only applies to packages or procedures, and not mappings.
If unchecked, descendant sessions are executed normally and the debugger client cannot connect to them.
The setting is unchecked by default.
8.3.2.5 Break On Error
Check Break on Error to cause the debugger to suspend execution at a task where an error happened. This enables you to review data within the transaction.
If unchecked, session execution engine reacts to any errors as usual. The debugger client does not provide you any notification.
The setting is unchecked by default.
8.4 Stepping through a Blueprint in the Session Editor
The blueprint shows all of the steps and task hierarchy of the selected session, and allows you to go through individual commands.
When you start a session, the Session Editor in its Blueprint view opens, if the Associate to Current Client option has been selected. Otherwise, in the debug toolbar, select Current Cursor to open the Session Editor.
8.4.1 Steps and Tasks
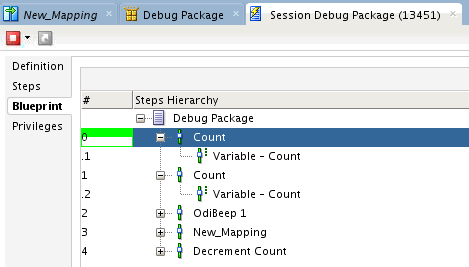
Each row in a blueprint represents a step or task. Tasks in a blueprint can be container tasks, and can execute serially or in parallel. Tasks inside a container task are leaf nodes that get executed. Sessions based on mappings have only one step, while sessions based on packages can have multiple steps.
8.5 Using the Debugging Cursor
You can place the cursor before or after the execution of a line. The debugger highlights half a cursor position before or after the line.
Figure 8-1 shows a cursor position before the execution of a line:
Figure 8-1 Cursor Positioned Before a Step
Description of ''Figure 8-1 Cursor Positioned Before a Step''
8.5.1 Debug Actions
You can perform debug actions for a selected cursor position.
8.5.1.1 Step Into
The Step Into action steps to the beginning of the first child node of the currently selected node. If the currently selected node does not have a child, this is disabled.
The Step Into action works for all things including steps and tasks.
8.5.1.2 Pause
The Pause action suspends the current execution. When the execution is paused, you can modify the code of the tasks that are yet to be executed, and that modified code is taken up when you resume the execution.
The execution can be continued by stepping through the steps/tasks, or by resuming execution.
8.5.1.3 Resume
The Resume action resume execution at the current cursor and continues until the session is finished or a breakpoint is reached.
8.5.1.4 Run to Task End
The Run to Task End action runs to the end of the currently selected task. If the task has children, execute all children until the end of the task is reached.
This action is disabled if the cursor is not at the beginning of a task.
8.5.1.5 Run to Next Task
The Run to Next Task action runs to the beginning of the next task. If the cursor is at the last task in a list of tasks, it goes to the end of the parent task.
8.5.2 Multiple Cursors
You can use multiple cursors for in-session parallelism.
8.5.2.1 Special Behavior
A parallel container task opens a separate cursor for each child task, and a cursor that remains on the container task until the last child task has finished. Each child cursor can be used independently to step through tasks, use breakpoints, or view data or variables. The child cursor disappears when the child task is finished. Performing the resume command on a child cursor only progresses to the end of the child task.
8.5.3 Using Breakpoints
You can set breakpoints on blueprint steps and tasks to suspend execution for debugging purposes.
8.5.3.1 About the Debug Breakpoints Window
Use Debug Breakpoints to view the list of all breakpoints.
8.5.3.2 About Design vs. Runtime Breakpoints
There are two lists of breakpoints, runtime breakpoints, and design breakpoints.
-
Runtime breakpoints can be added in the blueprint tab of a Session Editor. Runtime breakpoints on a blueprint are used across sessions that are started from the same blueprint. A scenario execution will reuse a blueprint as long as the scenario remains unchanged.
-
Design breakpoints are defined in a design artifact such as package or procedure. When executing, a design breakpoint generates a runtime breakpoint in the blueprint it is associated with. You can add design breakpoints in the package editor.
8.5.3.3 Placing Breakpoints
To add a breakpoint:
-
Select Run > Breakpoint > Add Breakpoint.
-
A red dot is placed in the blueprint to represent the breakpoint.
-
Start or resume the execution.
-
When the executions suspends at the breakpoint, inspect the following:
-
debugging data. See "Debugging Variables".
-
variable values. See "Debugging Variables".
-
debugging session threads. See "Debugging Threads".
-
8.5.3.4 Editing Breakpoints
To edit a breakpoint:
-
Select Run > Breakpoint > Edit Breakpoint.
-
The Breakpoint Properties window appears.
-
Set the following properties.
-
Enabled: checked if the breakpoint is enabled.
-
if checked, the breakpoint is active and suspends execution.
-
if unchecked, the breakpoint is ignored during execution.
-
-
Suspend after executing the task:
-
if checked, the breakpoint suspends after executing the task or step.
-
if unchecked, the breakpoint suspends before executing the task or step.
-
-
Pass count: the number of times the breakpoint has to be passed before suspending execution; 0 suspends the execution on the initial pass, 1 passes the breakpoint once before suspending execution.
-
-
Click OK.
8.5.3.5 Removing Breakpoints
To remove a single breakpoint:
-
Right-click on the step or task and select Remove Breakpoint.
To remove all breakpoints (available only from the breakpoint window):
-
Select Run > Breakpoint > Remove All.
8.5.3.6 Enabling and Disabling Breakpoints
To enable or disable a single breakpoint, select:
-
Run > Breakpoint > Enable, or,
-
Run > Breakpoint > Disable.
To enable or disable all breakpoints (available only from the breakpoint window), select:
-
Run > Breakpoint > Enable All, or,
-
Run > Breakpoint > Disable All.
8.5.4 Debugging Data
Use the Debug Data tab to query data in the context of the current debugger task.
The data window has two tabs, Source Task Data and Target Task Data, to query the data servers associated with the source and the target for the current task. The Get Data command in the main toolbar inserts the SQL code of the current task into both Source Task Data and Target Task Data fields. The window provides a field to enter a SQL command and execute it by clicking the Run SQL Code button.
SQL commands use the transaction context of the current session, uncommitted data can be queried. If there are multiple tasks at debug execution in the session, the commands use the context of the task synced to the data window.
8.5.4.1 Get Data
Get Data inserts the SQL code of the currently selected task into the SQL command field of the Debug Data window. Both the Source Task Data and Target Task Data windows are populated.
The Get Data command associates with the original cursor line; if you keep stepping the data window remains attached to the original cursor line. You must press Get Data again to go to the new current cursor line.
8.5.4.1.1 Source Task Data
Typically, the task code for Source command contains a Select query to retrieve data from source. By default, this query is displayed in the Source Task Data field. You must review and modify the query before executing, as the content may be inappropriate to execute unchanged.
8.5.4.1.2 Target Task Data
The Target Task Data typically contains a DML operation such as Insert or Update. Oracle Data Integrator attempts to parse the target SQL to identify the target table name and provide a simple query, such as:
select * from <parsedTargetTableName>
If Oracle Data Integrator is unable to parse the target SQL to identify the target table name, a suggested query appears, such as:
select * from <SpecifyTargetTableName>
You must review and modify the query before executing, as the content may be inappropriate to execute unchanged.
8.5.4.2 Run SQL Code
You are required to execute Get Data before doing a Run SQL Code. You can run queries to view or select data, but you cannot not apply changes to the data.
8.5.4.2.1 Editing SQL Code
To edit SQL code and query data:
-
Select the Debug Data tab in a session.
-
Select Get Data to insert the SQL code of the current task into the Source Task Data and Target Task Data fields.
-
Edit the SQL command. You can use a
selectstatement to query the data on the target uncommitted transaction. -
Click Run SQL Code.
8.5.5 Debugging Variables
Use the Debug Variables tab to view all the variables used in the current session, and see how a variable may change as you step through the steps and tasks. You can change the value of a variable to affect the execution of the session.
You can view the following information for each variable:
| Properties | Description |
|---|---|
| Name | Name of the variable. |
| Value | Value of the variable. Can be modified to change execution. |
| Type | Type of the variable. |
8.5.5.1 Modifying Variables
To modify a variable:
-
Set breakpoints, if required. See "Using Breakpoints".
-
Position the cursor in the blueprint.
-
In the Debug Variables tab, select the variable whose value you want to modify.
-
Start or resume the execution of the session.
8.5.6 Debugging Threads
Use the Debug Threads tab to see all threads for the connected Session Editor in focus. The icon of the thread shows whether the thread is suspended or executing.
8.6 Managing Debugging Sessions
You can see a list of all active debug sessions in the Debug Session window by selecting Window > Debugger > Debug Sessions.
From the Debug Sessions window, you can connect or disconnect the listed sessions.
| Properties | Description |
|---|---|
| Agent | Agent executing the session. |
| Session Number | ID of the session. |
| Session Name | Name of the session. |
| Session Connected | Shows whether the session is connected or not connected to the debugger client. |
8.6.1 Stop Normal and Stop Immediate
You can disconnect a session normally or immediately:
-
In the Debug Sessions window, right-click a session in the list and select Disconnect Debug Session.
The session becomes active in the Studio.
-
Select the Disconnect button in the upper left of the session window, and choose:
-
Stop Normal: The session is stopped once the current task is finished.
-
Stop Immediate: The current task is immediately interrupted and the session is stopped. This mode allows to stop long-running tasks, as for example long SQL statements before they complete.
-
-
Confirm the disconnection by clicking OK.
-
When the session is stopped, you see the message 'Session debugging completed'. The session is removed from the Debug Sessions list.
See "Stopping a Session".
8.6.2 Restart Execution
In the session window, you can restart a stopped session.
To restart a session:
-
In the upper left of the session window, select Restart Execution.
The Restart Execution window appears.
-
To select the agent to execute the session, select one of the following options:
-
Use the Previous Agent: <agent name> to use the agent that was used to execute a previous session.
-
Choose another Agent: to select the agent that you want to use to execute the session. Select Internal to use the ODI Studio built-in agent.
-
-
Select the Log Level. Log level 6 has the same behavior as log level 5, but with the addition of variable and sequence tracking.
-
Click OK to restart the indicated session and to close the dialog.
You see an informational message, 'Session Launched', and the session is added to the Debug Sessions list.
To restart a failed session in debug mode:
-
In the navigator tree, select the failed session.
-
Right-click and select Debug.
-
In the Debug window, configure options described in "Debug Session Options".
-
Click OK.
An information message indicates that the session has restarted.