B Configuring Single Sign On with Oracle Access Manager (OAM)
When EDQ is integrated with Oracle Access Manager, a user can login on a common access page and have automatic access to EDQ applications and the web console without additional Logins (assuming or course that the user has the required EDQ permissions). If there are multiple EDQ installations using the same OAM configuration, the login will work for each.
This section covers the configuration steps to integrate EDQ with OAM. It does not cover installation and basic configuration or OAM or installation of the Web Tier front end (OHS). This appendix contains the following sections:
B.1 Prerequisites
The following are the prerequisites for installing OAM:
-
OAM must be configured with an Authentication Scheme using an identity store supported by WebLogic (typically LDAP - Active Directory or Oracle Internet Directory).
-
WebLogic must be configured to authenticate EDQ using the same identity store. See Chapter 4, "Integrating External User Management (LDAP) using WebLogic and OPSS". This should be configured and tested with EDQ before proceeding with the OAM integration steps.
-
A web server front end (OHS or Apache) must be installed and configured with Webgate software and the WebLogic plugin (mod_wl_ohs). These are bundled with OHS 12 releases.
B.2 OAM configuration
To configure OAM, follow the steps below:
-
Create a Webgate in OAM using the authentication schema which refers to the identity store configured in WebLogic.
Create these HTTP resources in the Webgate:
-
Copy the Webgate artefacts to your OHS installation and place in the webgate/config directory.
B.3 WebLogic plugin configuration
Ensure that the WebLogic plugin (mod_wl_ohs) is configured in the web server front end. Add this entry to the plugin configuration file (normally mod_wl_ohs.conf):
<Location /edq>
  SetHandler weblogic-handler
  WebLogicPort managed server port
  WebLogicHost hostname
</Location>
If you are using a WebLogic cluster, replace the host and port settings with a cluster definition:
WebLogicCluster host1:port1, host2:port2, ...
Ensure that the WebLogic Plug-In enabled option is set for the EDQ servers. This can be done at the domain, cluster, server template or server level. For the domain the option is present in the Configuration/Web Applications tab. For the other items the option is present in the Advanced area of the General Configuration tab.
B.4 WebLogic Configuration
To configure WebLogic, follow the steps below:
-
Login to the Administration Console and navigate to Security Realms/myrealm.
-
Click the Providers tab.
-
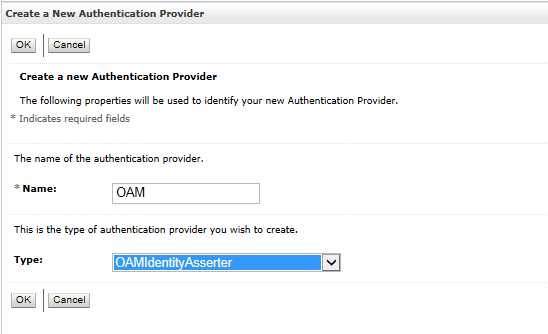
Click New to add a new provider.
-
Enter a name, for example, OAM and select the OAMIdentityAsserter.
-
Click OK.
The new, unconfigured provider is added to the bottom of the list.
Note:
There is no need to restart the Administration Server at this point. -
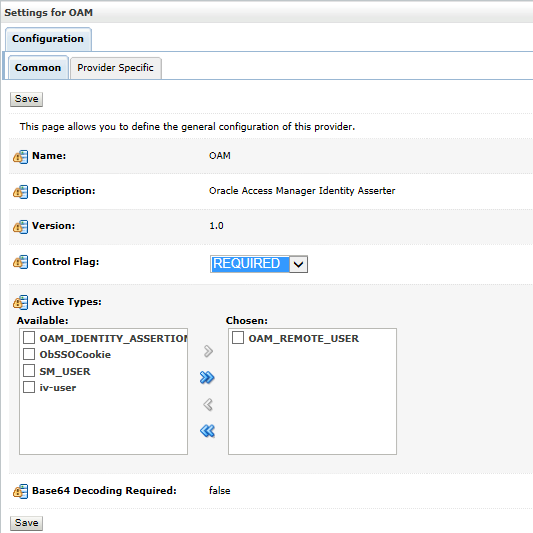
Click on the new provider. On the Configuration screen change the control flag to REQUIRED.
-
Click Save and then select the Provider Specific tab.
Enter configuration information for OAM. Also, where OAM is configured without Webgate security, just enter the Access Gate Name and Primary Access Server.
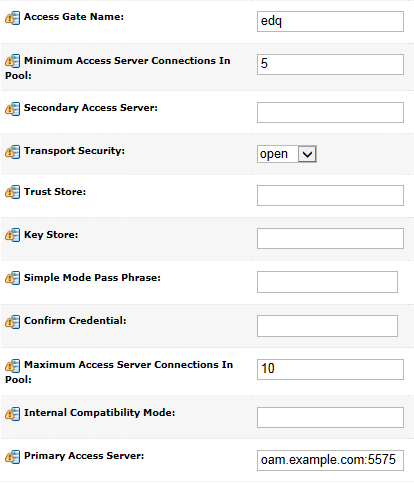
This information for this tab will be provided by the OAM administrator.
-
Click Save and return to the Providers list.
Use the Reorder button to move the OAM provider to the top of the list.
-
Restart the Administration Server and EDQ managed servers. OAM integration is now complete.