2 How To...
This chapter provides information on how to perform certain key tasks in EDQ. These are most useful when you already understand the basics of the product.
This chapter includes the following sections:
2.1 Execution Options
EDQ can execute the following types of task, either interactively from the GUI (by right-clicking on an object in the Project Browser, and selecting Run), or as part of a scheduled Job.
The tasks have different execution options. Click on the task below for more information:
-
External Tasks (such as File Downloads, or External Executables)
-
Exports (of data)
In addition, when setting up a Job it is possible to set Triggers to run before or after Phase execution.
When setting up a Job, tasks may be divided into several Phases in order to control the order of processing, and to use conditional execution if you want to vary the execution of a job according to the success or failure of tasks within it.
2.1.1 Snapshots
When a Snapshot is configured to run as part of a job, there is a single Enabled? option, which is set by default.
Disabling the option allows you to retain a job definition but to disable the refresh of the snapshot temporarily - for example because the snapshot has already been run and you want to re-run later tasks in the job only.
2.1.2 Processes
There are a variety of different options available when running a process, either as part of a job, or using the Quick Run option and the Process Execution Preferences:
-
Readers (options for which records to process)
-
Process (options for how the process will write its results)
-
Run Modes (options for real time processes)
-
Writers (options for how to write records from the process)
2.1.2.1 Readers
For each Reader in a process, the following option is available:
The Sample option allows you to specify job-specific sampling options. For example, you might have a process that normally runs on millions of records, but you might want to set up a specific job where it will only process some specific records that you want to check, such as for testing purposes.
Specify the required sampling using the option under Sampling, and enable it using the Sample option.
The sampling options available will depend on how the Reader is connected.
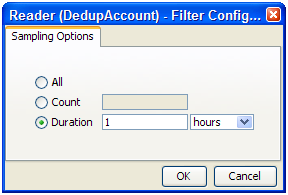
For Readers that are connected to real time providers, you can limit the process so that it will finish after a specified number of records using the Count option, or you can run the process for a limited period of time using the Duration option. For example, to run a real time monitoring process for a period of 1 hour only:
For Readers that are connected to staged data configurations, you can limit the process so that it runs only on a sample of the defined record set, using the same sampling and filtering options that are available when configuring a Snapshot. For example, to run a process so that it only processes the first 1000 records from a data source:
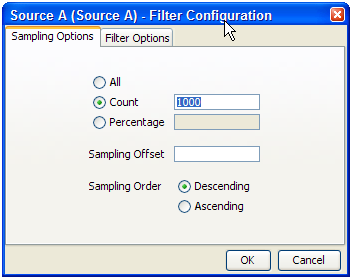
The Sampling Options fields are as follows:
-
All - Sample all records.
-
Count - Sample n records. This will either be the first n records or last n records, depending on the Sampling Order selected.
-
Percentage - Sample n% of the total number of records.
-
Sampling Offset - The number of records after which the sampling should be performed.
-
Sampling Order - Descending (from first record) or Ascending (from last).
Note:
If a Sampling Offset of, for example, 1800 is specified for a record set of 2000, only 200 records can be sampled regardless of the values specified in the Count or Percentage fields.
2.1.2.2 Process
The following options are available when running a process, either as part of the Process Execution Preferences, or when running the process as part of a job.
-
Use Intelligent Execution?
Intelligent Execution means that any processors in the process which have up-to-date results based on the current configuration of the process will not re-generate their results. Processors that do not have up-to-date results are marked with the rerun marker. For more information, see the
Processor Statestopic in Enterprise Data Quality Online Help. Intelligent Execution is selected by default. Note that if you choose to sample or filter records in the Reader in a process, all processors will re-execute regardless of the Intelligent Execution setting, as the process will be running on a different set of records. -
Enable Sort/Filter in Match processors?
This option means that the specified Sort/Filter enablement settings on any match processors in the process (accessed via the Advanced Options on each match processor) will be performed as part of the process execution. The option is selected by default. When matching large volumes of data, running the Sort/Filter enablement task to allow match results to be reviewed may take a long time, so you may want to defer it by de-selecting this option. For example, if you are exporting matching results externally, you may want to begin exporting the data as soon as the matching process is finished, rather than waiting until the Enable Sort/Filter process has run. You may even want to over-ride the setting altogether if you know that the results of the matching process will not need to be reviewed.
-
Results Drill Down
This option allows you to choose the level of Results Drill Down that you require.
-
All means that drilldowns will be available for all records that are read in to the process. This is only recommended when you are processing small volumes of data (up to a few thousand records), when you want to ensure that you can find and check the processing of any of the records read into the process.
-
Sample is the default option. This is recommended for most normal runs of a process. With this option selected, a sample of records will be made available for every drilldown generated by the process. This ensures that you can explore results as you will always see some records when drilling down, but ensures that excessive amounts of data are not written out by the process.
-
None means that the process will still produce metrics, but drilldowns to the data will be unavailable. This is recommended if you want the process to run as quickly as possible from source to target, for example, when running data cleansing processes that have already been designed and tested.
-
-
Publish to Dashboard?
This option sets whether or not to publish results to the Dashboard. Note that in order to publish results, you first have to enable dashboard publication on one or more audit processors in the process.
2.1.2.3 Run Modes
To support the required Execution Types, EDQ provides three different run modes.
If a process has no readers that are connected to real time providers, it always runs in Normal mode.
If a process has at least one reader that is connected to a real time provider, the mode of execution for a process can be selected from one of the following three options:
In Normal mode, a process runs to completion on a batch of records. The batch of records is defined by the Reader configuration, and any further sampling options that have been set in the process execution preferences or job options.
Prepare mode is required when a process needs to provide a real time response, but can only do so where the non real time parts of the process have already run; that is, the process has been prepared.
Prepare mode is most commonly used in real time reference matching. In this case, the same process will be scheduled to run in different modes in different jobs - the first job will prepare the process for real time response execution by running all the non real time parts of the process, such as creating all the cluster keys on the reference data to be matched against. The second job will run the process as a real time response process (probably in Interval mode).
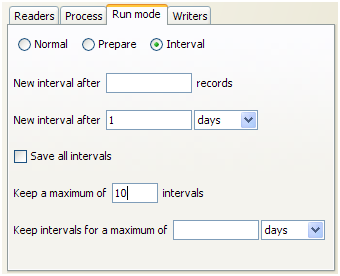
In Interval mode, a process may run for a long period of time, (or even continuously), but will write results from processing in a number of intervals. An interval is completed, and a new one started, when either a record or time threshold is reached. If both a record and a time threshold are specified, then a new interval will be started when either of the thresholds is reached.
As Interval mode processes may run for long periods of time, it is important to be able to configure how many intervals of results to keep. This can be defined either by the number of intervals, or by a period of time.
For example, the following options might be set for a real time response process that runs on a continuous basis, starting a new interval every day:
Browsing Results from processing in Interval mode
When a process is running in Interval mode, you can browse the results of the completed intervals (as long as they are not too old according to the specified options for which intervals to keep).
The Results Browser presents a simple drop-down selection box showing the start and end date and time of each interval. By default, the last completed interval is shown. Select the interval, and browse results:

If you have the process open when a new set of results becomes available, you will be notified in the status bar:
You can then select these new results using the drop-down selection box.
2.1.2.4 Writers
For each Writer in a process, the following options are available:
-
Write Data?
This option sets whether or not the writer will 'run'; that is, for writers that write to stage data, de-selecting the option will mean that no staged data will be written, and for writers that write to real time consumers, de-selecting the option will mean that no real time response will be written.
This is useful in two cases:
-
You want to stream data directly to an export target, rather than stage the written data in the repository, so the writer is used only to select the attributes to write. In this case, you should de-select the Write Data option and add your export task to the job definition after the process.
-
You want to disable the writer temporarily, for example, if you are switching a process from real time execution to batch execution for testing purposes, you might temporarily disable the writer that issues the real time response.
-
-
Enable Sort/Filter?
This option sets whether or not to enable sorting and filtering of the data written out by a Staged Data writer. Typically, the staged data written by a writer will only require sorting and filtering to be enabled if it is to be read in by another process where users might want to sort and filter the results, or if you want to be able to sort and filter the results of the writer itself.
The option has no effect on writers that are connected to real time consumers.
2.1.3 External Tasks
Any External Tasks (File Downloads, or External Executables) that are configured in a project can be added to a Job in the same project.
When an External Task is configured to run as part of a job, there is a single Enabled? option.
Enabling or Disabling the Enable export option allows you to retain a job definition but to enable or disable the export of data temporarily.
2.1.4 Exports
When an Export is configured to run as part of a job, the export may be enabled or disabled (allowing you to retain a Job definition but to enable or disable the export of data temporarily), and you can specify how you want to write data to the target Data Store, from the following options:
Delete current data and insert (default)
EDQ deletes all the current data in the target table or file and inserts the in-scope data in the export. For example, if it is writing to an external database it will truncate the table and insert the data, or if it is writing to a file it will recreate the file.
EDQ does not delete any data from the target table or file, but adds the in-scope data in the export. When appending to a UTF-16 file, use the UTF-16LE or UTF-16-BE character set to prevent a byte order marker from being written at the start of the new data.
Replace records using primary key
EDQ deletes any records in the target table that also exist in the in-scope data for the export (determined by matching primary keys) and then inserts the in-scope data.
Note:
- When an Export is run as a standalone task in Director (by right-clicking on the Export and selecting Run), it always runs in Delete current data and insert mode.
-
Delete current data and insert and Replace records using primary key modes perform Delete then Insert operations, not Update. It is possible that referential integrity rules in the target database will prevent the deletion of the records, therefore causing the Export task to fail. Therefore, in order to perform an Update operation instead, Oracle recommends the use of a dedicated data integration product, such as Oracle Data Integrator.
2.1.5 Results Book Exports
When a Results Book Export is configured to run as part of a job, there is a single option to enable or disable the export, allowing you to retain the same configuration but temporarily disable the export if required.
2.1.6 Triggers
Triggers are specific configured actions that EDQ can take at certain points in processing.
-
Before Phase execution in a Job
-
After Phase execution in a Job
For more information, see Using Triggers in Administering Oracle Enterprise Data Quality and the Advanced Options For Match Processors topic in Enterprise Data Quality Online Help.
2.2 Creating and Managing Jobs
This topic covers:
Note:
- It is not possible to edit or delete a Job that is currently running. Always check the Job status before attempting to change it.
-
Snapshot and Export Tasks in Jobs must use server-side data stores, not client-side data stores.
2.2.1 Creating a Job
-
Expand the required project in the Project Browser.
-
Right-click the Jobs node of the project and select New Job. The New Job dialog is displayed.
-
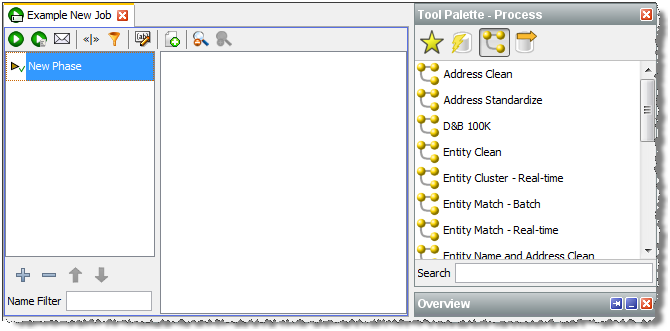
Enter a Name and (if required) Description, then click Finish. The Job is created and displayed in the Job Canvas:
-
Right-click New Phase in the Phase list, and select Configure.
-
Enter a name for the phase and select other options as required:
Field Type Description Enabled? Checkbox To enable or disable the Phase. Default state is checked (enabled). Note: The status of a Phase can be overridden by a Run Profile or with the 'runopsjob' command on the EDQ Command Line Interface.
Execution Condition Drop-down list To make the execution of the Phase conditional on the success or failure of previous Phases. The options are:
-
Execute on failure: the phase will only execute if the previous phase did not complete successfully.
-
Execute on success (default): the Phase will only execute if all previous Phases have executed successfully.
-
Execute regardless: the Phase will execute regardless of whether previous Phases have succeeded or failed.
Note: If an error occurs in any phase, the error will stop all 'Execute on success' phases unless an 'Execute regardless' or 'Execute on failure' phase runs with the 'Clear Error?' button checked runs first.
Clear Error? Checkbox To clear or leave unchanged an error state in the Job. If a job phase has been in error, an error flag is applied. Subsequent phases set to Execute on success will not run unless the error flag is cleared using this option. The default state is unchecked.
Triggers N/A To configure Triggers to be activated before or after the Phase has run. For more information, see Using Job Triggers. -
-
Click OK to save the settings.
-
Click and drag Tasks from the Tool Palette, configuring and linking them as required.
-
To add more Phases, click the Add Job Phase button at the bottom of the Phase area. Phase order can be changed by selecting a Phase and moving it up and down the list using the Move Phase buttons. To delete a Phase, click the Delete Phase button.
-
When the Job is configured as required, click File > Save.
2.2.2 Editing a Job
-
To edit a Job, locate it within the Project Browser and either double click it or right-click and select Edit....
-
The Job is displayed in the Job Canvas. Edit the Phases and/or Tasks as required.
-
Click File >Save.
2.2.3 Deleting a Job
Deleting a job does not delete the processes that the Job contained, and nor does it delete any of the results associated with it. However, if any of the processes contained in the Job were last run by the Job, the last set of results for that process will be deleted. This will result in the processors within that process being marked as out of date.
To delete a Job, either:
-
select it in the Project Browser and press the Delete key; or
-
right-click the job and select Delete.
Remember that it is not possible to delete a Job that is currently running.
2.2.4 Job Canvas Right-Click Menu
There are further options available when creating or editing a job, accessible via the right-click menu.
Select a task on the canvas and right click to display the menu. The options are as follows:
-
Enabled - If the selected task is enabled, there will be a checkmark next to this option. Select or deselected as required.
-
Configure Task... - This option displays the Configure Task dialog. For further details, see the Running Jobs Using Data Interfaces topic.
-
Delete - Deletes the selected task.
-
Open - Opens the selected task in the Process Canvas.
-
Cut, Copy, Paste - These options are simply used to cut, copy and paste tasks as required on the Job Canvas.
2.2.5 Editing and Configuring Job Phases
Phases are controlled using a right-click menu. The menu is used to rename, delete, disable, configure, copy, and paste Phases:
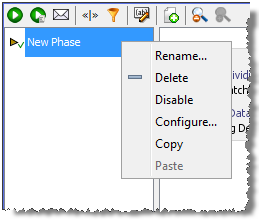
The using the Add, Delete, Up, and Down controls at the bottom of the Phase list:
For more details on editing and configuring phases see Creating a Job above, and also the Using Job Triggers topic.
For more information, see Understanding Enterprise Data Quality and Enterprise Data Quality Online Help at http://docs.oracle.com/middleware/12212/edq/index.html
2.3 Using Job Triggers
Job Triggers are used to start or interrupt other Jobs. Two types of triggers are available by default:
-
Run Job Triggers: used to start a Job.
-
Shutdown Web Services Triggers: used to shut down real-time processes.
Further Triggers can be configured by an Administrator, such as sending a JMS message or calling a Web Service. They are configured using the Phase Configuration dialog, an example of which is provided below:
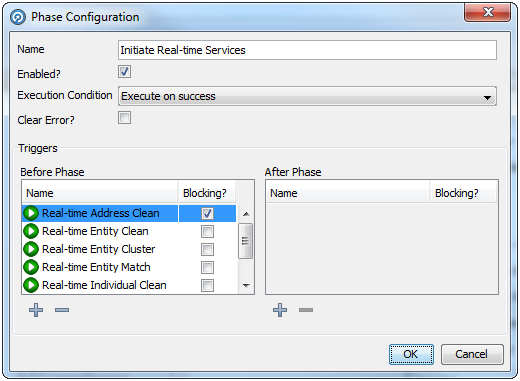
Triggers can be set before or after a Phase. A Before Trigger is indicated by a blue arrow above the Phase name, and an After Trigger is indicated by a red arrow below it. For example, the following image shows a Phase with Before and After Triggers:
Triggers can also be specified as Blocking Triggers. A Blocking Trigger prevents the subsequent Trigger or Phase beginning until the task it triggers is complete.
2.3.1 Configuring Triggers
-
Right-click the required Phase and select Configure. The Phase Configuration dialog is displayed.
-
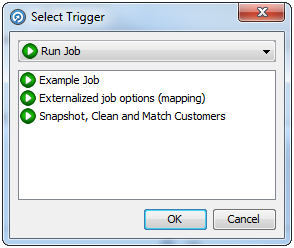
In the Triggers area, click the Add Trigger button under the Before Phase or After Phase list, as required. The Select Trigger dialog is displayed:
-
Select the Trigger type in the drop-down field.
-
Select the specific Trigger in the list area.
-
Click OK.
-
If required, select the Blocking? checkbox next to the Trigger.
-
Set further Triggers as required.
-
When all the Triggers have been set, click OK.
2.3.2 Deleting a Trigger from a Job
-
Right-click the required Phase and select Configure.
-
In the Phase Configuration dialog, find the Trigger selected for deletion and click it.
-
Click the Delete Trigger button under the list of the selected Trigger. The Trigger is deleted.
-
Click OK to save changes. However, if a Trigger is deleted in error, click Cancel instead.
For more information, see Understanding Enterprise Data Quality and Enterprise Data Quality Online Help at http://docs.oracle.com/middleware/12212/edq/index.html
2.4 Job Notifications
A Job may be configured to send a notification email to a user, a number of specific users, or a whole group of users, each time the Job completes execution. This allows EDQ users to monitor the status of scheduled jobs without having to log on to EDQ.
Emails will also only be sent if valid SMTP server details have been specified in the mail.properties file in the notification/smtp subfolder of the oedq_local_home directory. The same SMTP server details are also used for Issue notifications. For more information, see Administering Enterprise Data Quality Server.
The default notification template - default.txt - is found in the EDQ config/notification/jobs directory. To configure additional templates, copy this file and paste it into the same directory, renaming it and modifying the content as required. The name of the new file will appear in the Notification template field of the Email Notification Configuration dialog.
2.4.1 Configuring a Job Notification
-
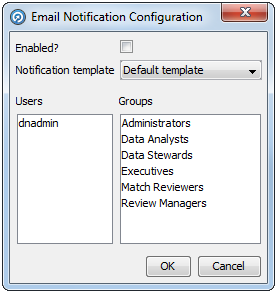
Open the Job and click the Configure Notification button on the Job Canvas toolbar. The Email Notification Configuration dialog is displayed.
-
Check the Enabled? box.
-
Select the Notification template from the drop-down list.
-
Click to select the Users and Groups to send the notification to. To select more than one User and/or Group, hold down the CTRL key when clicking.
-
Click OK.
Note:
Only users with valid email addresses will receive emails. For users that are managed internally to EDQ, a valid email address must be configured in User Administration. For users that are managed externally to EDQ, for example in WebLogic or an external LDAP system, a valid 'mail' attribute must be configured.2.4.2 Default Notification Content
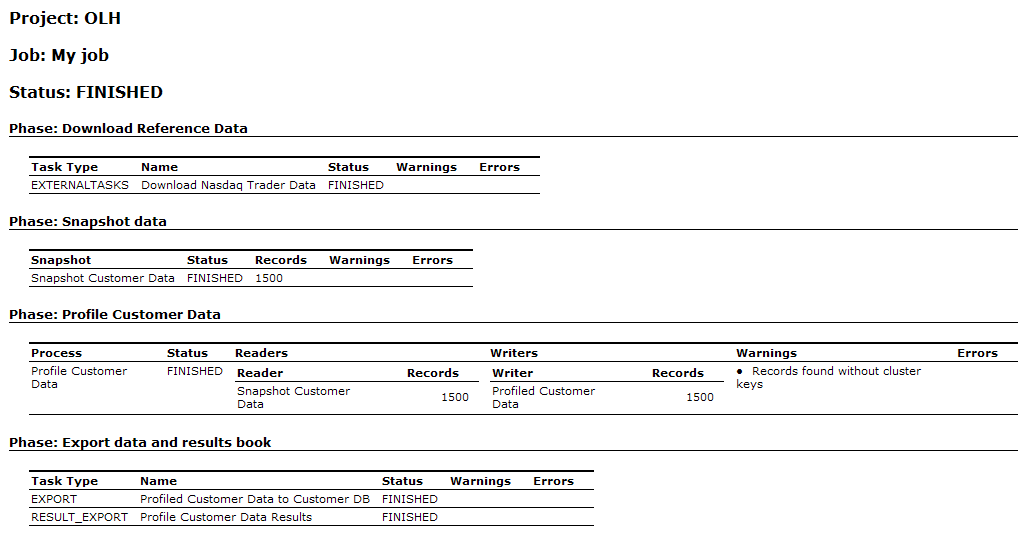
The default notification contains summary information of all tasks performed in each phase of a job, as follows:
The notification displays the status of the snapshot task in the execution of the job. The possible statuses are:
-
STREAMED - the snapshot was optimized for performance by running the data directly into a process and staging as the process ran
-
FINISHED - the snapshot ran to completion as an independent task
-
CANCELLED - the job was canceled by a user during the snapshot task
-
WARNING - the snapshot ran to completion but one or more warnings were generated (for example, the snapshot had to truncate data from the data source)
-
ERROR - the snapshot failed to complete due to an error
Where a snapshot task has a FINISHED status, the number of records snapshotted is displayed.
Details of any warnings and errors encountered during processing are included.
The notification displays the status of the process task in the execution of the job. The possible statuses are:
-
FINISHED - the process ran to completion
-
CANCELLED - the job was canceled by a user during the process task
-
WARNING - the process ran to completion but one or more warnings were generated
-
ERROR - the process failed to complete due to an error
Record counts are included for each Reader and Writer in a process task as a check that the process ran with the correct number of records. Details of any warnings and errors encountered during processing are included. Note that this may include warnings or errors generated by a Generate Warning processor.
The notification displays the status of the export task in the execution of the job. The possible statuses are:
-
STREAMED - the export was optimized for performance by running the data directly out of a process and writing it to the data target
-
FINISHED - the export ran to completion as an independent task
-
CANCELLED - the job was canceled by a user during the export task
-
ERROR - the export failed to complete due to an error
Where an export task has a FINISHED status, the number of records exported is displayed.
Details of any errors encountered during processing are included.
The notification displays the status of the results book export task in the execution of the job. The possible statuses are:
-
FINISHED - the results book export ran to completion
-
CANCELLED - the job was canceled by a user during the results book export task
-
ERROR - the results book export failed to complete due to an error
Details of any errors encountered during processing are included.
The notification displays the status of the external task in the execution of the job. The possible statuses are:
-
FINISHED - the external task ran to completion
-
CANCELLED - the job was canceled by a user during the external task
-
ERROR - the external task failed to complete due to an error
Details of any errors encountered during processing are included.
The screenshot below shows an example notification email using the default email template:
For more information, see Understanding Enterprise Data Quality and Enterprise Data Quality Online Help at http://docs.oracle.com/middleware/12212/edq/index.html
2.5 Optimizing Job Performance
This topic provides a guide to the various performance tuning options in EDQ that can be used to optimize job performance.
2.5.1 General Performance Options
There are four general techniques, applicable to all types of process, that are available to maximize performance in EDQ.
Click on the headings below for more information on each technique:
2.5.1.1 Data streaming
The option to stream data in EDQ allows you to bypass the task of staging data in the EDQ repository database when reading or writing data.
A fully streamed process or job will act as a pipe, reading records directly from a data store and writing records to a data target, without writing any records to the EDQ repository.
When running a process, it may be appropriate to bypass running your snapshot altogether and stream data through the snapshot into the process directly from a data store. For example, when designing a process, you may use a snapshot of the data, but when the process is deployed in production, you may want to avoid the step of copying data into the repository, as you always want to use the latest set of records in your source system, and because you know you will not require users to drill down to results.
To stream data into a process (and therefore bypass the process of staging the data in the EDQ repository), create a job and add both the snapshot and the process as tasks. Then click on the staged data table that sits between the snapshot task and the process and disable it. The process will now stream the data directly from the source system. Note that any selection parameters configured as part of the snapshot will still apply.
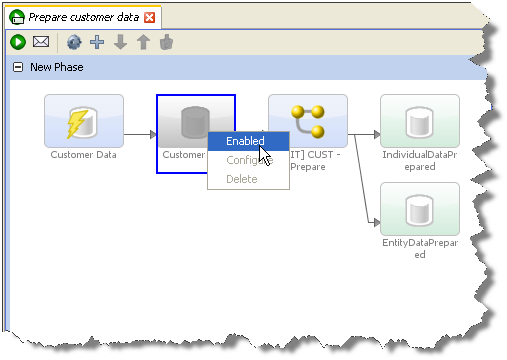
Note that any record selection criteria (snapshot filtering or sampling options) will still apply when streaming data. Note also that the streaming option will not be available if the Data Store of the Snapshot is Client-side, as the server cannot access it.
Streaming a snapshot is not always the 'quickest' or best option, however. If you need to run several processes on the same set of data, it may be more efficient to snapshot the data as the first task of a job, and then run the dependent processes. If the source system for the snapshot is live, it is usually best to run the snapshot as a separate task (in its own phase) so that the impact on the source system is minimized.
It is also possible to stream data when writing data to a data store. The performance gain here is less, as when an export of a set of staged data is configured to run in the same job after the process that writes the staged data table, the export will always write records as they are processed (whether or not records are also written to the staged data table in the repository).
However, if you know you do not need to write the data to the repository (you only need to write the data externally), you can bypass this step, and save a little on performance. This may be the case for deployed data cleansing processes, or if you are writing to an external staging database that is shared between applications, for example when running a data quality job as part of a larger ETL process, using an external staging database to pass the data between EDQ and the ETL tool.
To stream an export, create a job and add the process that writes the data as a task, and the export that writes the data externally as another task. Then disable the staged data that sits between the process and the export task. This will mean that the process will write its output data directly to the external target.
Note:
It is also possible to stream data to an export target by configuring a Writer in a process to write to a Data Interface, and configuring an Export Task that maps from the Data Interface to an Export target.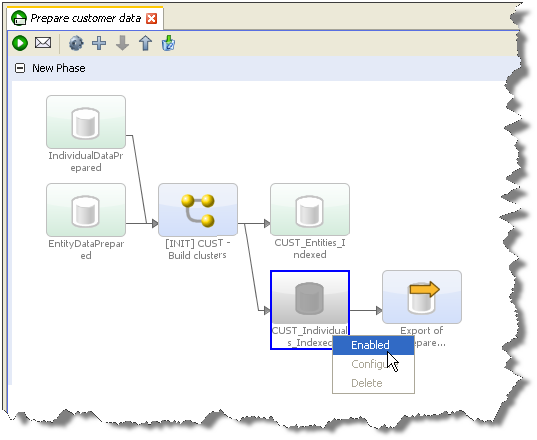
Note that Exports to Client-side data stores are not available as tasks to run as part of a job. They must be run manually from the EDQ Director Client as they use the client to connect to the data store.
2.5.1.2 Minimized results writing
Minimizing results writing is a different type of 'streaming', concerned with the amount of Results Drilldown data that EDQ writes to the repository from processes.
Each process in EDQ runs in one of three Results Drilldown modes:
-
All (all records in the process are written in the drilldowns)
-
Sample (a sample of records are written at each level of drilldown)
-
None (metrics only are written - no drilldowns will be available)
All mode should be used only on small volumes of data, to ensure that all records can be fully tracked in the process at every processing point. This mode is useful when processing small data sets, or when debugging a complex process using a small number of records.
Sample mode is suitable for high volumes of data, ensuring that a limited number of records is written for each drilldown. The System Administrator can set the number of records to write per drilldown; by default this is 1000 records. Sample mode is the default.
None mode should be used to maximize the performance of tested processes that are running in production, and where users will not need to interact with results.
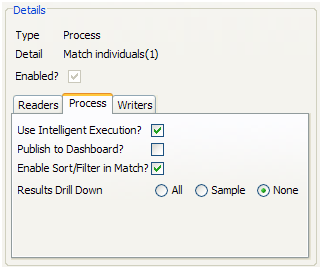
To change the Results Drilldown mode when executing a process, use the Process Execution Preferences screen, or create a Job and click on the process task to configure it.
For example, the following process is changed to write no drilldown results when it is deployed in production:
2.5.1.3 Disabling Sorting and Filtering
When working with large data volumes, it can take a long time to index snapshots and written staged data in order to allow users to sort and filter the data in the Results Browser. In many cases, this sorting and filtering capability will not be needed, or only needed when working with smaller samples of the data.
The system applies intelligent sorting and filtering enablement, where it will enable sorting and filtering when working with smaller data sets, but will disable sorting and filtering for large data sets. However, you can choose to override these settings - for example to achieve maximum throughput when working with a number of small data sets.
When a snapshot is created, the default setting is to 'Use intelligent Sort/Filtering options', so that the system will decide whether or not to enable sorting and filtering based on the size of the snapshot. For more information, see Adding a Snapshot.
However, If you know that no users will need to sort or filter results that are based on a snapshot in the Results Browser, or if you only want to enable sorting or filtering at the point when the user needs to do it, you can disable sorting and filtering on the snapshot when adding or editing it.
To do this, edit the snapshot, and on the third screen (Column Selection), uncheck the option to Use intelligent Sort/Filtering, and leave all columns unchecked in the Sort/Filter column.
Alternatively, if you know that sorting and filtering will only be needed on a sub-selection of the available columns, use the tick boxes to select the relevant columns.
Disabling sorting and filtering means that the total processing time of the snapshot will be less as the additional task to enable sorting and filtering will be skipped.
Note that if a user attempts to sort or filter results based on a column that has not been enabled, the user will be presented with an option to enable it at that point.
Staged Data Sort/Filter options
When staged data is written by a process, the server does not enable sorting or filtering of the data by default. The default setting is therefore maximized for performance.
If you need to enable sorting or filtering on written staged data - for example, because the written staged data is being read by another process which requires interactive data drilldowns - you can enable this by editing the staged data definition, either to apply intelligent sort/filtering options (varying whether or not to enable sorting and filtering based on the size of the staged data table), or to enable it on selected columns by selecting the corresponding Sort/Filter checkboxes.
Match Processor Sort/Filter options
It is possible to set sort/filter enablement options for the outputs of matching. See Matching performance options.
2.5.2 Processor-specific Performance Options
In the case of Parsing and Matching, a large amount of work is performed by an individual processor, as each processor has many stages of processing. In these cases, options are available to optimize performance at the processor level.
Click on the headings below for more information on how to maximize performance when parsing or matching data:
2.5.2.1 Parsing performance options
When maximum performance is required from a Parse processor, it should be run in Parse mode, rather than Parse and Profile mode. This is particularly true for any Parse processors with a complete configuration, where you do not need to investigate the classified and unclassified tokens in the parsing output.The mode of a parser is set in its Advanced Options.
For even better performance where only metrics and data output are required from a Parse processor, the process that includes the parser may be run with no drilldowns - see Minimized results writing above.
When designing a Parse configuration iteratively, where fast drilldowns are required, it is generally best to work with small volumes of data. When working with large volumes of data, an Oracle results repository will greatly improve drilldown performance.
2.5.2.2 Matching performance options
The following techniques may be used to maximize matching performance:
Matching performance may vary greatly depending on the configuration of the match processor, which in turn depends on the characteristics of the data involved in the matching process. The most important aspect of configuration to get right is the configuration of clustering in a match processor.
In general, there is a balance to be struck between ensuring that as many potential matches as possible are found and ensuring that redundant comparisons (between records that are not likely to match) are not performed. Finding the right balance may involve some trial and error - for example, assessment of the difference in match statistics when clusters are widened (perhaps by using fewer characters of an identifier in the cluster key) or narrowed (perhaps by using more characters of an identifier in a cluster key), or when a cluster is added or removed.
The following two general guidelines may be useful:
-
If you are working with data with a large number of well-populated identifiers, such as customer data with address and other contact details such as email addresses and phone numbers, you should aim for clusters with a maximum size of 20 for every million records, and counter sparseness in some identifiers by using multiple clusters rather than widening a single cluster.
-
If you are working with data with a small number of identifiers, for example, where you can only match individuals or entities based on name and approximate location, wider clusters may be inevitable. In this case, you should aim to standardize, enhance and correct the input data in the identifiers you do have as much as possible so that your clusters can be tight using the data available. For large volumes of data, a small number of clusters may be significantly larger. For example, Oracle Watchlist Screening uses a cluster comparison limit of 7m for some of the clustering methods used when screening names against Sanctions List. In this case, you should still aim for clusters with a maximum size of around 500 records if possible (bearing in mind that every record in the cluster will need to be compared with every other record in the cluster - so for a single cluster of 500 records, there will be 500 x 499 = 249500 comparisons performed).
See the Clustering Concept Guide for more information about how clustering works and how to optimize the configuration for your data.
Disabling Sort/Filter options in Match processors
By default, sorting, filtering and searching are enabled on all match results to ensure that they are available for user review. However, with large data sets, the indexing process required to enable sorting, filtering and searching may be very time-consuming, and in some cases, may not be required.
If you do not require the ability to review the results of matching using the Review Application, and you do not need to be able to sort or filter the outputs of matching in the Results Browser, you should disable sorting and filtering to improve performance. For example, the results of matching may be written and reviewed externally, or matching may be fully automated when deployed in production.
The setting to enable or disable sorting and filtering is available both on the individual match processor level, available from the Advanced Options of the processor (for details, see Sort/Filter options for match processors in the Advanced Options For Match Processors topic in Enterprise Data Quality Online Help), and as a process or job level override.
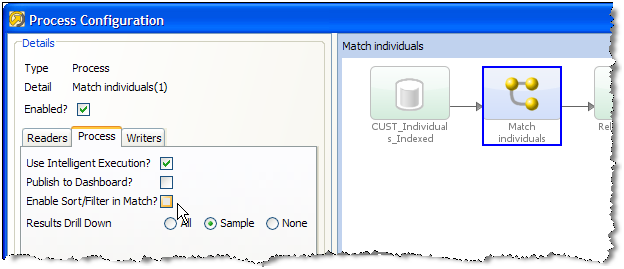
To override the individual settings on all match processors in a process, and disable the sorting, filtering and review of match results, untick the option to Enable Sort/Filter in Match processors in a job configuration, or process execution preferences:
Match processors may write out up to three types of output:
-
Match (or Alert) Groups (records organized into sets of matching records, as determined by the match processor. If the match processor uses Match Review, it will produce Match Groups, whereas if if uses Case Management, it will produce Alert Groups.)
-
Relationships (links between matching records)
-
Merged Output (a merged master record from each set of matching records)
By default, all available output types are written. (Merged Output cannot be written from a Link processor.)
However, not all the available outputs may be needed in your process. For example you should disable Merged Output if you only want to identify sets of matching records.
Note that disabling any of the outputs will not affect the ability of users to review the results of a match processor.
To disable Match (or Alert) Groups output:
-
Open the match processor on the canvas and open the Match sub-processor.
-
Select the Match (or Alert) Groups tab at the top.
-
Uncheck the option to Generate Match Groups report, or to Generate Alert Groups report.
Or, if you know you only want to output the groups of related or unrelated records, use the other tick boxes on the same part of the screen.
To disable Relationships output:
-
Open the match processor on the canvas and open the Match sub-processor.
-
Select the Relationships tab at the top.
-
Uncheck the option to Generate Relationships report.
Or, if you know you only want to output some of the relationships (such as only Review relationships, or only relationships generated by certain rules), use the other tick boxes on the same part of the screen.
To disable Merged Output:
-
Open the match processor on the canvas and open the Merge sub-processor.
-
Uncheck the option to Generate Merged Output.
Or, if you know you only want to output the merged output records from related records, or only the unrelated records, use the other tick boxes on the same part of the screen.
Batch matching processes require a copy of the data in the EDQ repository in order to compare records efficiently.
As data may be transformed between the Reader and the match processor in a process, and in order to preserve the capability to review match results if a snapshot used in a matching process is refreshed, match processors always generate their own snapshots of data (except from real time inputs) to work from. For large data sets, this can take some time.
Where you want to use the latest source data in a matching process, therefore, it may be advisable to stream the snapshot rather than running it first and then feeding the data into a match processor, which will generate its own internal snapshot (effectively copying the data twice). See Streaming a Snapshot above.
Cache Reference Data for Real-Time Match processes
It is possible to configure Match processors to cache Reference Data on the EDQ server, which in some cases should speed up the Matching process. You can enable caching of Reference Data in a real-time match processor in the Advanced Options of the match processor.
For more information, see Understanding Enterprise Data Quality and Enterprise Data Quality Online Help at http://docs.oracle.com/middleware/12212/edq/index.html
2.6 Publishing to the Dashboard
EDQ can publish the results of Audit processors and the Parse processor to a web-based application (Dashboard), so that data owners, or stakeholders in your data quality project, can monitor data quality as it is checked on a periodic basis.
Results are optionally published on process execution. To set up an audit processor to publish its results when this option is used, you must configure the processor to publish its results.
To do this, use the following procedure:
-
Double-click on the processor on the Canvas to bring up its configuration dialog
-
Select the Dashboard tab (Note: In Parse, this is within the Input sub-processor).
-
Select the option to publish the processor's results.
-
Select the name of the metric as it will be displayed on the Dashboard.
-
Choose how to interpret the processor's results for the Dashboard; that is, whether each result should be interpreted as a Pass, a Warning, or a Failure.
Once your process contains one or more processors that are configured to publish their results to the Dashboard, you can run the publication process as part of process execution.
To publish the results of a process to the Dashboard:
-
From the Toolbar, click the Process Execution Preferences button.
-
On the Process tab, select the option to Publish to Dashboard.
-
Click the Save & Run button to run the process.
When process execution is complete, the configured results will be published to the Dashboard, and can be made available for users to view.
For more information, see Understanding Enterprise Data Quality and Enterprise Data Quality Online Help at http://docs.oracle.com/middleware/12212/edq/index.html
2.7 Packaging
Most objects that are set up in Director can be packaged up into a configuration file, which can be imported into another EDQ server using the Director client application.
This allows you to share work between users on different networks, and provides a way to backup configuration to a file area.
The following objects may be packaged:
-
Whole projects
-
Individual processes
-
Reference Data sets (of all types)
-
Notes
-
Data Stores
-
Staged Data configurations
-
Data Interfaces
-
Export configurations
-
Job Configurations
-
Result Book configurations
-
External Task definitions
-
Web Services
-
Published Processors
Note:
As they are associated with specific server users, issues cannot be exported and imported, nor simply copied between servers using drag-and-drop.2.7.1 Packaging objects
To package an object, select it in the Project Browser, right-click, and select Package...
For example, to package all configuration on a server, select the Server in the tree, or to package all the projects on a server, select the Projects parent node, and select Package in the same way.
You can then save a Director package file (with a .dxi extension) on your file system. The package files are structured files that will contain all of the objects selected for packaging. For example, if you package a project, all its subsidiary objects (data stores, snapshot configurations, data interfaces, processes, reference data, notes, and export configurations) will be contained in the file.
Note:
Match Decisions are packaged with the process containing the match processor to which they are related. Similarly, if a whole process is copied and pasted between projects or servers, its related match decisions will be copied across. If an individual match processor is copied and pasted between processes, however, any Match Decisions that were made on the original process are not considered as part of the configuration of the match processor, and so are not copied across.2.7.2 Filtering and Packaging
It is often useful to be able to package a number of objects - for example to package a single process in a large project and all of the Reference Data it requires in order to run.
There are three ways to apply a filter:
-
To filter objects by their names, use the quick keyword NameFilter option at the bottom of the Project Browser
-
To filter the Project Browser to show a single project (hiding all other projects), right-click on the Project, and select Show Selected Project Only.
-
To filter an object (such as a process or job) to show its related objects, right-click on the object, and select Dependency Filter, and either Items used by selected item (to show other objects that are used by the selected object, such as the Reference Data used by a selected Process) or Items using selected item (to show objects that use the selected object, such as any Jobs that use a selected Process).
Whenever a filter has been applied to the Project Browser, a box is shown just above the Task Window to indicate that a filter is active. For example, the below screenshot shows an indicator that a server that has been filtered to show only the objects used by the 'Parsing Example' process:
You can then package the visible objects by right-clicking on the server and selecting Package... This will only package the visible objects.
To clear the filter, click on the x on the indicator box.
In some cases, you may want to specifically exclude some objects from a filtered view before packaging. For example, you may have created a process reading data from a data interface with a mapping to a snapshot containing some sample data. When you package up the process for reuse on other sets of data, you want to publish the process and its data interface, but exclude the snapshot and the data store. To exclude the snapshot and the data store from the filter, right-click on the snapshot and select Exclude From Filter. The data store will also be excluded as its relationship to the process is via the snapshot. As packaging always packages the visible objects only, the snapshot and the data store will not be included in the package.
2.7.3 Opening a package file, and importing its contents
To open a Director package file, either right-click on an empty area of the Project Browser with no other object selected in the browser, and select Open Package File..., or select Open Package File... from the File menu. Then browse to the .dxi file that you want to open.
The package file is then opened and visible in the Director Project Browser in the same way as projects. The objects in the package file cannot be viewed or modified directly from the file, but you can copy them to the EDQ host server by drag-and-drop, or copy and paste, in the Project Browser.
You can choose to import individual objects from the package, or may import multiple objects by selecting a node in the file and dragging it to the appropriate level in your Projects list. This allows you to merge the entire contents of a project within a package into an existing project, or (for example) to merge in all the reference data sets or processes only.
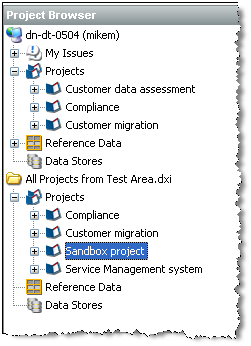
For example, the following screenshot shows an opened package file with a number of projects all exported from a test system. The projects are dragged and dropped into the new server by dragging them from the package file to the server:
Note that when multiple objects are imported from a package file, and there are name conflicts with existing objects in the target location, a conflict resolution screen is shown allowing you to change the name of the object you are importing, ignore the object (and so use the existing object of the same name), or to overwrite the existing object with the one in the package file. You can choose a different action for each object with a name conflict.
If you are importing a single object, and there is a name conflict, you cannot overwrite the existing object and must either cancel the import or change the name of the object you are importing.
Once you have completed copying across all the objects you need from a package file, you can close it, by right-clicking on it, and selecting Close Package File.
Opened package files are automatically disconnected at the end of each client session.
2.7.4 Working with large package files
Some package files may be very large, for example if large volumes of Reference Data are included in the package. When working with large package files, it is quicker to copy the file to the server's landingarea for files and open the DXI file from the server. Copying objects from the package file will then be considerably quicker.
To open a package file in this way, first copy the DXI file to the server landing area. Then, using the Director client, right-click on the server in the Project Browser and select Open Server Package File...
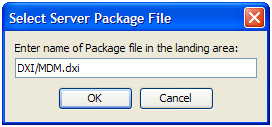
You then need to type in the name of the file into the dialog. If the file is stored in a subfolder of the landingarea, you will need to include this in the name. For example, to open a file called MDM.dxi that is held within a DXI subfolder of the landingarea:
2.7.5 Copying between servers
If you want to copy objects between EDQ servers on the same network, you can do this without packaging objects to file.
To copy objects (such as projects) between two connected EDQ servers, connect to each server, and drag-and-drop the objects from one server to the other:
Note:
To connect to another server, select File menu, New Server... The default port to connect to EDQ using the client is 9002.For more information, see Enterprise Data Quality Online Help. at http://docs.oracle.com/middleware/12212/edq/index.html
2.8 Purging Results
EDQ uses a repository database to store the results and data it generates during processing. All Results data is temporary, in the sense that it can be regenerated using the stored configuration, which is held in a separate database internally.
In order to manage the size of the Results repository database, the results for a given set of staged data (either a snapshot or written staged data), a given process, a given job, or all results for a given project can be purged.
For example, it is possible to purge the results of old projects from the server, while keeping the configuration of the project stored so that its processes can be run again in the future.
Note that the results for a project, process, job, or set of staged data are automatically purged if that project, process, job, or staged data set is deleted. If required, this means that project configurations can be packaged, the package import tested, and then deleted from the server. The configurations can then be restored from the archive at a later date if required.
To purge results for a given snapshot, set of written staged data, process, job, or project:
-
Right-click on the object in the Project Browser. The purge options are displayed.
-
Select the appropriate Purge option.
If there is a lot of data to purge, the task details may be visible in the Task Window.
Note:
- Purging data from Director will not purge the data in the Results window in Server Console. Similarly, purging data in Server Console will not affect the Director Results window. Therefore, if freeing up disc space it may be necessary to purge data from both.
-
The EDQ Purge Results commands only apply to jobs run without a run label (that is, those run from Director or from the Command Line using the runjobs command.
-
The Server Console Purge Results rules only apply to jobs run with a run label (that is, those run in Server Console with an assigned run label, or from the Command Line using the runopsjob command)
-
It is possible to configure rules in Server Console to purge data after a set period of time. See the
Result Purge Rulestopic in Enterprise Data Quality Online Help for further details. These purge rules only apply to Server Console results.
2.8.1 Purging Match Decision Data
Match Decision data is not purged along with the rest of the results data. Match Decisions are preserved as part of the audit trail which documents the way in which the output of matching was handled.
If it is necessary to delete Match Decision data, for example, during the development process, the following method should be used:
-
Open the relevant Match processor.
-
Click Delete Manual Decisions.
-
Click OK to permanently delete all the Match Decision data, or Cancel to return to the main screen.
Note:
The Match Decisions purge takes place immediately. However, it will not be visible in the Match Results until the Match process is re-run. This final stage of the process updates the relationships to reflect the fact that there are no longer any decisions stored against them.For more information, see Understanding Enterprise Data Quality and Enterprise Data Quality Online Help at http://docs.oracle.com/middleware/12212/edq/index.html
2.9 Creating Processors
In addition to the range of data quality processors available in the Processor Library, EDQ allows you to create and share your own processors for specific data quality functions.
There are two ways to create processors:
-
Using an external development environment to write a new processor - see the
Extending EDQtopic in Enterprise Data Quality Online Help for more details -
Using EDQ to create processors - read on in this topic for more details
2.9.1 Creating a processor from a sequence of configured processors
EDQ allows you to create a single processor for a single function using a combination of a number of base (or 'member') processors used in sequence.
Note that the following processors may not be included in a new created processor:
-
Parse
-
Match
-
Group and Merge
-
Merge Data Sets
A single configured processor instance of the above processors may still be published, however, in order to reuse the configuration.
To take a simple example, you may want to construct a reusable Add Gender processor that derives a Gender value for individuals based on Title and Forename attributes. To do this, you have to use a number of member processors. However, when other users use the processor, you only want them to configure a single processor, input Title and Forename attributes (however they are named in the data set), and select two Reference Data sets - one to map Title values to Gender values, and one to map Forename values to Gender values. Finally, you want three output attributes (TitleGender, NameGender and BestGender) from the processor.
To do this, you need to start by configuring the member processors you need (or you may have an existing process from which to create a processor). For example, the screenshot below shows the use of 5 processors to add a Gender attribute, as follows:
-
Derive Gender from Title (Enhance from Map).
-
Split Forename (Make Array from String).
-
Get first Forename (Select Array Element).
-
Derive Gender from Forename (Enhance from Map).
-
Merge to create best Gender (Merge Attributes).

To make these into a processor, select them all on the Canvas, right-click, and select Make Processor.
This immediately creates a single processor on the Canvas and takes you into a processor design view, where you can set up how the single processor will behave.
From the processor design view, you can set up the following aspects of the processor (though note that in many cases you will be able to use the default settings):
2.9.2 Setting Inputs
The inputs required by the processor are calculated automatically from the configuration of the base processors. Note that where many of the base processors use the same configured input attribute(s), only one input attribute will be created for the new processor.
However, if required you can change or rename the inputs required by the processor in the processor design view, or make an input optional. To do this, click on the Processor Setup icon at the top of the Canvas, then select the Inputs tab.

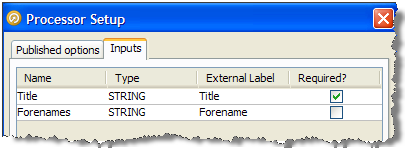
In the case above, two input attributes are created - Title and Forenames, as these were the names of the distinct attributes used in the configuration of the base processors.
The user chooses to change the External Label of one of these attributes from Forenames to Forename to make the label more generic, and chooses to make the Forename input optional:
Note that if an input attribute is optional, and the user of the processor does not map an attribute to it, the attribute value will be treated as Null in the logic of the processor.
Note:
It is also possible to change the Name of each of the input attributes in this screen, which means their names will be changed within the design of the processor only (without breaking the processor if the actual input attributes from the source data set in current use are different). This is available so that the configuration of the member processors matches up with the configuration of the new processor, but will make no difference to the behavior of the created processor.2.9.3 Setting Options
The processor design page allows you to choose the options on each of the member processors that you want to expose (or "publish") for the processor you are creating. In our example, above, we want the user to be able to select their own Reference Data sets for mapping Title and Forename values to Gender values (as for example the processor may be used on data for a new country, meaning the provided Forename to Gender map would not be suitable).
To publish an option, open the member processor in the processor design page, select the Options tab, and tick the Show publishing options box at the bottom of the window.
You can then choose which options to publish. If you do not publish an option, it will be set to its configured value and the user of the new processor will not be able to change it (unless the user has permission to edit the processor definition).
There are two ways to publish options:
-
Publish as New - this exposes the option as a new option on the processor you are creating.
-
Use an existing published option (if any) - this allows a single published option to be shared by many member processors. For example, the user of the processor can specify a single option to Ignore Case which will apply to several member processors.
Note:
If you do not publish an option that uses Reference Data, the Reference Data will be internally packaged as part of the configuration of the new processor. This is useful where you do not want end users of the processor to change the Reference Data set.In our example, we open up the first member processor (Derive Gender from Title) and choose to publish (as new) the option specifying the Reference Data set used for mapping Title values to Gender values:
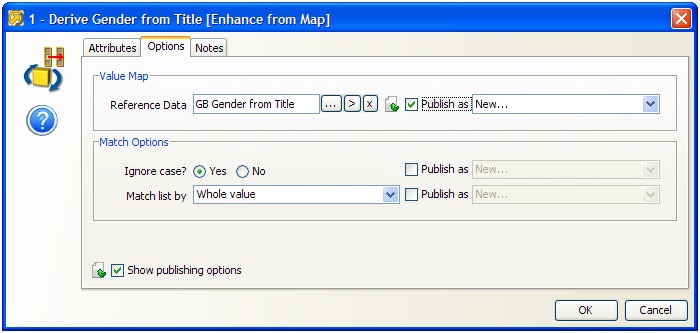
Note above that the Match Options are not published as exposed options, meaning the user of the processor will not be able to change these.
We then follow the same process to publish the option specifying the Reference Data set used for mapping Forename values to Gender values on the fourth processor (Derive Gender from Forename).
Once we have selected the options that we want to publish, we can choose how these will be labeled on the new processor.
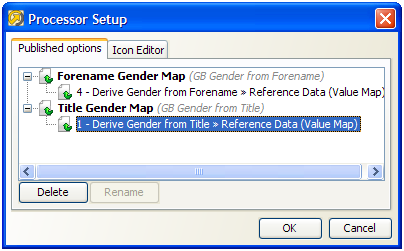
To do this, click on Processor Setup button at the top of the canvas and rename the options. For example, we might label the two options published above Title Gender Map and Forename Gender Map:
2.9.4 Setting Output Attributes
The Output Attributes of the new processor are set to the output attributes of any one (but only one) of the member processors.
By default, the final member processor in the sequence is used for the Output Attributes of the created processor. To use a different member processor for the output attributes, click on it, and select the Outputs icon on the toolbar:

The member processor used for Outputs is marked with a green shading on its output side:

Note:
Attributes that appear in Results Views are always exposed as output attributes of the new processor. You may need to add a member processor to profile or check the output attributes that you want to expose, and set it as the Results Processor (see below) to ensure that you see only the output attributes that you require in the new processor (and not for example input attributes to a transformation processor). Alternatively, if you do not require a Results View, you can unset it and the exposed output attributes will always be those of the Outputs processor only.2.9.5 Setting Results Views
The Results Views of the new processor are set to those of any one (but only one) of the member processors.
By default, the final member processor in the sequence is used for the Results of the created processor. To use a different member processor for the results views, click on it, and select the Results icon on the toolbar:

The member processor used for Results is now marked with an overlay icon:

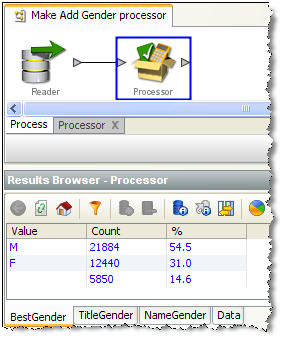
Note that in some cases, you may want to add a member processor specifically for the purpose of providing Results Views. In our example, we may want to add a Frequency Profiler of the three output attributes (TitleGender, ForenameGender and BestGender) so that the user of a new processor can see a breakdown of what the Add Gender processor has done. To do this, we add a Frequency Profiler in the processor design view, select the three attributes as inputs, select it as our Results Processor and run it.
If we exit the processor designer view, we can see that the results of the Frequency Profiler are used as the results of the new processor:
2.9.6 Setting Output Filters
The Output Filters of the new processor are set to those of any one (and only one) of the member processors.
By default, the final member processor in the sequence is used for the Output Filters of the created processor. To use a different member processor, click on it, and select the Filter button on the toolbar:

The selected Output Filters are colored green in the processor design view to indicate that they will be exposed on the new processor:

2.9.7 Setting Dashboard Publication Options
The Dashboard Publication Options of the new processor are set to those of any one (and only one) of the member processors.
If you require results from your new processor to be published to the Dashboard, you need to have an Audit processor as one of your member processors.
To select a member processor as the Dashboard processor, click on it and select the Dashboard icon on the toolbar:

The processor is then marked with a traffic light icon to indicate that it is the Dashboard Processor:

Note:
In most cases, it is advisable to use the same member processor for Results Views, Output Filters, and Dashboard Publication options for consistent results when using the new processor. This is particularly true when designing a processor designed to check data.2.9.8 Setting a Custom Icon
You may want to add a custom icon to the new processor before publishing it for others to use. This can be done for any processor simply by double-clicking on the processor (outside of the processor design view) and selecting the Icon & Group tab.
See the Customizing Processor Icons for more details.
Once you have finished designing and testing your new processor, the next step is to publish it for others to use.
For more information, see Enterprise Data Quality Online Help at http://docs.oracle.com/middleware/12212/edq/index.html
2.10 Publishing Processors
Configured single processors can be published to the Tool Palette for other users to use on data quality projects.
It is particularly useful to publish the following types of processor, as their configuration can easily be used on other data sets:
-
Match processors (where all configuration is based on Identifiers)
-
Parse processors (where all configuration is based on mapped attributes)
-
Processors that have been created in EDQ (where configuration is based on configured inputs)
Published processors appear both in the Tool Palette, for use in processes, and in the Project Browser, so that they can be packaged for import onto other EDQ instances.
Note:
The icon of the processor may be customized before publication. This also allows you to publish processors into new families in the Tool Palette.To publish a configured processor, use the following procedure:
-
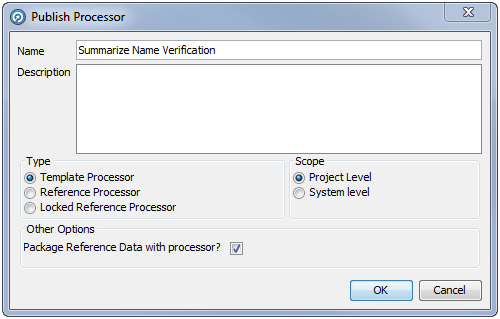
Right-click on the processor, and select Publish Processor. The following dialog is displayed:
-
In the Name field, enter a name for the processor as it will appear on the Tool Palette.
-
If necessary, enter further details in the Description field.
-
Select the Published processor Type: Template, Reference, or Locked Reference.
-
Select the Scope: Project (the processor is available in the current project only) or System (the processor is available for use in all projects on the system).
-
If you want to package the associated Reference Data with this published processor, select the Package Reference Data with processor checkbox.
Note:
Options that externalized on the published processor always require Reference Data to be made available (either in the project or at system level. Options that are not externalized on the published processor can either have their Reference Data supplied with the published processor (the default behavior with this option selected) or can still require Reference Data to be made available. For example, to use a standard system-level Reference Data set.2.10.1 Editing a Published Processor
Published processors can be edited in the same way as a normal processor, although they must be republished once any changes have been made.
If a Template Published processor is edited and published, only subsequent instances of that processor will be affected, as there is no actual link between the original and any instances.
If a Reference or Locked Reference Published processor is reconfigured, all instances of the process will be modified accordingly. However, if an instance of the processor is in use when the original is republished, the following dialog is displayed:

2.10.2 Attaching Help to published processors
It is possible to attach Online Help before publishing a processor, so that users of it can understand what the processor is intended to do.
The Online Help must be attached as a zip file containing an file named index.htm (or index.html), which will act as the main help page for the published processors. Other html pages, as well as images, may be included in the zip file and embedded in, or linked from, the main help page. This is designed so that a help page can be designed using any HTML editor, saved as an HTML file called index.htm and zipped up with any dependent files.
To do this, right-click the published processor and select Attach Help. This will open a file browsing dialog which is used to locate and select the file.
Note:
The Set Help Location option is used to specify a path to a help file or files, rather than attaching them to a processor. This option is intended for Solutions Development use only.If a processor has help attached to it, the help can be accessed by the user by selecting the processor and pressing F1. Note that help files for published processors are not integrated with the standard EDQ Online Help that is shipped with the product, so are not listed in its index and cannot be found by search.
2.10.3 Publishing processors into families
It is possible to publish a collection of published processors with a similar purpose into a family on the Tool Palette. For example, you may create a number of processors for working with a particular type of data and publish them all into their own family.
To do this, you must customize the family icon of each processor before publication, and select the same icon for all the processors you want to publish into the same family. When the processor is published, the family icon is displayed in the Tool Palette, and all processors that have been published and which use that family icon will appear in that family. The family will have the same name as the name given to the family icon.
For more information, see Understanding Enterprise Data Quality and Enterprise Data Quality Online Help at http://docs.oracle.com/middleware/12212/edq/index.html
2.11 Using Published Processors
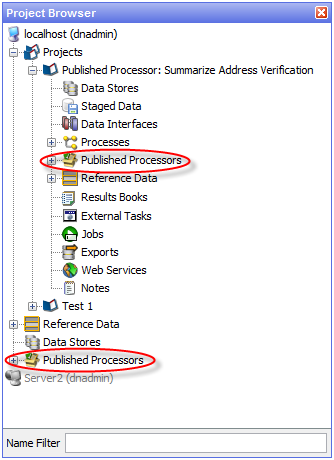
Published processors are located in either the individual project or system level, as shown below:
There are three types of Published processor:
-
Template - These processors can be reconfigured as required.
-
Reference - These processors inherit their configuration from the original processor. They can only be reconfigured by users with the appropriate permission to do so. They are identified by a green box in the top-left corner of the processor icon.
-
Locked Reference - These processors also inherit the configuration from the original processor, but unlike standard Reference processors, this link cannot be removed. They are identified by a red box in the top-left corner of the processor icon.
These processors can be used in the same way as any other processor; either added from the Project Browser or Tool Palette by clicking and dragging it to the Project Canvas.
For further information, see the Published Processors topic in Enterprise Data Quality Online Help.
2.11.1 Permissions
The creation and use of published processors are controlled by the following permissions:
-
Published Processor: Add - The user can publish a processor.
-
Published Processor: Modify - This permission, in combination with the Published Processor: Add permission - allows the user to overwrite an existing published processor.
-
Published Processor: Delete - The user can delete a published processor.
-
Remove Link to Reference Processor - The user can unlock a Reference published processor. See the following section for further details.
2.11.2 Unlocking a Reference Published Processor
If a user has the Remove Link to Reference Processor permission, they can unlock a Reference Published processor. To do this, use the following procedure:
-
Right click on the processor.
-
Select Remove link to Reference Processor. The following dialog is displayed:

-
Click OK to confirm. The instance of the processor is now disconnected from the Reference processor, and therefore will not be updated when the original processor is.
For more information, see Understanding Enterprise Data Quality and Enterprise Data Quality Online Help.
2.12 Investigating a Process
During the creation of complex processes or when revisiting existing processes, it is often desirable to investigate how the process was set up and investigate errors if they exist.
2.12.1 Invalid Processor Search
Where many processors exist on the canvas, you can be assisted in discovering problems by using the Invalid Processor Search (right click on the canvas). This option is only available where one or more processors have errors on that canvas.
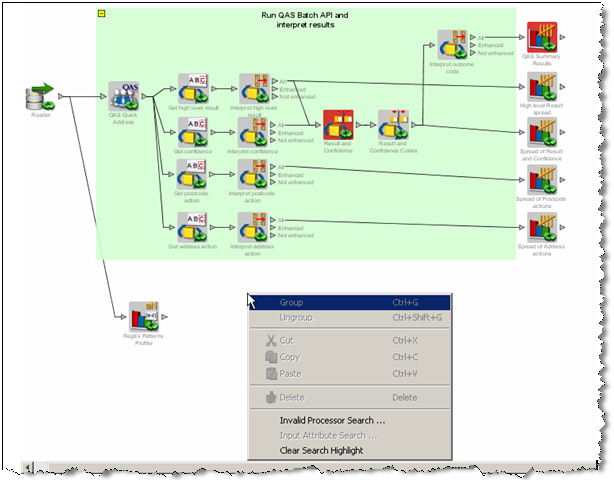
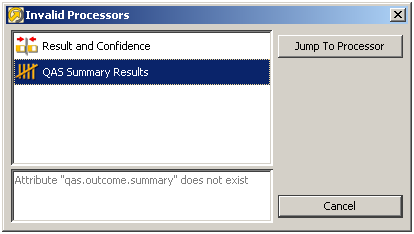
This brings up a dialog showing all the invalid processors connected on the canvas. Details of the errors are listed for each processor, as they are selected. The Jump To Processor option takes the user to the selected invalid processor on the canvas, so the problem can be investigated and corrected from the processor configuration.
2.12.2 Input Attribute Search
You may list the attributes which are used as inputs to a processor by right clicking on that processor, and selecting Input Attribute Search.
The icons used indicate whether the attribute is the latest version of an attribute or a defined attribute.
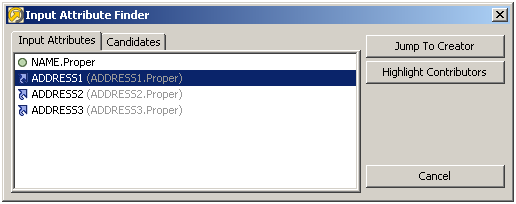
There are 2 options available:
-
Jump to Creator - this takes you to the processor which created the selected attribute.
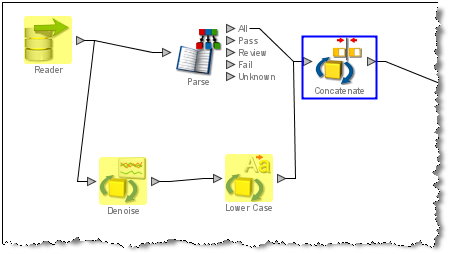
-
Highlight Contributors - this highlights all the processors (including the Reader, if relevant) which had an influence on the value of the selected input attribute. The contributory processors are highlighted in yellow. In the example below, the Concatenate processor had one of its input attributes searched, in order to determine which path contributed to the creation of that attribute.
The candidates tab in the Input Attributes Search enables the same functionality to take place on any of the attributes which exist in the processor configuration. The attributes do not necessarily have to be used as inputs in the processor configuration.
2.12.3 Clear Search Highlight
This action will clear all the highlights made by the Highlight Contributors option.
For more information, see Understanding Enterprise Data Quality and Enterprise Data Quality Online Help at http://docs.oracle.com/middleware/12212/edq/index.html
2.13 Previewing Published Results Views
It is possible to preview the results of running a process before it is run, or to disable or delete specific results views. This is done with the Published Results Views dialog:
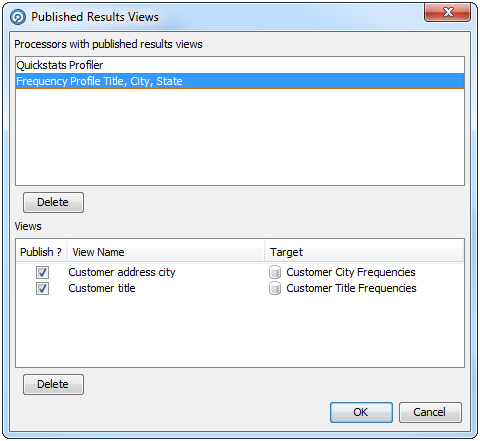
To open the dialog, either:
-
click the Published Results Views button on the Process toolbar:

-
or right-click on a processor in the Process and select Published Results Views in the menu:

This dialog is divided into two areas:
-
Processors with published results views - Lists all the processors in the process that have published views.
-
Views - Lists the views of the processor currently selected in the Processors with published results views area.
Published views can be selected or deselected by checking or unchecking the Publish? checkbox. Alternatively, they can be deleted by selecting the view and clicking Delete.
If a view is deleted by accident, click Cancel on the bottom-right corner of the dialog to restore it.
For more information, see Understanding Enterprise Data Quality and Enterprise Data Quality Online Help at http://docs.oracle.com/middleware/12212/edq/index.html
2.14 Using the Results Browser
The EDQ Results Browser is designed to be easy-to-use. In general, you can click on any processor in an EDQ process to display its summary view or views in the Results Browser.
The Results Browser has various straight-forward options available as buttons at the top - just hover over the button to see what it does.
However, there are a few additional features of the Results Browser that are less immediately obvious:
2.14.1 Show Results in New Window
It is often useful to open a new window with the results from a given processor so that you can refer to the results even if you change which processor you are looking at in EDQ. For example, you might want to compare two sets of results by opening two Results Browser windows and viewing them side-by-side.
To open a new Results Browser, right-click on a processor in a process and select Show results in new window.
The same option exists for viewing Staged Data (either snapshots or data written from processes), from the right-click menu in the Project Browser.
2.14.2 Show Characters
On occasion, you might see unusual characters in the Results Browser, or you might encounter very long fields that are difficult to see in their entirety.
For example, if you are processing data from a Unicode-enabled data store, it may be that the EDQ client does not have all the fonts installed to view the data correctly on-screen (though note that the data will still be processed correctly by the EDQ server).
In this case, it is useful to inspect the characters by right-clicking on a character or a string containing an unusual character, and selecting the Show Characters option. For example, the below screenshot shows the Character Profiler processor working on some Unicode data, with a multi-byte character selected where the client does not have the required font installed to display the character correctly. The character therefore appears as two control characters:
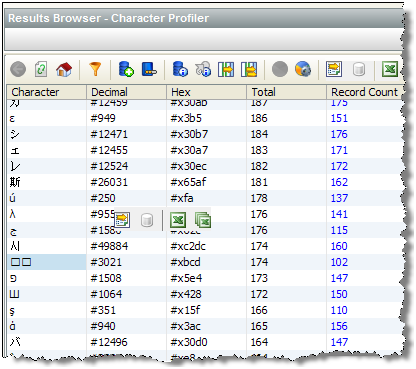
If you right-click on the character and use the Show Characters option, EDQ can tell you the character range of the character in the Unicode specification. In the case above, the character is in the Tamil range:
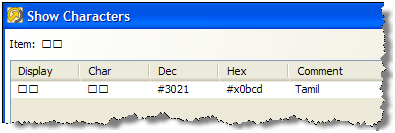
The Show Characters option is also useful when working with very long fields (such as descriptions) that may be difficult to view fully in the Results Browser.
For example, the below screenshot shows some example data captured from car advertisements:
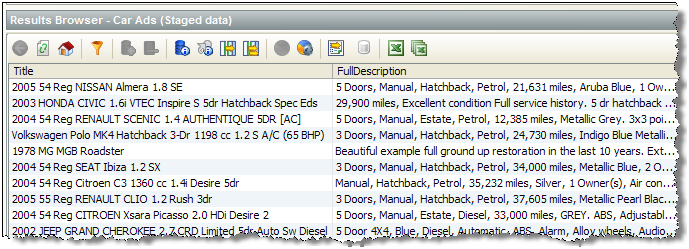
The Full Column Widths button will widen the columns to show the full data, but in this case there is too much data to show on the width of a screen. To see the FullDescription field as wrapped text, it is possible to right-click on the rows you want to view and use the Show Characters option. You can then click on the arrow at the top-right of the screen to show each value in a text area, and use the arrows at the bottom of the screen to scroll between records:
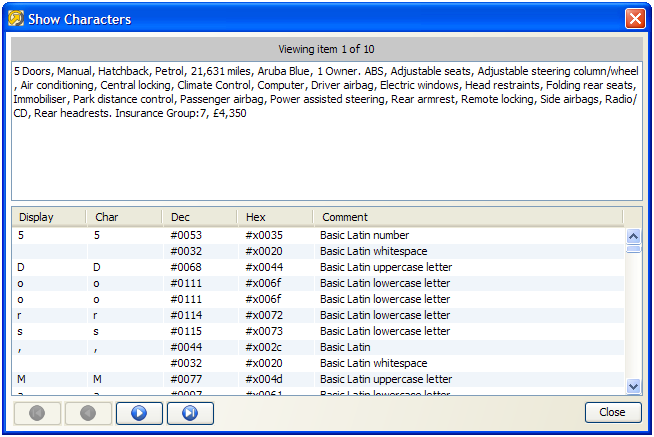
2.14.3 Select Column Headers
Clicking on the column header in the Results Browser will sort the data by that column. However, if you control-click on the column header (hold down the Ctrl key and click on the header), you can select all the visible (loaded) data in that column in the Results Browser. This is useful for example to copy all loaded rows, or to use them to create or add to reference data using the right-click option. Note that the Results Browser only loads 100 records by default, so you may want to use the Load All Data button before selecting the column header.
Multiple column headers can be selected in the same way.
For more information, see Understanding Enterprise Data Quality and Enterprise Data Quality Online Help at http://docs.oracle.com/middleware/12212/edq/index.html
2.15 Using the Event Log
The Event Log provides a complete history of all jobs and tasks that have run on an EDQ server.
By default, the most recent completed events of all types are shown in the log. However, you can filter the events using a number of criteria to display the events that you want to see. It is also possible to tailor the Event Log by changing the columns that are displayed in the top-level view. Double-clicking on an event will display further information where it is available.
The displayed view of events by any column can be sorted as required. However, older events are not displayed by default, so a filter must be applied before sorting before they can be viewed.
2.15.1 Logged Events
An event is added to the Event Log whenever a Job, Task, or System Task either starts or finishes.
Tasks are run either as part of Jobs or individually instigated using the Director UI.
The following types of Task are logged:
-
Process
-
Snapshot
-
Export
-
Results Export
-
External Task
-
File Download
The following types of System Task are logged:
-
OFB - a System Task meaning 'Optimize for Browse' - this optimizes written results for browsing in the Results Browser by indexing the data to enable sorting and filtering of the data. The 'OFB' task will normally run immediately after a Snapshot or Process task has run, but may also be manually instigated using the EDQ client by right-clicking on a set of Staged Data and selecting Enable Sort/Filter, or by a user attempting to sort or filter on a non-optimized column, and choosing to optimize it immediately.
-
DASHBOARD - a System Task to publish results to the Dashboard. This runs immediately after a Process task has been run with the Publish to Dashboard option checked.
2.15.2 Server selection
If the Director UI is connected to multiple servers, you can switch servers using the Server drop-down field in the top-left hand corner.
If Server Console UI is connected to multiple servers, select the required server in the tab list at the top of the window.
2.15.3 Filtering events
Quick filter options are made available to filter by Event Type, Status and Task Type. Simply select the values that you want to include in the filter (using Control - Select to select multiple items) and click on the Run Filter button on the bottom left of the screen to filter the events.
For example:
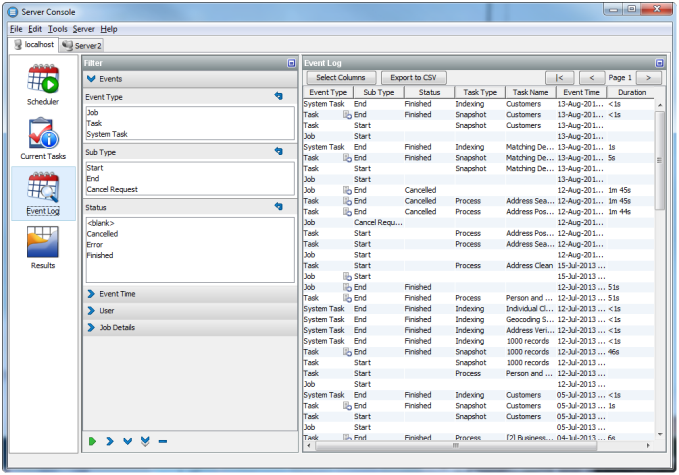
Free-text filters (search ahead)
Further free-text filtering options are available to filter by Project Name, Job Name, Task Name and User Name. These are free-text so that you can enter partial names into the fields. You can enter a partial name into any of these fields - provided the object contains the partial name, it will be displayed (though note that matching is case-sensitive). For example, if you use a naming convention where all projects working on live systems have a name including the word 'Live' you can display all events for live systems as follows:
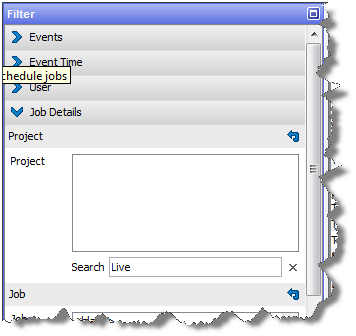
Note:
The Project Name column is not displayed by default. To change the view to see it, click the Select Columns button on the left hand side, and check the Project Name box.The final set of filters, on the right-hand side of the screen, allow you to filter the list of events by date and time. A Date picker is provided to make it easier to specify a given date. Note that although only the most recent events are shown when accessing the Event Log, it is possible to apply filters to view older events if required.
Note:
Events are never deleted from the history by EDQ, though they are stored in the repository and may be subject to any custom database-level archival or deletion policies that have been configured on the repository database.Events may be filtered by their start times and/or by their end times. For example, to see all Jobs and Tasks (but not System Tasks) that completed in the month of November 2008, apply filters as follows:
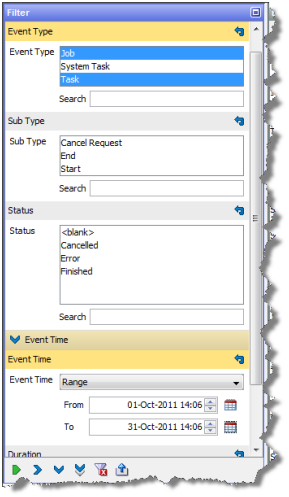
To change the set of columns that are displayed on the Event Log, click the Select Columns button on the top left of the Event Log area. The Select Columns dialog is displayed. Select or deselect the columns as required, and click OK or save or Cancel to abandon the changes. Alternatively, click Default to restore the default settings:
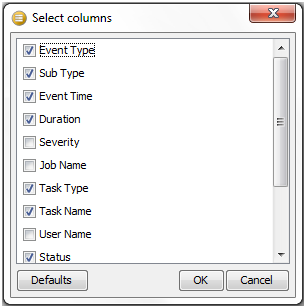
Note that Severity is a rarely used column - it is currently set to 50 for tasks or jobs that completed correctly, and 100 for tasks or jobs that raised an error or a warning.
Opening an event
Double-clicking to open an event will reveal further detail where it is available.
Opening a Task will display the Task Log, showing any messages that were generated as the task ran:
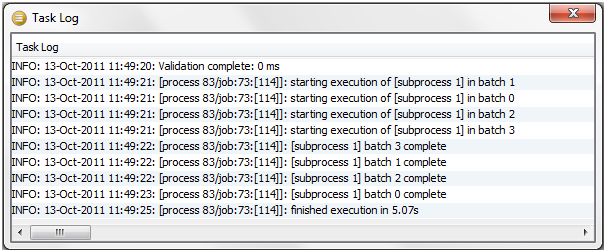
Note:
Messages are classified as INFO, WARNING, or SEVERE. An INFO message is for information purposes and does not indicate a problem. A WARNING message is generated to indicate that there could be an issue with the process configuration (or data), but this will not cause the task to error. SEVERE messages are generated for errors in the task.For Jobs, if a notification email was configured on the job, the notification email will be displayed in a web browser when opening the completed event for the Job. Jobs with no notifications set up hold no further information.
Exporting data from the Event Log
It is possible to export the viewable data in the Event Log to a CSV file. This may be useful if you are in contact with Oracle Support and they require details of what has run on the server.
To export the current view of events, click Export to CSV. This will launch a browser on the client for where to write the CSV file. Give the file a name and click Export to write the file.
For more information, see Enterprise Data Quality Online Help at http://docs.oracle.com/middleware/12212/edq/index.html
2.16 Reviewing Matching Results
One of the main principles behind matching in EDQ is that not every match and output decision can be made automatically. Often the fastest and most efficient way to determine if possible matches should be considered as the same, and what their merged output should be (where appropriate), is to look through the matching records manually, and make manual decisions.
EDQ provides two different applications for reviewing match results: Match Review and the Case Management. The review application is chosen as part of the match processor configuration, and determines the way in which the results are generated. For any given processor, therefore, the two applications are mutually exclusive. The selection of the review application also changes some of the options available to the match processor.
It is possible to change the configuration of a match processor at any time, to switch between review applications, but the processor must be re-run before any results are available to the new application.
The review application to be used should be chosen based upon the requirements of the process downstream of the match processor and the strengths of each review application, which are detailed in the following sections:
2.16.1 Match Review
The Match Review application is a lightweight review application which requires no configuration. It supports the manual review of match results and merge results, the persistence of manual match decisions between runs and the import and export of manual match decisions. If key information is changed between processor runs, any previously saved match decisions for that relationship are invalidated, and the relationship is raised for re-review.
The Match Review application is suitable for implementations where a small number of reviewers in the same business unit share the review work. It does not support group distribution or assignment of review work, and offers basic review management capabilities.
2.16.2 Case Management
The Case Management application offers a customizable, workflow-oriented approach to match reviewing. Case Management groups related review tasks (alerts) together, to form cases. Cases and alerts can both exist in a number of states, with permitted transitions between them. Case Management also supports automatic escalation of alerts on a time-out basis, or based on other, configurable, attributes.
Case Management supports assignment of work to individual users or to a group of users, and more sophisticated review management capabilities than those offered by Match Review.
Case Management must be explicitly activated for each match processor that wants to use it, and extra configuration is required to support the generation of cases and alerts.
Case Management does not support merge reviews.
For more information on the Case Management system, see the Using Case Management topic in Enterprise Data Quality Online Help.
2.17 Importing Match Decisions
EDQ provides functionality allowing you to import decision data and apply it to possible matches within the Match processor.
Importing decisions may be a one-off activity, or an ongoing part of the matching process. For example, if you are migrating your matching processes into EDQ from a different application, it will be desirable to include all the previous decisions as part of the migration. Alternatively, if the review process is carried out externally, decision import may be used routinely to bring the external decisions back into EDQ.
It is also possible to import match decisions that were exported from another process or instance of EDQ, for example from another match process working on the same data.
All match decisions in EDQ refer to a pair of possibly matching records. For an imported decision to be applied, therefore, it must be possible to match it to a relationship which was created by the match processor with a Review rule. If you import a decision for a pair of records that the processor has identified as a definite match, or are not matched at all, the decision will not be applied, unless and until the matching logic is changed so that a Review relationship is created for the records.
Note that it is possible to import decisions and use Case Management (or Match Review) to create manual decisions. If a decision with a later date/time than any manual decisions for a relationship is imported, it will be treated as the latest decision. If a decision with exactly the same date/time as a manual decision is imported, the manual decision is given precedence over the imported decision.
The remainder of this help topic provides a step-by-step guide to importing match decisions.
2.17.1 Step 1 - Connect the decisions data into the match processor
To import match decisions, use a Reader to read in the imported decision data, and connect the data into the Decisions input port to the match processor:
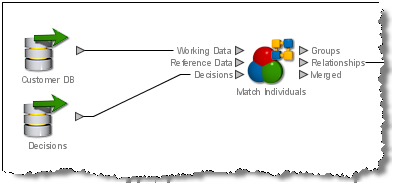
Note:
As Group and Merge does not allow manual decisions on possible matches, it does not have a Decisions input port.This data must include all the identifying information for the relationship required to match it to the corresponding relationship in the EDQ matching process (that is, attributes for each attribute that is included in the configurable Decision Key for the match processor for both records in the relationship), and fields for the decision, review user and review date/time. It is also possible to import comments made when reviewing possible matches.
2.17.2 Step 2 - Specifying the attributes that hold the new decision data
When a set of decisions data is connected in to a match processor (as above), an additional sub-processor appears when the match processor is opened:
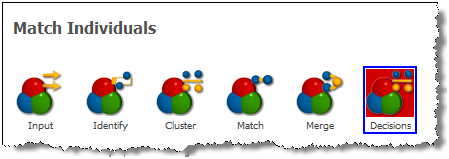
Double-click on the Decisions sub-processor to map the decisions data into the matching process.
The first tab allows you to set the fields in the connected decisions data with the actual decision and comment values that you want to import, along with details such as user name and date/time.
The following screenshot shows an example of a correct configuration for importing match decision data:
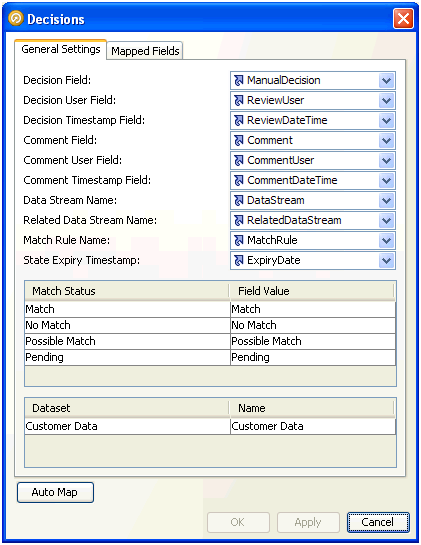
The first section in the screenshot above shows the attributes in the imported decision data that will be used to capture the decision data. Note that all the Comment fields are optional. The Auto Map button attempts to map the fields automatically by looking for any of the default names for these fields. The default names for the fields are as follows, as these are the names created when writing out relationships from a match processor in EDQ:
| Decision Field | Default (Auto) Name |
|---|---|
| Decision Field | RuleDecision |
| Decision User Field | ReviewedBy |
| Decision Timestamp Field | ReviewDate |
| Comment Field | Comment |
| Comment User Field | CommentBy |
| Comment Timestamp Field | CommentDate |
| Data Stream Name | DataStreamName |
| Related Data Stream Name | RelatedDataStreamName |
| Match Rule Name | MatchRule |
| State Expiry Timestamp | ExpiryDate |
This means that if you are importing decision data back into the same match processor that generated the relationships for review, you should be able to use Auto Map to map all the decision fields automatically.
Note:
The State Expiry Timestamp field is only shown for processors using Case Management to handle reviews.The second section of the first tab allows you to specify the actual decision values of the configured Decision field (ManualDecision in the example above) and how they map to the decision values understood by EDQ. In the case above, the field values are the same as those used by EDQ - Match, No Match, Possible Match and Pending.
The third section allows you to specify the name values expected in the decisions data for the data streams used by the match processor. This is especially important for match processors with multiple data sets, in order to match each imported decision with the correct records from the correct data streams. In the case above, the match processor is a Deduplicate processor working on a single data stream. This means that all the records (both records in each relationship) are from the same data stream ('Customer Data'). As the Name 'Customer Data' is specified above, all the decisions data being imported must have the value 'Customer Data' in both the DataStream and RelatedDataStream attributes.
2.17.3 Step 3 - Mapping the decisions data fields
Next, use the Mapped Fields tab of the Decisions sub-processor to map the fields in the imported decisions data to the necessary fields in the match relationships. The requirements for this mapping differ, depending on whether you are using Match Review or Case Management to process your potential matches.
-
When Match Review is in use, only the decision data fields which correspond to the Decision Key fields in the matching data need to be mapped. For ease of reference, these fields are highlighted in red in the mapping tab:
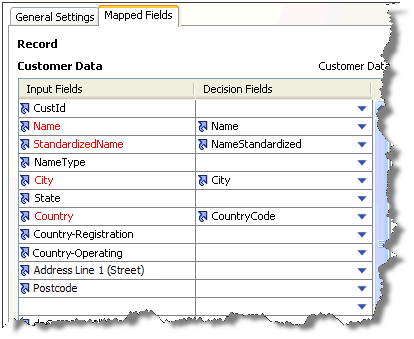
-
When Case Management is in use, all the active data fields must be mapped. No highlighting is used in this case.
The following screenshot shows an example of configuring the attributes in the Decision data to the Decision Key of a simple Deduplicate match processor:
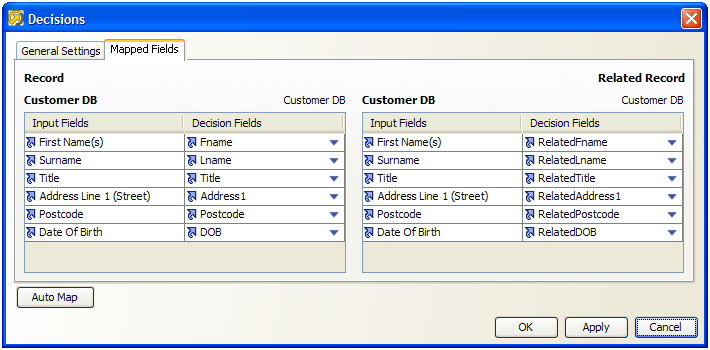
Note that the decisions data needs attributes for both records in the relationship-in this case, record and related record.
2.17.4 Step 4 - Importing the decisions
Once the Decisions sub-processor has been correctly configured, you can click the OK button to save the configuration. The match decisions can then be imported by running the matching process.
If you are performing a one-off import of decisions, check that the decisions have been imported correctly, and then delete the Reader for the decisions data.
If you want to continue importing decisions as part of the regular running of the match process, the reader for the decisions data should remain connected. You can refresh the decisions data in the same way as any other data source in EDQ, by rerunning the snapshot, or by streaming the data directly into the matching process. Note that if a decision has already been imported it will not be re-imported even if it exists in the decisions data.
Imported decisions are treated in the same way as decisions made using EDQ, and are therefore visible in Case Management (or in the Match Review application), and will also affect the Review Status summary of the match processor.
For more information, see Enterprise Data Quality Online Help at http://docs.oracle.com/middleware/12212/edq/index.html
2.18 Exporting Match Decisions
All relationship review activity conducted in EDQ (manual match decisions, and review comments) can be written out of the match processor on which the review was based. This may be useful for any of the following reasons:
-
To store a complete audit trail of review activity
-
To export match decisions for import into another process (for example, a new match process working on the same data)
-
To enable data analysis on review activity
Manual match decisions and review comments are written out of a match process on the Decisions output filter from each match processor.
The data can be seen directly in the Data View of the match processor, and can be connected up to any downstream processor, such as a Writer to stage the data.
Note that the match processor must be rerun after review activity takes place to write all decisions and comments to the Decisions output.
Also, it is not possible to export Case Management decisions via a match processor. The import/export options within Case Management Administration for workflows and case sources must be used instead.
The following screenshot shows an example of the Decisions data output written out using a Writer:
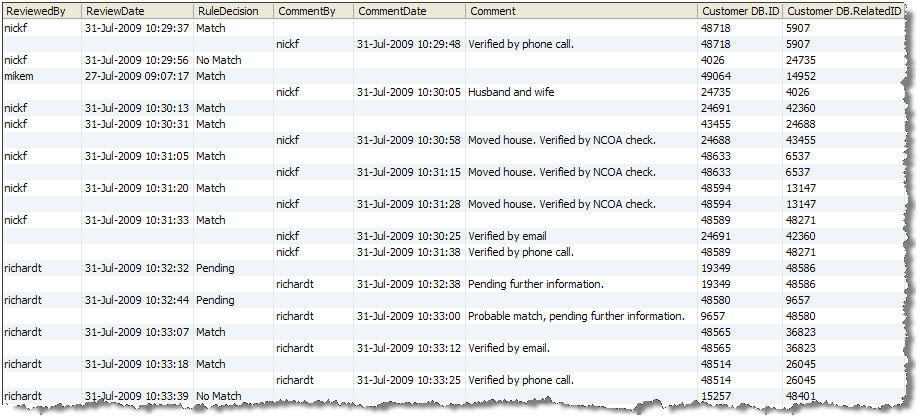
Note that all the relationship data at the time of the decision or comment is copied to the decision or comment record, in order to keep a complete audit trail of the data to which the decision or comment applies. As above, the data stored for manual match decisions and comments is a little different, but these are output together as a review comment may relate to a match decision.
If required, the comment and decision records may be split in downstream processing - for example, by performing a No Data Check on the RuleDecision attribute. All records with No Data in this attribute are review comments, and all records with data in this attribute are manual match decisions.
Written decisions may be exported to a persistent external data store, processed in another process, or imported to another match process working on the same data if required - see Importing Match Decisions.
For more information, see Enterprise Data Quality Online Help at http://docs.oracle.com/middleware/12212/edq/index.html
2.19 Externalizing Configuration Settings
It is possible to expose a number of configuration settings that are initially configured using the Director application such that they can be overridden at runtime, either by users of the EDQ Server Console user application, or by external applications that call EDQ jobs using its Command Line Interface.
This allows users of third-party applications that are integrated with EDQ to change job parameters to meet their requirements. For example, users might use a standard EDQ job on several different source files, specifying the input file name as an option at runtime, along with a Run Label, used to store results separately for each run of the job.
Job phases are automatically externalized - that is, the Director user does not need to configure anything to allow phases to be enabled or disabled at runtime, using a Run Profile.
The other points at which options can be externalized are below. Click on each point for further information:
-
Externalizing Snapshots (Server-side only)
-
Externalizing Exports (Server-side only)
2.19.1 Externalizing Processor Options
There are two stages to externalizing processor options:
-
Select the processor options to externalize.
-
Provide meaningful names for the externalized options at the process level.
-
Externalized processor options are configured at the process level, and therefore are available for all other processors within the process.
-
Externalized options within a process must have unique names. However, it is possible to use the same name for an externalized option in other processes.
-
The second stage is optional, but Oracle recommends that meaningful names be set to ensure that externalized options can be easily identified.
2.19.1.1 Select processor options to externalize
-
In the Canvas area, double-click on the required processor. The Processor Configuration dialog is displayed.
-
Select the Options tab.
-
Click the Show Externalized Options button on the bottom-right of the dialog. An Externalize button is displayed next to each option.
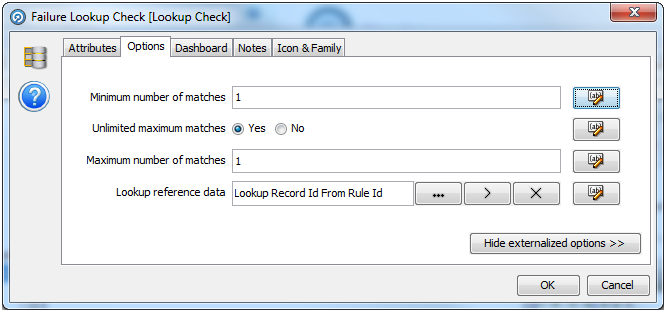
-
For each option that needs to be externalized:
-
Click the Externalize button. The Externalize dialog is displayed.
-
Check the box in the dialog. A default label is assigned.
-
Edit the label if required, or (if available) select another from the drop-down list.
-
Click OK.
-
-
When externalized, the button next to each option is marked with green to indicate that it is externalized.
-
When all the options are externalized as required, click OK to save, or Cancel to abandon.
2.19.1.2 Rename externalized options
Externalized processor options are used (overridden in jobs) at the process level.
Each externalized processor option for the process has a default name. Use the following procedure to assign a different name:
-
Right-click on the relevant processor, and select Externalize. The Process Externalization dialog is displayed. This displays all the externalized options available in the process.
-
Ensure the Enable Externalization check box is selected.
-
Click on the required option in the top area of the dialog. The bottom area shows the processor(s) that the option is linked to, and allows you to link directly to the processor(s) in the Canvas.
-
Click Rename.
-
Click OK to save, or Cancel to abandon.
Note:
The name you give to the externalized option is the name that must be used when overriding the option value, either in a Run Profile, or from the command line, using the syntax for such override options. For a full guide to this syntax, complete with examples of overriding externalized option values, see the instructions in the template.properties file that is provided in the oedq_local_home/runprofiles directory of your EDQ installation.2.19.2 Externalizing Match Processors
The Externalize option is displayed on the Sub-Processor window of each Match processor. Open this window by double-clicking on the Match processor on the Canvas.
Externalizing Match processors allows the following settings to be changed dynamically at runtime:
-
Which Clusters are enabled/disabled
-
The cluster limit for each cluster
-
The cluster comparison limit for each cluster
-
Which match rules are enabled/disabled
-
The order in which match rules are executed
-
The priority score associated with each match rule
-
The decision associated with each rule
There are two stages to externalizing Match processor options:
-
Select Match processor options to externalize
-
Configure the externalized Match processor options at the process level
Note:
The second stage is optional, but recommended to ensure the externalized option has a meaningful name.2.19.2.1 Select Match processor options to externalize
-
Click Externalize on the Sub-Processor window. The Externalization dialog is displayed.
-
Select the properties to externalize with the check boxes next to the Match Properties listed.
-
Click OK to accept, or Close to abandon.
2.19.2.2 Configure externalized Match processor options at the process level
Externalized options have a default generic name. Use the following procedure to assign a different name:
-
Right-click on the relevant processor, and select Externalize. The Process Externalization dialog is displayed. This displays all the externalized options in the process, including any externalized match processor options.
-
Ensure the Enable Externalization check box is selected.
-
Click on the required option in the top area of the dialog. The bottom area shows the name of the processor it originates from and allows you to link directly to that processor in the Canvas.
-
Click Rename.
-
Enter the new name in the Rename dialog.
-
Click OK to save, or Cancel to abandon.
2.19.3 Externalizing Jobs
Tasks within Jobs contain a number of settings that can be externalized.
To externalize a setting on a Task:
-
Right-click on the Task and select Configure Task.
-
Click the Externalize button next to the required setting.
-
Select the checkbox in the Externalize pop-up.
-
A default name for the setting is displayed, which can be edited if required.
-
Click OK.
These settings are then managed from the Job Externalization dialog. To open the dialog, click the Job Externalization button on the Job Canvas tool bar:
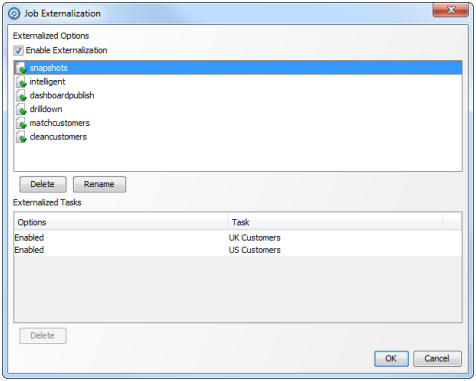
Externalization for a Job can be enabled or disabled by checking or clearing the Enable Externalization box.
The Externalized Options area shows the options that are available for externalization.
-
To delete an option, select it and click Delete (under the Externalized Options area).
-
To rename an option, select it and click Rename. Edit the name in the Rename pop-up and click OK.
The Externalized Tasks area shows the selected option next to the Task it is associated with. If an option is associated with more than Task, it is listed once for each Task. The example dialog above shows that the Enabled option is associated with the UK Customers and US Customers tasks.
To disassociate an option from a Task, select it in this area and click Delete.
2.19.4 Externalizing Snapshots
Only snapshots from server-side Data Stores can be externalized. Note that externalizing snapshots allows external users to override not only configuration of the snapshot itself (such as the table name, sample size, and SQL WHERE clause) but also options of the Data Store the snapshot is being read from (for example the file name, or database connection details).
Use the following procedure:
-
Right-click on the required snapshot in the Project Browser.
-
Select Externalize.... The Snapshot Externalization dialog is displayed. Note that both Snapshot and Data Store options are available.
-
Select an option by checking the corresponding box. The field on the right is enabled.
-
If required, enter a custom name for the option in this field.
-
Click OK to save changes, or Cancel to abandon.
2.19.4.1 Snapshot Externalization Dialog
The fields on the right of all Externalization dialogs contain the default name used for each externalization attribute. This is the label used to reference the externalized attribute in any third-party tool or file.
To change any field name, check the box to the left and edit the field as required.
Note:
Avoid the use of spaces in attribute names.The fields in this dialog vary, depending on whether the Data Store is a file or a database:
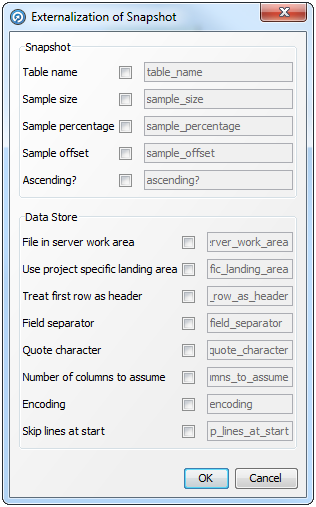
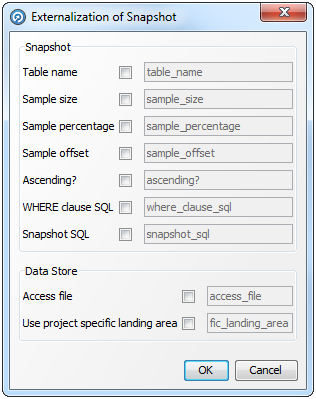
2.19.5 Externalizing External Tasks
To externalize an External Task, right-click on the task in the Project Browser and select Externalize.
Select and edit the options as required. Click OK to save or Cancel to abandon.
The fields on the right of all Externalization dialogs contain the default name used for each externalization attribute. This is the label used to reference the externalized attribute in any third-party tool or file.
To change any field name, check the box to the left and edit the field as required.
Note:
Avoid the use of spaces in attribute names.2.19.6 Externalizing Exports
To externalize an Export, right click on the Export in the Project Browser and select Externalize.
Select and edit the options as required. Click OK to save or Cancel to abandon.
The fields on the right of all Externalization dialogs contain the default name used for each externalization attribute. This is the label used to reference the externalized attribute in any third-party tool or file.
To change any field name, check the box to the left and edit the field as required.
Note:
Avoid the use of spaces in attribute names.Externalizing exports allows external users to override not only configuration of the export itself (such as the table name to write to) but also options of the Data Store the export is writing to (for example the file name, or database connection details).
Note:
It is not possible to externalize the configuration that maps Staged Data attributes to target database columns. Furthermore, if the export is not set up to create a new table and you want to change the target table that it writes to dynamically at runtime, the target table must have exactly the same structure as the one used in the export definition, with the same columns and data types.2.19.6.2 Example of the Export Externalization dialog for a Delimited Text file
Note that in this case, the only options available are those of the target file itself.
The configuration of the export within the job determines whether or not a new file is written, or if an existing file is appended to - this setting cannot be externalized.
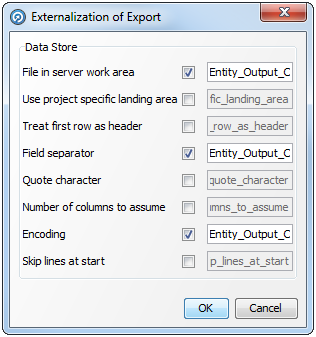
2.20 Managing Data Interfaces
This topic covers:
2.20.1 Adding a Data Interface
-
Right-click the Data Interfaces node in the Project Browser and select New Data Interface. The Data Interface dialog is displayed.
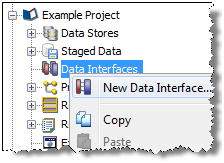
-
Add the attributes that you require in the Data Interface, or paste a copied list of attributes.
To create a Data Interface from Staged or Reference Data:
-
Right-click on the object in the Project Browser, and select Create Data Interface Mapping. The New Interface Mappings dialog is displayed.
-
Click New Data Interface to create an interface with the attributes and data types of the Staged or Reference Data selected.
2.20.2 Editing a Data Interface
-
Right-click on the Data Interface in the Project Browser.
-
Select Edit.... The Data Interface Attributes dialog is displayed.
-
Edit the attributes as required. Click Finish to save or Cancel to abandon.
2.20.3 Creating Data Interface Mappings
Data Interface mappings are required so that data can be 'bound" into or out of a process or a job.
To create a mapping, either:
-
right-click on the Data Interface, select Mappings, and click the + button on the Data Interface Mappings dialog to start the New Mapping wizard; or
-
right-click on a Staged Data or Reference Data set, select Create Data Interface Mapping, and click the required Data Interface in the New Data Interface Mappings dialog.
Note:
Data sources are either mapped as Data In or Data Out, depending on their type:-
Staged Data, Web Services and JMS can be either Data In or Data Out.
-
Reference Data and Snapshots can only be configured as Data In.
-
Data Interface Mappings wizard
Once the data source or target is selected, the Mapping area is displayed on the New Data Interface Mappings dialog.
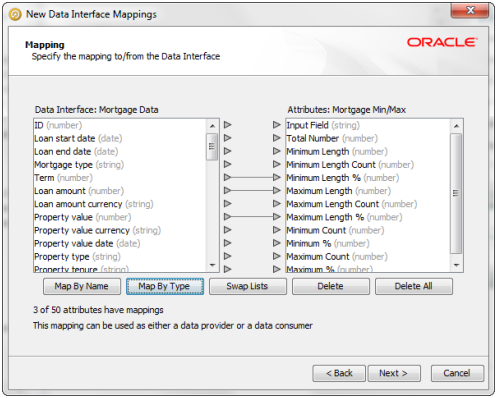
Notes:
- Data can be mapped by Type or by Name:
-
Map by type maps the attributes on the left-hand side to the lined-up attribute on the right-hand side, as long as the Data Type (String, String Array, Number, Number Array, Date or Date Array) of both attributes is the same.
-
Map by name attempts to match the name of each attribute on the left-hand side to the name of an attribute on the right-hand side. Note that the matching is case-insensitive.
-
-
If the Data Interface contains attributes that do not exist in a mapped data source that is read into a process, these attributes are treated as having Null values in all processes.
-
For Data Out mappings the Data Interface is displayed on the left, and vice versa for Data In mappings. However, this can be changed by clicking Swap Lists. For mappings which can be either Data In or Out, the default option is to have the Data Interface on the left.
2.20.4 Deleting Data Interfaces
-
Right-click on the Data Interface, and select Delete. The following dialog is displayed:
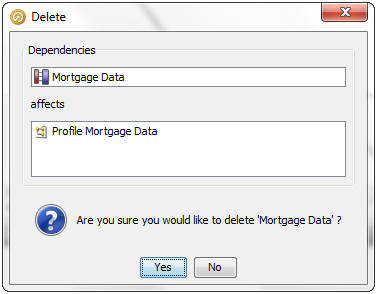
The Delete dialog shows which linked or dependent objects are affected by the deletion, if any.
-
Click Yes to proceed, or No to cancel.
For more information, see Understanding Enterprise Data Quality and Enterprise Data Quality Online Help at http://docs.oracle.com/middleware/12212/edq/index.html
2.21 Running Jobs Using Data Interfaces
When a process including a Data Interface is run - either as a standalone process or as part of a job - the user must configure how the Data Interface reads or writes data.
Note:
Data Interfaces are used in readers or writers in processes. Therefore, the Mappings available during configuration will vary depending on how the Data Interface is implemented.2.21.1 Configuring a Data Interface in a job
When a process containing a Data Interface is added to a job, it will appear as in the following example:
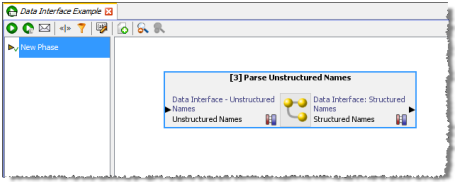
Any Data Interfaces that appear in the job must be configured in order for the job to run.
To configure each Data Interface:
-
Double click on the Data Interface. The Configure Task dialog is displayed:
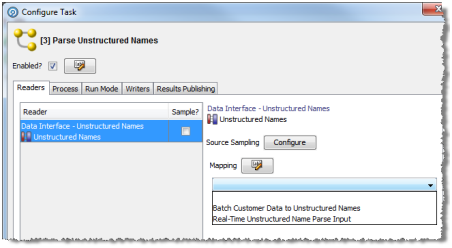
-
Select the required Mapping in the drop-down field.
Note:
It is possible to configure multiple mappings for a writer (for example, to write data to two difference staged data sets) but only a single mapping for a reader. -
Click OK to save, or Cancel to abandon.
Once Data Interface mappings have been specified for each data interface in a job, both the mappings and the objects that they bind to appear in the job. This means the job can now be run. See Example - Job containing two Data Interfaces below.
2.21.2 Linking processes with a Data Interface
It is possible to link two or more processes that contain Data Interfaces, provided one is configured as a reader and the other as a writer.
-
Add both processes to the job, as in the following example:
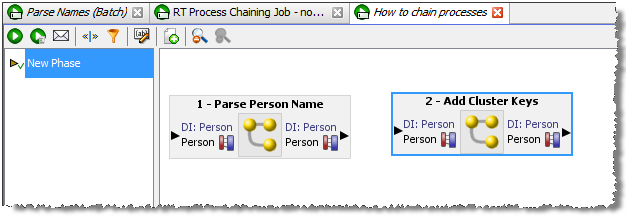
-
Click and drag the connector arrow from the first process to the second. The processes will be linked:
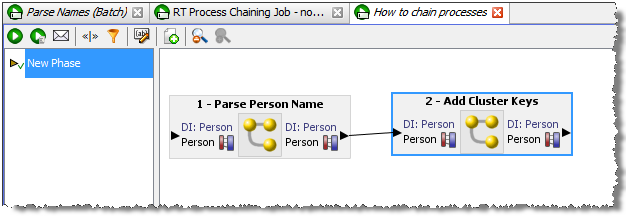
2.21.3 Chaining Processes in a Real-Time Job
Because of the way EDQ handles data streams within real-time jobs, there is a limitation on how processes should be chained together.
As long as only one data stream is maintained within the process chain from request to response, EDQ will be able to reconcile responses to requests and the real-time service will work as expected.
However, if the data stream is split and then merged further down the process chain, EDQ will be unable to reconcile the response to the request. Therefore, the first Web Service request sent will cause the job to fail. The error and log message generated will contain the following text: "failed to transmit ws packet: no request found matching this response".
An example of such a chain is shown in the following screenshot:
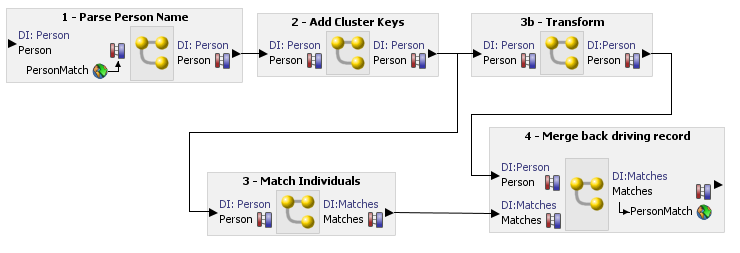
2.21.4 Example - Job containing two Data Interfaces
In this example job, a process is used that both reads from and writes to Data Interfaces. The user selects mappings to allow the process to run in real time, but also to log its real time responses to staged data.
-
First create the job and drag the process onto the Canvas:

-
Then double-click the input and output Data Interfaces to select the Mappings.
-
For the input Data Interface, select a web service input that has been mapped to the Data Interface:
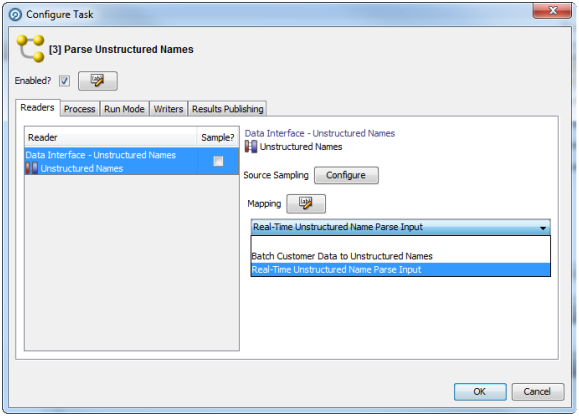
-
For the output Data Interface, select both a 'Batch' (staged data) mapping, and a 'Real-Time' (web service output) mapping using the dialog below:
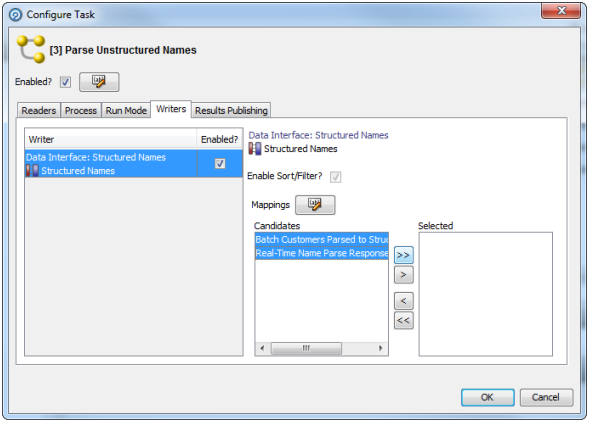
-
Click OK to save. The job appears as follows, and is now ready to be run or scheduled:
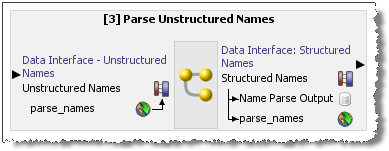
For more information, see Understanding Enterprise Data Quality and Enterprise Data Quality Online Help at http://docs.oracle.com/middleware/12212/edq/index.html
2.22 Publishing to Case Management
Case Management is enabled in the Advanced Options dialog of Match processors. To enable Case Management for a processor, open it and click the Advanced Options link:

In the Advanced Options dialog, select Case Management in the Review System drop-down field:
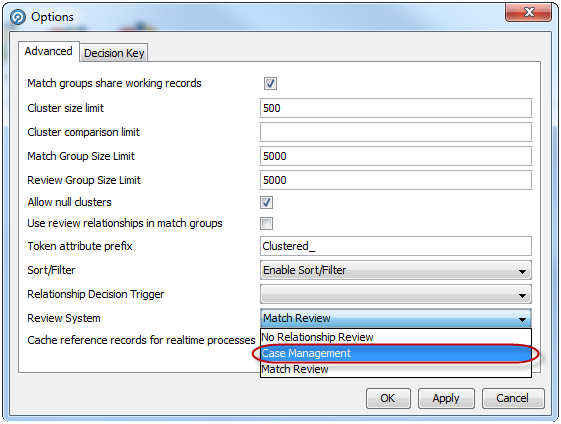
Note:
The Use review relationships in match groups check box is disabled when Case Management is selected, and the Decision Key tab is replaced by the Case Source tab.Further configuration is required before Case Management can be used with this processor:
-
Configure a case source for the processor using the Case Source tab.
-
Map the input data streams to the data sources defined in the case source.
When these steps are complete, the Match Review links associated with the match processor will also be disabled:
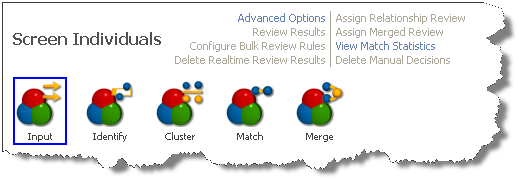
For more information, see Understanding Enterprise Data Quality and Enterprise Data Quality Online Help at http://docs.oracle.com/middleware/12212/edq/index.html
2.23 Execution Types
EDQ is designed to support three main types of process execution:
However, in order to preserve the freedom to design processes independently of their intended execution mode and switch between types easily, execution options are configured at the process or job level.
2.23.1 Batch
Processes are normally initially designed as batch processes, as a set of data is normally required in order to test that a process produces the required results, even if it will eventually be deployed as a real time process.
Batch processes have the following characteristics:
-
They read data from staged data configurations (such as snapshots).
-
They may include any of the processors in the processor library, including those such as Duplicate Check that are not suitable for real time response processes.
-
They either write no results, or write their results to a staged data table and/or external database or file.
-
They are executed in Normal mode. That is, the process completes when the batch has been completely processed.
2.23.2 Real time response
Real time response processes are designed to be called as interactive services to protect data quality at the point of data entry. A real time response process may perform virtually any data quality processing, including checking, cleaning and matching data. Profiling would not normally be used in a real time response process.
Real time response processes have the following characteristics:
-
They read data from a real time provider (such as the inbound interface of a Web Service).
Note:
A real time response process may also include Readers connected to staged data configurations (such as snaphots), for example when Real time reference matching - in this case the process must be executed in Prepare mode before processing requests. -
They write data to a real time consumer (such as the outbound interface of a Web Service).
Note:
A real time response process may include Writers connected to staged data configurations, for example, to write a full audit trail of all records processed and their responses. These writers will not write any results until the process stops, regardless of any interval settings. -
They are typically executed in Normal mode, and do not write out results, but may be executed in Interval mode, allowing results to be written out while the process runs continuously.
-
They should not include processors that are unsuitable for real time response processing, such as Duplicate Check.
Note:
If a real time process includes a processor that is unsuitable for real time response processing, it will raise an exception when the first record or message is received. The supported execution types of each processor are listed in the help page for the processor.
Note that real time response processes may use much, or all, of the same logic as a batch process.
2.23.3 Real time monitoring
Real time monitoring processes are designed to check data quality at the point of data entry, but not return a response to the calling application, so that there is no extra burden on the user modifying the data on the source system. As there is no need to return a response, there are fewer restrictions on what the EDQ process can do - for example, it may include profiling processors that work on all the records for the period of time that the monitoring process runs.
Real time monitoring processes have the following characteristics:
-
They read data from a real time provider (such as the inbound interface of a Web Service).
-
They may include any of the processors in the processor library, including those such as Duplicate Check that are not suitable for real time response processes.
Note:
If a real time monitoring process contains processors that are designed to process whole batches, and are therefore not suitable for real time response processes, it should be run in Normal mode, and not in Interval mode. The supported execution types of each processor are listed in the help page for the processor. -
They either write no results, or write their results to a staged data table and/or external database or file.
-
The process completes when it is stopped or when a configured time or record threshold is reached.
-
They may be executed either in Normal mode (for a limited period of time, or processing a limited number of records), or in Interval mode.
For more information, see Enterprise Data Quality Online Help at http://docs.oracle.com/middleware/12212/edq/index.html
2.24 Customizing Processor Icons
It is possible to customize the icon for any processor instance in EDQ. This is one way of distinguishing a configured processor, which may have a very specific purpose, from its generic underlying processor. For example, a Lookup Check processor may be checking data against a specific set of purchased or freely available reference data, and it may be useful to indicate that reference data graphically in a process.
The customization of a processor icon is also useful when creating and publishing new processors. When a processor has been published, its customized icons becomes the default icon when using the processor from the Tool Palette.
To customize a processor icon:
-
Double-click on a processor on the Canvas
-
Select the Icon & Family tab
-
To change the processor icon (which appears at the top right of the image), use the left side of the screen.
-
To change the family icon, use the right side of the screen (Note that when publishing a processor, it will be published into the selected group, or a new family created if it does not yet exist)
-
For both processor and family icons, a dialog is launched showing the server image library. You can either select an existing image, or create a new image.
-
If adding a new image, a dialog is shown allowing you to browse for (or drag and drop) an image, resize it, and enter a name and optional description.
Once an image has been created on a server, it is added to the server's image library and available whenever customizing an icon. The image library on a server can be accessed by right-clicking on a server in the Project Browser, and selecting Images...
For more information, see Enterprise Data Quality Online Help.
2.25 Enabling Case Management
The Case Management and Case Management Administration applications are published on the EDQ Launchpad by default. However, if they are not present, they must be added to the Launchpad and User Groups assigned to them.
For further information, see the Launchpad Configuration and Application Permissions topics in Enterprise Data Quality Online Help.
2.26 Publishing Result Views to Staged Data
EDQ can publish (or 'write') top-level Results Views of processors to Staged Data.
Note:
'Top-level' here means the first summary view of results. Interim results views that are accessed by drilling down on the top-level results views cannot be published. Data views also cannot be published in this way - data in a process is written to Staged Data using a Writer.The publishing of Results Views to Staged Data has three purposes:
-
To export Results Views to a target Data Store
-
To use Results View data in further processing (for example in a Lookup)
-
To allow users of the Server Console UI to view selected process results
Published Results Views are written to Staged Data on process execution.
To set up a Results View to be written to Staged Data:
-
Select the processor in the Canvas to see its results in the Results Browser.
-
Click
 to publish the Results View to Staged Data. This brings up the Publish Results dialog:
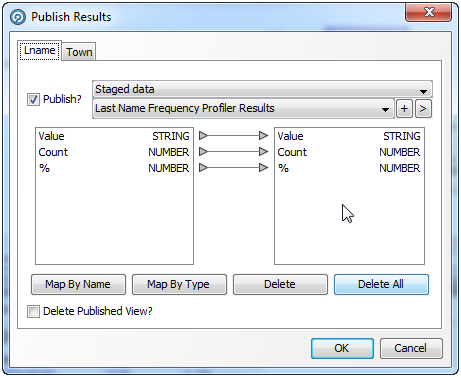
Using this dialog, you can:
-
Specify or change the name of the Staged Data set that you want to write to
-
Change the attributes of the Staged Data set to use different attribute names from the generic Results View names that appear on the left
-
Remove attributes from the Staged Data set if there are attributes in the Results View that you do not want to write out
-
Switch the publishing of a Results View on or off without losing the configuration
-
Note that if the processor outputs multiple top-level Results Views, as in the Frequency Profiler example above, the Publish Results dialog shows multiple tabs, one for each view. You can choose to publish any or all of the processor views.
2.26.1 Published Results Indicator
Processors in a process that are configured to write one or more Results Views to Staged Data, and where publishing is currently enabled, are indicated using an overlay icon on the Canvas, as shown below:

Note:
If the Staged Data set that a Results View is being written to is deleted or renamed, the indicator turns red to indicate an error. This is treated in the same way as if the processor's configuration is in error; that is, the process cannot run.Staged Results Views and the Server Console UI
By default, all data that is snapshotted or staged during the execution of a job in the Server Console UI (or using the 'runopsjob' command from the Command Line Interface) is available for view in the Server Console Results Browser by users with the appropriate permissions. This includes any Results Views that you choose to stage in processes that are run in the Job.
However, it is possible to override the visibility of a specific Staged Data set in the Server Console UI using an override setting in a Run Profile.
For more information, see Enterprise Data Quality Online Help at http://docs.oracle.com/middleware/12212/edq/index.html
