1 Introduction to MapViewer
Oracle Fusion Middleware Mapviewer (MapViewer) is a programmable tool for rendering maps using spatial data managed by Oracle Spatial and Graph or Oracle Locator (also referred to as Locator). MapViewer provides tools that hide the complexity of spatial data queries and cartographic rendering, while providing customizable options for more advanced users. These tools can be deployed in a platform-independent manner and are designed to integrate with map-rendering applications.
This chapter contains the following major sections:
-
Section 1.4, "Installing and Deploying MapViewer in WebLogic Server 12c"
-
Section 1.7, "Oracle Real Application Clusters and MapViewer"
-
Section 1.8, "High Availability and MapViewer" (for advanced users)
Note:
If you have an existing MapViewer Release 11g installation, and if you want to use its MapViewer configuration on the latest Oracle Fusion Middleware release, see Section 1.5, "Upgrading MapViewer"1.1 Overview of MapViewer
MapViewer is shipped as part of Oracle Fusion Middleware. Its main deliverable is a Java EE (Java Platform, Enterprise Edition) application that can be deployed to a Java EE container, such as that for Oracle Fusion Middleware. MapViewer includes the following main components:
-
A core rendering engine (Java library) named
SDOVISthat performs cartographic rendering. A servlet is provided to expose the rendering functions to web applications. -
A suite of application programming interfaces (APIs) that allow programmable access to MapViewer features. These APIs include XML, Java, and an AJAX-based JavaScript API.
-
A graphical map builder tool that enables you to create map symbols, define spatial data rendering rules, and create and edit MapViewer objects.
-
Oracle Maps, which includes map cache and FOI (feature of interest) servers that facilitate the development of interactive geospatial web applications.
The core rendering engine connects to the Oracle database through Java Database Connectivity (JDBC). It also reads the map metadata (such as map definitions, styling rules, and symbology created through the Map Builder tool) from the database, and applies the metadata to the retrieved spatial data during rendering operations.
The XML API provides application developers with a versatile interface for submitting a map request to MapViewer and retrieving the map response. The JavaBean-based API provides access to MapViewer's rendering capabilities. The JavaScript API enables you to create highly interactive web applications that use the Oracle Maps feature of MapViewer.
The Map Builder tool simplifies the process of creating and managing map, theme, and symbology metadata in a spatial database. For information about this tool, see Chapter 7.
Oracle Maps, built on core MapViewer features, uses a map tile server that caches map image tiles, and a feature of interest (FOI) server that streams live data out of a database to be displayed as interactive features on a map. You can use the AJAX-based JavaScript API with Oracle Maps to provide sophisticated mapping solutions. Oracle Maps also allows for advanced customization and querying capabilities.
The primary benefit of MapViewer is its integration with Oracle Spatial and Graph, Oracle Locator, and Oracle Fusion Middleware. MapViewer supports two-dimensional vector geometries stored in Oracle Spatial and Graph, as well as GeoRaster data and data in the Oracle Spatial and Graph topology and network data models. Oracle MapViewer is also an Open Geospatial Consortium (OGC)-compliant web map service (WMS) and web map tile service (WMTS) server.
1.1.1 Basic Flow of Action with MapViewer
With MapViewer, the basic flow of action follows a two-step request/response model, whether the client requests a map or some MapViewer administrative action.
For a map request:
-
The client requests a map, passing in the map name, data source, center location, map size, and, optionally, other data to be plotted on top of a map.
-
The server returns the map image (or a URL for the image) and the minimum bounding rectangle (MBR) of the map, and the status of the request.
For a MapViewer administrative request:
-
The client requests a MapViewer administrative action, passing in the specific type of request and appropriate input values.
-
The server returns the status of the request and the requested information.
Figure 1-1 shows the basic flow of action with MapViewer.
Figure 1-1 Basic Flow of Action with MapViewer
Description of ''Figure 1-1 Basic Flow of Action with MapViewer''
1.1.2 MapViewer Architecture
Figure 1-2 illustrates the architecture of MapViewer.
As shown in Figure 1-2:
-
MapViewer is part of the Oracle Fusion Middleware middle tier.
-
MapViewer includes a rendering engine.
-
MapViewer can communicate with a client web browser or application using the HTTP protocol.
-
MapViewer performs spatial data access (reading and writing Oracle Spatial and Graph or Oracle Locator data) through JDBC calls to the database.
-
The database includes Oracle Spatial and Graph or Oracle Locator, as well as mapping metadata.
1.2 Getting Started with MapViewer
To get started using MapViewer, follow these steps:
-
Either before or after you install and deploy MapViewer, read Chapter 2 to be sure you understand important terms and concepts.
-
Ensure that you have the prerequisite software (see Section 1.3).
-
Install (if necessary) and deploy MapViewer (see Section 1.4).
-
Use MapViewer for some basic tasks. For example, create an Oracle Maps application (see Chapter 6).
-
Optionally, use the Map Builder tool (described in Chapter 7) to familiarize yourself with styles, themes, and maps, and the options for each, and optionally to preview spatial data.
1.3 Prerequisite Software for MapViewer
To use MapViewer, you must have the following software:
-
A Java EE server supported by Oracle MapViewer (see
http://www.oracle.com/technetwork/middleware/mapviewer/j2ee-server-support-097757.html) -
Oracle Database with Spatial and Graph option or Locator (Release 10g or later)
-
Oracle Client (Release 10g or later), if you need to use JDBC Oracle Call Interface (OCI) features. In general, though, the JDBC thin driver is recommended for use with MapViewer, in which case Oracle Client is not required.
-
Java SDK 1.6 or later
MapViewer also supports the headless AWT mechanism in J2SE SDK, which enables MapViewer to run on Linux or UNIX systems without setting any X11 DISPLAY variable. To enable AWT headless mode on Linux or UNIX systems, specify the following in the command line to start MapViewer:
-Djava.awt.headless=true
1.4 Installing and Deploying MapViewer in WebLogic Server 12c
You can install and deploy MapViewer to run in the WebLogic Server 12c middle tier by using one of the following approaches:
-
Use the WebLogic Server universal installer, as explained in Section 1.4.1.
-
Manually deploy an exploded MapViewer EAR folder, as explained in Section 1.4.2.
-
Manually deploy an unexploded MapViewer EAR file, as explained in Section 1.4.3.
Because MapViewer uses ADF components, the required components must be installed as part of the whole installation. MapViewer is a Java EE web application, and after the installation it listens for incoming map requests on its container's HTTP port.
1.4.1 Deploying MapViewer Using the Universal Installer
This section explains how to use the universal installer to deploy MapViewer to WebLogic Server 12c. If WebLogic Server 12c has not been installed, then you need to install it first before installing MapViewer. This section covers the following topics:
1.4.1.1 Installing WebLogic Server
If you need to install WebLogic Server, follow these steps.
-
Check if the Java environment is set properly. It needs to be JDK8 or later. For example:
java -version
The result should look something like the following
java version "1.8.0_65"
Java(TM) SE Runtime Environment (build 1.8.0_65-b17)
Java HotSpot(TM) 64-Bit Server VM (build 25.65-b01, mixed mode)
-
Go to
http://www.oracle.com/technetwork/middleware/fusion-middleware/downloads/index.html. -
Read and accept the license agreement.
-
Under Oracle WebLogic Server 12cR2 (12.2.1.x), select the Fusion Middleware Infrastructure Installer.
-
Click Download File and save the file in a location of your choice, such as a temporary folder.
-
Launch the installation program. For example (and replace x with the appropriate number):
java -jar fmw_12.2.1.x.0_infrastructure.jar
For more information, see the WebLogic Server installation documentation for your operating system.
1.4.1.2 Creating Required JRF Components Using the Repository Creation Utility
Note:
If you are using WebLogic Server 12.2.1.x.0 or later, you can skip the steps in this section, unless any other applications (besides MapViewer) need to have the JRF components installed in the WebLogic Server domain. (The JRF components do not need to be installed for MapViewer.)The repository creation utility (RCU) loads into the database some Java Runtime Framework (JRF) components needed for configuring WebLogic Server. If you do not already have these JRF components loaded, follow the instructions in this section.
This RCU program can be found in the $Oracle_Home/oracle_common/bin folder (for example, /scratch/Oracle/Middleware/Oracle_Home/oracle_common/bin). (The Oracle_Home folder was specified in Section 1.4.1.1, "Installing WebLogic Server".) Go to the folder containing the RCU program and then follow these steps:
-
Launch the RCU program. For example:
./rcu
-
When you see the Welcome page, click Next.
-
On the Create Repository page, accept the default (System Load and Product Load).
The database user for creating this database connection must have DBA privileges.
Click Next.
-
On the Database Details page, enter information for the fields.
The database user for this connection must have the SYSDBA role.
Click Next. (A pop-up window displays the progress of the prerequisites checking.)
-
On the Select Components Page:
-
For the unique prefix for all schemas created in this session, either select an existing prefix or create a new prefix of your choice.
-
For repository components, ensure that the following are selected: Metadata Services, Audit Services, Audit Services Append, Audit Services Viewer, and Oracle Platform Security Services.
-
In the Common Infrastructure Services row (which you cannot edit), note the Schema Owner name (DEV_STB), because you will need to enter it when you configure WebLogic Server (in Section 1.4.1.4, "Configuring WebLogic Server").
Click Next.
-
-
On the Schema Passwords page, set the passwords for the schemas to be created in the database. You can use the same password for all the schemas or different passwords. The passwords will be required when retrieving the components when configuring WebLogic Server.
Click Next.
-
On the Map Tablespaces page, accept the defaults and click Next.
-
On the Summary page, review the information, and click Create.
-
On the Completion Summary page, review the information. You will need to provide the Component Infrastructure Services schema owner (DEV_STB) and the password or passwords that you specified.
When you are finished, close the window to complete the repository creation utility (RCU).
1.4.1.3 Installing MapViewer Using the Universal Installer
After installing WebLogic Server, you are ready to install MapViewer using its universal installer.
Download the fmw_12.2.1.x.0_mapviewer_generic.jar file (replace x with the appropriate number) from the Oracle Technology Network, put it in a folder of your choice, such as /scratch/tmp, and follow these steps:
-
Go to the folder where the
mapviewer_generic.jarfile is. For example:cd /scratch/tmp
-
Check if the Java environment is set properly. It needs to be JDK8 or later. For example:
java -version
The result should look something like the following
java version "1.8.0_65"
Java(TM) SE Runtime Environment (build 1.8.0_65-b17)
Java HotSpot(TM) 64-Bit Server VM (build 25.65-b01, mixed mode)
-
Launch the installation program. For example (replace x with the appropriate number):
java -jar fmw_12.2.1.x.0_mapviewer_generic.jar
You will see a Welcome page for the MapViewer 12c Installation.
Click Next.
-
On the Installation Location page, specify the Oracle_Home installation location that you specified in Section 1.4.1.1, "Installing WebLogic Server". For example:
/scratch/Oracle/Middleware/Oracle_Home
Click Next.
-
On the Prerequisites Check page, the installation program checks the operating system and the Java version. When it completes, click Next.
-
The Installation Summary page displays a summary report of this installation. Review it before you click Install.
The Installation Progress page shows the steps and progress of the installation.
-
On the Installation Complete page, note the Create MapViewer domain option.
-
If you enable (check) this option, when you click Finish you are taken to the WebLogic Server configuration program to start deploying MapViewer.
-
If you disable (uncheck) this option, when you click Finish you are not automatically taken to the WebLogic Server configuration program, but must launch that program manually later.
-
1.4.1.4 Configuring WebLogic Server
To configure WebLogic Server to deploy MapViewer, follow these steps.
-
If you did not enable the Create MapViewer domain option in the last step in Section 1.4.1.3, "Installing MapViewer Using the Universal Installer", go to
$Oracle_Home/wlserver/common/binand launch the configuration wizard (config.shfile). For example:cd /scratch/Oracle/Middleware/Oracle_Home/oracle_common/common/bin ./config.sh
-
On the Configuration Type page, specify the
Create new domainoption because you need to create a new domain for MapViewer.Either specify a domain location or accept the default location (which may be similar to
/scratch/Oracle/Middleware/Oracle_Home/user_projects/domains/base_domain), and click Next. -
On the Templates page:
-
Select Create Domain Using Product Templates.
-
Template Categories:All Categories -
Available Templates: Ensure that the following are selected if you installed JRF components. If you did not need to install JRF components for MapViewer, then just select the first (Mapviewer) template.Oracle MapViewer-12.2.1.x.0 [oracle_common] Oracle JRF 12.2.1.x.0 [oracle_common] WebLogic Coherence Cluster Extension-12.2.1.x.0 [wlserver]
Click Next.
-
-
On the Administrator Account page, enter the name for the account or accept the default name, enter and confirm the password, and click Next. (You will need the name and password when you log in to the administrator account.)
-
On the Domain Mode and JDK page, select the appropriate domain mode (Development or Production) and the JDK location, and click Next.
-
(Only if the Oracle JRF template was selected in step 3:) On the Database Configuration Type page, specify the required information. For Schema Owner and Schema Password, specify the values from Section 1.4.1.2, "Creating Required JRF Components Using the Repository Creation Utility" (if you ran that utility) -- for example, DEV_STB for Schema Name.
After entering the information, click Get RCU Configuration to retrieve the schema data that was loaded into the database by the repository creation utility. When this operation completes, click Next.
-
(Only if the Oracle JRF template was selected in step 3:) On the JDBC Component Schema page, select all listed schemas (
LocalSvcTbl Schema,OPSS Audit Schema,OPSS Audit Viewer Schema, andOPSS Schema), and click Next. -
On the Advanced Configuration page, select Administration Server, and click Next. (Optionally, before clicking Next select any other advanced configuration options that you want to specify in subsequent wizard pages.)
-
On the Administration Server page, for each option either accept the default value or specify a different one. Examples of default values: Server Name as
AdminServer, Listen Address asAll Local Addresses, and Listen Port as7001.In Server Groups, check options
JRF-MAN-SVR(if the Oracle JRF template was selected in step 3) andMAPVIEWER-MAN-SVRin order for MapViewer to be deployed inAdminServerClick Next.
-
On the Configuration Summary page, you can select among several Views (Deployment, Application, Service) to see configuration details, then click Create to create the domain for MapViewer.
-
On the Configuration Progress page, view the progress and steps for domain creation, then click Next.
-
On the Configuration Success page, note the Domain Location (where you will need to go to start WebLogic Server) and the Admin Server URL (where you will need to go to manage the MapViewer server). (You do not need to click those links now.)
If you selected additional options on the Advanced Configuration page, there will be more steps in the configuration. In particular, if you deploy to a managed server with Oracle JRF (Java Required Files) using an Oracle RAC data source, note the following:
-
When JRF (or Enterprise Manager) is being extended to the domain, ensure that both the MDS and OPSS schemas are created by the repository creation utility (RCU). (These schemas are not used by MapViewer itself; rather, they are dependencies of JRF.)
-
The Enterprise Manager or JRF templates must target the same managed server or servers to which MapViewer is being deployed. In other words, JRF libraries and related services must be available on the target managed server or servers.
-
Ensure all the JRF-related data sources used to connect to the RCU schemas, such as MDS and OPSS, are deployed to the same managed server or servers. When Multi type data sources are used (as is often the case with Oracle RAC databases), ensure all the Multi type data sources and their child Generic type data sources are deployed to the managed server or servers. (These data sources are not used by MapViewer; rather, they are required by JRF during server startup and for application deployment.)
1.4.1.5 Starting WebLogic Server and Configuring MapViewer
To start WebLogic Server and perform some MapViewer administration tasks, follow these steps:
-
Start WebLogic Server, go to the domain location, and run
startWebLogic.sh. For example:cd /scratch/Oracle/Middleware/Oracle_Home/user_projects/domains/base_domain ./startWebLogic.sh
If you are prompted for the WebLogic Administrator user name and password, enter the values you specified in Section 1.4.1.4, "Configuring WebLogic Server".
-
When the server is running. open a browser window and enter the Admin Server URL (see the last step in Section 1.4.1.4, "Configuring WebLogic Server").
-
On the WebLogic Server Administration Console, notice
mapViewerunder Deployments, and click the mapViewer name to display the MapViewer settings page. -
On the MapViewer settings page, click the Testing tab, expand the
mapviewernode, and click the default MapViewer URL to open the application in a browser. -
Enter the user name and password for MapViewer administration (typically the same as for WebLogic Server administration).
-
On the MapViewer Administration home page. there are many administrative tasks that you can perform. For example, you can configure a map data source, as follows:
-
Click Configuration (upper left part on the page).
-
In the displayed XML text area, find the commented-out
<map_data_source>element, and remove the comment characters and change the element definition to be one valid for the data source you want to define. -
Click Save and then Restart to apply the changes. (You should see a progress bar display while MapViewer is restarting.)
-
After MapViewer has restarted, you can click the Admin link and see that your data source has been added.
-
1.4.2 Manually Deploying an Exploded MapViewer EAR Folder in WebLogic Server
This section describes how to deploy MapViewer manually from an exploded EAR folder in WebLogic Server. It contains the following topics:
1.4.2.1 Prerequisites for Manually Deploying MapViewer
Before you can manually deploy MapViewer, you must have done the following:
-
Installed WebLogic Server 12c, as explained in Section 1.4.1.1, "Installing WebLogic Server"
-
Created the necessary Java Runtime Framework (JRF) components, as explained in Section 1.4.1.2, "Creating Required JRF Components Using the Repository Creation Utility"
-
Configured WebLogic Server, as explained in Section 1.4.1.4, "Configuring WebLogic Server"
(If you cannot see and select MapViewer and MapViewer Samples templates, it is because you skipped the steps in Section 1.4.1.3, "Installing MapViewer Using the Universal Installer".)
-
Started WebLogic Server, as explained in Section 1.4.1.5, "Starting WebLogic Server and Configuring MapViewer"
1.4.2.2 Unpacking the MapViewer EAR File into a Folder
You must download the MapViewer archived file, mapviewer.ear, from the Oracle Technology Network, and then unpack it to a directory on the server where WebLogic is running. This directory will become the working folder of your MapViewer installation, where MapViewer will (by default) read the configuration file and save generated map images into some subdirectories. It is recommended that the directory be a permanent (not temporary) one. It can be a shared directory if you want the same MapViewer binaries to be deployed to multiple WebLogic servers running on multiple hosts.
The MapViewer directory is typically named mapviewer.war or mapviewer (or the same as the context path under which MapViewer is deployed).
In the following instructions, assume that you have created a directory named /scratch/ul/mapviewer as the top MapViewer directory. If you create another directory, adapt the instructions accordingly. Follow these steps to unpack the mapviewer.ear file into that directory:
-
Copy
mapviewer.earinto/scratch/ul/mapviewer. -
If
/scratch/ul/mapvieweris not already your current directory, go there. -
Rename
mapviewerrm.eartomapviewer.ear. -
Create a subdirectory named
mapviewer.ear. -
Unpack
mapviewer1.earintomapviewer.ear(that is, into/scratch/ul/mapviewer/mapviewer.ear). -
Go to the
mapviewer.eardirectory. -
Rename
web.wartoweb1.war. -
Create a subdirectory named
web.war. -
Unzip
web1.warintoweb.war(that is, into/scratch/ul/mapviewer/mapviewer.ear/web.war).
The mapviewer.ear file is now unpacked and configured. Under its deployment directory, which is mapviewer.ear folder, there are many subdirectories. You may want to explore a bit and familiarize yourself with some of the subdirectories in case you want to perform debugging, administration, or manual configuration. The following show some of the main subdirectories of this MapViewer deployment example:
/mapviewer.ear
    META-INF/
    web.war/
       console/
       css/
       fsmc/
        css/
        images/
        jslib
       icons/
       jet/
       jslib/
          v2/
       META-INF/
       scripts/
       templates/
       WEB-INF/
            admin/
            catalogs/
            classes/
            conf/
            lib/
            tags/
            xsd/
The /web.war/fsmc directory contains the Oracle Maps JavaScript V1 API library, and the /web.war/jslib directory contains the Oracle Maps JavaScript V2 API library. The /web.war/WEB-INF directory and its subdirectories contain libraries and MapViewer administration and configuration files.
Because you have unpacked MapViewer's EAR file into an exploded folder, you can start deploying the folder to WebLogic Server. You must ensure that WebLogic Server is properly configured and up and running before moving onto the next MapViewer deployment stage.
1.4.2.3 Deploying MapViewer from an Exploded EAR File
Follow there steps to deploy the exploded MapViewer EAR folder to WebLogic Server:
-
Log in to the WebLogic Server Administration Console page.
-
If WebLogic Server was configured in Production mode, lock the server: go to Change Center > View changes and restarts, and click Lock & Edit.
-
Go to Domain Structure > Deployments.
-
On the Deployments page, click Install (above the list of deployments).
-
In the Install Application Assistant, under Locate deployment to install and prepare for deployment, for Path specify
/scratch/ul.mapviewer, for Current Location selectmapviewer.ear(the exploded EAR folder), and click Next. -
Under Choose targeting style, accept the default (
Install this deployment as an application), and click Next. -
Under Optional Settings, accept the defaults except under Service Accessibility, select
I will make this deployment accessible from the following location.This option causes the unpacked MapViewer location to become the "working" directory of MapViewer. It also makes it easier if you want to upgrade MapViewer in the future, in which case you simply unpack the new
mapviewer.earfile to this directory and restart WebLogic Server. Click the Finish button to go to the Summary of deployment page.Click Finish.
-
On the Summary of Deployments page for the mapviewer deployment, under Change Center > View changes and restarts, click Activate Changes.to activate the deployment.
-
Start MapViewer as follows:
-
Go to Change Center > View changes and restarts, and click Lock & Edit.
-
Go to Domain Structure > Deployments.
-
In the Deployments list, select
mapviewer. -
Click Start > Servicing all requests (below the Deployments list).
MapViewer is now started (its State is
Active).
-
If you want, you can log in to the MapViewer Administration Console to perform some administrative tasks (for example, see Section 1.4.1.5, "Starting WebLogic Server and Configuring MapViewer").
1.4.3 Manually Deploying an Unexploded MapViewer EAR File in WebLogic Server
This section discusses how to prepare and manually deploy the MapViewer archive file, the mapviewer.ear file, in WebLogic Server 12c. It covers the following topics:
1.4.3.1 Preparing to Install MapViewer From an Unexploded EAR File
Before deploying MapViewer from an un-exploded (archived) file, you need to create a folder and copy some configuration files into that folder. There is no requirements as to where you should create the folder, but it is recommended that you designate a folder that serves as MapViewer's private folder, and copy the configuration files under the exploded WEB-INF/conf folder into a subfolder also named conf. This private folder should be outside any temporary deployment folders, and outside any other locations that might be overwritten during a system installation or upgrade. Configuration files must be copied from the WEB-INF/conf folder into this private folder's conf subdirectory. (See Section 1.4.2.2, "Unpacking the MapViewer EAR File into a Folder" for the exploded folder structure and to see what is in the WEB-INF/conf folder).
The files to copy to WEB-INF/conf/conf are the following:
afwRules.xml
mapViewerConfig.xml
wmsConfig.xml
wmtsConfig.xml
If the Java EE servers are running as a cluster, it is strongly recommended that the private folder for MapViewer be placed on a shared drive, so that all deployed MapViewer binaries can see and use it. This private folder should never be accessible to the public. Note that at runtime, MapViewer also creates and modifies several folders and files inside the private folder, such as log files and cached map tiles.
Creating such a private folder to store the editable configuration files also applies to the case when MapViewer is deployed from an exploded EAR folder, but you want to make the folder read-only so that MapViewer does not create or change any files in the exploded EAR folder during runtime.
For both cases, either MapViewer is deployed from an unexploded EAR file or from a read-only exploded-EAR folder, you must specify where the external mapViewerConfig.xml file is, so that at runtime MapViewer can determine the private folder and load configuration parameters from its appropriate configuration files. The default private folder is the MapViewer EAR archive's WEB-INF/ folder, and WEB-INF/conf/ is the folder containing the configuration files.
In this example, the external folder is set to /scratch/_maps/. A subfolder, /scratch/_maps/conf, is created to contain the configuration files that were copied from the EAR file's WEB-INF/conf folder into WEB-INF/conf/conf.
You must tell MapViewer where to look for the external mapViewerConfig.xml file. You can use several methods for this, but for all methods you specify the absolute path to this mapViewerConfig.xml file, and then MapViewer derives the private folder based on this path. For example, assume external folder is at /scratch/_maps/conf/ and that you have copied the mapViewerConfig.xml, afwRules.xml, wmsConfig.xml, and wmtsConfig.xml files into it. In this case, during startup MapViewer checks in the locations for the preceding methods in the order listed, and uses whichever mapViewerConfig.xml file it finds first. When MapViewer finds the location (in this example /scratch/_maps/), it uses the folder as the private folder.:
If MapViewer still cannot find an external mapViewerConfig.xml file after trying locations for all of the preceding methods, it attempts to find the default mapViewerConfig.xml file in the EAR file's WEB-INF/conf/folder. Consequently, this will no longer be a read-only deployment, because MapViewer will be writing files into the exploded EAR folder from its deployment, just as in the traditional deployment (be deployed from an exploded EAR folder).
For all methods in which an external mapViewerConfig.xml file is being used, you must also specify a public folder for MapViewer to save the generated map images, as explained in section "Specifying a Public Folder for Generated Map Images".
Use one of the following methods to tell MapViewer where to look for the external mapViewerConfig.xml file:
-
Method 1: Use a JVM option.
This method specifies the location of the external
mapViewerConfig.xmlfile using a JVM option,oracle.maps.config, which is typically added to the Java EE server startup script. For example, for WebLogic server you can add this option to the domain'ssetDomainEvn.shscript (right after the-Djavax.management.builder.initial=weblogic.management.jmx.mbeanserver.WLSMBeanServerBuilderoption in that script):EXTRA_JAVA_PROPERTIES= "… -Doracle.maps.config=/scratch/_maps/conf/mapViewerConfig.xml … "
After making the change, you must restart WebLogic Server before attempting the MapViewer deployment.
-
Method 2: Use : Use a
<context-param>element inweb.xml.This method requires modifying the included
web.xmlfile in the MapViewer EAR archive file'sWEB-INF/ folderbefore deployment. In theweb.xmlfile, add a new<context-param>element just after the<description>element to specify the location of the external configuration file. For example:<context-param> <param-name>oracle.maps.config</param-name> <param-value>/scratch/_maps/conf/mapViewerConfig.xml</param-value> </context-param> -
Method 3: Use a properties file in the classpath.
This method involves creating a properties file and placing it in the MapViewer classpath, as follows:
-
Create a text file named
config.propertiescontaining a single line referring to the location of themapViewerConfig.xmlfile. For example:oracle.maps.config=/scratch/_maps/conf/mapViewerConfig.xml
-
Create an empty folder
oracle/and a subfoldermaps/, and saveconfig.propertiesfile in themaps/subfolder. In other words, you should have a path like this:oracle/maps/config.properties
-
Create a JAR archive that contains this path and file, and run the
jarcommand from inside the parent folder oforacle. (The name of the ,jar file can be anything you want.) For examplejar cvf maps_config.jar oracle
-
Place this newly created JAR file in the MapViewer classpath. For example, in WebLogic Server you can place this jar in the domain's
libfolder. For example, in:/scratch/Oracle/Middleware/Oracle_Home/user_projects/domains/base_domain/lib
-
1.4.3.1.1 Specifying a Public Folder for Generated Map Images
When an external mapViewerConfig.xml file is to be used, you must also specify a public folder for MapViewer to save generated map images so that users and MapViewer client applications can access them over the web. To do this, specify an appropriate path attribute in the <save_images_at> element of the external mapViewerConfig.xml file.
Be sure that the <save_images_at> element is not commented out. (By contrast, in the traditional deployment you can often leave the <save_images_at> element commented out, in which case MapViewer uses the images folder of the exploded WAR file for saving generated map images.)
The specified path must not point to any location inside the MapViewer EAR archive or folder.
If you have multiple MapViewer instances running in a cluster, this public folder must be on a shared drive.
1.4.3.2 Installing MapViewer from an Unexploded EAR File
This section covers the steps when you manually deploy MapViewer from an archived (unexploded) EAR file.
Note:
Before you perform the steps in this section, you must also be sure you have downloaded themapviewer.ear file from the Oracle Technology Network to a folder, such as /scratch/ul/mapviewer, and that you have met the prerequisites explained in Section 1.4.2.1, "Prerequisites for Manually Deploying MapViewer".-
Log in to the WebLogic Server Administration Console page.
-
If WebLogic Server was configured in Production mode, lock the server: go to Change Center > View changes and restarts, and click Lock & Edit.
-
Go to Domain Structure > Deployments.
-
On the Deployments page, click Install (above the list of deployments).
-
In the Install Application Assistant, under Locate deployment to install and prepare for deployment, for Path specify
/scratch/ul.mapviewer, for Current Location selectmapviewer.ear(the exploded EAR folder), and click Next. -
Under Choose targeting style, accept the default (
Install this deployment as an application), and click Next. -
Under Optional Settings, accept the defaults and click Finish.
-
On the Summary of Deployments page for the mapviewer deployment, under Change Center > View changes and restarts, click Activate Changes.to activate the deployment.
-
Start MapViewer as follows:
-
Go to Change Center > View changes and restarts, and click Lock & Edit.
-
Go to Domain Structure > Deployments.
-
In the Deployments list, select
mapviewer. -
Click Start > Servicing all requests (below the Deployments list).
MapViewer is now started (its State is
Active).
-
1.4.4 After Deploying MapViewer
After deploying MapViewer, you may need or want to perform one or more actions:
1.4.4.1 Verifying If the Deployment Was Successful
To test if the MapViewer server has started correctly, point your browser to the MapViewer instance. For example, if MapViewer is installed on a system named www.example.com and the HTTP port is 7001, enter the following URL to invoke the MapViewer server with a simple get-version request:
http://www.example.com:8888/mapviewer/omserver?getv=t
If MapViewer is running correctly, it should immediately send back a response text string indicating the version number, such as:
12.2.1.1.0
If the server has not been started or initialized correctly, there will be no response, or the message 500 internal server error will be displayed.
If the response message includes wording like MapServer is not ready, try again later, This could mean that the MapViewer server is initializing, but the process will take some additional time (for example, because the system is slow or because multiple predefined data sources are specified in the configuration file and MapViewer is attempting to connect to these databases). In this case, you can wait for at least a few seconds and try the preceding request again.
However, if you continue to get this response message, there may be a problem with the deployment. You then need to look into the log file to identify the underlying cause.
1.4.4.2 Running SQL Scripts
If the target Oracle Database version is 12.1 or later, you do not need to run any scripts described in this topic.
If the target database is earlier than Oracle Database 12.1, you need to run at least one script and possibly more. For each script that you run, you must run it on each target Oracle database from which MapViewer will render spatial data.
MapViewer uses a set of system views to store necessary mapping metadata in a target database. A target database is a database with Oracle Spatial and Graph or Oracle Locator (Release 10g or later) installed and from which you want MapViewer to render maps. MapViewer requires the following system views:
-
USER_SDO_MAPS
-
USER_SDO_THEMES
-
USER_SDO_STYLES
-
USER_SDO_CACHED_MAPS
The USER_SDO_CACHED_MAPS view is used by the Oracle Maps feature. It stores definitions of map tile cache instances. If the target database is earlier than Oracle Database 12.1,you must create this view manually by running the following script while connected as the SYS user:
SQL> @$MV_HOME/WEB-INF/admin/mcsdefinition.sql
-
USER_SDO_EDIT_SESSIONS
The USER_SDO_EDIT_SESSIONS view is used to store editing sessions for the Map editor application. It stores definitions of data that can be edited. Verify if your database has this editing view, and if not then run the following script while connected as the SYS user:
SQL> @$MV_HOME/WEB-INF/admin/sdedefinition.sql
If the target database is Release 9.2 or later, the USER_SDO_MAPS, USER_SDO_THEMES, and USER_SDO_STYLES views are created and populated automatically. However, if the target database has a release number lower than 9.2, you must manually create and populate these views by running the following scripts while connected as the MDSYS user:
SQL> @$MV_HOME/WEB-INF/admin/mapdefinition.sql
SQL> @$MV_HOME/WEB-INF/admin/defaultstyles.sql
1.4.4.3 Creating MapViewer Array Types (If Necessary)
For each database schema that it connects to, MapViewer checks for the existence of the following SQL array types that support array-type binding variables that might exist in some predefined themes:
-
MV_STRINGLIST
-
MV_NUMBERLIST
-
MV_DATELIST
If these types do not exist, MapViewer attempts to create them in the database schema associated with the MapViewer data source. However, if the user associated with that schema does not have sufficient privileges to create new types, a privileged user must create the types by connecting to the data source schema and entering the following statements:
CREATE or REPLACE type MV_STRINGLIST as TABLE of VARCHAR2(1000);
CREATE or REPLACE type MV_NUMBERLIST as TABLE of NUMBER;
CREATE or REPLACE type MV_DATELIST as TABLE of DATE;
1.5 Upgrading MapViewer
Upgrading MapViewer enables you to use an existing MapViewer configuration in WebLogic Server on Oracle Fusion Middleware Release 12.2.1.x.0. If you have an existing MapViewer installation (11g or 12c) with a Fusion Middleware release before 12.2.1.x.0, and if you want to continue to use your existing MapViewer configuration, follow the instructions in this section.
The main upgrade steps are:
1.5.1 Shutting Down the Old WebLogic Server
Before starting deployment of the new MapViewer 12c version in WebLogic 12c, it is recommended that you shut down the old WebLogic Server, for example, WebLogic Server 11g.
You can shut down the WebLogic Server using the administration console page or using a command line in the command line window.
1.5.2 Deploying MapViewer in WebLogic Server 12c
Follow the guidelines in Section 1.4, "Installing and Deploying MapViewer in WebLogic Server 12c" to deploy the new MapViewer 12c in Weblogic Server 12c. The new MapViewer can be deployed in any deployment option in Section 1.4. When the deployment is done, MapViewer needs to be up and running.
1.5.3 Running the Upgrade Assistant Wizard
After the old WebLogic Server has been shut down and the newly deployed MapViewer is up and running, follow these step to perform the upgrade. In these steps, assume that the Oracle Home of the new WebLogic Server 12c is /scratch/Oracle/Middleware12c/Oracle_Home.
-
Go to
$Oracle_Home/oracle_common/upgrade/bin, and run theua(Upgrade Assistant Wizard) program:./ua
-
When you see the Upgrade Assistant Welcome page, click Next.
-
On the Weblogic Components page, for type of upgrade select All Configurations Used by a Domain.
For Domain Directory, specify the
12.2.1.x.0domain directory.Click Next.
-
On the Component List page, ensure that Oracle MapViewer is in the list of components to be upgraded, and click Next.
-
On the Prerequisites page, check (select) all boxes.
-
On the MapViewer Upgrade page, select the MapViewer configuration file version.
-
For Release 11, specify the path for
mapViewerConfig.xmlfor the old MapViewer deployment. (Usually it is located at the folder of the unpacked EAR configuration, for example,$EAR_FOLDER/web.war/WEB-INF/conf.) Then click Next. -
For Release 12, the default path on the wizard page points to the 12.2.1.x.0 domain configuration file to be upgraded; however, you can specify another path. Then click Next.
-
-
On the Examine page, view the status of a pre-check of the components before any upgrade occurs (for example,
succeededindicating upgrade of the component can proceed, orupgrade not necessary), and click Next. -
On the Upgrade Summary page, view the list of configurations that will be upgraded, and click Upgrade.
-
On the Upgrade Progress page, view the progress of the upgrade and the status of any components that were upgraded.
After closing Upgrade Assistant, you can either restart MapViewer using its administration console or go back to the WebLogic Server Administration Console to restart MapViewer server. If you use the MapViewer's administration console, go to the Configuration page and click Restart. If you use the WebLogic Server administration console, from the Deployments table, Stop and then Start MapViewer to have the upgrade take effect.
If you now log in to the MapViewer's Administration Console (see Section 1.6, "Administering MapViewer") and view the Configuration and Datasources, you will notice that the old MapViewer has been successfully migrated into the newly deployed MapViewer.
1.6 Administering MapViewer
This section introduces the MapViewer Administration page and some administrative and configuration tasks that you can perform, such as adding new data sources, managing map tile layers used by Oracle Maps, and setting logging levels. It includes the following topics:
1.6.1 Logging in to the MapViewer Administration Page
After you have verified that MapViewer is running properly, it is suggested that you log in to the MapViewer Administration page. To do this, go first to the MapViewer Welcome page, which is typically http://<host>:<port>/mapviewer, where <host> and <port> should be replaced by the correct value for your installation. Figure 1-3 shows the MapViewer Welcome page
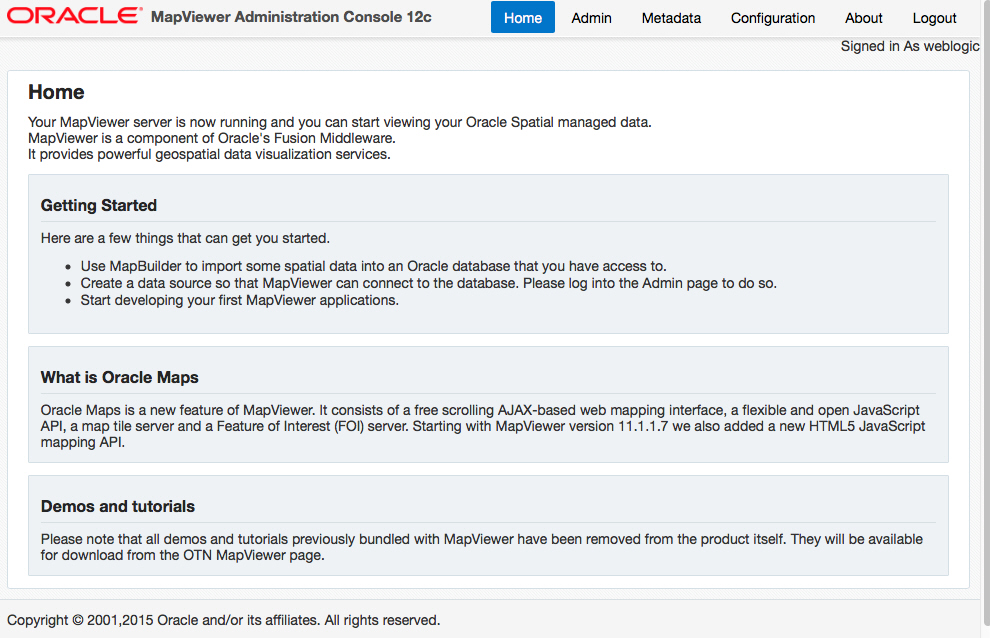
Click the Admin link at the top right.
The MapViewer administration page is displayed, as shown in Figure 1-4.
Figure 1-4 MapViewer Administration Page
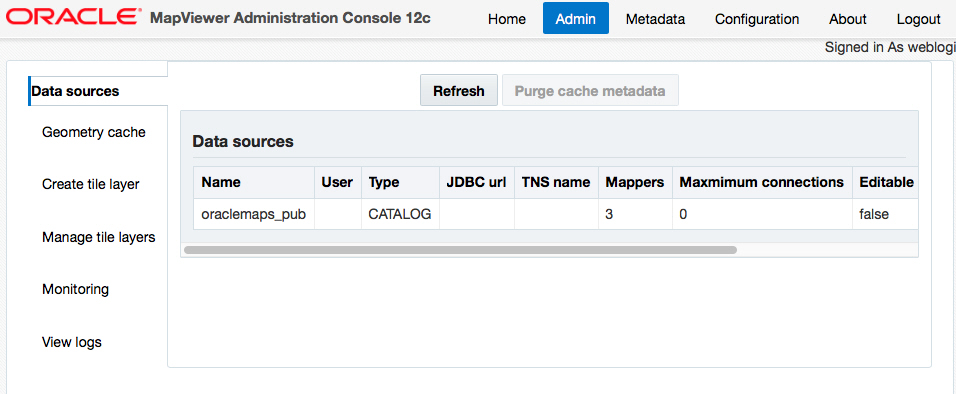
Description of ''Figure 1-4 MapViewer Administration Page''
You can use this administration page to perform administrative tasks, such as clearing cached data, creating tile layers, managing tile layers, and restarting the server (use the Monitoring link to restart).
1.6.2 Configuring MapViewer
If the default configuration settings for running MapViewer are not adequate, you can configure MapViewer by editing the MapViewer configuration file, mapViewerConfig.xml, which is located in the $MAPVIEWER_HOME/WEB-INF/conf directory. To modify this file, you can use a text editor, or you can use the MapViewer Administration page.
After you modify this file, you must restart the container to have the changes take effect; however, you can instead use the MapViewer Administration page to restart only the MapViewer servlet (instead of the entire Java EE instance, which may have other applications deployed and running) if you installed MapViewer with a standalone Glassfish instance.
If you deployed MapViewer to a WebLogic Server instance with multiple processes (thus with multiple physical JVMs on the same host), or if you deployed to a WebLogic Server instance that is in a clustered island (with multiple WLS instances running on multiple hosts), you must restart the WebLogic Server instance itself for the changes to the MapViewer configuration file to take effect in all MapViewer servers. In the latter case (clustered WebLogic Server instances), you may also need to modify the MapViewer configuration file in the MapViewer directory hierarchy for each host's WebLogic Server instance in the cluster.
The MapViewer configuration file defines the following information in XML format:
-
Logging information, defined either through container-controlled logging (recommended) or in the
<logging>element (see Section 1.6.2.1) -
Map image file information, defined in the
<save_images_at>element (see Section 1.6.2.2) -
Administrative request restrictions, defined in the
<ip_monitor>element (see Section 1.6.2.3) -
Web proxy information for accessing external information across a firewall, defined in the
<web_proxy>element (see Section 1.6.2.4) -
Global map "look and feel" configuration, defined in the
<global_map_config>element (see Section 1.6.2.5) -
Internal spatial data cache settings, defined in the
<spatial_data_cache>element (see Section 1.6.2.6) -
Custom image renderer registration, defined in the
<custom_image_renderer>element (see Appendix C) -
Permanent map data sources, defined in the
<map_data_source>element (see Section 1.6.2.15) -
Security configurations, defined in the
<security_config>element -
WMS services configurations, defined in the
<wms_config>element -
External attribute data provider registration, defined in
<ns_data_provider>elements -
Map tile server configurations, defined in the
<map_tile_server>element -
UTF grid lifecycle parameters, defined in the
<utfgrid_life_cycle>element -
External spatial data provider registration, defined in the
<s_data_provider>element -
Map data sources, defined in the
<map_data_source>element -
Map data server stream parameters, defined in the
<mds_config>element -
OAM logout parameters, defined in the
<oam_logout>element
All path names in the mapViewerConfig.xml file are relative to the directory in which the file is stored, unless otherwise specified.
Example 1-1 shows a sample mapViewerConfig.xml file.
Example 1-1 Sample MapViewer Configuration File
<?xml version="1.0" ?>
<!-- This is the configuration file for MapViewer. -->
<!-- Note: All paths are resolved relative to this directory (where
           this config file is located), unless specified as an absolute
           path name.
 -->

<MapperConfig>

  <!-- ****************************************************************** -->
  <!-- ************************ Logging Settings ************************ -->
  <!-- ****************************************************************** -->

  <!-- Uncomment the following to modify logging. Possible values are:
       log_level = "fatal"|"error"|"warn"|"info"|"debug"|"finest"
                 default: info) ;
       log_thread_name = "true" | "false" ;
       log_time = "true" | "false" ;
       one or more log_output elements.
  -->
  <!--
    <logging log_level="info" log_thread_name="false"
             log_time="true">
       <log_output name="System.err" />
       <log_output name="../log/mapviewer.log" />
    </logging>
  -->

  <!-- ****************************************************************** -->
  <!-- ********************** Map Image Settings ************************ -->
  <!-- ****************************************************************** -->

  <!-- Uncomment the following only if you want generated images to
       be stored in a different directory, or if you want to customize
       the life cycle of generated image files.

       By default, all maps are generated under
       $ORACLE_HOME/lbs/mapviewer/web/images.

       Images location-related attributes:
       file_prefix: image file prefix, default value is "omsmap"
       url:  the URL at which images can be accessed. It must match the 'path'
             attribute below. Its default value is "%HOST_URL%/mapviewer/images"
       path: the corresponding path in the server where the images are
             saved; default value is "%ORACLE_HOME%/lbs/mapviewer/web/images"

       Images life cycle-related attributes:
       life: the life period of generated images, specified in minutes.
             If not specified or if the value is 0, images saved on disk will
             never be deleted.
       recycle_interval:  this attribute specifies how often the recycling
             of generated map images will be performed. The unit is minute.
             The default interval (when not specified or if the value is 0)
             is 8*60, or 8 hours.

   -->
  <!--
   <save_images_at  file_prefix="omsmap"
                   url="http://mypc.mycorp.com:8888/mapviewer/images"
                   path="../web/images"
   />
  -->

  <!-- ****************************************************************** -->
  <!-- ********************* IP Monitoring Settings ********************* -->
  <!-- ****************************************************************** -->

  <!-- Uncomment the following to enable IP filtering for administrative
        requests.
    Note:
    - Use <ips> and <ip_range> to specify which IPs (and ranges) are allowed.
      Wildcard form such as 20.* is also accepted. Use a comma-delimited
      list in <ips>.

    - Use <ips_exclude> and <ip_range_exclude> for IPs and IP ranges
      prohibited from accessing eLocation.

    - If an IP falls into both "allowed" and "prohibited" categories, it is
      prohibited.

    - If you put  "*" in an <ips> element, then all IPs are allowed, except
      those specified in <ips_exclude> and <ip_range_exclude>.
      On the other hand, if you put "*" in an <ips_exclude> element, no one
      will be able to access MapViewer (regardless of whether an IP is in
      <ips> or <ip_range>).

    - You can have multiple <ips>, <ip_range>, <ips_exclude>, and
      <ip_range_exclude> elements under <ip_monitor>.

    - If no <ip_monitor> element is present in the XML configuration
      file, then no IP filtering will be performed (all allowed).

    - The way MapViewer determines if an IP is allowed is:

          if(IP filtering is not enabled) then allow;
          if(IP is in exclude-list) then not allow;
          else if(IP is in allow-list) then allow;
          else not allow;
   -->

  <!--
     <ip_monitor>
          <ips> 138.1.17.9, 138.1.17.21, 138.3.*, 20.* </ips>
          <ip_range> 24.17.1.3 - 24.17.1.20 </ip_range>
          <ips_exclude> 138.3.29.* </ips_exclude>
          <ip_range_exclude>20.22.34.1 - 20.22.34.255</ip_range_exclude>
     </ip_monitor>
   -->

  <!-- ****************************************************************** -->
  <!-- ********************** Web Proxy Setting  ************************ -->
  <!-- ****************************************************************** -->
  <!-- Uncomment and modify the following to specify the web proxy setting.
       This is only needed for passing background image URLs to
       MapViewer in map requests or for setting a logo image URL, if
       such URLs cannot be accessed without the proxy.
   -->

  <!--
    <web_proxy host="www-proxy.my_corp.com"  port="80" />
  -->

  <!-- ****************************************************************** -->
  <!-- *********************** Security Configuration ******************* -->
  <!-- ****************************************************************** -->
  <!-- Here you can set various security related configurations of MapViewer.
  -->

  <security_config>
    <disable_direct_info_request> false </disable_direct_info_request>
  </security_config>

  <!-- ****************************************************************** -->
  <!-- *********************** Global Map Configuration ***************** -->
  <!-- ****************************************************************** -->
  <!-- Uncomment and modify the following to specify systemwide parameters
       for generated maps. You can specify your copyright note, map title, and
       an image to be used as a custom logo shown on maps. The logo image must
       be accessible to this MapViewer and in either GIF or JPEG format.
       Notes:
         -  To disable a global note or title, specify an empty string ("") for
            the text attribute of <note> and <title> element.
         - position specifies a relative position on the map where the
                  logo, note, or title  will be displayed. Possible values are
                  NORTH, EAST, SOUTH, WEST, NORTH_EAST, SOUTH_EAST,
                  SOUTH_WEST, NORTH_WEST, and CENTER.
         - image_path specifies a file path or a URL (starts with "http://")
                    for the image.

       <rendering> element attributes:
       - Local geodetic data adjustment: If allow_local_adjustment="true",
         MapViewer automatically performs local data
         "flattening" with geodetic data if the data window is less than
         3 decimal degrees. Specifically, MapViewer performs a simple
         mathematical transformation of the coordinates using a tangential
         plane at the current map request center.
         If allow_local_adjustment="false" (default), no adjustment is
         performed.
       - Automatically applies a globular map projection (geodetic data only):
         If use_globular_projection="true", MapViewer will
         apply a globular projection on the fly to geometries being displayed.
         If use_globular_projection="false" (the default), MapViewer does no map
         projection to geodetic geometries. This option has no effect on
         non-geodetic data.
   -->

  <!--
    <global_map_config>
        <note text="Copyright 2009, Oracle Corporation"
              font="sans serif"
              position="SOUTH_EAST"/>
        <title  text="MapViewer Demo"
                font="Serif"
                position="NORTH" />
        <logo image_path="C:\\images\\a.gif"
              position="SOUTH_WEST" />

        <rendering allow_local_adjustment="false"
                   use_globular_projection="false" />
    </global_map_config>
  -->

  <!-- ****************************************************************** -->
  <!-- ****************** Spatial Data Cache Setting  ******************* -->
  <!-- ****************************************************************** -->
  <!-- Uncomment and modify the following to customize the spatial data cache
       used by MapViewer. The default is 64 MB for in-memory cache.

       To disable the cache, set max_cache_size to 0.

       max_cache_size:  Maximum size of in-memory spatial cache of MapViewer.
                        Size must be specified in megabytes (MB).
       report_stats:    If you would like to see periodic output of cache
                        statistics, set this attribute to true. The default
                        is false.
   -->

  <!--
    <spatial_data_cache   max_cache_size="64"
                          report_stats="false"
    />
  -->

  <!-- ****************************************************************** -->
  <!-- ******************** Custom Image Renderers ********************** -->
  <!-- ****************************************************************** -->
  <!-- Uncomment and add as many custom image renderers as needed here,
       each in its own  <custom_image_renderer> element. The "image_format"
       attribute specifies the format of images that are to be custom
       rendered using the class with full name specified in "impl_class".
       You are responsible for placing the implementation classes in the
       MapViewer's classpath.
  -->
  <!--
  <custom_image_renderer image_format="ECW"
                         impl_class="com.my_corp.image.ECWRenderer" />
  -->

  <!-- ****************************************************************** -->
  <!-- ****************** Custom WMS Capabilities Info ****************** -->
  <!-- ****************************************************************** -->
  <!-- Uncomment and modify the following tag if you want MapViewer to
       use the following information in its getCapabilities response.
       Note: all attributes and elements of <wms_config> are optional.
  -->
  <!--
  <wms_config host="www.my_corp.com" port="80">
    <title>
        WMS 1.1 interface for Oracle Mapviewer
    </title>
    <abstract>
        This WMS service is provided through MapViewer.
    </abstract>
    <keyword_list>
       <keyword>bird</keyword>
       <keyword>roadrunner</keyword>
       <keyword>ambush</keyword>
    </keyword_list>
    <sdo_epsg_mapfile>
      ../config/epsg_srids.properties
    </sdo_epsg_mapfile>
  </wms_config>
  -->

  <!-- ****************************************************************** -->
  <!-- **************** Custom Non-Spatial Data Provider **************** -->
  <!-- ****************************************************************** -->
  <!-- Uncomment and add as many custom non-spatial data provider as
       needed here, each in its own <ns_data_provider> element.
       You must provide the id and full class name here. Optionally you
       can also specify any number of global parameters, which MapViewer
       will pass to the data provider implementation during initialization.
       The name and value of each parameter is interpreted only by the
       implementation.
  -->

  <!-- this is the default data provider that comes with MapViewer; please
       refer to the MapViewer User's Guide for instructions on how to use it.

  <ns_data_provider
    id="defaultNSDP"
    class="oracle.sdovis.NSDataProviderDefault"
  />
  -->

  <!-- this is a sample NS data provider with prameters:
  <ns_data_provider
    id="myProvider1" class="com.mycorp.bi.NSDataProviderImpl" >

    <parameters>
      <parameter name="myparam1" value="value1" />
      <parameter name="p2"       value="v2"     />
    </parameters>

  </ns_data_provider>
  -->

  <!-- ****************************************************************** -->
  <!-- *******************  Map Tile Server Setting  ******************* -->
  <!-- ****************************************************************** -->
  <!-- Uncomment and modify the following to customize the map tile server.

       <tile_storage> specifies the default root directory under which the
       cached tile images are to be stored if the cache instance configuration
       does not specify the root directory for the cache instance. If the
       default root directory is not set or not valid, the default root
       direcotry will be set to be $MAPVIEWER_HOME/web/tilecache

          default_root_path:  The default root directory under which the cached
                              tile images are stored.
  -->

  <!--
     <map_tile_server>
       <tile_storage default_root_path="/scratch/tilecachetest/"/>
    </map_tile_server>
  -->

  <!-- ****************************************************************** -->
  <!-- ******************** Predefined Data Sources  ******************** -->
  <!-- ****************************************************************** -->
  <!-- Uncomment and modify the following to predefine one or more data
       sources.
       Note: You must precede the jdbc_password value with a '!'
             (exclamation point), so that when MapViewer starts the next
             time, it will encrypt and replace the clear text password.
  -->

  <!--
  <map_data_source name="mvdemo"
                   jdbc_host="elocation.example.com"
                   jdbc_sid="orcl"
                   jdbc_port="1521"
                   jdbc_user="scott"
                   jdbc_password="!password"
                   jdbc_mode="thin"
                   number_of_mappers="3"
   />
   -->

</MapperConfig>
This MapViewer configuration topic includes the following subtopics:
1.6.2.1 Specifying Logging Information
MapViewer provides a flexible logging mechanism to record runtime information and events. You can configure the granularity, volume, format, and destination of the log output. You can also configure the maximum size of log files as well as automatic log file rotation.
There are two ways to configure MapViewer's logging: container-controlled logging, and using the <logging> element in the configuration file.
If the <logging> element in the mapViewerConfig.xml file is commented out or missing, MapViewer uses container-controlled logging, specifically using the following loggers:
-
oracle.mapviewer.wsfor all web server (maps, tiles, features) messages -
oracle.mapviewer.accessfor all user access -
oracle.mapviewer.sdovisfor all rendering (maps, themes, features) messages -
oracle.mapviewer.webconsolefor all administrative console log messages
If the <logging> element in the mapViewerConfig.xml file is in use (that is, if the <logging> element is not commented out or missing), MapViewer uses that information instead of using container-controlled logging. The <logging> element can have the following attributes and subelements:
-
The
console_log_levelattribute controls the levels of information that are recorded in the log, which in turn affect the log output volume. Set theconsole_log_levelattribute value to one of the following, listed from most restrictive logging to least restrictive logging:FATAL,ERROR,WARN,INFO,DEBUG, andFINEST. TheFATALlevel outputs the least log information (only unrecoverable events are logged), and the other levels are progressively more inclusive, with theFINESTlevel causing the most information to be logged. For production work, a level ofWARNor more restrictive (ERRORorFATAL) is recommended; however, for debugging you may want to set a less restrictive level. -
The
file_limitattribute controls the maximum file size of a log file. The unit is Mb and the default value is 50 (that is, by the default value for the maximum log file size is 50Mb). -
The
file_countattribute determines the number of log files created. The files are rotated (that is, when the last log file reaches its maximum size, the first log file is reused). The default value is 10. -
The
<logger>subelement specifies the log level for a particular logger. -
The
<log_output>subelement identifies output for the logging information. By default, log records are written to the system error console. You can change this to the system output console or to one or more files, or some combination. If you specify more than one device through multiple<log_output>subelements, the logging records are sent to all devices, using the same logging level and attributes.
1.6.2.2 Specifying Map File Storage and Life Cycle Information
Map image file information is specified in the <save_images_at> element. By default, images are stored in the $ORACLE_HOME /lbs/mapviewer/web/images directory. You do not need to modify the <save_images_at> element unless you want to specify a different directory for storing images.
A mapping client can request that MapViewer send back the URL for an image file instead of the actual map image data, by setting the format attribute of the <map_request> element (described in Section 3.1.2.1.1) to GIF_URL or PNG_URL. In this case, MapViewer saves the requested map image as a file on the host system where MapViewer is running and sends a response containing the URL of the image file back to the map client.
You can specify the following map image file information as attributes of the <save_images_at> element:
-
The
file_prefixattribute identifies the map image file prefix. A map image file name will be a fixed file prefix followed by a serial number and the image type suffix. For example, if the map image file prefix isomsmap, a possible GIF map image file could beomsmap1.gif.Default value:
file_prefix=omsmap -
The
urlattribute identifies the map image base URL, which points to the directory under which all map image files are saved on the MapViewer host. The map image URL sent to the mapping client is the map image base URL plus the map image file name. For example, if the map image base URL ishttp://dev04.example.com:1521/mapviewer/images, the map image URL foromsmap1.gifwill behttp://dev04.example.com:1521/mapviewer/images/omsmap1.gif.Default value:
url=$HOST_URL/mapviewer/images -
The
pathattribute identifies the path of the directory where all map image files are saved on the MapViewer host system. This directory must be accessible by HTTP and must match the map image URL. Map image files saved in the directory specified by thepathattribute should be accessible from the URL specified by theurlattribute.However, if you are deploying MapViewer to WebLogic Server, the default value for the
pathattribute (../web/images) is not correct. The path attribute value in this case should be../../images,because the physical "images" directory ismapviewer.ear/web.war/images; so using relative path, the value should be../../imagesfor thepathattribute to resolve to the physical directory. -
The
lifeattribute specifies the number of minutes that a generated map image is guaranteed to stay on the file system before the image is deleted. If thelifeattribute is specified, therecycle_intervalattribute controls how frequently MapViewer checks for possible files to delete.Default: MapViewer never deletes the generated map images.
-
The
recycle_intervalattribute specifies the number of minutes between times when MapViewer checks to see if it can delete any image files that have been on the file system longer than the number of minutes for thelifeattribute value.Default value:
480(8 hours)
1.6.2.3 Restricting Administrative (Non-Map) Requests
In addition to map requests, MapViewer accepts administrative (non-map) requests, such as requests to list all data sources and to add and delete data sources. (Chapter 5 describes the administrative requests.) By default, all MapViewer users are permitted to make administrative requests.
However, if you want to restrict the ability to submit administrative requests, you can edit the MapViewer configuration file to allow administrative requests only from users with specified IP addresses.
To restrict administrative requests to users at specified IP addresses, add the <ip_monitor> element to the MapViewer configuration file (or uncomment and modify an existing element, if one is commented out). Example 1-2 shows a sample <ip_monitor> element excerpt from a configuration file.
Example 1-2 Restricting Administrative Requests
<MapperConfig>
   . . .
   <ip_monitor>
      <ips> 138.1.17.9, 138.1.17.21, 138.3.*, 20.* </ips>
      <ip_range> 24.17.1.3 - 24.17.1.20 </ip_range>
      <ips_exclude> 138.3.29.* </ips_exclude>
      <ip_range_exclude>20.22.34.1 - 20.22.34.255</ip_range_exclude>
   </ip_monitor>
   . . .
</MapperConfig>
In Example 1-2:
-
The following IP addresses are explicitly included as able to submit administrative requests (unless excluded by an
<ips_exclude>element): 138.1.17.9, 138.1.17.21, all that start with 138.3., all that start with 20., and all in the range (inclusive) of 24.17.1.3 to 24.17.1.20. -
The following IP addresses are explicitly excluded from submitting administrative requests: all starting with 138.3.29., and all in the range (inclusive) of 20.22.34.1 to 20.22.34.255.
-
All other IP addresses that are not explicitly included cannot submit administrative requests.
Syntax notes for the <ip_monitor> element:
-
Use
<ips>and<ip_range>elements to specify which IP addresses (and ranges) are allowed. Asterisk wildcards (such as20.*) are acceptable. Use a comma-delimited list for addresses. -
Use
<ips_exclude>and<ip_range_exclude>elements to exclude IP addresses and address ranges from submitting administrative requests. If an address falls into both the included and excluded category, it is excluded. -
If you specify the asterisk wildcard in an
<ips>element, all associated IP addresses are included except any specified in<ips_exclude>and<ip_range_exclude>elements.
1.6.2.4 Specifying a Web Proxy
Sometimes the MapViewer server needs to make HTTP connections to external web servers, such as to obtain a background image through a URL or to contact an external WMS server to fetch its map images. In such cases, if there is a firewall between the MapViewer server and the target web server, you may need to specify the HTTP proxy information to MapViewer so that it will not be blocked by the firewall. The following example specifies web proxy information:
<web_proxy host="www-proxy.mycorp.com" port="80" />
If the web proxy requires authentication, you can specify the user and password attributes. If the password value is preceded by the exclamation mark (!) character, the password value will be encrypted on the first loading of the configuration file. For example:
<web_proxy host="www-proxy.mycorp.com" port="80" user="uservalue" password="!pwdvalue" />
1.6.2.5 Specifying Global Map Configuration Options
You can specify the following global "look and feel" options for the display of each map generated by MapViewer:
-
Title
-
Note (such as a copyright statement or a footnote)
-
Logo (custom symbol or corporate logo)
-
Local geodetic data adjustment
-
Splitting geometries along the 180 meridian
To specify any of these options, use the <global_map_config> element. For example:
<global_map_config>
    <note text="Copyright (c) 2009, Example Corporation"
              font="sans serif"
              position="SOUTH_EAST"/>
    <title  text="Map Courtesy of Example Corp."
              font="Serif"
              position="NORTH"/>
    <logo image_path="C:\\images\\a.gif"
              position="SOUTH_WEST"/>

    <rendering allow_local_adjustment="false"
               use_globular_projection="false"/>
</global_map_config>
Set the map title through the <title> element of the <global_map_config> element. You can also set the map title in an individual map request by specifying the title attribute with the <map_request> element, and in this case, the title in the map request is used instead of the global title in the MapViewer configuration file. Note the following information about the attributes of the <title> element:
-
The
textattribute specifies the title string. -
The
fontattribute specifies a font. The font must exist on the system where MapViewer is running. -
The
positionattribute provides a positioning hint to MapViewer when determining where the map title will be drawn on a map. Possible values are:NORTH,EAST,SOUTH,WEST,NORTH_EAST,SOUTH_EAST,SOUTH_WEST,NORTH_WEST, andCENTER.Default value:
NORTH
Set the map note through the <note> element of the <global_map_config> element. Note the following information about the attributes of the <note> element:
-
The
textattribute specifies the note string. -
The
fontattribute specifies a font. The font must exist on the system where MapViewer is running. -
The
positionattribute provides a positioning hint to MapViewer when determining where the map note will be drawn on a map. Possible values are:NORTH,EAST,SOUTH,WEST,NORTH_EAST,SOUTH_EAST,SOUTH_WEST,NORTH_WEST, andCENTER.Default value:
SOUTH_EAST
Set the map logo through the <logo> element of the <global_map_config> element. The map logo image must be in either JPEG or GIF format. The image can be stored in a local file system where the MapViewer instance will have access to it, or it can be obtained from the web by specifying its URL. To specify a map logo, uncomment the <map_logo> element in the MapViewer configuration file and edit its attributes as needed.
Note the following information about the attributes of the <logo> element:
-
The
image_pathattribute must specify a valid file path name, or a URL starting withhttp://. -
The
positionattribute provides a positioning hint to MapViewer when determining where the map logo will be drawn on a map. Possible values are:NORTH,EAST,SOUTH,WEST,NORTH_EAST,SOUTH_EAST,SOUTH_WEST,NORTH_WEST, andCENTER.Default value:
SOUTH_WEST
If the logo image is obtained through a URL that is outside your firewall, you may need to set the web proxy in order for MapViewer to retrieve the logo image. For information about specifying a web proxy, see Section 1.6.2.4.
If you also specify a map legend, be sure that its position is not the same as any position for a map title, note, or logo. (Map legends are explained in Section 2.4.2 and Section 3.1.2.11. The default position for a map legend is SOUTH_WEST.)
To have MapViewer automatically project geodetic data to a local non-geodetic coordinate system before displaying it if the map data window is less than 3 decimal degrees, specify allow_local_adjustment="true" in the <rendering> element.
To have MapViewer automatically apply a globular map projection (that is, a map projection suitable for viewing the world, and specifically the azimuthal equidistant projection for MapViewer), specify use_globular_projection="true" in the <rendering> element. This option applies to geodetic data only.
1.6.2.6 Customizing the Spatial Data Cache
You can customize the in-memory cache that MapViewer uses for spatial data by using the <spatial_data_cache> element. For example:
<spatial_data_cache   max_cache_size="64"
                      report_stats="true"
/>
You can specify the following information as attributes of the <spatial_data_cache> element:
-
The
max_cache_sizeattribute specifies the maximum number of megabytes (MB) of in-memory cache.Default value:
64 -
The
report_statsattribute, if set totrue, instructs the MapViewer server to periodically (every 5 minutes) output cache statistics, such as the number of objects cached, the total size of cache objects, and data relating to the efficiency of the internal cache structure. The statistics are provided for each data source and for each predefined theme. They can help you to determine the optimal setting of the in-memory cache. For example, if you want to pin all geometry data for certain themes in the memory cache, you need to specify amax_cache_sizevalue that is large enough to accommodate these themes.Default value:
false
The spatial data cache is always enabled by default, even if the element is commented out in the configuration file. To completely disable the caching of spatial data, you must specify the max_cache_size attribute value as 0 (zero).
Note:
The disk-based spatial cache, which was supported in the previous release, is no longer supported, because performance tests have shown that disk-based spatial caching was often less efficient than fetching spatial objects directly from the database when needed (that is, in cases where the cached objects frequently did not need to be retrieved again after caching).For detailed information about the caching of predefined themes, see Section 2.3.1.6.
1.6.2.7 Specifying the Security Configuration
You can use the <security_config> element to specify whether MapViewer should reject <info_request> elements in requests. An <info_request> element is a type of request from a client that asks MapViewer to execute a simple SQL statement and return the result rows in plain text or XML format. This request is often used by MapViewer applications to identify features displayed on a map, or to run simple spatial search queries.
However, if the MapViewer data source information is exposed, malicious attackers might be able to abuse this capability and obtain sensitive information. To prevent this from happening, you can make sure MapViewer always connects to a database schema that has very limited access rights and hosts only non-sensitive information, and you can also reject all <info_request> requests by specifying the <security_config> element as follows:
<security_config>
  <disable_direct_info_request> true </disable_direct_info_request>
</security_config>
Note, however, that this setting affects some Mapviewer features. For example, the identify() method of the MapViewer Java API will no longer work, and applications will need to implement their own identify() method through other means.
You can also define remote URLs that the MapViewer built-in proxy servlet is allowed to communicate with. Use commas to separate such URLs. You can end a URL with the * (asterisk) wildcard character to allow multiple URLs that start with a path. The following example specifies one remote URL:
<security-config>
    …
    <proxy_enabled_hosts>
      foo.com:8080/mapviewer
    </proxy_enabled_hosts>
    …
</security-config>
To facilitate MapViewer's HTTPS (SSL) connection with external web sites that use self-signed certificates, you may register those certificates here. Use one entry for each server that requires an HTTPS connection. The following example shows an excerpt specifying one entry:
<security_config>
    …
    <certificates>
        <entry>
           <host_name>fooserver.com</host_name>
           <keystore_file>/scratch/fooserver.jks</keystore_file>
           <key>123456</key>
        </entry>
    </certificates>
    …
</security_config>
The subelements for each certificate's <entry> element are the following.
The host_name attribute specifies the IP address or domain name of the server that requires an HTTPS connection.
The keystore_file attribute specifies the file containing a single self-signed certificate. After you obtain the certificate (typically a .pem file) from the server site, you can create a key store by using the Java keytool command. For example:
keytool -import -file fooserver.pem -alias fooserver -keystore fooserver.jks
The key attribute specifies the password that you provided when creating the key store file. (It is used to ensure the integrity of the key store file itself.)
1.6.2.8 Registering a Custom Image Renderer
MapViewer can display images stored in a database BLOB through its image theme capability. When the image data stored in the BLOB is in a format unknown to MapViewer, such as ECW, you can register a custom image renderer so that MapViewer can use it to display such images. For information about creating and registering a custom image renderer, see Appendix C.
To specify a custom image renderer, use the <custom_image_renderer> element, as shown in the following example:
<custom_image_renderer image_format="ECW"
                       impl_class="com.my_corp.image.ECWRenderer" />
The image_format attribute specifies the image format name with which this custom image renderer should be associated.
The impl_class attribute specifies the name of the class that implements the custom image renderer.
1.6.2.9 Registering a Custom Spatial Provider
MapViewer can render spatial data that is in an external (non-Oracle Spatial and Graph) native format, such as shapefile, if there is a spatial provider implementation registered for the format. For information about implementing an external spatial data provider (in connection with custom geometry themes), see Section 2.3.9.
To register an external spatial data provider, use the <s_data_provider> element, as shown in the following example:
<s_data_provider
  id="shapefileSDP"
  class="oracle.sdovis.ShapefileDataProvider"
  >
  <parameters>
    <parameter name="datadir" value="/temp/data" />
  </parameters>
</s_data_provider>
The class attribute specifies the name of the class that implements the external spatial data provider.
The <parameters> element specifies a set of initialization parameters that are used by the data provider during its initialization process. In this example, the shapefile provider has a data directory ("datadir") parameter that points to directory where MapViewer can look for the data.
1.6.2.10 Registering Custom Nonspatial Data Providers
When generating thematic map layers, MapViewer can dynamically join nonspatial attribute data (such as sales for each region) that originates from an external source with the base geometries (boundaries of all the regions) that are stored in the database. For information about thematic mapping using external attribute data from nonspatial data providers, see Section 2.3.12.1.
To register a nonspatial data provider, use the <ns_data_provider> element, as shown in the following example:
<ns_data_provider id="testProvider"
                  class="com.mycorp.GetSalesData" >
  <parameters>
    <parameter name="bi_database" value="stadb32.mycorp.com" />
    <parameter name="sid" value="bidata"  />
  </parameters>
</ns_data_provider>
The id attribute uniquely identifies a nonspatial data provider. Use this id value in any map request that involves the provider.
The class attribute specifies the name of the class that implements the nonspatial data provider.
The <parameters> element specifies a set of initialization parameters that are used by the nonspatial data provider during its initialization process.
1.6.2.11 Customizing SRS Mapping
You can use the <srs_mapping> element to specify an SDO to EPSG SRID mapping file, which define mappings between Oracle Spatial and Graph SDO_SRID values and EPSG codes. As explained in Section E.1.3, each line in the specified mapping file must contain an SDO_SRID value and the corresponding EPSG code. The <srs_mapping> element can be used with WMS and WFS themes.
The following example uses the <srs_mapping> element to specify an SDO to EPSG SRID mapping file:
<srs_mapping>
  <sdo_epsg_mapfile>
    ../config/epsg_srids.properties
  </sdo_epsg_mapfile>
</srs_mapping>
1.6.2.12 Customizing WMS GetCapabilities Responses
MapViewer can be used as an Open Geospatial Consortium WMS (Web Map Server) 1.1.1 compliant server. As such, a WMS client can send MapViewer the GetCapabilities request. In response, MapViewer will send back the list of themes that it hosts and other important information, such as the data provider's name and a list of keywords that might of interest to the requesting client.
Note:
Effective with MapViewer 12.n, there is a separate WMS configuration file (wmsConfig.xml) that contains more information than is in the <wms_config> element in the MapViewer configuration file. It is recommended that you define any custom WMS configuration parameters in this separate WMS configuration file; any settings there will override any conflicting settings in the <wms_config> element in the MapViewer configuration file.
For more information about the wmsXonfig.xml file, see Section E.3.5, "Customizing GetCapabilities Responses: Additional Options".
You can use the <wms_config> element to customize the descriptive information sent back to the client as part of the GetCapabilities response, as shown in the following example:
<wms_config host="www.my_corp.com" port="80"
            protocol="http" default_datasource="dsrc1"
            public_datasources="dsrc1,dsrc2">
  <title>
    WMS 1.1 interface for Oracle Application Server 10g MapViewer
  </title>
  <abstract>
    This WMS service is provided through Oracle MapViewer.
  </abstract>
  <keyword_list>
    <keyword>bird</keyword>
    <keyword>roadrunner</keyword>
    <keyword>ambush</keyword>
  </keyword_list>
  <sdo_epsg_mapfile>
    ../config/epsg_srids.properties
  </sdo_epsg_mapfile>
</wms_config>
The host attribute specifies the host part of the service request URL that the client should use for future WMS requests made to this MapViewer server.
The port attribute specifies the port part of the service request URL that the client should use for future WMS requests made to this MapViewer server.
The protocol attribute specifies the protocol part of the service request URL that the client should use for future WMS requests made to this MapViewer server.
The default_datasource attribute specifies the base data source used to retrieve the capabilities response. If this attribute is not defined, the data source WMS is used, and that data source must exist in this MapViewer server.
The public_datasources attribute specifies which data source contents are to be listed in the GetCapabilities response. If this attribute is not defined, all data source contents will be listed.
The <title> element specifies the service title to be included as part of the response.
The <abstract> element specifies the abstract to be included as part of the response.
The <keyword_list> element specifies a list of keywords that best describe the types of layers served by this MapViewer server.
The <sdo_epsg_mapfile> element specifies a text file that defines mappings from Oracle Spatial and Graph (SDO) SRID values to the corresponding EPSG SRID values that are typically used in most WMS requests and responses. For information about this mapping file, see Section E.1.3.
1.6.2.13 Customizing WMTS GetCapabilities Responses
MapViewer can be used as an Open Geospatial Consortium WMTS (Web Map Tile Service) 1.0.0 compliant server, enabling tile layers defined in the USER_SDO_CACHED_MAPS metadata view to be retrieved through WMTS requests. A WMTS client can send MapViewer the GetCapabilities request. In response, MapViewer will send back the list of tile layers that it hosts and other important information, such as the data provider's name and a list of keywords that might of interest to the requesting client. You can edit the WMTS configuration file, which is stored in the same folder as that for mapViewerConfig.xml with a name of wmtsConfig.xml, to provide such customized information.
In the wmtsConfig.xml file, you can use the <wmts_config> element to customize the descriptive information sent back to the client as part of the GetCapabilities response, as shown in the following example:
<wmts_config>
     <public_datasources>
        <public_datasource name="MVDEMO" include_all_tile_layers="true"/>
        <public_datasource name="ELOCATION">
          <tile_layers>
            <tile_layer name="WORLD_MAP"/>
          </tile_layers>
        </public_datasource>
    </public_datasources>
    <sdo_epsg_mapfile>
      ../config/epsg_srid.properties
    </sdo_epsg_mapfile>
   <ServiceAttributes>
    <ServiceIdentification>
        <Title>Web Map Tile Service by myCorp</Title>
        <Abstract> U.S. maps for state and county boundaries and big cities</Abstract>
        <Keywords>
           <Keyword>Maps,U.S. State Boundaries,Cities</Keyword>
        </Keywords>
    </ServiceIdentification>
    <ServiceProvider>
      <ProviderName>provider's name</ProviderName>
        <ProviderSite url="http://www.myCorp.com/mySite"/>
    </ServiceProvider>
  </ServiceAttributes>
</wmts_config>
The <public_datasources> element can contain <public_datasource> subelements, which specify which data sources' tile layers to list in the WMTS GetCapabilities response. If this <public_datasources> element is not defined, all data sources' tile layers will be listed; if this element is defined but contains no <public_datasource> subelement, then no tile layers from any data source will be listed in the response.
The <public_datasource> element must contain a name attribute, which indicates the name of the data source.
The include_all_tile_layers attribute is optional, and the default is false. When set to true, it indicates that all tile layers in that data source are to be listed in the response.
The <tile_layer> element must contain a name attribute, which indicates the name of the tile layer to be included in the response from the data source defined in its parent element.
The <sdo_epsg_mapfile> element specifies a text file that defines mappings from Oracle Spatial and Graph (SDO) SRID values to the corresponding EPSG SRID values that are typically used in most WMTS requests and responses. For information about this mapping file, see Section E.1.3, "SDO to EPSG SRID Mapping File".
The <Title> element specifies the service title to be included as part of the response.
The <Abstract> element specifies the abstract to be included as part of the response.
The <Keywords> element specifies a collection of keywords (from its <Keyword> subelements) that best describe the types of layers served by this MapViewer server.
More information can be found in the comments in the wmtsConfig.xml file.
1.6.2.14 Configuring the Map Tile Server for Oracle Maps
The Oracle Maps feature of MapViewer can pre-generate base map image tiles and cache them through the map tile server. You can use the <map_tile_server> element to provide configuration information to the map tile server, such as default location for map tile file storage, and logging information, as shown in the following example:
<map_tile_server>
   <tile_storage default_root_path="/scratch/tilecache/" />
   <logging log_level="finest" log_thread_name="false" log_time="true">
      <log_output name="System.err"/>
   </logging>
</map_tile_server>
The <tile_storage> element specifies the default root directory where all map image tiles generated by this MapViewer server will be stored.
The <logging> element specifies logging information specific to the map tile server.
1.6.2.15 Defining Permanent Map Data Sources
Every map request must have a data source attribute that specifies a map data source, which is a database user with geospatial data. You can predefine available map data sources by using the <map_data_source> element. For example:
<map_data_source name="mvdemo"
                 jdbc_host="mapsrus.example.com"
                 jdbc_sid="orcl"
                 jdbc_port="1521"
                 jdbc_user="scott"
                 jdbc_password="!password"
                 jdbc_mode="thin"
                 number_of_mappers="5"
                 allow_jdbc_theme_based_foi="true"
                 plsql_package="web_user_info"
/>
You can specify the following information as attributes of the <map_data_source> element:
-
The
nameattribute specifies a unique data source name to MapViewer. You must specify the data source name in all map requests that identify a data source. -
You must specify all necessary connection information, or a container data source name, or a net service name (TNS name). That is, you must specify only one of the following, which are described in this section:
jdbc_host,jdbc_sid,jdbc_port, andjdbc_user; orcontainer_ds; orjdbc_tns_name.If the database on which you defined a data source on is restarted, and if the data source is created from
jdbc_host/jdbc_sid/jdbc_portorjdbc_tns_nameattributes, MapViewer will resume normal operation (for example responding to map requests with properly created maps) as soon as the database is back online. -
The
jdbc_host,jdbc_sid,jdbc_port, andjdbc_userattributes specify the database connection information and the database user name. (As an alternative to specifying these attributes and thejdbc_passwordandjdbc_modeattributes, you can specify thecontainer_dsattribute, described later in this section.) -
The
jdbc_passwordattribute specifies the database user's login password. It must be prefixed with an exclamation point (!) when you specify the password for the first time. When MapViewer next restarts, it will automatically obfuscate and replace the clear text password.MapViewer does not change this password string in any way; no conversion to upper or lower case is performed. If the database uses case-sensitive passwords, the specified password must exactly match the password in the database.
-
The
jdbc_modeattribute tells MapViewer which Oracle JDBC driver to use when connecting to the database. The default isthin(for the "thin" driver). The other possible value isoci8, which requires that you also have the Oracle Database client installed on the same host on which MapViewer is running. -
The
container_dsattribute lets you specify the Java EE container name (JNDI name) instead of specifying thejdbc_host,jdbc_sid,jdbc_port,jdbc_user,jdbc_password, andjdbc_modeattributes. For example, assume you created a JDBC data source using the WebLogic Server console and gave it a JNDI name ofjdbc/OracleDS. You can then define the permanent MapViewer data source as follows:<map_data_source name="mvdemo" container_ds="jdbc/OracleDS" number_of_mappers="5" />If you use the
container_dsattribute, and if you want MapViewer to resume normal operation (for example, responding to map requests with properly created maps) automatically after the database on which you defined a data source is restarted, you must instruct the container data source to always validate a connection before it can be returned to the application. Check your middleware documentation for whether this option is supported and, if it is supported, how to enable it. -
The
jdbc_tns_nameattribute identifies a net service name that is defined in thetnsnames.orafile. -
The
number_of_mappersattribute identifies the maximum number of map renderers available (and thus the maximum number of map requests that MapViewer can process in parallel for the data source) for this data source. Any unprocessed map requests are queued and eventually processed. For example, if the value is 3, MapViewer will be able to process at most three mapping requests concurrently. If a fourth map request comes while three requests are being processed, it will wait until MapViewer has finished processing one of the current requests.Specifying a large
number_of_mappersvalue (such as 50 or 100) can improve the overall throughput, but it will also increase runtime memory and CPU usage at times of peak loads, since MapViewer will attempt to process more concurrent map requests. It will also increase the number of active database sessions. Therefore, be sure that you do not set too large a number for this attribute.Note:
The obsoletemax_connectionsattribute no longer affects rendering and is ignored. Thenumber_of_mappersattribute value affects the actual maximum number of database connections or sessions open for the data source at any given time. -
The
allow_jdbc_theme_based_foiattribute lets you specify whether to allow JDBC theme-based FOI requests to be performed against this data source. A JDBC theme-based FOI request is based on a dynamic SQL query constructed by the JavaScript client application.By default, such FOI requests are not allowed unless you set this attribute to
true. Due to the potential security threat, JDBC theme-based FOI requests should be used with caution. You should only allow JDBC theme-based FOI requests on database connections that are granted very low privilege and contain only data that you want to expose. See Section 6.1.1.3 for more information about JDBC theme-based FOI requests. -
The
plsql_packageattribute lets you specify a PL/SQL package to be used for secure map rendering, as explained in Section 1.9. -
The
web_user_typeattribute (not shown in the example in this section) lets you specify the source for the authenticated user's name. It is especially useful for getting the authenticated user's name from a cookie, in conjunction with specifying a PL/SQL package to be used for secure map rendering. For more information about theweb_user_typeattribute and an example of its use, see Section 1.9.2.
1.6.2.16 Configuring and Securing the Map Data Server for the HTML5 API
Starting with Mapviewer for Oracle Fusion Middleware Release 11.1.1.7, themes can be streamed by default, and the only way to protect them is by adding authentication, that is, by adding a security constraint in the MapViewer web.xml file and by configuring the <mds_config> element in the configuration file to authorize access to various themes.
The Map Data Server (MDS) server component facilitates the streaming of geospatial data in vector format to the Oracle Maps V2 API (described in Section 6.2.2, "JavaScript API V2" and Section 6.3.2, "Using the V2 API"). The MDS provides a RESTful API for browser clients to request the vector data of any predefined or dynamic (JDBC) theme from a MapViewer server instance. The only way to secure or protect the access to this service is by adding a security constraint in the MapViewer web.xml deployment file, as in the following example:
<security-constraint>
<web-resource-collection>
. . .
<url-pattern>/dataserver/*</url-pattern>
</web-resource-collection>
<auth-constraint>
<role-name>map_admin_role</role-name>
</auth-constraint>
</security-constraint>
The preceding example adds a security constraint to any incoming URL with the relative path /dataserver/ in it. Because the MDS servlet responds only to URLs with /dataserver in its path, this constraint effectively protects all access to the MDS. This means that any application or web client accessing the Map Data Server will require proper authentication, and only those users with the role map_admin_role will be granted access. (For more information on how to secure a Java EE servlet such as MDS, check the Java EE and WebLogic Server documentation.)
Starting with MapViewer version 11.1.1.7.1, access to any predefined or dynamic (JDBC) theme's vector data is blocked by default, regardless of whether you added a security constraint on the MDS URL patterns. In other words, for example, even if the /dataserver/* URLs are protected and an HTML5 application has passed authentication, it still cannot access a theme's data without proper authorization. When an Oracle Maps HTML5 application attempts to load or display a theme without proper authorization, the error message typically contains a statement like "This data source does not allow streaming access."
To grant access to a data source's themes, you must explicitly configure the <mds_config> element in the configuration file.
Example 1-3 shows an <mds_config> element in which two MapViewer data sources, mvdemo and my-data, are configured such that certain themes of theirs can be streamed to clients.
Example 1-3 Configuring the mds.xml File
<mds_config>

<data_source name="mvdemo">
<allow_predefined_themes>true</allow_predefined_themes>
<deny>my_secret_theme</deny>
<allow_dynamic_themes>true</allow_dynamic_themes>
</data_source>

<data_source name="my-data">
<allow_predefined_themes>false</allow_predefined_themes>
<allow>
<theme>public_points_theme</theme>
<theme>office_locations*</theme>
</allow>
<allow_dynamic_themes>false</allow_dynamic_themes>
</data_source>

</mds_config>
In Example 1-3:
-
Each data source authorizes its themes in its own
<data_source>element. With this element, the two tags<allow_predefined_themes>and<allow_dynamic_themes>provide the overall or default access control on these two types of themes. Note that for dynamic/JDBC themes, you can also disable them in the data source definition (in the mainmapViewerConfig.xmlfile). If a dynamic theme is disabled in the data source definition, then that setting always has precedence (regardless of how it is set in the<mds_config>element.). -
The
mvdemodata source grants all clients with access to both predefined and dynamic (JDBC) theme vector data by default; this is a reasonable choice given the nature of the data (data from publicly available samples). An exception is added, however, for themy_secret_themetheme, through the use of the<deny>tag. -
For the
my-datadata source, access to both types of themes is blocked by default. In this case exceptions (to open certain themes to streaming) are added through the<allow>tag. In both<allow>and<deny>tags, the theme names or patterns are case insensitive, and the wild card character * (asterisk) can be used to match multiple themes. The example uses the<allow>tag to open the themepublic_points_themeand all the themes whose name starts withoffice_locationsto streaming, while all other themes are blocked. No dynamic/SQL theme is allowed on this data source.
If you modify the <mds_config> element, you must restart the deployed MapViewer instance for the modifications to take effect.
1.6.3 Performing MapViewer Administrative Tasks
Besides knowing how to configure MapViewer, you should also know how to perform other important administrative tasks using the MapViewer administration page. To log in to this page, see the instructions in Section 1.6.1.
The tasks you can do as a MapViewer administrator include the following:
-
Editing the configuration file
Click Configuration.
-
Refreshing the list of data sources
Click Admin to refresh the list automatically, or click Refresh to perform a manual refresh.
-
Clearing cached definitions of MapViewer styles, themes, and base maps
Click Admin, select the data source, then click Purge Cached Metadata.
-
Clearing cached geometry data for predefined themes
Click Admin, then Geometry Cache, then Purge for a selected theme or all themes.
-
Creating map tile layers for Oracle Maps
Click Admin, then Create Tile Layer, select the tile layer type, and click Next.
Internal map source: Enter the map cache name, then select the data source and base map. Also define parameters for cache storage (where tiles will be stored), zoom levels, minimum and maximum scale, spatial reference ID (SRID), data bounding box (MBR), and tile size and format. Click Next and Submit to create the map tile layer. You can also define the map cache properties in XML by clicking XML.
External map source: Enter the map cache name, then select the data source. To provide access to the external source, define parameters such as the map service URL, the request method (GET or POST), the proxy information (if needed), the java adapter class name and its location on the server, and additional adapter properties. Also define parameters for cache storage (where tiles will be stored), zoom levels, minimum and maximum scale, spatial reference ID (SRID), data bounding box (MBR), and tile size and format. Click Next and Submit to create the map tile layer. You can also define the map cache properties in XML by clicking XML.
For other types of tile layers (Oracle Maps, Here, Google, TomTom), follow similar steps.
-
Managing map tile layers for Oracle Maps
Click Admin, then Manage Tile Layers. Then do any of the following:
To manually refresh the tile layer list, click Refresh.
To edit a map tile layer, select the row for that layer and click Edit/View Details.
To view and manage map tile layer, select the row for that layer and click View Map/Manage Tiles.
1.7 Oracle Real Application Clusters and MapViewer
When the database is an Oracle Real Application Cluster (Oracle RAC), you can connect to the Oracle RAC database using either of the following options:
-
Let MapViewer connect to the database through the data source of the Java EE container, such as WebLogic Server 12c.
Create a JDBC data source in WebLogic Server Enterprise Manager that connects to the Oracle RAC database, as explained in Section 1.7.1. The data source can then be used by MapViewer and other applications through JNDI lookup.
This option is often used at sites where administrators create and monitor these kinds of connections for WebLogic Server, and/or where connections are used by multiple applications. This option also hides the database connection details (such as database user name and password) from the applications.
-
Enable MapViewer to connect to the database service directly.
Define a MapViewer data source directly using the Oracle RAC service name (not the database SID), as explained in Section 1.7.2.
This option is simpler to implement than the preceding option.
After doing either of the these options, restart MapViewer, as explained in Section 1.7.3.
1.7.1 Creating a Container Oracle RAC Data Source for the MapViewer Server
You can create a JDBC data source in the MapViewer container for Oracle RAC, and then use that container data source in the MapViewer configuration file, as follows:
1.7.1.1 Create a Container Oracle RAC Data Source
You can use Oracle Enterprise Manager 12c or later to create a data source that connects to the Oracle RAC database.
The following steps show how to create GridLink data source. (These are followed by steps showing how to create a Multi data source.)
-
Log in to Enterprise Manager and in the Target Navigation pane, click the server instance that contains the MapViewer server.
In Figure 1-5, clicking map_viewer1 under WebLogic Domain causes the
map_viewer1server information to appear in the main area of the window.Figure 1-5 Selecting the Server Instance
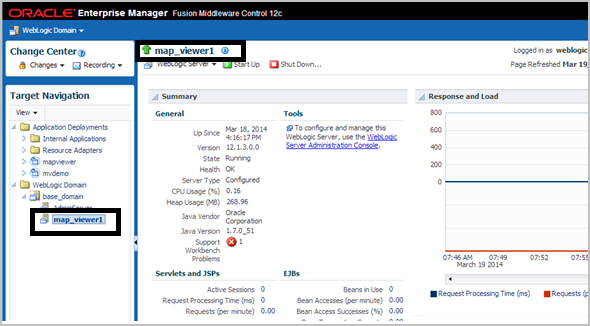
Description of ''Figure 1-5 Selecting the Server Instance''
-
Click WebLogic Server and select JDBC Data Sources, as shown in Figure 1-6.
-
Under JDBC Data Sources, click Create and select GridLink Data Source, as shown in Figure 1-7.
Figure 1-7 Creating a GridLink Data Source
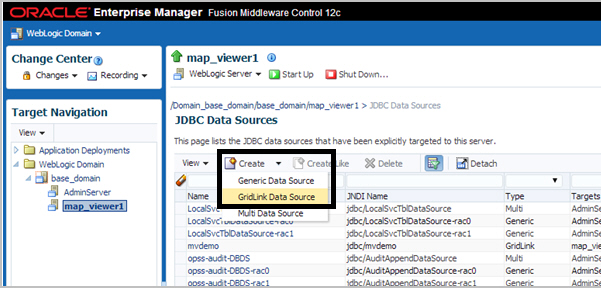
Description of ''Figure 1-7 Creating a GridLink Data Source''
-
Enter any necessary information in the Creating New JDBC Data Source wizard. For example, to create a container data source named
jdbc/mvdemo:-
Data Source Properties: Specify Data Source Name as
mvdemo, Driver Service Name asOracle Driver (Thin XA) for GridLink Connections Versions: Any, and JNDI Name asjdbc/mvdemo. -
Connection Properties: Generate the URL for database user
mvdemoon the appropriate host. -
Transaction Properties: Accept the displayed transaction properties.
-
ONS Properties: Accept the displayed transaction properties, or make any changes as needed.
-
Select Targets: Select (check)
map_viewer1under Name to deploy the JDBC data source on the desired server. -
Review: Review the properties for the new data source to be created. If you need to make any changes, go back and make them and then return to this page.
-
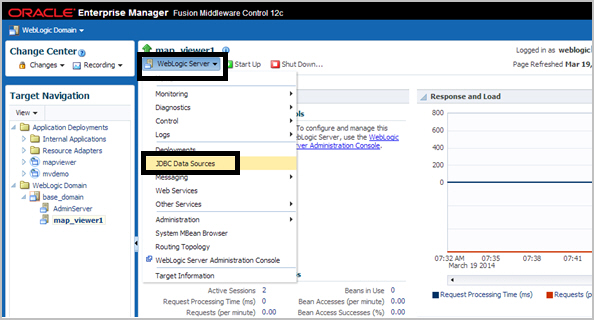
To create a Multi data source instead of a GridLink data source as in the preceding instructions, adapt the steps as appropriate. For example:
-
Log in to Enterprise Manager and in the Target Navigation pane, click the server instance that contains the MapViewer server.
In Figure 1-8, clicking map_viewer1 under WebLogic Domain causes the
map_viewer1server information to appear in the main area of the window.Figure 1-8 Selecting the Server Instance
Description of ''Figure 1-8 Selecting the Server Instance''
-
Click WebLogic Server and select JDBC Data Sources, as shown in Figure 1-9.
-
Under JDBC Data Sources, click Create and select Multi Data Source, as shown in Figure 1-10.
Figure 1-10 Creating a Multi Data Source
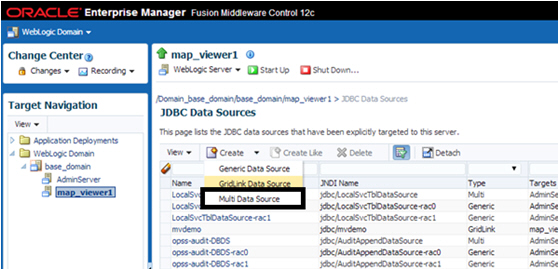
Description of ''Figure 1-10 Creating a Multi Data Source''
-
Enter any necessary information. For example:
-
Data Source Properties: Specify Data Source Name as
mvdemo, JNDI Name asjdbc/mvdemo, and Algorithm Type asFailover. -
Select Targets: Select (check)
map_viewer1under Name . -
Select Data Source Type: Accept the default values (
non-XA Driver). -
Click Create New Data Source.
-
Specify properties for the first data source node, such as: Name:
mvdemo-rac0, JNDI Name:jdbc/mvdemo-rac0, Database Type:Oracle. -
For Database Driver, select
Oracle's Driver (Thin) for Oracle RAC Service-Instance connections: Versions: Any. -
Accept the default values (
Supports Global TransactionsandOne-Phase Commit). -
Define the connection properties for Node 1. Provide values for Service Name, Database Name, Host Name, Port, Database User Name, Password, and Protocol.
-
Verify the properties and click Test Configuration. If it succeeds, click Next.
-
Select (check) the server in which MapViewer is deployed (
map_viewer1), and click Finish. -
On the next page, click Create a New Data Source to create and configure the second node.
-
Specify properties for the second data source node, such as: Name:
mvdemo-rac1, JNDI Name:jdbc/mvdemo-rac1, Database Type:Oracle. -
For Database Driver, select
Oracle's Driver (Thin) for Oracle RAC Service-Instance connections: Versions: Any. -
Accept the default values (
Supports Global TransactionsandOne-Phase Commit). -
Define the connection properties for Node 2. Provide values for Service Name, Database Name, Host Name, Port, Database User Name, Password, and Protocol.
-
Verify the properties and click Test Configuration. If it succeeds, click Next.
-
Select (check) the server in which MapViewer is deployed (
map_viewer1), and click Finish. -
If you need to add more nodes, click Create a New Data Source and create each in the same way as before.
-
1.7.1.2 Create a MapViewer Data Source Using a Container Data Source
After creating a container data source in the MapViewer container (explained in Section 1.7.1.1), create a new MapViewer data source that enables it to connect to the Oracle RAC database by adding the container_ds attribute in the MapViewer data source. For example:
<map_data_source  name="mvdemo"
                  container_ds="jdbc/mvdemo"
                  number_of_mappers="7" />
In the preceding example:
-
The
nameattribute specifies the MapViewer data source name, which is required for map requests. -
The value for the
container_dsattribute must match the JNDI Name that you specified on the Data Source Properties page of the Creating New JDBC Data Source wizard. -
The
number_of_mappersattribute specifies the maximum number of supported concurrent map requests that can target this data source.
For more information about these attributes, see Section 1.6.2.15, "Defining Permanent Map Data Sources".
1.7.2 Creating a MapViewer Data Source Using the Oracle RAC Service Name
As an alternative to creating a JDBC container data source for use with the container_ds attribute in the MapViewer configuration file (as explained in Section 1.7.1), you can create a MapViewer data source directly in the MapViewer configuration file by specifying the connection parameters to the Oracle RAC data service. (This type of connection works only with Oracle Database Release 11.2 and later.) For example:
    <map_data_source name="mvdemo"
         jdbc_host="rac.mycompany.com"
         jdbc_sid="//srv.mycompany.com"
         jdbc_port="1521"
         jdbc_user="mvdemo"
         jdbc_password="!mypassword"
         jdbc_mode="thin"
         number_of_mappers="8"
         allow_jdbc_theme_based_foi="true"
         editable="false"
    />
In the preceding example:
-
The
jdbc_hostattribute must be the Oracle RAC SCAN IP address or host name. -
The
jdbc_sidattribute (note the leading//characters in jdbc_sid="//srv.mycompany.com") specifies the Oracle RAC database service name, not the SID value.
For more information about the attributes in this example, see Section 1.6.2.15, "Defining Permanent Map Data Sources".
1.7.3 Restarting MapViewer
After performing the instructions in Section 1.7.1, "Creating a Container Oracle RAC Data Source for the MapViewer Server" or Section 1.7.2, "Creating a MapViewer Data Source Using the Oracle RAC Service Name", you must restart MapViewer to have the newly created data source take effect.
After you have restarted MapViewer, whenever you request a map from the data source, MapViewer obtains the necessary database connections (from the container if you chose the option in Section 1.7.1, or directly from the connection parameters if you chose the option in Section 1.7.2).
1.8 High Availability and MapViewer
Note:
This section is intended for advanced users who want to take full advantage of the high availability features of Oracle Fusion Middleware with MapViewer. You must have a strong understanding of high availability features, which are described in Oracle Fusion Middleware High Availability Guide.MapViewer users can benefit from the high availability features of Oracle Database and Oracle Fusion Middleware.
1.8.1 Deploying MapViewer on a Middle-Tier Cluster
MapViewer can be deployed to a WebLogic Server cluster. You must take care, however, about how the generated image files on each host are named and referenced through URLs by client applications.
Consider the following sample scenario. When a map request is sent to the front web server, it reaches the MapViewer server running on host A. MapViewer on host A then sends back the URL for the generated map image, and the client then sends a second request to fetch the actual image. This second request might be received by WebLogic Server running on host B, which has no such image (or which will send back an incorrect image with the same name).
There is no single best solution for this problem in all environments. One option is to have the hosts share common networked storage, so that the map images are deposited in the same virtual (networked) file system by different MapViewer servers running on different hosts. You must configure the map file storage information (see Section 1.6.2.2) for each MapViewer instance so that the images are deposited in different subdirectories or so that they have different file prefixes. Otherwise, the image files generated by the multiple MapViewer servers might overwrite each other on the disk. By properly configuring the map file storage information, you ensure that each URL sent back to the client uniquely identifies the correct map on the network drive.
If you cannot use networked drives, consider using a load balancer. You may first need to configure the map file storage information for each MapViewer instance (as explained in the preceding paragraph), so that each MapViewer instance names its generated images using an appropriate scheme to ensure uniqueness. You can then specify rules in the load balancer to have it redirect image requests to a certain host if the URL matches a certain pattern, such as containing a specified map image file prefix.
1.9 Secure Map Rendering
This section describes how to implement secure map rendering based on a web user's identity. Users with different roles or permissions will see different feature sets when viewing the same theme. The basic idea is that MapViewer will always invoke a specified PL/SQL package to set the web user's identity in the database whenever accessing the database for any themes. This user information can be used by the database to enforce data access control.
Note:
In this section, the terms user and authenticated user refer to the application or web user that logs into Oracle Fusion Middleware or Oracle Single Sign-On (SSO). It is not the same as the database user. MapViewer itself will connect directly to a database schema that stores all the geospatial data.MapViewer will connect directly to a database schema that stores all the geospatial data. To enforce access control for MapViewer on the data in this schema, you must perform the following steps:
-
Create a PL/SQL package in the database schema. The package must have at least two named procedures:
set_user(username)andclear_user(). -
Create views, set access rights on database objects, and perform other tasks, based on the user identity stored in the PL/SQL package (which is set by MapViewer through the set_user procedure for each database session).
-
Create a MapViewer data source to the schema, providing the name of the PL/SQL package as part of the data source definition. This is considered a secured data source.
-
Create MapViewer themes that are based on the views created in step 2.
-
Establish web authentication for users accessing your MapViewer application page or pages, so that when a map request reaches the MapViewer servlet, the web session object should contain an authenticated user's identity.
-
Issue map and FOI (feature of interest) requests that view the themes defined in step 4, either directly or through the use of base maps and Oracle Maps.
MapViewer will automatically pass the user identity to the database using the PL/SQL package before it executes any query for these themes. Only those rows that are visible to the identified user will be returned from the database and rendered by MapViewer.
Section 1.9.1 explains how secure map rendering works and provides implementation details and examples. Section 1.9.3 describes some options for authenticating users and refers to a supplied demo.
1.9.1 How Secure Map Rendering Works
MapViewer, as a Java EE application, can obtain the identity of a web user that has been authenticated to Oracle Fusion Middleware or Oracle Single Sign-On (SSO). This user information can then be preserved and propagated to the database, where secure access to map layers and tables can be set up based on the user identity. For example, a database administrator (DBA) can create a view of a base table that selects only those spatial features visible to a specific user.
To pass the web user identity from Oracle Fusion Middleware or Oracle Single Sign-On (SSO) to the database, use a secure PL/SQL package that sets the user identity in the database. This PL/SQL package is created by a DBA or application developer and installed in the data source schema. Such a package can have any number of procedures and functions, but it must contain at least the following two procedures:
-
set_user(username) -
clear_user()
Whenever a theme is requested from a secured data source, MapViewer invokes the set_user procedure in the associated PL/SQL package before it executes any data query for the theme, and it invokes the clear_user procedure when the querying process is complete for the theme.
Example 1-4 shows a PL/SQL package that you can use for secure map rendering. You can create this package in the example MVDEMO schema.
Example 1-4 PL/SQL Package for Secure Map Rendering
CREATE OR REPLACE PACKAGE web_user_info
AS
    PROCEDURE set_user (p_name IN VARCHAR2);
    PROCEDURE clear_user;
    FUNCTION  get_user
        RETURN VARCHAR2;
END;
CREATE OR REPLACE PACKAGE BODY web_user_info
AS
    w_name VARCHAR2 (32767);

  PROCEDURE set_user (p_name IN VARCHAR2)
  AS
  BEGIN
     w_name := LOWER (p_name);
  END;

  PROCEDURE clear_user
  AS
  BEGIN
      w_name := null;
  END;

  FUNCTION get_user
    RETURN VARCHAR2
  AS
  BEGIN
    RETURN w_name;
  END;
END;
/
In Example 1-4, set_user and clear_user are two required methods, and get_user is a convenience function that can be used in creating views or for other data access control purposes
After you create the package (which essentially contains the user identity for the current database session), you can set up an elaborate virtual private database that uses this user information (see Oracle Database Security Guide for information about using Oracle Virtual Private Database, or VPD). For simplicity, however, this section does not discuss VPD creation, but shows that you can create views that use this user information to enforce data access control.
For example, in the example MVDEMO schema you can add a column named ACCOUNT_MGR to the existing CUSTOMERS table, and assign an account manager to each customer stored in this table. You can then create a view that returns only customer rows for a specific account manager, as shown in Example 1-5.
Example 1-5 View for Secure Map Rendering
CREATE OR REPLACE VIEW customers_view
AS
  SELECT * FROM customers
  WHERE account_mgr = web_user_info.get_user;
You can now define a MapViewer theme based on this view, so that whenever account managers log in and want to view customer data on a map, each will only see his or her own customers.
After you have installed the PL/SQL package, you can pass the name of this package to MapViewer as part of the definition of a data source by using the plsql_package attribute, as shown in Example 1-6.
Example 1-6 Data Source Definition for Secure Map Rendering
<map_data_source name="mvdemo"
                 jdbc_host="system32.example.com"
                 jdbc_sid="mv"
                 jdbc_port="15214"
                 jdbc_user="mvdemo"
                 jdbc_password="password"
                 jdbc_mode="thin"
                 number_of_mappers="3"
                 allow_jdbc_theme_based_foi="true"
                 plsql_package="web_user_info"
   />
When you specify a PL/SQL package name in a data source definition, MapViewer flags the data source as a secure data source, and it automatically invokes the package's set_user and clear_user procedures whenever performing any theme queries on the data source.
1.9.2 Getting the User Name from a Cookie
Sometimes the authenticated user's name is not passed to MapViewer through a Java EE or OSSO session. such as when you integrate MapViewer within Application Express (APEX), where authentication is carried out by APEX and the user name is not available through a Java EE or OSSO session. To enable you to work around this issue, MapViewer also supports getting the user name from a cookie. It is your responsibility to set up the cookie within APEX to hold the authenticated user name.
To ensure that MapViewer picks up the user name from a named cookie, you must specify the web_user_type attribute in the data source definition (in addition to the mandatory plsql_package attribute). For example, if you want MapViewer to pick up the user name from a cookie named MON_USER, your secure data source definition should look like Example 1-7.
Example 1-7 Data Source Definition Specifying Cookie Name
<map_data_source name="mvdemo"
                  jdbc_host="system32.example.com"
                  jdbc_sid="mv"
                  jdbc_port="25650"
                  jdbc_user="mvdemo"
                  jdbc_password="LfCDQ6NH59nuV7zbeY5QY06sqN7XhiUQ"
                  jdbc_mode="thin"
                  number_of_mappers="3"
                  allow_jdbc_theme_based_foi="true"
                  plsql_package="web_user_info"
                  web_user_type="MON_USER"
  />
The possible values for the web_user_type attribute are:
-
J2EE_USER: tells MapViewer to get the authenticated user name from a Java EE session -
OSSO_USER: tells MapViewer to get the authenticated user from an OSSO session. -
<cookie-name>: tells MapViewer to get the authenticated user from a cookie with the specified name. The cookie name is not case sensitive.
If web_user_type is not specified, MapViewer first looks for the user name in the Java EE session; and if none is found, it looks for the user name in the OSSO session (if present).
1.9.3 Authenticating Users: Options and Demo
How, when, and where users are authenticated depend on the requirements of your application and the setup of your installation. For example, your options include the following:
-
Deploy MapViewer as part of an enterprise portal site, so that end users always first log onto the portal before performing any mapping functions through MapViewer.
-
Deploy MapViewer on a separate system, and have users authenticate to a central Oracle SSO server.
As long as the HTTP requests reaching MapViewer contain the authenticated user information, MapViewer will be able to pass the requests on to the database, and the secure data access approach will work as expected.
1.9.4 Using Single Sign-On (SSO) with MapViewer
If you want to set up Single Sign-On to authenticate users who want to view maps with MapViewer, follow these major steps:.
1.9.4.1 Install Oracle Access Manager
Oracle Access Manager (also referred to as Access Manager) provides the core functionality of Web Single Sign On (SSO), authentication, authorization, centralized policy administration and agent management, real-time session management and auditing.
1.9.4.2 Configure MapViewer
To configure MapViewer for use with SSO, follow these steps:
-
Add and configure the Oracle Access Management Asserter.
-
Using the WebLogic Server console for your domain, go to Security Realms, click the Name link for your realm, click Providers, then Authentication.
-
Under Authentication Providers, click New to display the Create a New Authentication Provider page, shown in Figure 1-11.
Figure 1-11 Create a New Authentication Provider
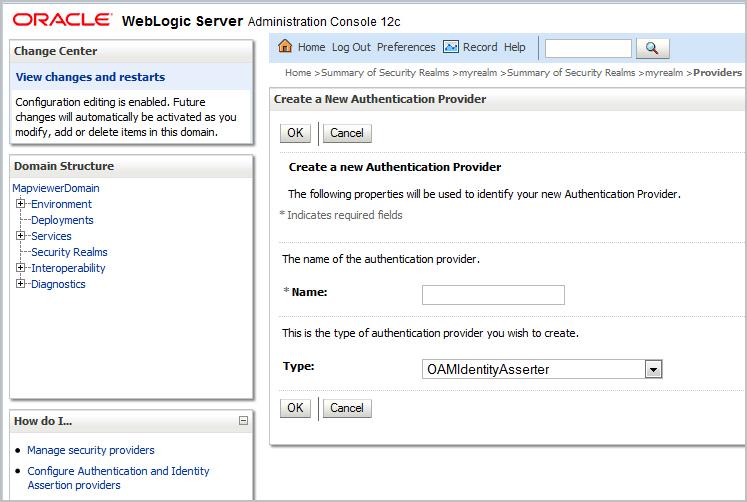
Description of ''Figure 1-11 Create a New Authentication Provider''
For Name, specify a name of your choice for this authentication provider. For example:
OAM Id AsserterFor Type, select
OAMIdentityAsserter. -
Click OK.
-
In the Authentication Providers table, click the Name link for the provider you just created.
-
Under Settings for the provider, on the Common tab, set Control Flag to
REQUIRED. -
Under Active Types, add
ObSSOCookieandOAM_REMOTE_USERto the Chosen list. -
Click Save.
-
-
Add and configure the authentication provider for OID.
-
Using the WebLogic Server console for your domain, go to Security Realms, click the Name link for your realm, click Providers, then Authentication.
-
Under Authentication Providers, click New to display the Create a New Authentication Provider page.
For Name, specify a name of your choice for this authentication provider. For example:
OID AuthenticatorFor Type, select
OracleInternetDirectoryAuthenticator. -
Click OK.
-
In the Authentication Providers table, click the Name link for the provider you just created.
-
Under Settings for the provider, on the Common tab, set Control Flag to
SUFFICIENT, and click Save. -
Click the Provider Specific tab, and specify the provider-specific configuration for this Oracle Internet Directory Authentication provider:
Host: The host name or IP address of the LDAP server.
Port: The port number on which the LDAP server is listening.
Principal: The Distinguished Name (DN) of the LDAP user that WebLogic Server should use to connect to the LDAP server.
Credential and Confirm Credential: The credential (usually a password) used to connect to the LDAP server.
User Base DN: The base distinguished name (DN) of the tree in the LDAP directory that contains users.
User Name Attribute: The attribute of an LDAP user object class that specifies the name of the user. The user name attribute specified must match the one specified in the All Users Filter and User From Name Filter attributes.
Group Base DN: The base distinguished name (DN) of the tree in the LDAP directory that contains groups.
-
Click Save.
-
-
Reorder the providers.
-
Go to the page with the list of providers (Home > Summary of Security Realms > realm-name >Providers)
-
Click Reorder (below the list of providers.
-
On the Reorder Authentication Providers page, order the Available providers to place the ones you created at the top of the list, as follows:
(Your specified OAM Identity Asserter)
(Your specified Authentication provider for OID)
DefaultAuthenticatorDefaultIdentityAsserter -
Click OK.
-
-
Configure the Oracle Access Manager (OPSS) SSO provider.
-
Execute the addOAMSSOProvider() WLST command, replacing some parameters with the appropriate values for your server. The statements to run have the following format:
$ ORACLE_HOME/common/bin/wlst.sh
connect('weblogic', 'welcome1' [,host,port])
addOAMSSOProvider(loginuri="/${app.context}/adfAuthentication", logouturi="/oamsso/logout.html")
disconnect()
Note that the
hostandportparameters forconnect()default tolocalhost:7001; so if you need to override these default values, specify those parameter. -
Restart your domain (the administration server and all managed servers).
-
1.9.4.3 Configure Oracle Access Manager
Create an application domain in Oracle Access Manager. An application domain is used to protect your application URIs so that single sign-on processing is triggered. Table 1-1 shows the protected and public URIs that must be configured for MapViewer.
Table 1-1 Protected and Public URIs to Configure for MapViewer Application Domain
| Protected URIs | Public URIs |
|---|---|
|
/mapviewer/console /mapviewer/mapadmin /mapviewer/mcsadmin /mapviewer |
/mapviewer/dataserver /mapviewer/foi /mapviewer/mcserver /mapviewer/wms /mapviewer/wmts |
Each protected and public URI of the application must be configured. For detailed conceptual information and instructions, see the "Configuring Oracle Access Manager (OAM)" topic in Oracle Fusion Middleware Administering Oracle WebCenter Portal.
1.9.4.4 Configure MapViewer Oracle Access Manager Logout Parameters
Effective with Version 12.2. in addition to the Oracle Access Manager (OAM) configuration described in Section 1.9.4.3, if you are using MapViewer with SSO sign-on, you must define the logout parameters in the MapViewer configuration file. The OAM logout URL parameter can be found in the WebGate properties using the OAM console. The relevant section of the configuration file is:
<!-- ****************************************************************** -->
<!-- ******************** OAM centralized logout  ******************** -->
<!-- ****************************************************************** -->
<!-- Uncomment the <oam_logout> tag to configure the logout URL
     for MapViewer JET web console. The parameters should be related with
     the OAM logout redirect URL value registered in OAM installation:
     protocol: http, https,...
     host: OAM host
     port: OAM logout port
     mv_webgate_port: OAM MapViewer server port (Webgate port). It is optional,
                      but is recommended to allow a correct logout of the
non OAM MapViewer that is setup in the OAM environment
-->
<!--
<oam_logout
    protocol="http"
    host="oam.host.com"
    port="7001"
    mv_webgate_port="0001"
 />-->
1.9.4.5 Configure Oracle HTTP Server
Configure the Oracle HTTP Server to forward HTTP requests to your applications. For details, see the topic about installing and configuring the Oracle HTTP Server in Oracle Fusion Middleware Administering Oracle WebCenter Portal.
1.10 MapViewer Demos and Tutorials
Several MapViewer demos and tutorials are included in a separate application archive named mvdemo.ear, and deployed to the same Java EE container where mapviewer.ear is deployed.
Once deployed the demos and tutorials will be accessible from a URL in this format: http://host:port/mvdemo/
See also the resources available at:
http://www.oracle.com/technetwork/middleware/mapviewer/downloads/