将 GraphQL 与 Vue 和 Oracle Content Management 结合使用
简介
GraphQL 是 API 的查询语言,也是使用现有数据执行这些查询的运行时。
在本教程中,我们将介绍如何将 GraphQL 与 Vue 连接至 Oracle Content Management。特别是,我们将通过使用 GraphQL 查询所需数据,重点关注最少示例站点上的现有“人员”页。其他页面(“Home(主页)”和“Contact Us(与我们联系)”)当前使用的是 REST API。
先决条件
在继续本教程之前,我们建议您先阅读以下信息:
要学习本教程,您需要:
- Oracle Content Management 订阅
- 具有内容管理员角色的 Oracle Content Management 账户
- 完成的在 Vue 中构建最少站点的教程
我们正在构建的内容
使用 Vue 中内置的最少站点,您可以轻松地从 Oracle Content Management 资料档案库检索图像和其他内容。
要查看我们正在构建的内容,教程的结束状态是使用 Oracle Content Management 中的内容的基本 Vue 最少站点:
https://headless.mycontentdemo.com/samples/oce-vue-minimal-sample
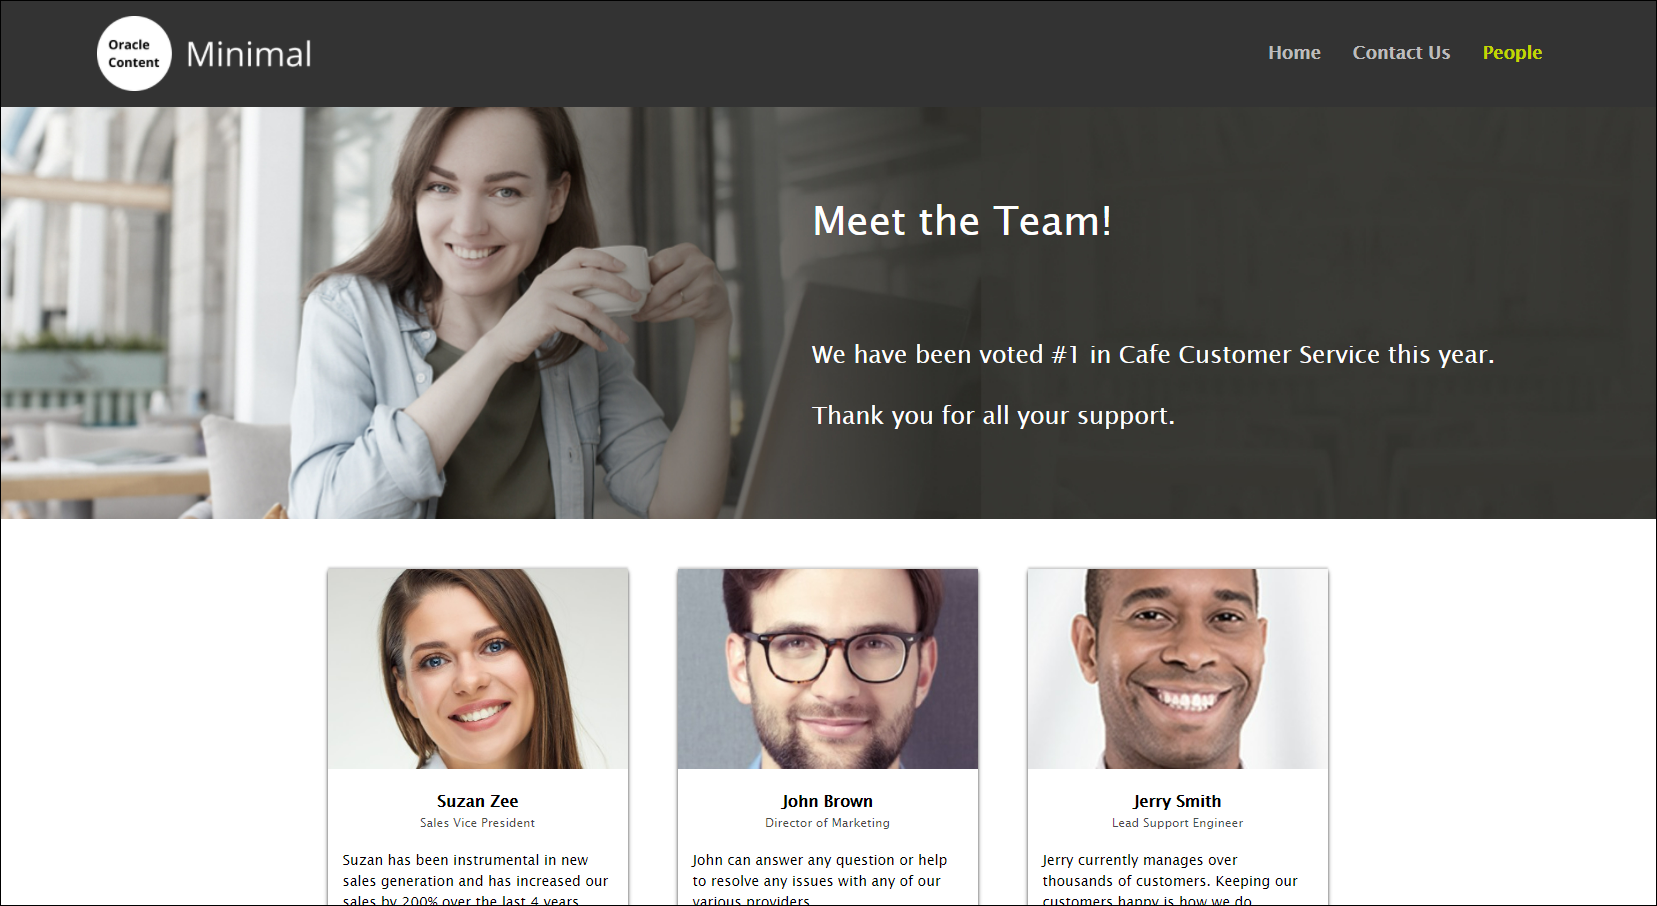
本教程将仅重点介绍该网站的“人员”页面。
以下是本教程结尾的人员页:

要继续,您需要有效订阅 Oracle Content Management 并使用内容管理员角色登录。
任务 1:了解人员页分类
可下载资产包包含一个名为 Minimal Main GraphQL 且带有 slug ‘ minimalmaingraphql ’ 的资产。
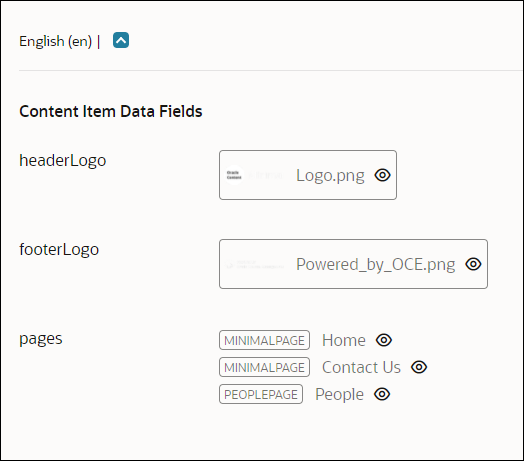
Minimal Main GraphQL 资产包含名为“人员”的 PeoplePage 类型的页面。内容如下所示:

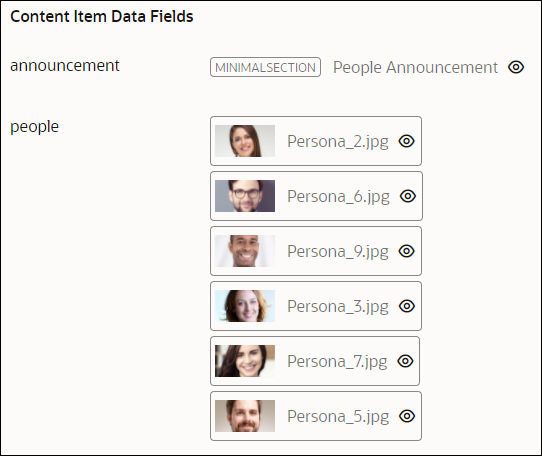
人员资产的类型为 PeoplePage,它包含人员的子类型。内容如下所示:

以下是 people 资产示例的外观(请注意“属性”面板中的所有元数据):

任务 2:与 Vue 中的 GraphQL 接口
本教程的初衷是使用 vue-apollo 库在 Oracle Content Management GraphQL 接口与 Vue 最小样例应用程序之间提供方便的接口。遗憾的是,编写此样例时,vue-apollo 实现仅可用于 Vue 2.x 应用程序,而最小 Vue 样例使用 Vue 3.x。正在努力支持 Vue 3 中的 apollo,但在创建此样本时它仍处于字母级别开发阶段。因此,此样例是使用交叉提取编写的,该库为服务器端和客户端使用提供提取实现。由于 GraphQL 查询最终只是一个 POST 请求,因此这仍然有效,但需要比 vue-apollo 实现更低级别的数据操作。
现有应用程序布局
数据检索
最初的 Vue 示例使用 REST 调用填充两页:主页和通过唯一的拖动值引用的动态页。这两个页面都包含一个或多个表示要在页面上呈现的 HTML 块的“部分”条目。由于此公用布局,两个页面都可以使用相同的页面模板 Page.vue 来显示其数据。要添加到示例中的“人员”页面的结构非常相似,但基于使用 GraphQL 检索的数据构建。
页面路由
使用 Vue Router 扩展处理应用程序中页面的路由。这样,就可以将页面分成两个特殊情况:主页和唯一拖动值引用的任意数量的页面。这样,只需在应用程序的主要资产中添加对子页面的引用,然后按上述方式定义人员资产,就可以向应用程序添加更多子页面。
VueX 状态管理
页面中显示的所有数据都使用 VueX 存储进行管理。这负责调用用于检索每个页面内容的内容 SDK。
包括 GraphQL 支持的更新
安装相关性
第一步是安装 GraphQL 支持所需的库。我们需要安装跨提取来提供浏览器和服务器端网络访问以及 https-proxy-agent,以便在需要时提供代理支持。这是通过运行以下命令完成的:
npm install cross-fetch https-proxy-agent添加新代码以运行 GraphQL 查询
然后,我们创建一个名为 src/scripts/graphql-service.js 的新文件。此文件将执行 GraphQL 查询,然后从结果中提取有用的字段。这是通过创建交叉提取查询来对 Oracle Content Management 进行 POST 调用来完成的。GraphQL 数据在 POST 调用的主体中传递。
export default async function fetchPeopleData(peopleSlug) {
      try {
        const channelToken = `${process.env.CHANNEL_TOKEN}`;
        const fetchParams = {
          method: 'POST',
          headers: {
            'Content-Type': 'application/json',
          },
          body: JSON.stringify({
            query: `
          {
            getPeoplePage(slug: "${peopleSlug}", channelToken: "${channelToken}" ) {
              id
              slug
              name
              fields {
                announcement {
                  id
                  fields {
                    type: fieldType
                    heading
                    body
                    actions
                    image {
                      ...sectionImages
                    }
                  }
                }
                people {
                  id
                  fields {
                    fullname
                    title
                    biodata
                    file {
                      metadata {
                        width
                        height
                      }
                    }
                    renditions {
                      name
                      format
                      file {
                        url
                        metadata {
                          height
                          width
                        }
                      }
                    }
                  }
                }
              }
            }
          }
          fragment sectionImages on image {
            id
            fields {
              file {
                metadata {
                  width
                  height
                }
              }
              renditions {
                name
                format
                file {
                  url
                  metadata {
                    height
                    width
                  }
                }
              }
            }
          }
          `,
          }),
        };

        // Figure out if we need a proxy. Only needed on server-side render
        if (typeof window === 'undefined' && typeof process === 'object') {
          const proxyServer = process.env.SERVER_URL.startsWith('https')
            ? process.env.oce_https_proxy : process.env.oce_https_proxy;
          if (proxyServer) {
            const proxy = createHttpsProxyAgent(proxyServer);
            fetchParams.agent = proxy;
          }
        }

        const response = await fetch(`${process.env.SERVER_URL}/content/published/api/v1.1/graphql`, fetchParams);
        const queryResult = await response.json();
        return extractRequiredPeopleFields(queryResult);
      } catch (error) {
        console.log(error);
        return ('');
      }
    }
还有一个小实用程序函数,用于简化从调用返回的 JavaScript 对象。这样可以减少结果中不必要的数据嵌套。
function extractRequiredPeopleFields(queryResult) {
      const result = { announcement: {}, people: [] };

      result.slug = queryResult.data.getPeoplePage.slug;
      result.name = queryResult.data.getPeoplePage.name;
      const base = queryResult.data.getPeoplePage.fields;
      if (base.announcement) {
        result.announcement = base.announcement.fields;
      }
      if (base.people) {
        result.people = base.people;
      }
      return result;
    }
在 VueX Store 中集成查询代码
现在我们可以检索数据,下一步是将其放在应用程序用来管理其数据的 VueX 存储中。这是在 src/vuex/index.js 中通过添加以下实用程序函数和存储实现的:
    state.peoplePageData // storage for the object data
        // get the data for the People Page given its slug
        fetchPeoplePage({ commit }, pageSlug) {
          return fetchPeopleData(pageSlug).then((data) => {
            commit('setPeoplePageData', data);
          });
        },
        // setter function used to update the state
        setPeoplePageData(state, data) {
          state.peoplePageData = data;
        },
分支代码以呈现“人员”页
接下来,我们将创建集成点,应用程序可以在其中调用代码来呈现“人员”页面。通过修改 Page.vue 中的现有代码,可以根据 slug 值有条件地呈现。可以在 src/pages/Page.vue 中找到。
    <!-- Component for the Page. -->
    // The template will conditionally render different sections depending
    // on the value of the unique slug of the current page.
    <template>
      <div v-if="data.hasError">
        <Error :errorObj="data" />
      </div>
      <div v-else-if="data.slug === 'people'">
        <Person :gqldata ="data"/>
      </div>
      <div v-else>
        <section :class="`content ${section.fields.type}`" :key="section.id"
          v-for="(section) in data.fields.sections">
          <Section :section="section" />
        </section>
      </div>
    </template>

    ....
    // Likewise, the fetch data call will seek out different data from the VueX store depending on
    // the desired slug
    methods: {
        fetchData() {
          let data = {};
          // People is a special case and is handled by GraphQL in the store
          if (this.slug === 'people') {
            data = this.$store.dispatch('fetchPeoplePage', this.slug);
          } else {
          // return the Promise from the action
            data = this.$store.dispatch('fetchPage', this.slug);
          }
          return data;
        },
      },
添加代码以呈现人员页面内容
接下来,创建生成“人员”页面内容的组件。此代码采用 src/components/Person.vue。呈现非常简单。组件中的可执行代码采用传入的页面滑块(在本例中始终为“人员”),然后从 VueX 高速缓存检索相应的数据。这将返回一个简单的 JavaScript 对象,然后用于下面的模板。
<template>
      <div >
        <section  class="announcement">
            <div>
          <picture v-if="gqldata.announcement.image && renditionURLs">
          <source type="image/webp" :srcSet="renditionURLs.srcset" />
          <source :srcSet="renditionURLs.jpgSrcset" />
          <img
            id="header-image"
            :src="renditionURLs.large"
            alt="Company Logo"
            :width="renditionURLs.width"
            :height="renditionURLs.height"
          />
          </picture>
              <div class="textcontent">
                <h1>{{gqldata.announcement.heading}}</h1>
              </div>
              <div class="text">
                <div v-html=cleanContent></div>
              </div>
            </div>
        </section>
          <div class="all_people">
          <div v-for="person in gqldata.people" :key="person.id" >
            <section className="person">
              <img className="profile_picture"
              :src="person.fields.renditions[0].file.url" :alt="person.fields.fullname" />
              <div className="profile">
                <div className="profile_name">{{person.fields.fullname}}</div>
                <div className="profile_position">{{person.fields.title}}</div>
                <div className="profile_description">{{person.fields.biodata}}</div>
              </div>
            </section>
          </div>
        </div>
      </div>
    </template>
组件中的其余代码用于从 VueX 存储中提取数据。
添加新 CSS
最后,我们将所需的 CSS 样式添加到应用程序。可以在 src/assets/global.css 中找到此信息。
/*
    * Styles for the people cards
    */
    .all_people {
      margin: 0 auto;
      max-width: 1000px;
      display: grid;
      grid-template-columns: repeat(auto-fill, minmax(300px, 1fr));
      gap: 50px;
      margin-top: 50px;
      margin-bottom: 50px;
    }

    .person {
      margin: 0 auto;
      width: 300px;
      box-shadow: 0px 4px 4px rgba(0, 0, 0, 0.25), 0px 2px 4px rgba(0, 0, 0, 0.5), 0px -2px 2px rgba(0, 0, 0, 0.15);
      height: 100%;
    }

    .profile {
      padding: 20px 15px;
    }

    .profile_picture {
      width: 100%;
      height: 200px;
      object-fit: cover;
      display: block;
    }

    .profile_name {
      text-align: center;
      font-size: 16px;
      font-weight: bold;
    }

    .profile_position {
      text-align: center;
      font-size: 12px;
      color: rgba(0, 0, 0, 0.7);
      margin-bottom: 18px;
    }

    .profile_description {
      font-size: 14px;
      display: flex;
      justify-content: center;
    }
结论
在本教程中,我们使用 GraphQL 将“人员”页添加到最少示例站点,以获取该页的数据。其他页面(“Home(主页)”和“Contact Us(与我们联系)”)仍使用 REST API。
有关 Oracle Content Management 中 GraphQL 的附加信息,请参阅文档。
将 GraphQL 与 Vue 和 Oracle Content Management 结合使用
F51318-01
2021 年 12 月
Copyright © 2021, Oracle and/or its affiliates.
第一作者:Oracle Corporation