將容器新增至 Oracle JET Web App
簡介
回應式頁面版面配置可彈性調整規模,以配合各式各樣的螢幕大小,從小電話到桌上型電腦監視器。Oracle JavaScript Extension Toolkit (JET) 彈性版面配置包含眾多下階元素,能以任何方向排列。當螢幕大小變更時,這些元素會自行調整並增加,以填滿未使用的空間或收縮,以避免配置中的父系或子系元素溢位。您可以使用 Oracle JET 版面配置類別 oj-flex 和 oj-flex-item 來建立回應式容器,以設計回應式頁面版面配置。Oracle JET 樣式類別 oj-panel 和 oj-panel-bg 會將框線和色彩新增至容器。您可以使用這些樣式類別來協助視覺化版面配置,您可以在最終應用程式中加以移除。
您在此教學課程中建立的 Web 應用程式具有一個頁面版面配置結構,其中含有第二個上階容器和下階容器 (活動容器) 的主要上階容器。第二個上階貨櫃會保留兩個下階貨櫃:「作業料號」與「料號明細」貨櫃。
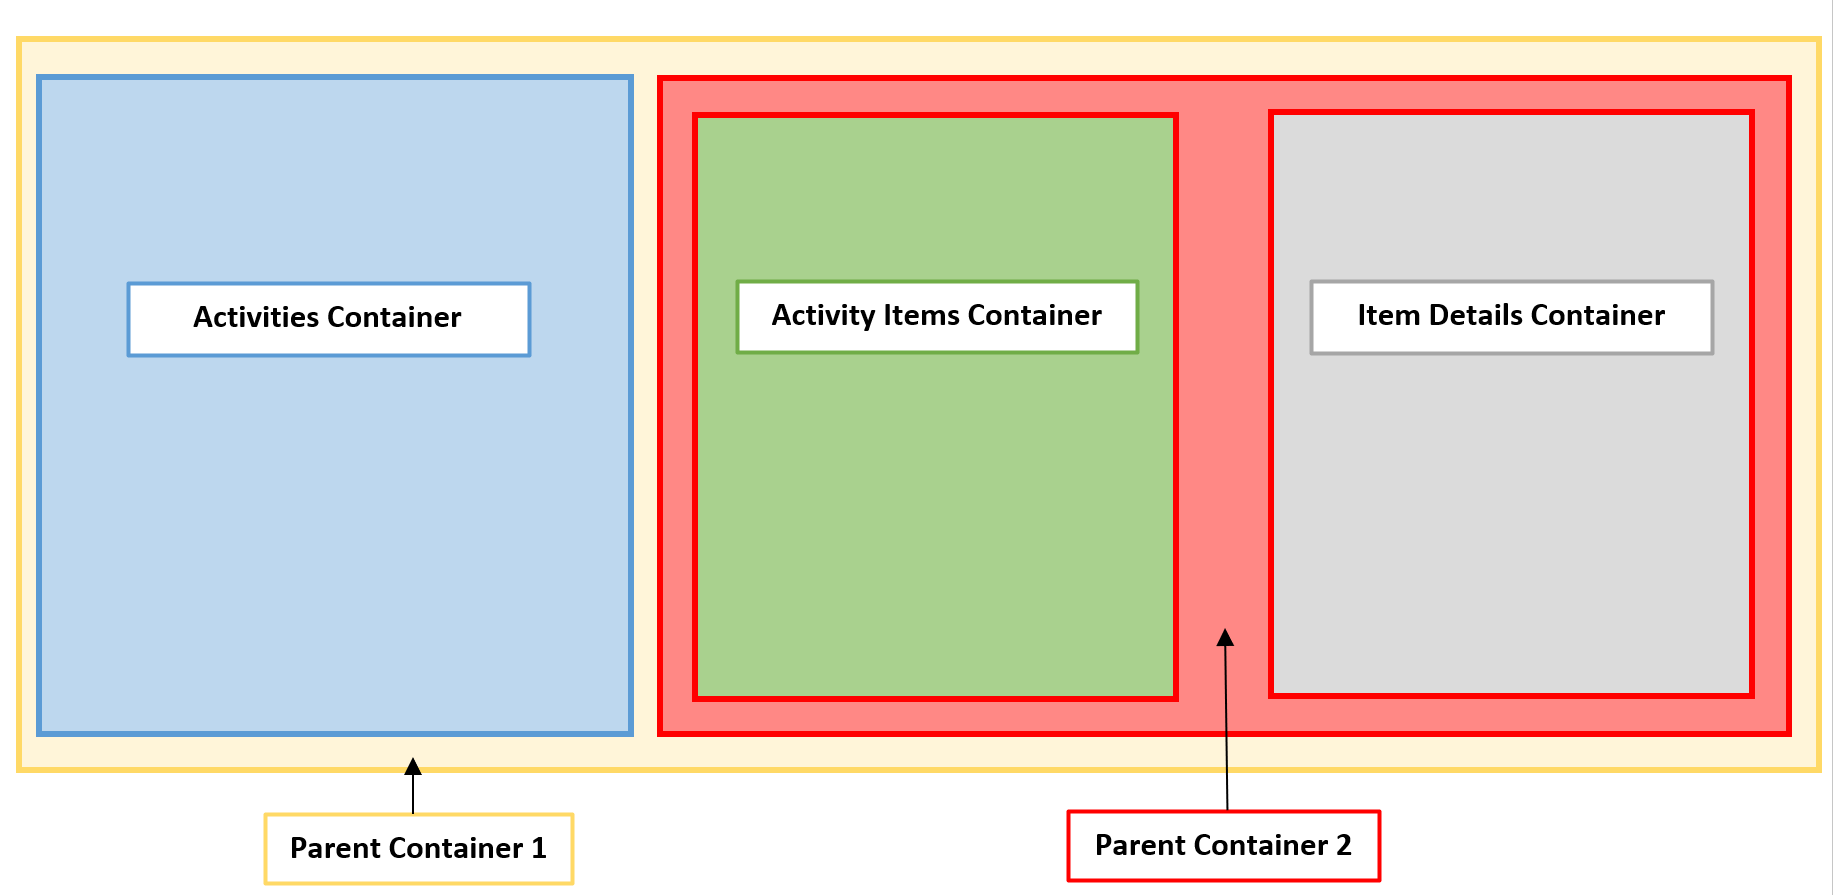
父項容器是一個保留子項容器。不過,如果子項容器包含子項容器 (例如上述的父項容器 2),也可以是父項容器。
在您要建立之頁面版面配置的下列圖例中,主要 div 元素包含「父項容器 1」。上階容器 1 在下階容器 1 與上階容器 2 周邊走。上階貨櫃 2 包含兩個下階貨櫃,即下階貨櫃 2 與下階貨櫃 3。
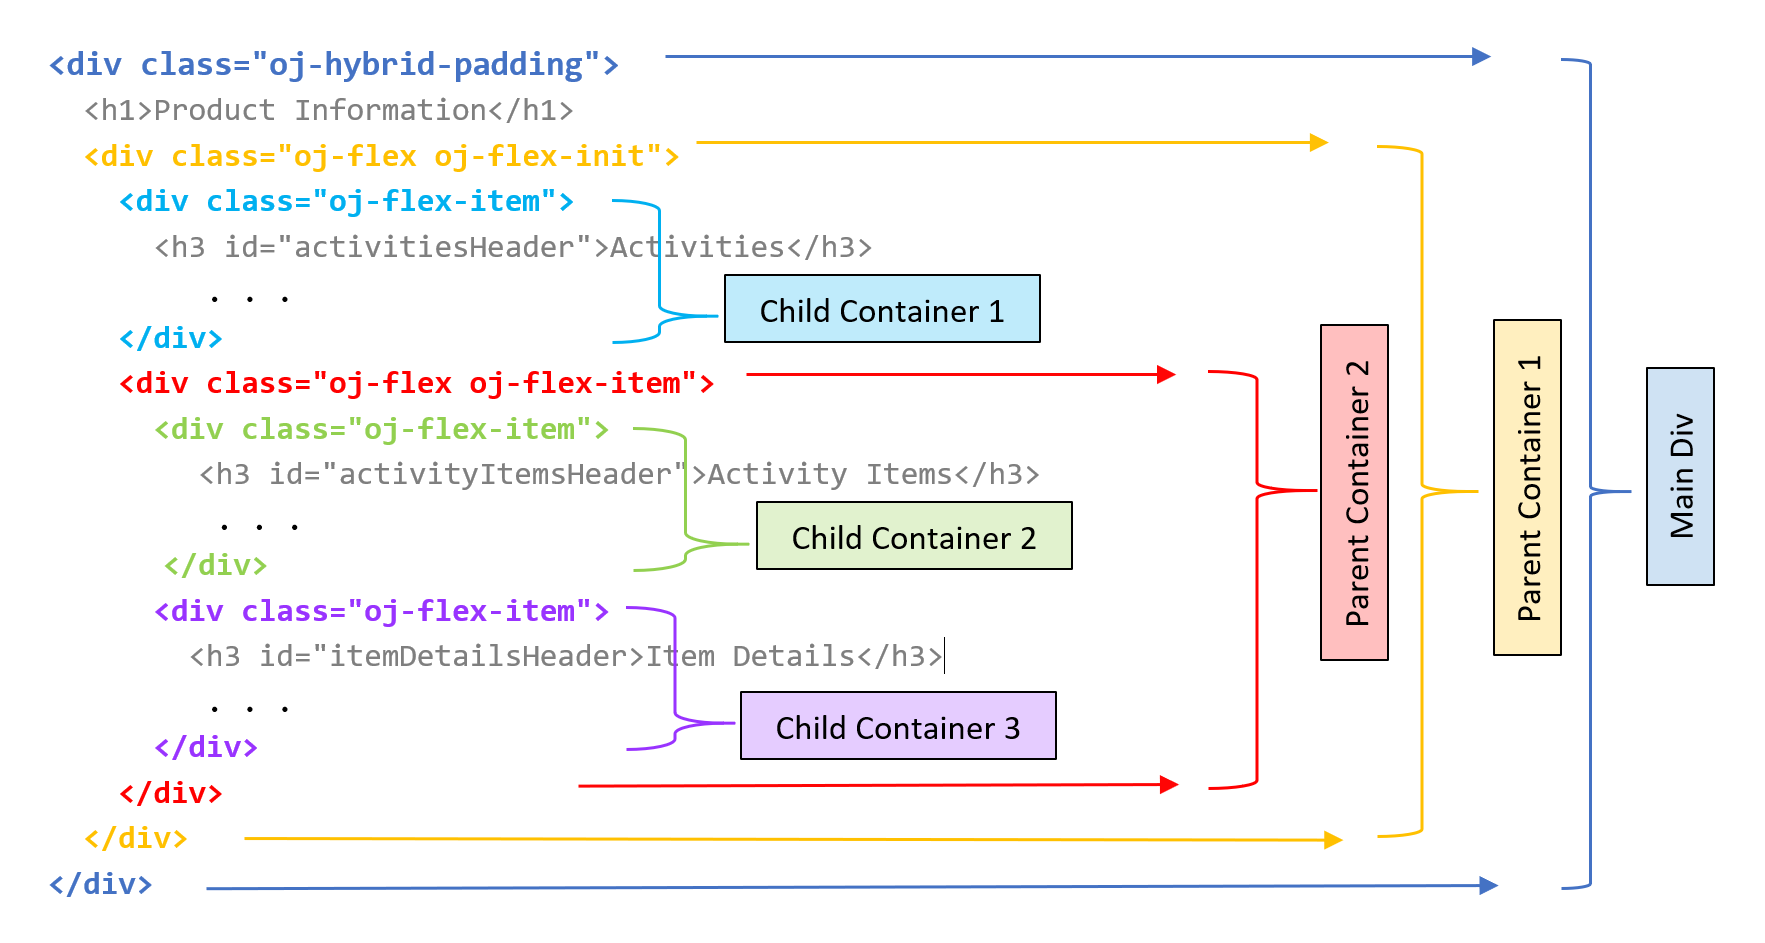
responsive-layout-containers.png 圖解的描述
目標
在本教學課程中,您將使用 Oracle JET 版面配置和樣式類別,新增容器與面板,將頁面版面配置轉換成 Oracle JET Web 應用程式中的回應式頁面版面配置。
必要條件
- 設定使用 JavaScript 程式實際執行、Node.js 及已安裝最新 Oracle JET 命令行介面建立 Oracle JET App 的開發環境
- Google Chrome Web 瀏覽器已安裝並設為預設 Web 瀏覽器
- 存取 Oracle JET Developer Cookbook
- (選項 1) 完成此系列中上一個學習路徑:在 Oracle JavaScript Extension Toolkit 中開發 Web 應用程式
- (選項 2) 如果您尚未完成此系列中的上一個學習路徑:下載的 jet_web_application_temp.zip
作業 1:下載入門應用程式
如果您繼續在先前學習路徑中建立的應用程式中工作,請略過此任務。
-
將
jet_web_application_temp.zip重新命名為JET_Web_Application.zip。將內容解壓縮至JET_Web_Application資料夾。 -
在終端機視窗中,驗證您已安裝最新版本的 Oracle JET。如果您沒有這麼做,請更新您的 Oracle JET 版本。
$ npm list -g @oracle/ojet-cli$ npm install -g @oracle/ojet-cli -
瀏覽至
JET_Web_Application資料夾,然後回復 Oracle JET 應用程式。$ ojet restore您的 App 已可供使用。
作業 2:新增作業容器
修改 Oracle JET Web 應用程式版面配置以新增彈性方塊版面配置。若要建立彈性版面配置,請將 Oracle JET oj-flex 類別新增至父項 div 元素,並將 oj-flex-item 類別新增至子項 div 元素。父項容器 1 是包含其中所有其他容器的父項容器。「下階貨櫃 1」是第一個下階貨櫃,且包含「作業」清單。
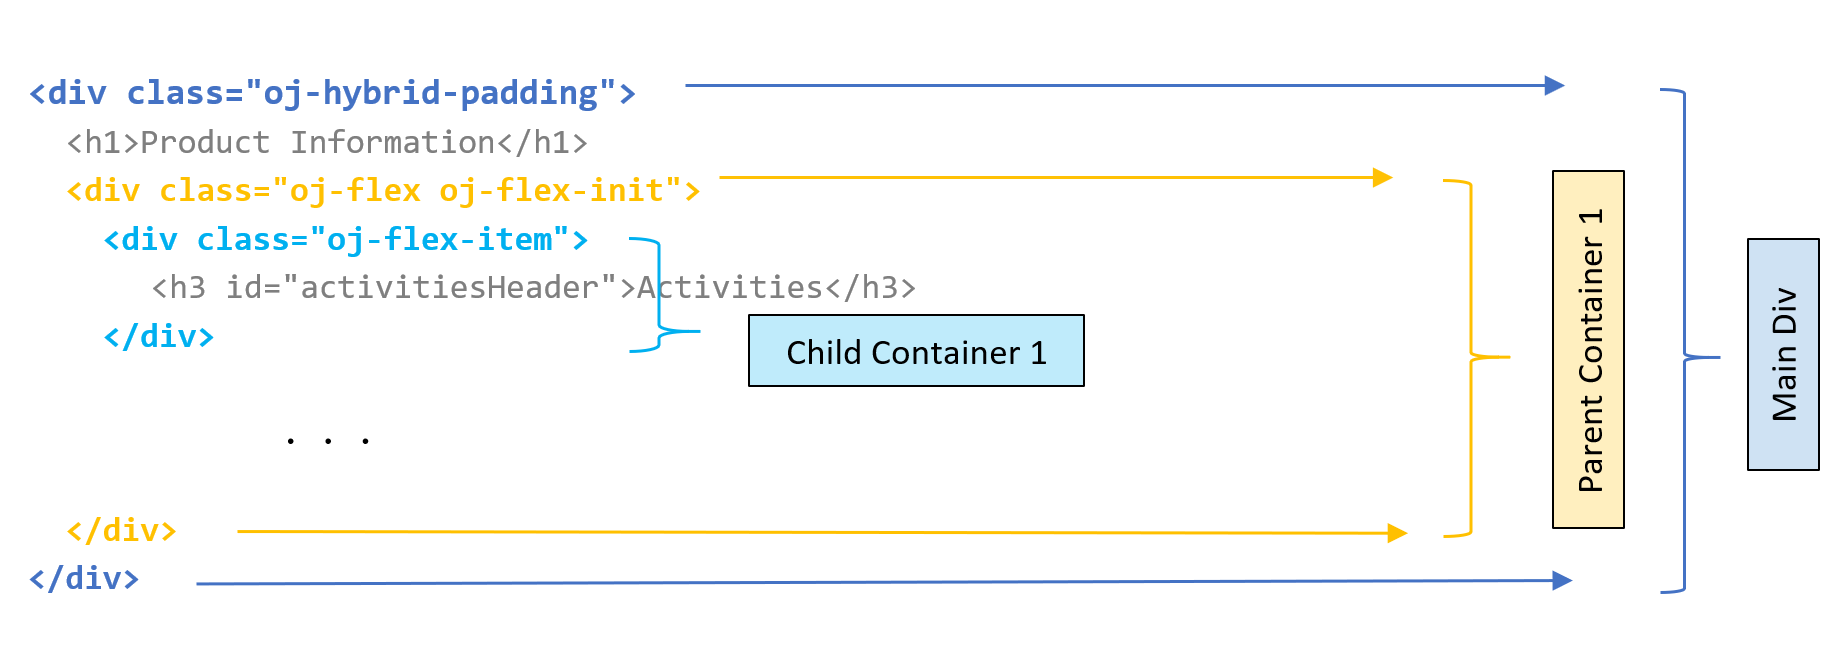
-
開啟 Oracle JET Cookbook,按一下功能表列中的版面配置與瀏覽,然後選取彈性版面配置元件。在工具列中,按一下 API 文件,然後選取 flex。
-
在 Flex Layout API 文件中,捲動至說明 Oracle JET 版面配置類別的表格,然後讀取關於
oj-flex類別。 -
瀏覽至
JET_Web_Application/src/ts/views目錄,然後在編輯器中開啟dashboard.html檔案。 -
尋找「產品資訊」標題
h1元素,並在元素下方新增外部div元素與 Oracle JET 容器類別搭配id屬性值parentContainer1。此div元素包含其中所有其他容器。在檔案結尾的最後關閉</div>之上新增結尾的</div>標記。<div class="oj-hybrid-padding"> <h1>Product Information</h1> <!-- Parent Container 1 contains all the panels in the app --> <div id="parentContainer1" class="oj-flex oj-flex-init"> <div id="activitiesContainer"> <h3 id="activitiesHeader">Activities</h3> . . . </oj-chart> </div> </div> </div> -
在「活動」標題之前尋找
id="activitiesContainer"的div元素,然後新增 Oracle JET 容器項目類別。<!-- The Activities container displays the Activities list --> <div id="activitiesContainer" class="oj-flex-item"> <h3 id="activitiesHeader">Activities</h3> -
儲存
dashboard.html檔案。您的程式碼看起來應該類似 parent-containers-dashboard-html.txt。
作業 3:新增料號明細貨櫃
修改 Oracle JET Web 應用程式回應式版面配置以新增「項目詳細資訊」容器。父項容器 2 包含兩個子項容器。子項容器 2 空白,但稍後的教學課程將包含「活動項目」清單。「下階貨櫃 3」包含「料號明細」圖表。
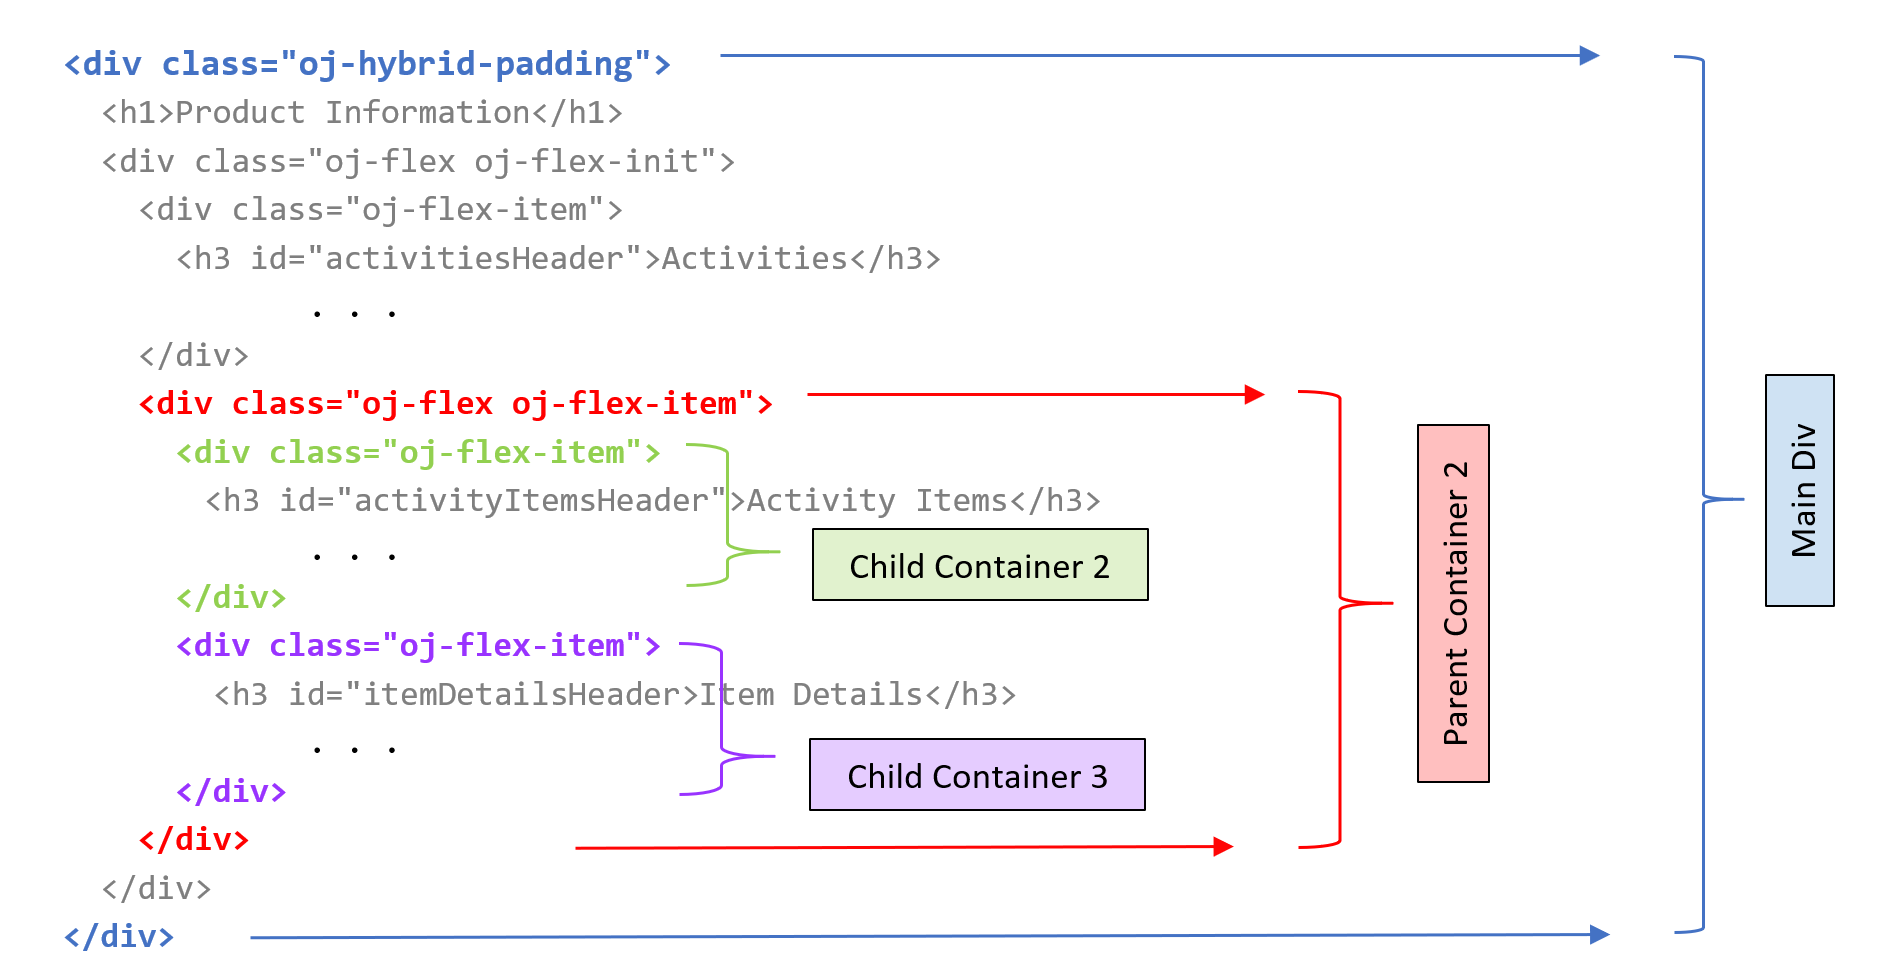
item-details-containers.png 圖的說明
-
尋找
div元素,其中id="itemDetailsContainer"。在上方,新增具有id屬性且值為parentContainer2的外部div元素,以及 Oracle JET 容器類別和容器項目類別。在檔案中的第二對最後一個結束</div>上新增結尾</div>標記。<!-- Parent Container 2 surrounds the Item Details container --> <div id="parentContainer2" class="oj-flex oj-flex-item"> <div id="itemDetailsContainer"> <h3>Item Details</h3> . . . </oj-chart> </div> </div> </div> </div> -
在
div元素下方,其中的id="parentContainer2",新增id屬性 (值為activityItemsContainer) 的空白div元素以及 Oracle JET 容器項目類別。<!-- Parent Container 2 surrounds the Activity Items and Item Details child containers --> <div id="parentContainer2" class="oj-flex oj-flex-item"> <div id="activityItemsContainer" class="oj-flex-item"> </div> <div id="itemDetailsContainer"> <h3>Item Details</h3> . . . -
最後,新增 Oracle JET 容器項目類別至
id="itemDetailsContainer"的div元素。<!-- Item Details container displays a chart upon selection --> <div id="itemDetailsContainer" class="oj-flex-item"> <h3>Item Details</h3> -
儲存
dashboard.html檔案。您的程式碼可能與 containers-dashboard-html.txt 類似。
作業 4:新增面板與面板顏色
套用 Oracle JET 樣式類別,將面板與面板顏色新增至 Web 應用程式中的容器與容器項目,以協助將版面配置視覺化。
-
尋找
div元素,其中id="parentContainer1",然後新增兩個樣式類別以指定框線與背景顏色的面板。<!-- The border and color for Parent Container 1 --> <div id="parentContainer1" class="oj-flex oj-flex-init oj-panel oj-bg-warning-20"> -
尋找
div元素,其中id="activitiesContainer",然後新增兩個樣式類別以指定框線與背景顏色的面板。<!-- The border and color for the Activities container --> <div id="activitiesContainer" class="oj-flex-item oj-bg-info-30"> <h3 id="activitiesHeader">Activities</h3> -
尋找
div元素,其中id="parentContainer2",然後新增兩個樣式類別以指定框線與背景顏色的面板。<!-- The border and color for Parent Container 2 --> <div id="parentContainer2" class="oj-flex oj-flex-item oj-panel oj-bg-danger-30"> -
尋找
div元素,其中id="itemDetailsContainer",然後新增兩個樣式類別以指定面板與面板顏色。<!-- The border and color for the Item Details container --> <div id="itemDetailsContainer" class="oj-flex-item oj-panel oj-bg-neutral-30"> -
儲存
dashboard.html檔案。您的程式碼看起來應該和 final-containers-dashboard-html.txt 類似。
作業 5:執行 Web 應用程式
-
在終端機視窗中,變更為
JET_Web_Application目錄,然後執行應用程式。$ ojet serveOracle JET 工具會在本機 Web 瀏覽器中執行 Web 應用程式,供您檢視儀表板內容。
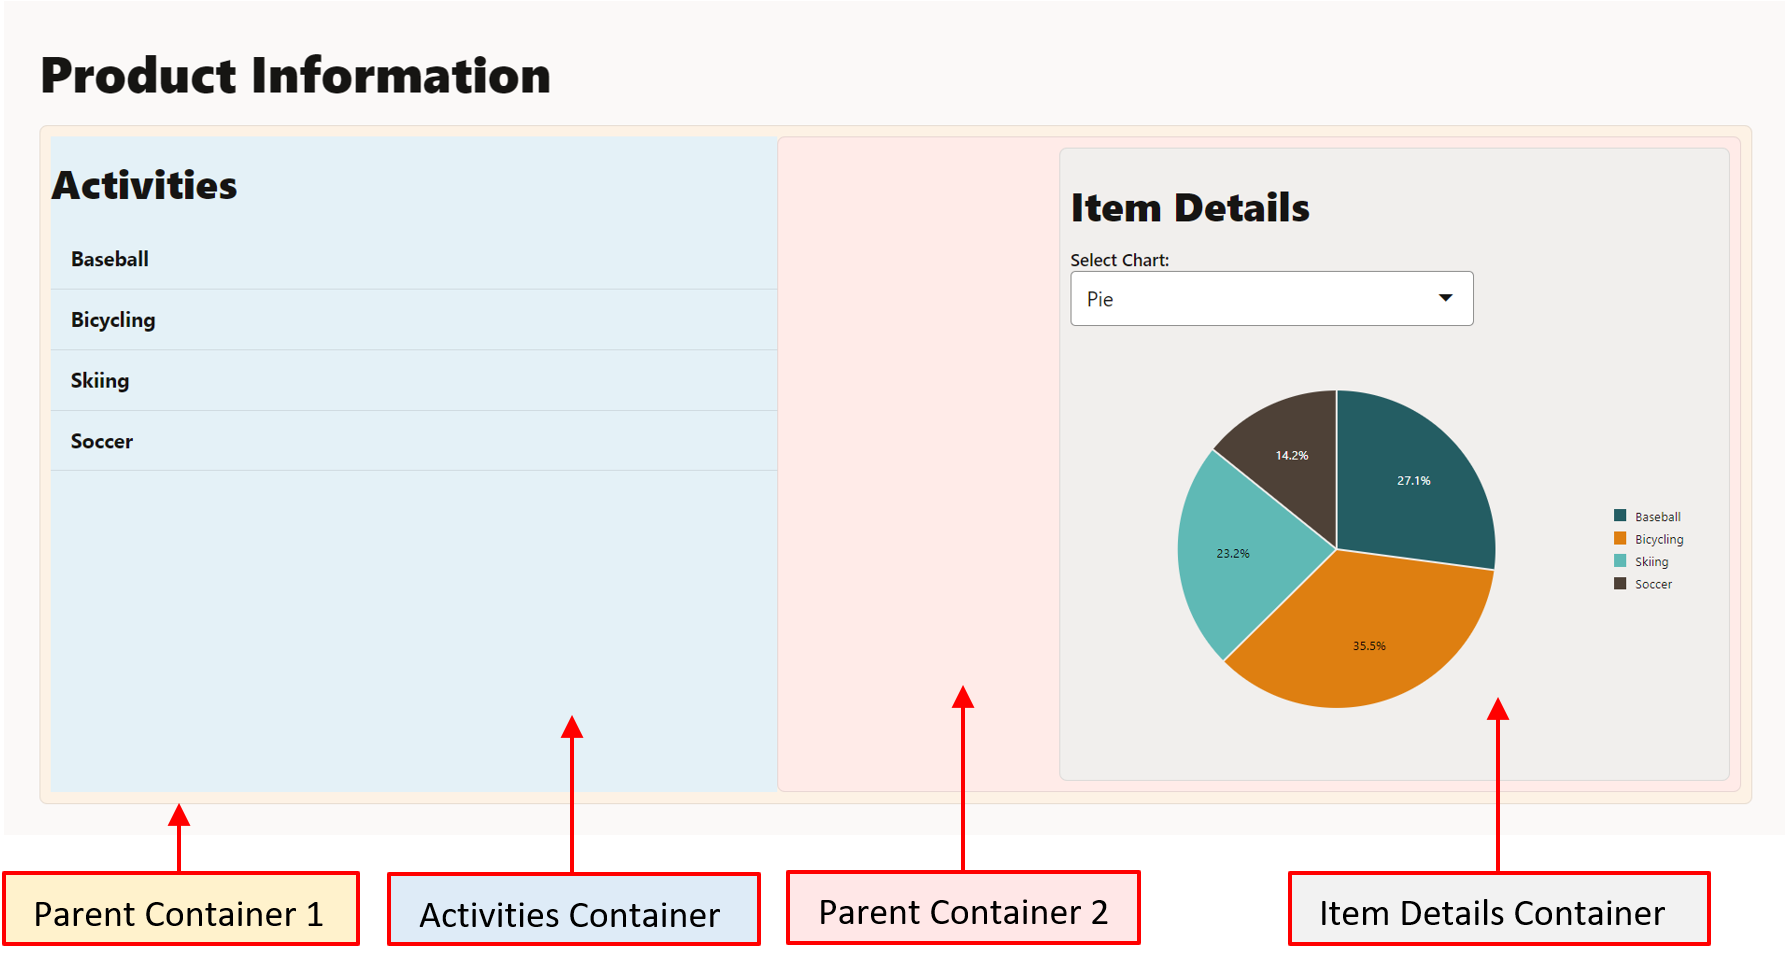
-
關閉顯示您執行中 Web App 的瀏覽器視窗或頁籤。
-
在終端機視窗中,按 Ctrl+C,如果出現提示,請輸入
y以結束 Oracle JET 工具批次工作。
其他學習資源
探索 docs.oracle.com/learn 上的其他實驗室,或是存取更多免費學習內容至 Oracle Learning YouTube 通道。此外,瀏覽 education.oracle.com/learning-explorer 以成為 Oracle Learning Explorer。
如需產品文件,請瀏覽 Oracle Help Center。
Add containers to the Oracle JET web app
F53130-01
February 2022
Copyright © 2022, Oracle and/or its affiliates.