Release 1.0.2.1 for Windows NT/2000
Part Number A88726-01
Library |
Contents |
Index |
| Oracle9i Application Server Installation Guide Release 1.0.2.1 for Windows NT/2000 Part Number A88726-01 |
|
![]()
![]()
This chapter guides you through the deinstallation and reinstallation process for Oracle9i Application Server. They are described in the following topics:
The following steps guide you through the deinstallation process of Oracle9i Application Server. This process is divided into three parts:
Follow the instructions below to deinstall Oracle Forms Services, Oracle Reports Services, and Oracle9iAS Discoverer Viewer.
Menu > Programs > Oracle for Windows NT > Oracle Installer.
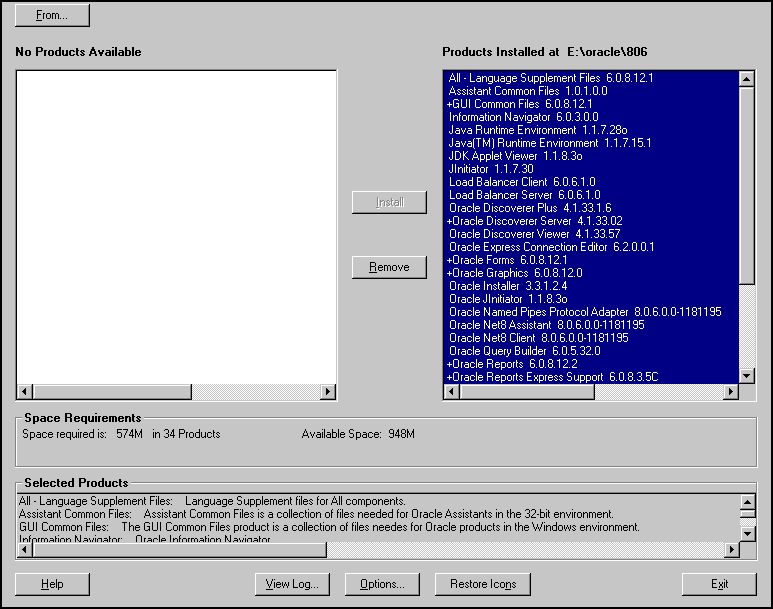
The Software Asset Manager allows you to deinstall components. Be sure to scroll down to select all installed components. When you click Remove, a dialog appears asking you if you want to remove the selected components. Click Yes. When all the components are deinstalled, quit the installer by clicking Exit.
You have successfully deinstalled Oracle Forms Services, Oracle Reports Services, and Oracle9iAS Discoverer Viewer.
Continue the deinstallation process:
If you have installed the Enterprise Edition of Oracle9i Application Server, then you must perform the following steps. If you have installed any other edition of Oracle9i Application Server, then proceed directly to "Deinstalling using Oracle Universal Installer".
-deinstall option:
prompt> wtacca -deinstall
Proceed to "Deinstalling using Oracle Universal Installer".
Once Oracle Universal Installer is launched, Welcome screen appears. Click on Deinstall Products.
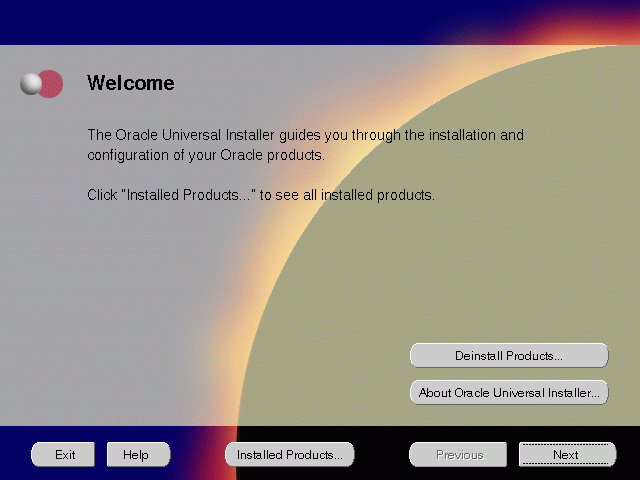
The Welcome screen provides information about Oracle Universal Installer.
The installer provides you with two ways to deinstall products:
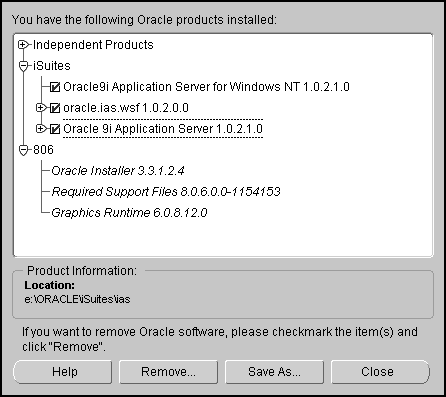
The Inventory screen appears when you click Deinstall Products on the Welcome screen, or Installed Products on any screen.
The Inventory screen displays all the components installed in Oracle home.
The following buttons and product information appear on the Inventory screen:
If you wish to deinstall Oracle9i Application Server completely, check the box displayed before the product name, which is listed directly below the Oracle home name.

The Confirmation screen lists all the components selected for deinstallation in the previous step. Scroll down the screen to verify selected components.
The following buttons appear on the Confirmation screen:
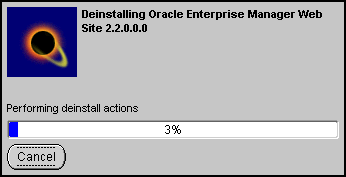
The Remove Progress Bar screen appears when you click Remove. The installer detects all components chosen for deinstallation from the Inventory screen and removes them from Oracle home.
You have successfully deinstalled Oracle9i Application Server.
Oracle Universal Installer does not allow reinstallation of Oracle9i Application Server over an already installed version. To reinstall Oracle9i Application Server over the same version, deinstall and then install the product.
|
|
 Copyright © 2001 Oracle Corporation. All Rights Reserved. |
|