Release 1 (9.0.1)
Part Number A88895-01
Home |
Solution Area |
Contents |
Index |
| Oracle9i Case Studies - XML Applications Release 1 (9.0.1) Part Number A88895-01 |
|
![]()
![]()
This chapter contains the following sections:
Discoverer Business Intelligence solutions transform an organization's data into information. Oracle Discoverer for the Web allows you to access this information using a Web browser interface.
Oracle Discoverer 4i Viewer makes the information available anywhere on the Internet or Intranet, and allows the information to be transparently embedded in Web pages or accessed from corporate Portals. Oracle Discoverer 4i Viewer can be customized, to fit any Web site using standard Web Technologies such as XML and XSL.
Discoverer allows you to make queries, while Reports lets you publish reports in different formats, including HTML, Adobe's Portable Document Format (PDF), and XML.
This chapter provides customization examples and describes strategies for using Discoverer 4i Viewer.
Discoverer4i Viewer can be driven and accessed by middle-tier B2B applications.
For more information on Discoverer4i Viewer see:
http://technet.oracle.com/docs/products/discoverer/doc_index.htm
Discoverer 4i Viewer allows you to:
Discoverer 4i Viewer uses no Java and no frames, enabling even low specification browsers to be used. Where JavaScript is enabled, Discoverer uses it to 'enhance' the user interface. But JavaScript is not required and the user interface degrades gracefully if JavaScript is not enabled.
Discoverer 4i Viewer can be used in the following ways:
The Discoverer 4i Viewer architecture is shown in Figure 7-1.
Discoverer 4i Viewer components are listed below:
See Figure 7-1 to understand how Discoverer 4i Viewer works:
The servlet uses Discoverer Server Interface (Model) to communicate with the Discoverer Application Server. Discoverer Server Interface and Discoverer Application Server are both also used by Discoverer Plus:
Discoverer Server Interface. This is an applet but here it is running on the Web Server, rather than in the client's JVM as in Discoverer Plus. The 4i Viewer Servlet communicates with Discoverer Application Server using Corba IIOP protocol.
Discoverer 4i Viewer andDiscoverer Plus use the same Discoverer Application Server.
It is the XSL file that allows the User Interface of Discoverer 4i Viewer to be customized for individual sites.

The Web Server and the Discoverer 4i Viewer Servlet container can be replicated using standard web farming and virtual hosting techniques.
In a real system there would be many users using each web and application server. Discoverer allows you to determine exactly how you want the load spread across available machines.
Discoverer 4i Viewer generates HTML by using the following XML components:
XSL configuration file (stylesheet) defines simple attributes, such as the fonts and colors to use, but it also defines the layout of each page, and the interactions with the user. By customizing the XSL stylesheet, specific Discoverer applications can be built and delivered on the Web.
After login, assume a Discoverer Viewer has asked for a list of workbooks that these workbooks are allowed to be opened in order to analyse their business. The URL issued is http://ukp14910.uk.oracle.com/disco/disco4iv?us=video&db=Disco
The URL specifies the machine the servlets are installed on, the username, and database connection string to use. The password is not normally shown on the URL for security reasons.
Discoverer 4iViewer Servlet processes the URL. It instructs the Discoverer Application Server to check the security setting for this user and return details of the workbooks that this user is allowed to access.
Security settings are held in the End User Layer tables in the database. After this information is returned from the Discoverer Application Server, the servlet generates the following XML in which you can see information about the three workbooks being returned:
<?xml version="1.0" encoding="UTF-8"?>
<?xml-stylesheet type="text/xsl" href="example1.xsl"?>
<discoverer version="3.5.8.12" login_method="discoverer">
 <account name="myname@mydatabase" ref="MYNAME%40mydatabase">
  <user>MYNAME</user>
   <database>mydatabase</database>
   <eul default="true" name="myeul">
   <workbook name="Store and Band Analysis" ref="Store~20and~20Band~20Analysis">
      <description>Shows sales by Store, broken into sales bands</description>
   </workbook>
   <workbook name="Video Sales Analysis" ref="Video~20Sales~20Analysis">
      <description>General purpose analysis of the business</description>
   </workbook>
   <workbook name="Annual Sales Report" ref="Annual~20Sales~20Report">
      <description>Shows yearly and quarterly sales of products</description>
   </workbook>
   </eul>
 </account>
</discoverer>
XSL is the industry standard stylesheet language defined by W3C. It allows a selection of elements from an XML file to be combined with an HTML template to generate HTML output for a Web Browser.
Discoverer 4i Viewer User Interface is entirely defined in XSL. This means it can be customized or copied to define alternative User Interface (UI) styles using standard Web development tools, such as HTML editors, XSL editors, or even simple text editors.
The XSL and XML .
Using the XML generated in Step 2 and the standard Discoverer 4i Viewer XSL configuration file (stylesheet), these are combined in the XSLT processor in the XML Parser for Java,v2. This then generates the HTML version of the XML document.
This HTML is sent back to the browser in response to the initial URL.
In Discoverer 4i Viewer, the generated HTML does not use frames and therefore makes minimal demands on the browser or internet device. Hence it is easy to integrate with other web applications or portals. Where JavaScript is enabled, Discoverer uses it to 'enhance' the user interface. But JavaScript is not required and the user interface degrades gracefully if JavaScript is not enabled.
You need to be able to easily modify fonts and colors to fit in with your corporate standards, or to display the company logo to add branding. These global changes can be made in a single XSL stylesheet file "style.xsl" that defines special `tags' for each style that can be modified. For example:
<xsl:variable name="logo_src"> </xsl:variable name>
to
<xsl:variable name="logo_src"> http:www.mycompany.com/images/mylogo.gif
</xsl:variable name>
<xsl:variable name="text_color">#000000</xsl:variable>
Many global style changes can be made in this way, but the overall operation of the User Interface remains unchanged. This is only one way of customizing Discoverer 4i Viewer. In fact, using XSL allows a complete customized application to be made, as the next example shows.
You can use the XML and XSL fragments below to experiment with customization in a Web Browser.
The data is a standard XML file, similar to the previous "Discoverer XML Example 1":
<?xml version="1.0" encoding="UTF-8"?>
<?xml-stylesheet type="text/xsl" href="example1.xsl"?>
<discoverer version="3.5.8.12" login_method="discoverer">
 <account name="myname@mydatabase" ref="MYNAME%40mydatabase">
  <user>MYNAME</user>
   <database>mydatabase</database>
   <eul default="true" name="myeul">
   <workbook name="Store and Band Analysis" ref="Store~20and~20Band~20Analysis">
      <description>Shows sales by Store, broken into sales bands</description>
   </workbook>
   <workbook name="Video Sales Analysis" ref="Video~20Sales~20Analysis">
      <description>General purpose analysis of the business</description>
   </workbook>
   <workbook name="Annual Sales Report" ref="Annual~20Sales~20Report">
      <description>Shows yearly and quarterly sales of products</description>
   </workbook>
   </eul>
 </account>
</discoverer>
The XML file starts by specifying the XML version. The 2nd line specifies the XSL file to be applied to process the data, "example1.xsl" and the rest of the file is generated from the Discoverer 4i Viewer.
The first two lines have been added here so that you can type the text into a file using a text editor and then open it in a Web Browser to see the results visually as the XSL is changed. Save the file with the extension "xml" if you want to try this.
XSL file, "example1.xsl", looks like this :
<?xml version="1.0" encoding="UTF-8"?>
<xsl:stylesheet version="1.0" xmlns:xsl="http://www.w3.org/TR/WD-xsl">
<xsl:template match="/">
  <html>
    <body bgcolor="#ffffff" link="#663300" text="#000000">
       <b><i>Choose a Workbook:</i></b>
       <br/>
       <table border="2">
         <xsl:for-each select="/discoverer/account/eul/workbook">
          <tr>
            <td width="242">
              <font face="sans-serif">
                <xsl:value-of select="@name"/>
              </font>
            </td>
            <td>
               <xsl:value-of select="description"/>
            </td>
          </tr>
        </xsl:for-each>
       </table>
    </body>
  </html>
</xsl:template>
</xsl:stylesheet>
Figure 7-2 shows what you see on a Browser when the XML file is opened in the Browser, the Browser reads in the XSL stylesheet (example1.xsl), and generates HTML.
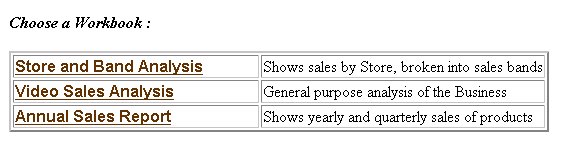
Table 7-1 examines the XSL file, example1.xsl, from line 5. It describes how the HTML is generated. The file starts by specifying the XML version. The 2nd line says that this file is a stylesheet. The HTML template starts with the <HTML> tag on line 4.
|
Note:
|
The XSL stylesheet is modified as follows:
<?xml version="1.0" encoding="UTF-8"?>
<xsl:stylesheet version="1.0" xmlns:xsl="http://www.w3.org/TR/WD-xsl">
<xsl:template match="/">
 <html>
  <body bgcolor="#ffffff" link="#663300" text="#000000">
   <table border="0">
      <tr>
        <td>width="500" height="100" background="disco_banner.gif">
          <font face="sans-serif">
            <b>Performance Reports</b>
          </font>
        </td>
      </tr>
   </table>
   <table border="0">
      <xsl:for-each select="/discoverer/account/eul/workbook">
         <tr>
           <td>
             <font face="sans-serif">
               <b>
                 <a href="link.htm">
                    <img src="button2.gif">
                      <xsl:attribute name="alt">
                      <xsl:value-of select="description"/>
                      </xsl:attribute>
                    </img>
                 </a>
               </b>
             </font>
           </td>
           <td>
             <font face="sans-serif">
                <xsl:value-of select="@name"/>
             </font>
           </td>
         </tr>
      </xsl:for-each>
   </table>
  </body>
</html>
</xsl:template>
</xsl:stylesheet>
When this is combined with the same XML, it appears as shown in Figure 7-3.
Now the appearance of the User Interface is completely different, as it takes on a more graphical look and feel. Instead of text links there are graphical buttons for running the reports, each with a dynamic `tool tip' that pops up when you position the mouse over the button.
The modified XSL file is described in Table 7-2.
Figure 7-4 shows a typical web-based rendition of this sample application.
What is a servlet?
Servlets are modules of Java code that run in a server application (hence the name "Servlets", similar to "Applets" on the client side) to answer client requests. Servlets are not tied to a specific client-server protocol but they are most commonly used with HTTP and the word "Servlet" is often used in the meaning of "HTTP Servlet".
Servlets make use of the Java standard extension classes in the packages javax.servlet (the basic Servlet framework) and javax.servlet.http (extensions of the Servlet framework for Servlets that answer HTTP requests). Since Servlets are written in the highly portable Java language and follow a standard framework, they provide a means to create sophisticated server extensions in a server and operating system independent way.
Typical uses for HTTP Servlets include:
What does Discoverer 4i Viewer use to communicate with the user's browser?
HTTP and HTML.
How is XML used by Discoverer 4i Viewer?
XML is generated by the middle-tier and represents the application state. Discoverer 4iViewer Servlet interprets an HTTP request from the user's browser, and makes the necessary calls to the Discoverer Server.
The server response is represented in XML generated by the Servlet. XSL is applied to this XML, producing the HTML that is displayed by the users browser.
By using XML and XSL together, the underlying data and the look and feel are separated allowing easy customization.
What does the disco4iv.xml file do?
You can use disco4iv.xml file to configure various options to make Discoverer 4i Viewer behave the way you want to. For example, you can specify the Discoverer Session that it should connect to.
How is XSL used by Discoverer 4i Viewer?
Discoverer 4i Viewer uses XSL (or more specifically XSLT) to transform the XML generated by the middle-tier into the HTML that is sent to the user's browser. By editing the XSL files, you gain complete control over the style and presentation of the UI.
What XSL processors can be used by Discoverer 4i Viewer?
Discoverer 4i Viewer can be configured to use Oracle XSLTProcessor. This is the default and part of the XDK for Java.
What tools are available to edit XSL Stylesheets?
You can use any text editor to edit XSL files however the following applications are designed especially for editing XSL:
What is commonly changed in order to customize a stylesheet?
To customize a styelsheet, edit the following items:
When I customize my own XSL Stylesheet, why can't I see my changes?
By default, the XSLT Processor caches the XSL files in its memory for better performance. You have two options for viewing the changes:
<argument name="xsl_cache">false</argument>
Why does my browser display a blank screen?
This is usually because you have done either of the following:
Where can I find more information on XML and XSL?
What is the structure of the Discoverer Viewer XML?
The XML documents generated by Discoverer Viewer conform to the following DTD:
<?xml version="1.0" encoding="UTF-8"?>
<!ELEMENT account (error*, user?, database?, connect?, role*, eul*, option*,
version*)>
<!ATTLIST account
    name CDATA #IMPLIED
    mv_summaries_supported (true | false) "true"
    ref CDATA #IMPLIED
>

<!ELEMENT axes (axis)*>

<!ELEMENT axis (item*)>
<!ATTLIST axis
    position (m | x | y | z) #REQUIRED
>

<!ELEMENT background_color EMPTY>
<!ATTLIST background_color
    red CDATA #REQUIRED
    green CDATA #REQUIRED
    blue CDATA #REQUIRED
>

<!ELEMENT cell EMPTY>
<!ATTLIST cell
    result CDATA #REQUIRED
>

<!ELEMENT chart (page_item*, dim:image_map)>
<!ATTLIST chart
    name CDATA #REQUIRED
    height CDATA #REQUIRED
    width CDATA #REQUIRED
>

<!ELEMENT command (#PCDATA)>
<!ATTLIST command
    name CDATA #REQUIRED
    ref CDATA #IMPLIED
    implied (true | false) "false"
    valid (true | false) "true"
>

<!ELEMENT connect (#PCDATA)>

<!ELEMENT data (value, qdr?)>

<!ELEMENT database (#PCDATA)>

<!ELEMENT date (#PCDATA)>
<!ATTLIST date
    ref CDATA #IMPLIED
>

<!ELEMENT description (#PCDATA)>
<!ELEMENT error (#PCDATA | command)*>
<!ATTLIST error
	code CDATA #REQUIRED
	severity CDATA #IMPLIED
>

<!ELEMENT discoverer (session, request, account*, export*, locale?, version*)>
<!ATTLIST discoverer
    login_method (application | discoverer) "discoverer"
>

<!ELEMENT drill (#PCDATA)>
<!ATTLIST drill
    ref CDATA #IMPLIED
>

<!ELEMENT drill_path (#PCDATA)>
<!ATTLIST drill_path
    name CDATA #REQUIRED
    hierarchy_name CDATA #IMPLIED
    direction (collapse | up | down) #REQUIRED
    level CDATA #REQUIRED
    ref CDATA #REQUIRED
>

<!ELEMENT edge (item*, edge_row*)>
<!ATTLIST edge
    placement (page | side | top) #REQUIRED
>

<!ELEMENT edge_row (value*)>

<!ELEMENT eul (workbook*, version*)>
<!ATTLIST eul
    name CDATA #REQUIRED
    default (true | false) "false"
    ref CDATA #IMPLIED
>

<!ELEMENT export (#PCDATA)>
<!ATTLIST export
    name CDATA #REQUIRED
    ref CDATA #IMPLIED
    format CDATA #REQUIRED
>

<!ELEMENT font EMPTY>
<!ATTLIST font
    name CDATA #REQUIRED
    size CDATA #REQUIRED
    bold (true | false) "false"
    italic (true | false) "false"
    strikeout (true | false) "false"
    underline (true | false) "false"
>

<!ELEMENT foreground_color EMPTY>
<!ATTLIST foreground_color
    red CDATA #REQUIRED
    green CDATA #REQUIRED
    blue CDATA #REQUIRED
>

<!ELEMENT format (background_color, foreground_color, graphic_bar_color?, font)>
<!ATTLIST format
    id CDATA #REQUIRED
    description CDATA #IMPLIED
    display_name CDATA #IMPLIED
    horizontal_alignment (left | center | default | right) #REQUIRED
    vertical_alignment (bottom | center | top | lower_bound | upper_bound)
#REQUIRED
    graphic_bar_visible (true | false) "false"
    word_wrap (true | false) "false"
>

<!ELEMENT format_map (format*)>

<!ELEMENT graphic_bar_color EMPTY>
<!ATTLIST graphic_bar_color
    red CDATA #REQUIRED
    green CDATA #REQUIRED
    blue CDATA #REQUIRED
>

<!ELEMENT group (value*, group*, data*)>

<!ELEMENT item (drill_path*, sort*)>
<!ATTLIST item
    name CDATA #REQUIRED
    key CDATA #REQUIRED
    id CDATA #IMPLIED
    format_class CDATA #IMPLIED
    heading CDATA #IMPLIED
>

<!ELEMENT layout (row*)>

<!ELEMENT locale (#PCDATA)>
<!ATTLIST locale
    language CDATA #REQUIRED
    country CDATA #REQUIRED
>

<!ELEMENT measure_edge (item+)>
<!ATTLIST measure_edge
    placement CDATA #REQUIRED
    level CDATA #REQUIRED
>

<!ELEMENT option (#PCDATA)>
<!ATTLIST option
    name (aq | ftd | msa | nad | nv | qif | qll | qpw | qrl | qtl | rpp | usd)
#REQUIRED
    enable (true | false) "false"
>

<!ELEMENT page_item (drill_path*, sort*, value+)>
<!ATTLIST page_item
    name CDATA #REQUIRED
    ref CDATA #IMPLIED
    key CDATA #IMPLIED
    id CDATA #IMPLIED
    format_class CDATA #IMPLIED
    heading CDATA #IMPLIED
>

<!ELEMENT parameter (value, prompt)>
<!ATTLIST parameter
    	name CDATA #REQUIRED
    	ref CDATA #IMPLIED
    	description CDATA #IMPLIED
    	lov_exists (true | false) "false"
    	multivalued (true | false) "false"
    	wildcard_supported (true | false) "false"
    	type CDATA #REQUIRED
>

<!ELEMENT prompt (#PCDATA)>

<!ELEMENT qdr (#PCDATA)>

<!ELEMENT query (parameter*, axes, sheet_data?, chart?, drill?)>
<!ATTLIST query
    	version CDATA #REQUIRED
    	status CDATA #REQUIRED
    	step CDATA #REQUIRED
    	elapsed CDATA #IMPLIED
    	estimate CDATA #REQUIRED
>

<!ELEMENT request (error*, command*)>
<!ATTLIST request
    	source CDATA #REQUIRED
    	parameters CDATA #IMPLIED
>

<!ELEMENT role (#PCDATA | security_group)*>
<!ATTLIST role
    	name CDATA #REQUIRED
    	ref CDATA #IMPLIED
    	current (true | false) "false"
>

<!ELEMENT row (cell*)>

<!ELEMENT security_group (#PCDATA)>

<!ELEMENT session EMPTY>
<!ATTLIST session
    	id CDATA #REQUIRED
>

<!ELEMENT sheet_data (page_item*, format_map?, edge*, measure_edge?, group*,
error*)>
<!ATTLIST sheet_data
    	name CDATA #REQUIRED
    	row_range_begin CDATA #REQUIRED
    	row_range_end CDATA #REQUIRED
    	total_rows CDATA #REQUIRED
    	mode (inline | outline) #REQUIRED
>

<!ELEMENT sheet_layout (axis+)>

<!ELEMENT sort EMPTY>
<!ATTLIST sort
    	type (none | group | hidden | page) #REQUIRED
    	direction (hi_lo | lo_hi) #REQUIRED
    	line_width CDATA #IMPLIED
    	spaces CDATA #IMPLIED
    	level CDATA #IMPLIED
>

<!ELEMENT time (#PCDATA)>
<!ATTLIST time
    	ref CDATA #IMPLIED
>

<!ELEMENT title (#PCDATA)>

<!ELEMENT user (#PCDATA)>

<!ELEMENT value (#PCDATA | drill_path)*>
<!ATTLIST value
    	current (true | false) "false"
    	default (true | false) "false"
    	wildcard (true | false) "false"
    	ref CDATA #IMPLIED
    	format_class CDATA #IMPLIED
    	item_class CDATA #IMPLIED
    	type (item | spacing | total) #IMPLIED
    	id CDATA #IMPLIED
    	data CDATA #IMPLIED
    	label CDATA #IMPLIED
>

<!ELEMENT version EMPTY>
<!ATTLIST version
    	component CDATA #REQUIRED
    	product CDATA #REQUIRED
    	version CDATA #REQUIRED
>

<!ELEMENT workbook (description?, worksheet*, date?, time?)>
<!ATTLIST workbook
    	name CDATA #REQUIRED
    	ref CDATA #IMPLIED
>

<!ELEMENT worksheet (description?, sheet_layout?, title?, layout?, query*)>
<!ATTLIST worksheet
    	name CDATA #REQUIRED
    	ref CDATA #REQUIRED
>

<!ELEMENT dim:image_map (GraphMap)>
<!ATTLIST dim:image_map
    	xmlns:dim CDATA #REQUIRED
>

<!--
The GraphMap and related entities are provided by the BI Beans team.
-->
<!ELEMENT GraphMap (DataLine | DataMarker | TwoDMarker | StockMarker |
AreaMarker | ThreeDMarker | LegendMarker |
    	LegendText | MarkerText | PieLabel | Slice | SliceLabel | O1TickLabel |
X1TickLabel | O1Title | X1Title |
    	Y1TickLabel | Y1Title | Y2TickLabel | Y2Title | ZTickLabel | ZTitle | Title
| Subtitle | Footnote)*>

<!ELEMENT DataLine (Group, Series, Tooltip?, Geometry)>

<!ELEMENT DataMarker (Group, Series, Tooltip?, Geometry)>
<!ELEMENT TwoDMarker (Group, Series, Tooltip?, Geometry)>
<!ELEMENT StockMarker (Group, Series, Tooltip?, Geometry)>
<!ELEMENT AreaMarker (Group, Series, Tooltip?, Geometry)>
<!ELEMENT ThreeDMarker (Group, Series, Tooltip?,Geometry)>
<!ELEMENT LegendMarker (Series, Geometry)>
<!ELEMENT LegendText (Series, Geometry)>
<!ELEMENT MarkerText (Group, Series, Geometry)>
<!ELEMENT PieLabel (Group, Geometry)>
<!ELEMENT Slice (Group, Series, Tooltip?, Geometry)>
<!ELEMENT SliceLabel (Group, Series, Geometry)>
<!ELEMENT O1TickLabel (Group, Geometry)>
<!ELEMENT X1TickLabel (Geometry)>
<!ELEMENT O1Title (Geometry)>
<!ELEMENT X1Title (Geometry)>
<!ELEMENT Y1TickLabel (Geometry)>
<!ELEMENT Y1Title (Geometry)>
<!ELEMENT Y2TickLabel (Geometry)>
<!ELEMENT Y2Title (Geometry)>
<!ELEMENT ZTickLabel (Series, Geometry)>
<!ELEMENT ZTitle (Series, Geometry)>
<!ELEMENT Title (Geometry)>
<!ELEMENT Subtitle (Geometry)>
<!ELEMENT Footnote (Geometry)>
<!ELEMENT Group (#PCDATA)>
<!ELEMENT Series (#PCDATA)>
<!ELEMENT Tooltip (Line)*>
<!ELEMENT Line (#PCDATA)>
<!ELEMENT Geometry (Vertex)*>
<!ELEMENT Vertex EMPTY>
<!ATTLIST Vertex x CDATA #REQUIRED>
<!ATTLIST Vertex y CDATA #REQUIRED>
|
|
 Copyright © 1996-2001, Oracle Corporation. All Rights Reserved. |
|