


|
|
The following sections describe how to run the installation program in console mode:
Start the installation program in console mode as described in Starting the Installation Program.
To complete the console-mode installation process, respond to the prompts in each section by entering the number associated with your choice or by pressing Enter to accept the default. To exit the installation process, enter exit (or x, for short) in response to any prompt. To review or change your selection, enter previous (or p, for short) at the prompt. To proceed to the following window, enter next (or n, for short).
| Note: | In the sample console text and directory pathnames provided in this section, Windows conventions (such as backslashes in pathnames) are used, for example, C:\bea\weblogic92. When entering pathnames on a UNIX system, be sure to use UNIX conventions, instead. For example, use forward slashes in pathnames, such as /home/bea/weblogic92. |
The following procedure steps you through the installation program. Use this procedure after you have started the installation program in console mode, as described in Starting the Installation Program. You will complete the following configurations as you run the installation program:
The following figure shows the first command widow of the installer.
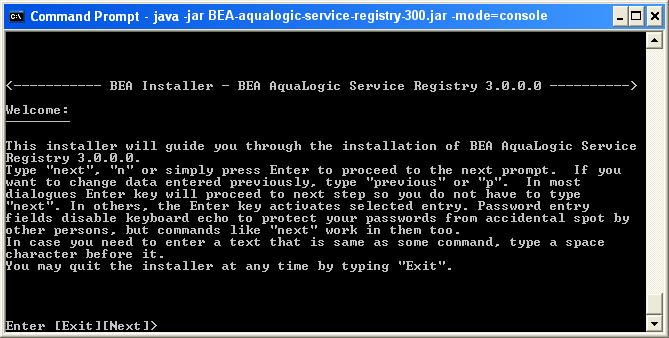
At the Welcome prompt, type next (or n for short) and then press Enter to continue with the installation process.
The following figure shows the Installation Directory command window.
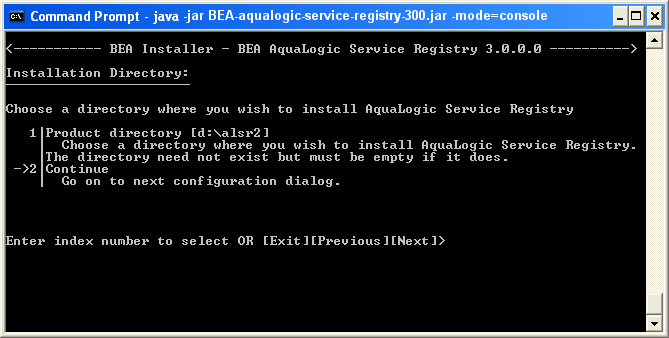
Specify the installation directory for the AquaLogic Service Registry instance installed on the target system.
| Note: | You must have read and write permissions on the installation directory. |
After specifying the installation directory, the Choose Shortcuts prompt is displayed.
The following figure shows the Choose Shortcuts command window.
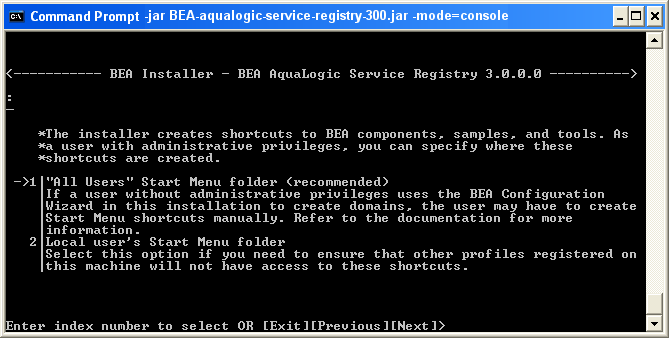
Choose which shortcuts are created as part of the installation:
After specifying the shortcuts, the Choose Deployment Target Type prompt is displayed.
The following figure shows the Deploy Target Type command window.
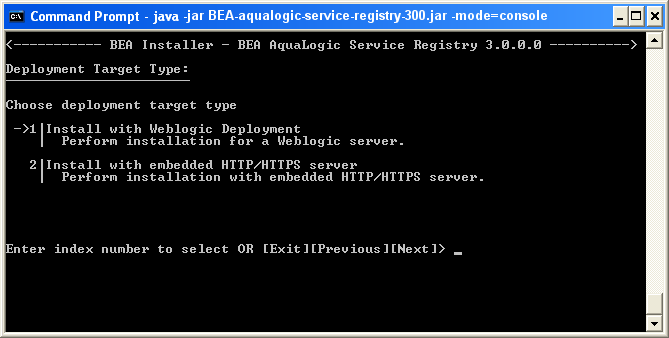
Choose the deployment target type:
After specifying the target, one of the following prompts are displayed:
Choose BEA Home—Go to BEA Home Directory.Choose Installer Type—Go to Installation Type.The following figure shows the BEA Home Directory command window.
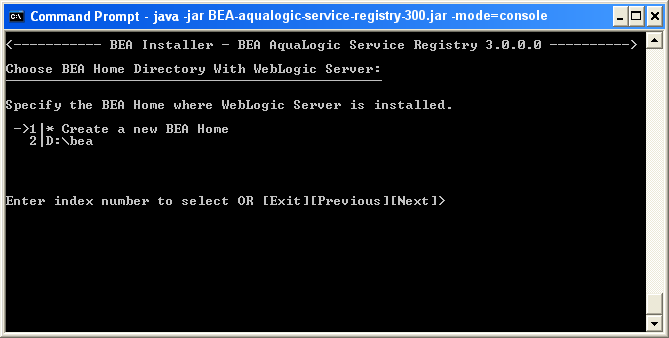
If you selected Install with Weblogic Deployment, choose the BEA Home directory where the target WebLogic Server instance is to be deployed:
The following figure shows the Installation Type command window.

Specify the type of installation you want to perform by entering the number associated with the install type:
After specifying the installation type, the SMTP Configuration prompt is displayed.
The SMTP configuration is important when users needs to receive E-mail notification from subscriptions and from the approval process.
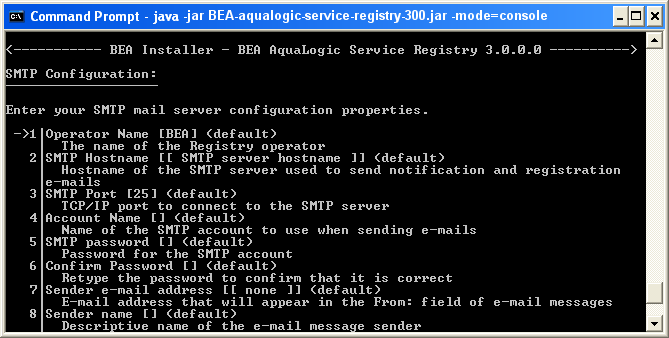
Enter your SMTP configuration properties:
After specifying the SMTP properties, the Administrator Account prompt is displayed.
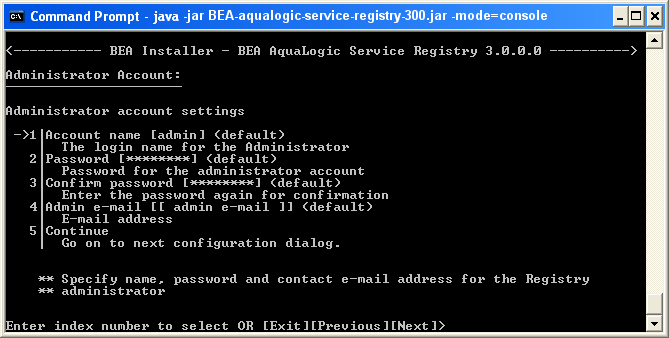
Configure the administrator account settings:
After specifying the administrator account setting, the Database Configuration prompt is displayed.
The registry requires a database which may be created during installation. During installation you can create a new database, create schema in an existing empty database, or connect to an existing database with created schema. If you do not create a database you can do it later using the Setup tool.
The following figure shows the Database Creation command window.
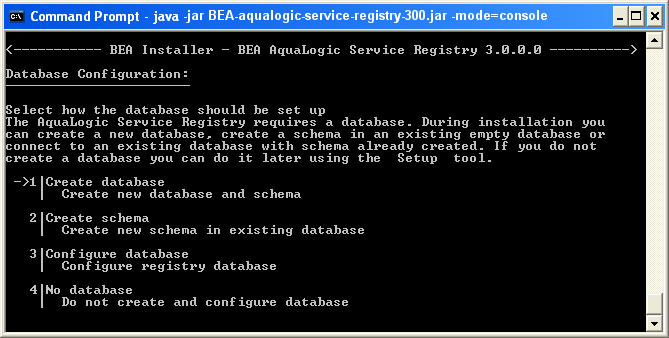
Select your database creation method:
| Note: | For more information, see Database Installation. |
If you chose to create a database, the Database Selection prompt is displayed.
The following figure shows the Database Selection command window.
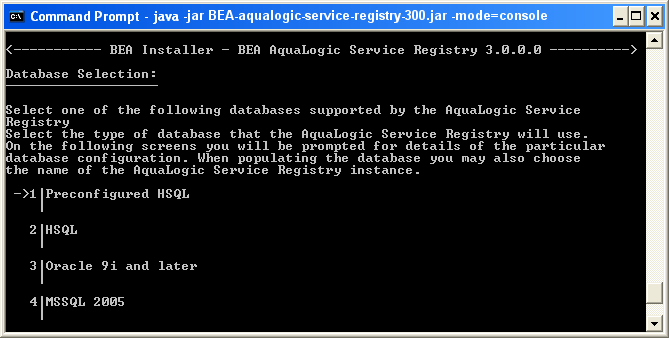
| Note: | The default database to create is the Preconfigured HSQL (HSQL). This database is recommended for evaluation purposes. |
The name is saved to the operational business entity. The registry name appears in the upper right corner of Registry Console and Business Service Console.
| Note: | You can change the database after installation using the Setup tool. For more information on database installation, see Database Installation. |
On the window displayed in Figure 4-8, you are only required to provide administrator account settings. The database files will be installed into the REGISTRY_HOME/hsqldb/uddinode directory. The database user is uddiuser and the password is uddi.
After selecting a database, the Authentication Provider prompt is displayed.
The following figure shows the Authentication Provider command window.
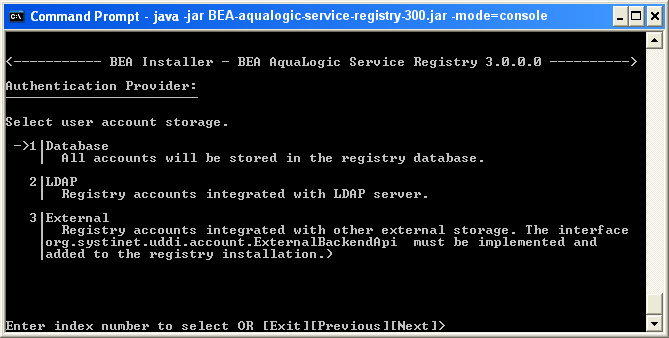
Select an authentication provider.
com.systinet.uddi.account.ExternalBackendApi must be implemented and added to the registry installation.After specifying the authentication provider, one of the following is displayed:
HTTP Server Settings prompt—Go to HTTP Server Settings.The following figure shows the HTTP Server Settings command window.

Enter the HTTP server settings:
changeit) The password is used to create a new security identity in the local protected store. It creates a certificate and adds this certificate to REGISTRY_HOME/conf/clientconf.xml; REGISTRY_HOME/conf/pstore.xml; and also exports it to the certificate file REGISTRY_HOME/doc/registry.crt, which is used in several situations including the approval process registry scenario. For instructions in how to operate the protected security store PStore Tool in the Administrator’s Guide in
Using the AquaLogic Service Registry.
After entering the HTTP server settings, the Deploy at End of Installation prompt is displayed.
The following figure shows the Deployment Settings command window.
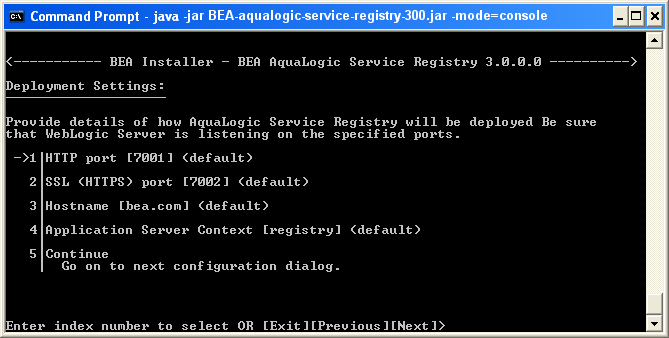
Enter deployment settings for target WebLogic server where AquaLogic Service Registry will be deployed.
After entering the deployment settings, the Deploy at End of Installation prompt is displayed.
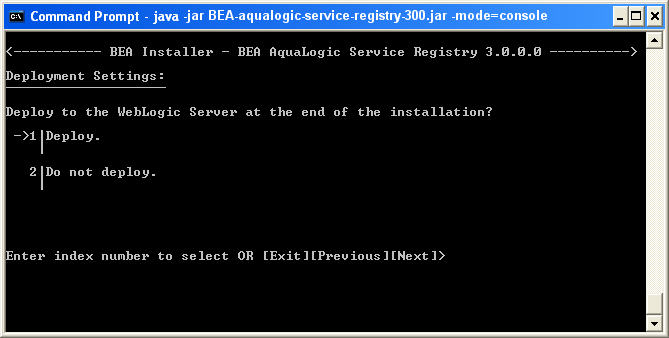
Specify whether you want to automatically deploy to the WebLogic server at the end of installation.
After selecting the deployment options, the Installation Summary prompt is displayed.
The following figure shows the Installation Summary command window.
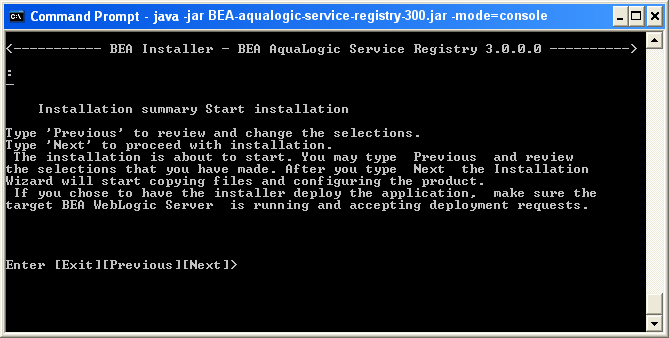
Confirmation and Start Install process—You will see a confirmation display as shown below. Type Next to continue with the installation process. If you want to change any of your selections type Previous.
When the installation is complete, press Enter or Exit to exit the installation program.
Note that WebLogic 8.1 and 9.2 are supported.
When you finish running the installer successfully, complete the following steps to complete the deployment of AquaLogic Service Registry to WebLogic Server.
If you have not already done so, enable SSL in WebLogic. Restart WebLogic Server so that the previous changes in to the startup script in Step 1 take effect.
| Note: | AquaLogic Service Registry ships with sample client code that requires the WebLogic Server SSL certificate for the WebLogic Server instance on which AquaLogic Service Registry is deployed. Note that any other client code you use must also be configured for SSL connections to AquaLogic Service Registry using the appropriate tools for that type of client. |
Import the WebLogic Server SSL certificate to the BEA AquaLogic Service Registry configuration file.
You can obtain the WebLogic SSL certificate via a browser by accessing a WebLogic-hosted page using HTTPS, and exporting the certificate to a Base-64 .cer file.
To import this certificate into AquaLogic Service Registry, use the PStoreTool located in [registry_home]/bin PStoreTool.sh. add – config [registry_home]/conf/clientconf.xml -certFile [weblogic.cer]
This completes the deployment. The BEA AquaLogic Service Registry URL is:
http://[hostname]:[http_port]/[context]/uddi/web
For information about the installed product and troubleshooting tips, go to Installation Summary.


|