4 Creating Remedy Trouble Tickets
You can create trouble tickets automatically or manually. The following sections explain how to create both types.
-
Automatically Creating a Trouble Ticket
-
Manually Creating a Trouble Ticket
Automatically Creating a Trouble Ticket
Perform the following steps to automatically create a trouble ticket:
-
Review the default out-of-box templates in Chapter 5, "Using Default Templates".
-
Select an appropriate ticket template with the desired mapping of Enterprise Manager alert fields to the Remedy ticket fields.
-
If you do not have a ticket template that satisfies your requirement, create one and register it.
-
Create a notification rule using the following steps:
Important:
Do not select more than one ticket template for this notification rule.-
From the Enterprise Manager console, click Preferences.
-
In the left pane, under Notification, click Rules, then Create.
-
In the Create Notification Rule General page, specify the rule name, a description, and the targets for which this rule should apply.
-
In the Create Notification Rule Availability page, select the availability states for which you want to create tickets.
-
In the Create Notification Rule Metrics page, select the metrics and their associated alert severities for which you want to create and update tickets.
Ensure that you select all relevant alert severities if you want to update the ticket when the alert severity changes. For example, to open a ticket for a critical alert on the CPU Utilization(%) metric and the ticket is to be updated if the CPU Utilization(%) changes to warning or clear severity, in the notification rule select
Critical,Warning, orClearseverities for the CPU Utilization(%) metric. -
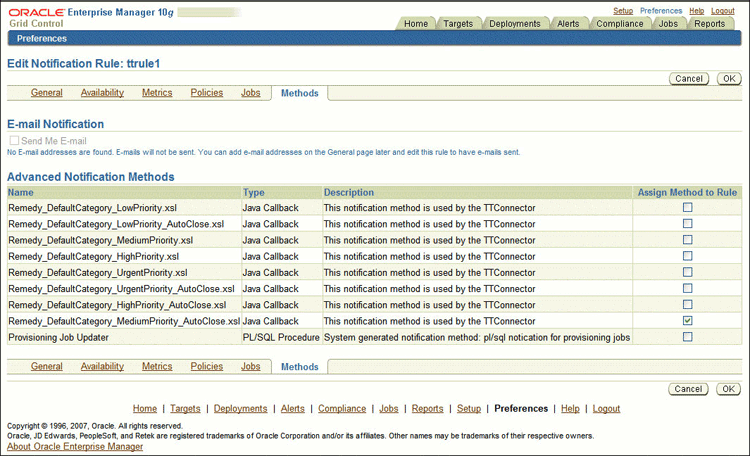
In the Create Notification Rule Methods page, choose the ticket template from the Advanced Notification Methods table shown in Figure 4–1.
In the table, registered ticket templates appear as Java Callback type notification methods under the same name as the ticket template's file name. This ticket template is used to open tickets for all availability and metric alerts specified in this notification rule.
This makes the ticket templates available for use to open tickets.
See Also:
"Configuring Notifications" in Oracle Enterprise Manager Advanced Configuration Guide
-
The following process occurs after you create the notification rule for your alerts:
-
A notification is sent to the Remedy Connector when a metric alert triggers that matches your rule. The Remedy connector creates/updates a ticket according to the ticket template as set in the notification rule.
-
The ticket is created or updated on the Remedy Trouble Ticket system.
-
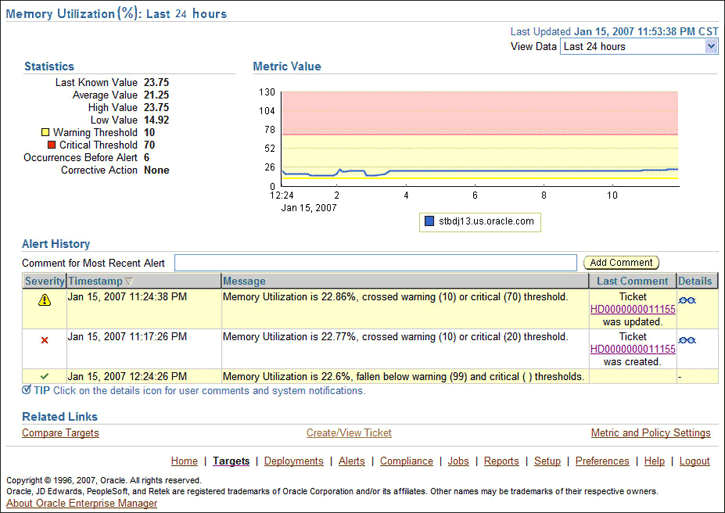
In Enterprise Manager, the alert annotation is updated. A comment is added to the Metric Details page of the alert to indicate that a ticket was created or updated, along with the ticket ID and ticket page URL.
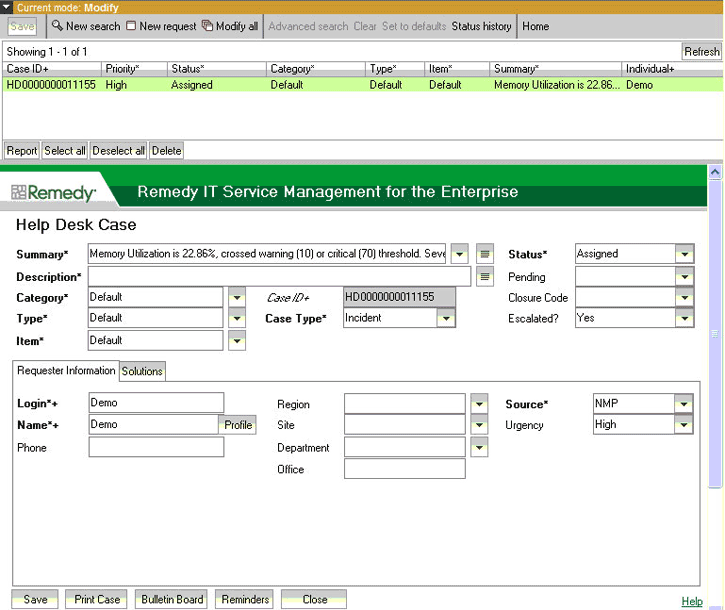
A ticket is updated if there is an existing active ticket for an alert. Figure 4–2 shows the ticket in Remedy console, and Figure 4–3 shows the alert as displayed in Enterprise Manager.
Manually Creating a Trouble Ticket
Perform the following steps to manually create a trouble ticket:
-
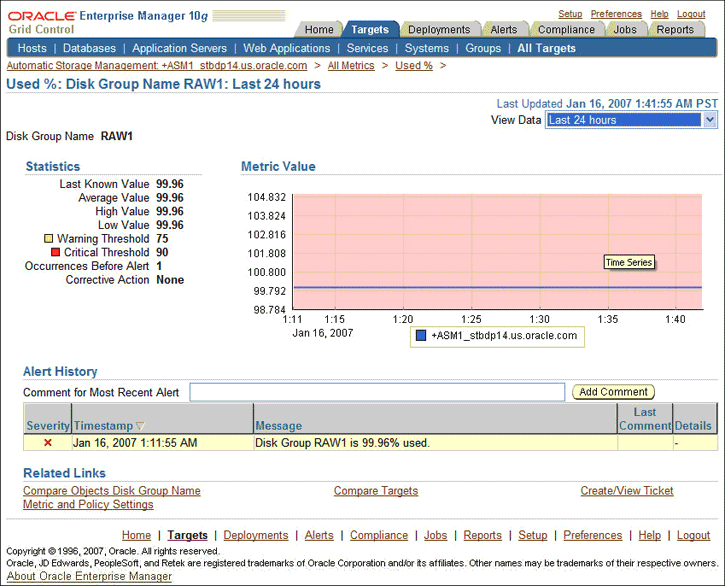
After a metric alert occurs, go to the associated metric details page for the alert. To access this page, click the alert message in the Enterprise Manager console (Figure 4–4).
-
Click the Create/View Ticket link in the Related Links section.
The Create Ticket page appears if no active ticket exists for the alert.
-
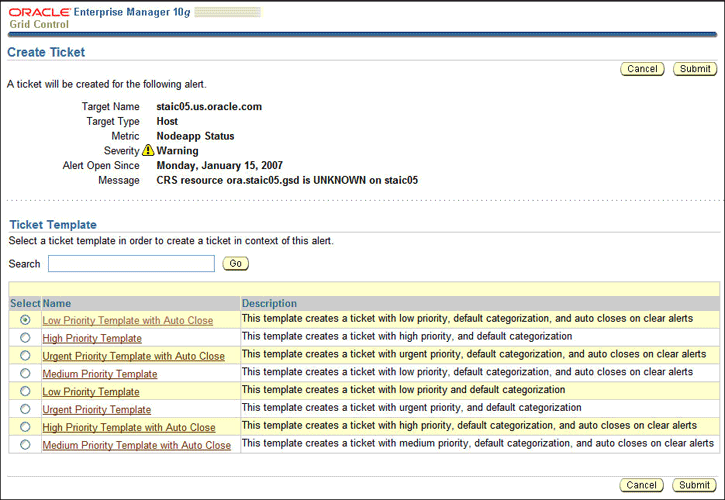
Select a ticket template and then click Submit (Figure 4–5).
If you do not see the desired template, you can register one using the
emctlcommand. See "Registering Ticket Templates" on page 3E6.If creating or updating the ticket is successful, the ticket ID appears in the Last Comment column of the Alert History table for the metric alert.If the Web console settings are configured and enabled, the ticket ID appears as a link to the ticket page in the Remedy Help Desk. If there is no annotation, the ticket creation fails and error information is logged in the file
emoms.log.
Note:
You cannot manually update the ticket using Remedy Connector. You have to manually update the ticket in the Remedy AR server for any subsequent alert change.