| Oracle® Retail Demand Forecasting Installation Guide Release 14.1.2 E70806-01 |
|

 Previous |
 Next |
| Oracle® Retail Demand Forecasting Installation Guide Release 14.1.2 E70806-01 |
|
Previous |
Next |
When upgrading RDF, use the upgrade option that corresponds best to your system's requirements. Refer to Upgrade Scenarios for additional information.
In order to upgrade RDF, first verify the following criteria for the RPAS system:
Verify that RPAS is currently installed and is at Release 13.3 or later. If not, refer to the section, Upgrade to Key RPAS Versions.
Verify that the UNIX operating system is updated to the currently supported version. Refer to the ”Hardware and Software Requirements” section of the Oracle Retail Predictive Application Server Installation Guide.
Verify that the environment variables are correctly set for both the server and PC; if they are not, follow these instructions to set them:
Change directories to the original RPAS installation directory (such as the one created by the most recent installer), and run retaillogin.ksh to set all environment variables. For example:
$ cd /retail$ ../retaillogin.ksh
Remove the empty workbook tab as described in the section, Tab Removal.
|
Notes: Once you have run the script, verify that the environment variables all point to the correct locations on your environment.If you have updated Java since the last installation of RPAS, verify that the JAVA_HOME path is correct. If not, update your |
If applicable, perform the procedure described in the section, Key Steps to Build or Upgrade the RDF Domain Prior to Running the RPAS Installer.
With the generally available (GA) configuration of pre-13.4 versions of RDF, an empty workbook tab exists that does not perform a function in the forecast scorecard workbook. This tab is not deleted by the plug-in regeneration because it does not exist in the master template. It is thus considered a customization. The new taskflow generation code in 13.4.0 also creates a task for it. The empty workbook tab in the forecast scorecard workbook has been removed from the 13.4 GA configuration.
For information on using the RPAS Configuration Tools, refer to the Oracle Retail Predictive Application Server Configuration Tools User Guide.
Follow these steps to remove the empty workbook tab.
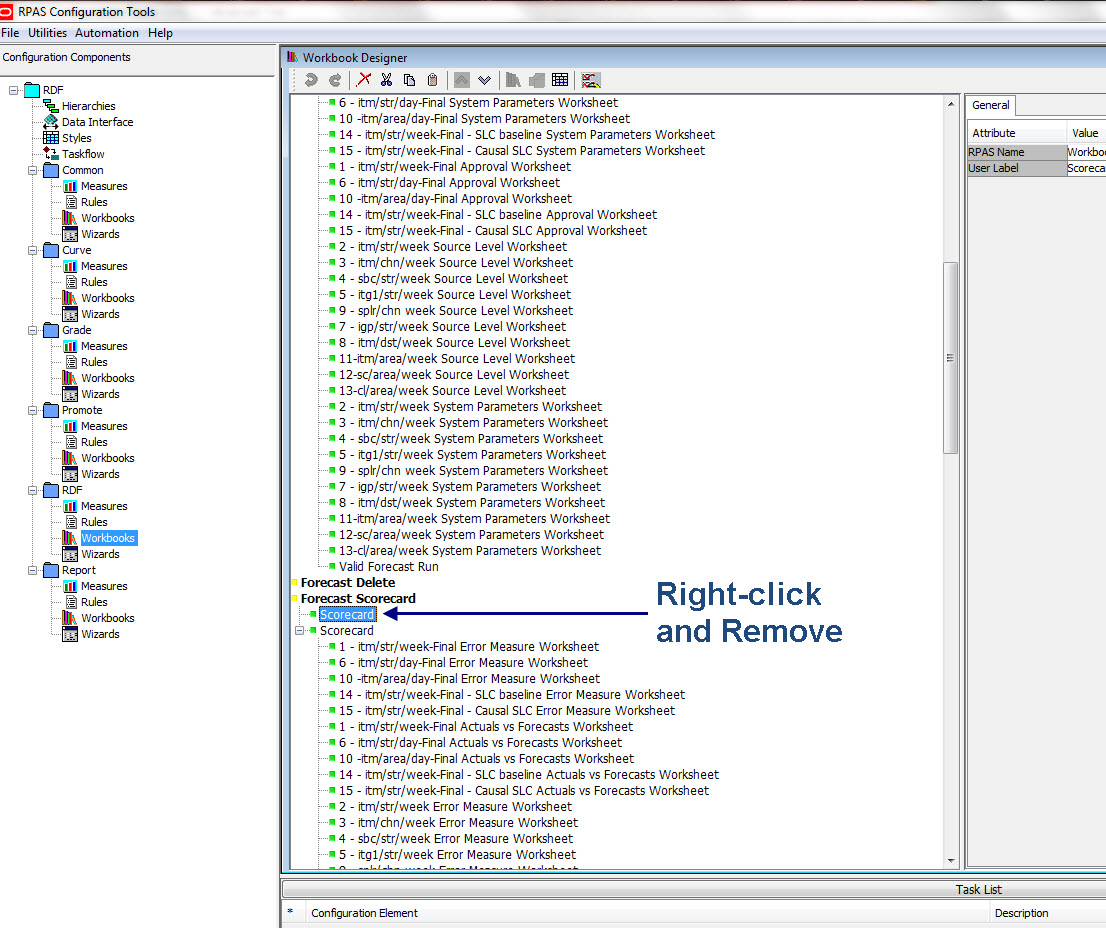
In Configuration Tools, locate the Forecast Scorecard workbook template under the RDF folder.
Locate the duplicate Scorecard workbook tab that does not have any worksheets. Right-click and Remove as shown in Figure 2-1.
The empty workbook tab is removed from Configuration Tools.
|
Note: This procedure is only necessary if your RDF Domain is customized. |
Before running the RPAS Installer, perform the following steps when building or upgrading the RDF Domain:
File Preparation for RDF
Run execPluginTask.sh for RDF, which creates data files in the directory <input path>:
execPluginTask.sh RDF:com.retek.labs.rdf.plugin.installer.InstallParameterDataGeneration <config path>/RDF/RDF.xml <input path>
|
Note: The <input path> is the argument for-in of rpasInstall. |
Data files generated in this step include:
| datasrcxlxb.ovr | fplantmp.ovr | slvlsxlxb.ovr |
| defreqmthtmp.ovr | prcelasxlxb.ovr | sprdproftmp.ovr |
| defsrctmp.ovr | prmliftovrintxlxb.ovr | pvarxlisd.csv.ovr |
| dtenablexlxb.ovr | promocanxlxb.ovr | pvarxlcovr.csv.ovr |
| fintxlxb.ovr | promohaloxlxb.ovr | pvarxlmuby.csv.ovr |
| flvlsxlxb.ovr | promolvlsxlxb.ovr | pvarxltvad.csv.ovr |
| fpdxlxb.ovr | seasproftmp.ovr |
This step is only required for a patch installation, do not perform for a full installation.
Manually copy the previously generated data files in Step 1a from directory <input path> to directory <domain path>/RDF/input:
do
orgFile=<input path>/${PatchFile}
destFile=<domain path>/RDF/input/${PatchFile}
if [[ -f "${orgFile}" ]]; then
cp -f "${orgFile}" "${destFile}"
fi
done
File Preparation for Promote (optional)
|
Note: This step is only required if your RDF configuration contains Promote. |
Run execPluginTask.sh for Promote, which creates data files in the directory <input path>:
execPluginTask.sh Promote:com.retek.labs.promote.plugin.installer.PromotePosGenerator <path to the configuration>/RDF/RDF.xml <path to the data files>
|
Note: The <input path> is the argument for-in of rpasInstall. |
Data files generated in this step include:
| cslh.dat | |
| finalpromolvls.csv.ovr | |
| opmh.csv.dat | |
| prmh.dat | |
| promomodeltype.csv.ovr |
This step is only required for a patch installation, do not perform for a full installation.
Manually copy the previously generated data files in Step 2a from directory <input path> to directory <domain path>/RDF/input:
do
orgFile=<input path>/${PatchFile}
destFile=<domain path>/RDF/input/${PatchFile}
if [[ -f "${orgFile}" ]]; then
cp -f "${orgFile}" "${destFile}"
fi
done
File Preparation for Curve (optional)
|
Note: This step is only required if your RDF configuration contains Curve. |
Run execPluginTask.sh for Curve, which creates data files in the directory <input path>:
execPluginTask.sh Curve:com.retek.labs.curve.plugin.installer.InstallParameterDataGeneration <path to the configuration>/RDF/RDF.xml <path to the data files>
|
Note: The <input path> is the argument for-in of rpasInstall. |
Data files generated in this step include:
| dataintxl.ovr | prfaggintxl.ovr | |
| flprofxl.ovr | prfaprvintxl.ovr | |
| pgdatatmp.ovr | prfintxl.ovr | |
| pgdefapmthtmp.ovr | proftypexl.ovr | |
| pgdefmasktmp.ovr | slprofxl.ovr | |
| pgmthtwtmp.ovr | strintxl.ovr | |
| pgnvtmp.ovr |
This step is only required for a patch installation, do not perform for a full installation.
Manually copy the previously generated data files in Step 3a from directory <input path> to directory <domain path>/RDF/input:
do
orgFile=<input path>/${PatchFile}
destFile=<domain path>/RDF/input/${PatchFile}
if [[ -f "${orgFile}" ]]; then
cp -f "${orgFile}" "${destFile}"
fi
done
File Preparation for Grade (optional)
|
Note: This step is only required if your RDF configuration contains Grade. |
Run execPluginTask.sh for Grade, which creates data files in the directory <input path>:
execPluginTask.sh Grade:com.retek.labs.grade.plugin.GradeDataGenerator <path to the configuration>/RDF/RDF.xml <path to the data files>
|
Note: The <input path> is the argument for-in of rpasInstall. |
Building a Grade workbook requires a junk position in the cluster hierarchy. Therefore, a junk position must exist in the clsh.dat. The following is a sample of clsh.dat:
| 1 | 1 Cluster01 | |
| 2 | 2 Cluster02 | |
| 3 | 3 Cluster03 | |
| 4 | 4 Cluster04 | |
| 5 | 5 Cluster05 | |
| Junk | Junk Cluster |
This step is only required for a patch installation, do not perform for a full installation.
Manually copy cluster hierarchy files in Step 4a from directory <input path> to directory <domain path>/RDF/input:
do
orgFile=<input path>/${PatchFile}
destFile=<domain path>/RDF/input/${PatchFile}
if [[ -f "${orgFile}" ]]; then
cp -f "${orgFile}" "${destFile}"
fi
done
Run rpasInstall to patch the domain.
For details on using rpasInstall, refer to Appendix D, "Run rpasInstall to Install RDF Domains."
Considerations for determining your upgrade options are provided in Table 2-1.
Table 2-1 Upgrade Scenarios
| Current Release Version | Upgrade Release Version | Scenario | Recommended Upgrade Process | Comments |
|---|---|---|---|---|
|
13.0.4.18 and earlier |
up to 13.2.3 |
RDF went live using a version prior to 13.0.4.18 and you have already gone through the Hierarchy Conversion Upgrade Process. |
Upgrade and Patch RPAS Release 13.0.4.19 or Later to RPAS Release 13.2.3 |
You only have to apply the Hierarchy Conversion Upgrade Process once. Afterwards you can upgrade using the Upgrade and Patch RPAS Release 13.0.4.19 or Later to RPAS Release 13.2.3. |
|
RDF went live using a version prior to 13.0.4.18 and you want to make the conversion to the newer format for class and subclass position names. |
Hierarchy Conversion Upgrade Process |
This is recommended for versions prior to 13.0.4.18. All future RDF releases assume this change has been made. This process creates aliases for the existing class and subclass positions using the new format. This is a feature of RPAS, and data can be accessed normally using these new position name aliases. You only have to apply the Hierarchy Conversion Upgrade Process once. After that, upgrade using the Upgrade and Patch RPAS Release 13.0.4.19 or Later to RPAS Release 13.2.3 |
||
|
RDF went live using a version prior to 13.0.4.18 and you want to retain the older format for class and subclass position names. |
Hierarchy Retention Upgrade Process |
This is not recommended for versions prior to 13.0.4.18, but may be potentially applicable for customers who have a custom integration from RDF to RMS that handles the class and subclass information in a way where adding the underscores would be problematic. This process does not add class and subclass position name aliases. Instead, it attempts to modify RETL schema files and domain configuration information to match what is in the domain. If this path is chosen, the Hierarchy Retention Upgrade Process must be applied as part of every upgrade. |
||
|
13.0.4.19 to 13.2.3.x |
13.0.4.19 to 13.2.3.x |
RDF went live using a version of 13.0.4.19 or later. |
Upgrade and Patch RPAS Release 13.0.4.19 or Later to RPAS Release 13.2.3 |
The results of Hierarchy Conversion Upgrade Process are automatically included in your domain. The Hierarchy Retention Upgrade Process does not apply. Use the Upgrade and Patch RPAS Release 13.0.4.19 or Later to RPAS Release 13.2.3 process. |
|
13.2.3.x |
13.3.0 or later |
RDF went live on any version up to and including 13.2.3.x and you want to upgrade to 13.3.0. |
Upgrade and Patch to RPAS Release 13.3 or Later |
This is required if you are upgrading to 13.3 or later from any version after 13.2.3. RPAS 13.3 made significant performance enhancements. All domains using RPAS 13.3 or later must apply a conversion process to run on RPAS 13.3 or later to benefit from the enhancements. |
|
Any |
14.1 or later |
RDF went live on any version up to 14.0 and you want to upgrade to a 14.1 or later version. |
Upgrade to Version 14.1 or Later |
This is required if you are upgrading to 14.1 or later from any version. In 14.1 RDF Causal Forecasting no longer uses an internal baseline and needs to be reconfigured to generate an external baseline. |
The following process outlines how to upgrade RDF from 13.0.4.19 to the current version using the RPAS Configuration Tools.
|
Note: After upgrading a domain or loading a new calendar hierarchy into the RDF domain, ensure that the current date measures value is within the new calendar hierarchy. |
The steps in this section only apply if you have a previous version of RDF.
The first step in upgrading to the most recent installation is to download the current upgrade from the My Oracle Support Web site (http://www.oracle.com/support/) to a staging folder (such as $PACKAGEDIR) that is accessible to all components of your current RPAS/RDF environment.
In this section, some steps must be performed on a server as well as on a Windows PC that has RPAS Configuration Tools installed. For brevity, the server is referred to as server and the Windows PC with RPAS Configuration Tools is referred to as PC.
The following example describes a sample upgrade extraction to the server. These sample server commands are provided to guide you through the file extraction process and to identify the files provided in this upgrade.
Open a terminal session on the server that contains the RPAS environment.
Enter the following commands:
$ mkdir packagedir
$ cp RDF.zip packagedir
$ cd packagedir
$ export PACKAGEDIR=`pwd`
$ unzip RDF.zip
The following files and directories may be extracted to the current directory:
Configurations.zip
PlugIn.zip
Data.zip
README.html
DOCS/
Unzip the files from Step 2 by running the following commands:
$ unzip Configurations.zip
$ unzip PlugIn.zip
$ unzip Data.zip
The following directories are extracted to the current directory:
configurations/
resources/
data/
Leave the terminal session window open for the RDF upgrade process described in the section, Upgrade and Patch to RPAS Release 13.3 or Later.
The following example describes a sample upgrade extraction to a PC. These sample commands are provided to guide you through the file extraction process and to identify the files provided in this upgrade.
Using Cygwin, enter the following commands:
$ mkdir packagedir
$ cp RDF.zip packagedir
$ cd packagedir
$ export PACKAGEDIR=`pwd`
$ unzip RDF.zip
The following files and directories may be extracted to the current directory:
Configurations.zip
PlugIn.zip
Data.zip
README.html
DOCS/
Unzip the PlugIn.zip file by running the following commands:
$ unzip PlugIn.zip
The following directory is extracted to the current directory:
resources/
Leave the Cygwin window open for the RDF upgrade process discussed in the section, Upgrade and Patch to RPAS Release 13.3 or Later.
Before you upgrade to a Release 13.3 or later, ensure that you have upgraded and patched to RPAS Release 13.2.3. Additionally, you may need to initially upgrade and patch to RPAS Release 13.0.4.19 before you can upgrade and patch to RPAS Release 13.3 or later.
|
Note: If your domain is 13.0.4.18 or earlier then begin with an upgrade described in Upgrades for Versions Earlier than 13.0.4.18. |
|
Note: If your domain is already upgraded and patched to RPAS Release 13.3, then continue with the typical upgrade described in Upgrade and Patch to RPAS Release 13.3 or Later. |
This list defines the upgrade process that is described in the following sections.
This section describes how to upgrade RDF from 13.0.4.19 or later to 13.2.3. Refer to Table 2-1 as to which upgrade version to use.
Upgrading your domain to a 13.3 RPAS domain requires that you first upgrade it to a 13.2.3 domain. For additional information instructions, see the ”Upgrading and Patching Domains” section in the 13.2.3 release of either the Classic Client or Fusion Client version of the Oracle Retail Predictive Application Server Administration Guide.
After upgrading, you must run a configuration patch over the domain to ensure compatibility with the RPAS version, regardless of whether there are any configuration changes.
Upgrading to a 13.3 RPAS domain requires the use of the convertDomain utility, which may not copy the entire contents of the source domain to the destination domain. For files that are not copied by convertDomain, you may need to copy them manually.
For information about what is and is not copied, see the ”convertDomain” section in the 13.3 release of either the Classic Client or Fusion Client version of the Oracle Retail Predictive Application Server Administration Guide.
The following process outlines how to upgrade RDF to the RPAS domain Release 13.3 or later using the RPAS Configuration Tools.
In addition, if there is a setup directory in the original domain, you must manually copy the setup directory into the converted destination domain (master and local domains).
The RDF and Curve custom hooks will not work correctly if the setup directory is not manually moved. For additional information, refer to the steps listed in the section, For the Server.
|
Note: After upgrading, you must run a configuration patch over the domain to ensure compatibility with the latest RPAS version, regardless of whether there are any configuration changes. |
With Release 13.4 or later, it is necessary to have a PROR hierarchy for an RDF configuration even if the regular price effect or cross promotional effect are not enabled. The PROR hierarchy is a duplicate of PROD hierarchy and they can share the same hierarchy data file. When the regular price effect or cross promotional effects are not enabled, the PROR hierarchy loading file can be set up as a dummy file with one line of record.
To upgrade a RDF domain to Release 13.4 or later, the configuration needs to add a PROR hierarchy if it does not currently exist. The configuration needs to be regenerated by:
Upgrading to Release 13.4 or later.
Using the new configuration to patch the domain.
The hierarchy order of the RLTV should occur after the Calendar Hierarchy, and before the Product and Location Hierarchy. If you have not configured the Life Cycle Profile in Curve, then RLTV is not used.
If you would like to add a Life Cycle Profile in Curve or have already implemented a Life Cycle Profile in Curve, then the hierarchy order in your current configuration needs to be modified prior to configuration regeneration. The RPAS domain requires must be rebuilt from the beginning because a hierarchy order change is not upgradable.
Follow these steps for the PC to upgrade to the current version.
In Cygwin, copy the RDF plug-ins to the RPAS Configuration Tools.
$ cp -R $PACKAGEDIR/resources $RIDE_HOME/
Open RPAS Configuration Tools.
In RPAS Configuration Tools, load the RDF configuration:
From the Configuration Tools File menu, select Open.
From the Open window, locate the configuration file and click Open.
Automate Curve (optional), RDF and Promote (if applicable) by performing the following:
|
Note: Promote Automation must be run last - after RDF Automation. |
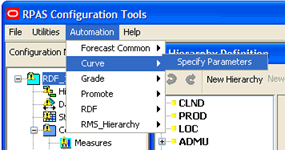
For Curve: from the Automation menu, select Curve, then Specify Parameters.
The Curve Forecasting Parameters window opens. Click OK.
For RDF, set:
Specify Parameters
Cloning Configuration
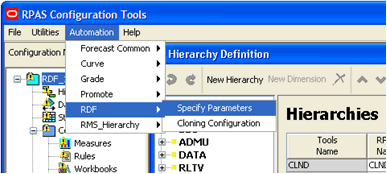
From the Automation menu, select RDF, and then Specify Parameters.
The Forecasting Parameters window opens. Click OK.
From the Automation menu, select RDF, and then Cloning Configuration.
The Cloning Configuration window opens. Click OK.
For Promote: from the Automation menu, select Promote, then Specify Parameters.
The Forecasting Parameters window opens. Click OK.
In the RPAS Configuration Tools File menu, click Save to save the configuration.
Zip the configuration in Cygwin and transfer the.zip file to the RPAS server. Note where it is saved. You will need this configuration for Step 2 of the section, For the Server.
Follow these steps for the server to upgrade to the current version.
|
Note: For the upgrade, take note of the following steps:
|
Copy the RDF plug-ins to the RPAS Configuration Tools.
$ cp -R $PACKAGEDIR/resources $RIDE_HOME/
Unzip the updated configuration and note where it is extracted. You saved this configuration in Step 6 of the section, For the PC.
To upgrade the prior version of your RDF domain to the current release, you must manually copy the setup directory into the converted destination domain (master and local domains). The RDF and Curve custom hooks will not work correctly if the setup directory is not manually moved.
To use the regular price effect functionality when upgrading a previous version of RDF to Release 13.3 or later, perform these steps:
Add a PROR hierarchy into your hierarchy. The PROR hierarchy is a duplicate of PROD hierarchy and they can share the same data file.
Prior to patching the domain, the PROR hierarchy data file needs to be included into the input directory of the domain.
|
Note: This release requires a PROR hierarchy as described in "PROR Hierarchy for Release 13.4 and Later". |
Upgrade your RDF domain using the 14.1.2 RDF package that contains a sample script named buildRDF.sh. The script, buildRDF.sh, can be used to build or upgrade an RDF domain:
buildRDF.sh -c <config path> -i <input path> -l <log path> -d <domain path> [-m <max process#>] [-f: <log file>] -p
Table 2-2 Flag Descriptions for buildRDF.sh
| Flag | Where: | Is the Path for the: | Default Value* |
|---|---|---|---|
|
-c |
<config path> |
configurations |
$PWD/../DomainCfg/Version11.0/Promote |
|
-i |
<input path> |
input files |
$PWD/../DomainBuild/to_rpas |
|
-l |
<log path> |
log file |
$PWD/../ |
|
-d |
<domain path> |
domain |
$PWD/../domain |
|
-m |
<max process#> |
number of max processes for loading measures |
1 |
|
-f |
<log file > |
log file |
build_domain.log |
|
-p |
<make patch build > |
domain patching |
none |
|
-u |
<show usage of this script> |
show usage of this script |
none |
|
-n |
<configName> |
configuration name |
RDF |
|
-r |
<partionDimension> |
partion dimension |
pgrp |
|
* Where $PWD is the current directory |
|||
|
Note: The flag-p must be used for domain patching.
The flag |
This section describes how to upgrade RDF to 14.1 or later. Refer to Table 2-1 as to which upgrade version to use.
This is required if you are upgrading to 14.1 or later from any version. In 14.1 RDF Causal Forecasting no longer uses an internal baseline and needs to be reconfigured to generate an external baseline.
Follow these steps to upgrade RDF to 14.1 or later:
Before regenerating, open the RDF plug-in and modify the Spread Profile field for source levels.
| If the Spread Profile Field Contains... | Then... |
|---|---|
| A curve level (for example, 01) | Clear the field. |
| A measure name | Leave the field as it is. |
| A curve level and a measure name (for example, 01,measure_name) | Update the curve level (for example, apvp01,measure_name. |
If any Final Levels have Cross Promotion Effects turned on, then update these fields with measure names:
Promo Halo Ratio
Promo Max Halo Ratio
Promo Cann Ratio
Promo Max Cann Ratio
|
Note: These measures are outputs from CPEM. |
If there is Causal Forecasting configured using an internal baseline, then an extra Final Level needs to be configured to generate an external baseline. In 14.1 or later, Causal Forecast only supports an external baseline.
The Approved Forecast of the new Final Level is set as the causal external baseline measure in the Forecast Administration workbook.
Configure preprocessing to provide proper input data preprocessing for the Causal Forecast and Baseline Forecast.
The data source for Baseline Forecast must not include out of stock, promotional spike, and other unwanted events.
The data source for Causal Forecast must not include out of stock, seasonal effects and other unwanted events.
Any data source change needs to be modified through the RDF plug-in.
When upgrading RDF, use the upgrade option that corresponds best to your system's requirements and which format you want to use for your class and subclass position names. For additional information refer to About Class and Subclass Hierarchy Information.
The old and new position names are considered distinct by RPAS. There are a special considerations for customers wishing to upgrade from a pre-13.0.4.18 version of RDF to a later version. These considerations along with the recommended upgrade process are summarized in Table 2-1, "Upgrade Scenarios".
In RDF 13.0.4.19, positions in the location hierarchy were renamed to ensure unique position names based on the RMS data. Due to these product hierarchy changes, customers upgrading from RDF 13.0.4.18 or prior versions who use the standard integration between RMS and RDF should use the product hierarchy conversion process before integrating with RMS as described in the Hierarchy Conversion Upgrade Process.
Customers upgrading from RDF 13.0.4.18 or prior versions who want to retain their existing displayed class and subclass information should follow the Hierarchy Retention Upgrade Process.
About Class and Subclass Hierarchy Information
In release 13.0.4.18, Oracle modified the way that class and subclass hierarchy information received from RMS through the RETL process is treated. The change was to insert an underscore ”_” character between the RMS department, class, and subclass values. This was done as a precautionary measure to prevent potential data mapping issues.
With integration between RMS and RDF, it is crucial to keep data at class or subclass levels distinct. This upgrade process makes explicit the mapping of items at the class and subclass level between RMS and RDF.
As an example, assume that in RMS the department has a value of 11, the class has a value of 22, and the subclass has a value of 33. The following table shows the old and new values that the RETL process uses for the department, class, and subclass position names in RDF.
| Field | RMS | RDF Pre 13.0.4.18 | RDF Post 13.0.4.18 |
|---|---|---|---|
| Department | 11 | 11 | 11 |
| Class | 22 | 1122 | 11_22 |
| Subclass | 33 | 112233 | 11_22_33 |
Refer to Table 2-1, "Upgrade Scenarios" as to which upgrade version to use.
Typically, you will use this process when:
Upgrading from RDF versions prior to 13.0.4.18 up to 13.2.3
Using standard integration between RMS and RDF
Storing data at class or subclass levels
|
Note: Users upgrading from a version prior to 13.0.4.18 must apply this process. In the future, if you are already on 13.0.4.18 or later, this process need not be followed again. |
Follow these steps to complete the Hierarchy Conversion Upgrade Process.
Point environment variable RPAS_HOME to the new RPAS_HOME.
Run the script $RPAS_HOME/rfx/src/rmse_rpas_merchhier.ksh to generate the rmse_rpas_merchhier.dat file. This file generates the new class and subclass position names.
Run repos.ksh with the -a n flag to produce the position rename file and run renamePositions without actually applying the changes.
Examine the log file PRODrename.log for errors.
When you are ready, run the repos.ksh script without the -a y flag to apply the changes.
Refer to Table 2-1, "Upgrade Scenarios" as to which upgrade version to use.
Typically, you will use this process when:
Upgrading to 13.0.4.18 or later (from any version) up to 13.2.3
You want to retain your existing displayed class and subclass information
Table 2-3 lists the environment variables needed for the Hierarchy Retention Upgrade Process.
Table 2-3 Environment Variables
| Environment Variables | Description |
|---|---|
|
UPGRADE_HOME |
This variable should point to the path of Upgrade scripts where configuration files are present:
|
|
RDF_DOMAIN_PATH |
The Path of RDF Domain which you are going to patch. The dimension field length of this RDF Domain is taken and applied to the Configuration and Schema files. |
|
RDF_SCHEMA_DIR |
The RETL RDF Schema files directory. It must be the latest release directory, which you are using for patching. It points to the Schema files location in the release, which you are using for patching the RDF domain. |
|
TOOLS_CONFIG_DIR |
The Configuration Tools XML files directory. It points to the directory where the |
|
UPGRADE_BACKUP_DIR |
A backup of Schema and |
Table 2-4 lists the scripts needed for the Hierarchy Retention Upgrade Process.
Follow these steps to complete the Hierarchy Retention Upgrade Process.
Export the environment variables listed in Table 2-3, "Environment Variables".
Change the directory to UpgradeScripts directory:
$ cd UpgradeScripts
Run the updatetoolsconfiguration.ksh script to update the hierarchy.xml file.
$ ./updatetoolsconfiguration.ksh
Run the updateschemafiles.ksh script to update the RETL RDF Schema files
$ ./updateschemafiles.ksh