2 Getting Started with Oracle B2B
Oracle B2B provides a Web-based interface for creating B2B transactions.
This chapter contains the following topics:
2.1 What You Need to Get Started with Oracle B2B
In addition to installing Oracle SOA Suite, which includes Oracle B2B, you will need to install:
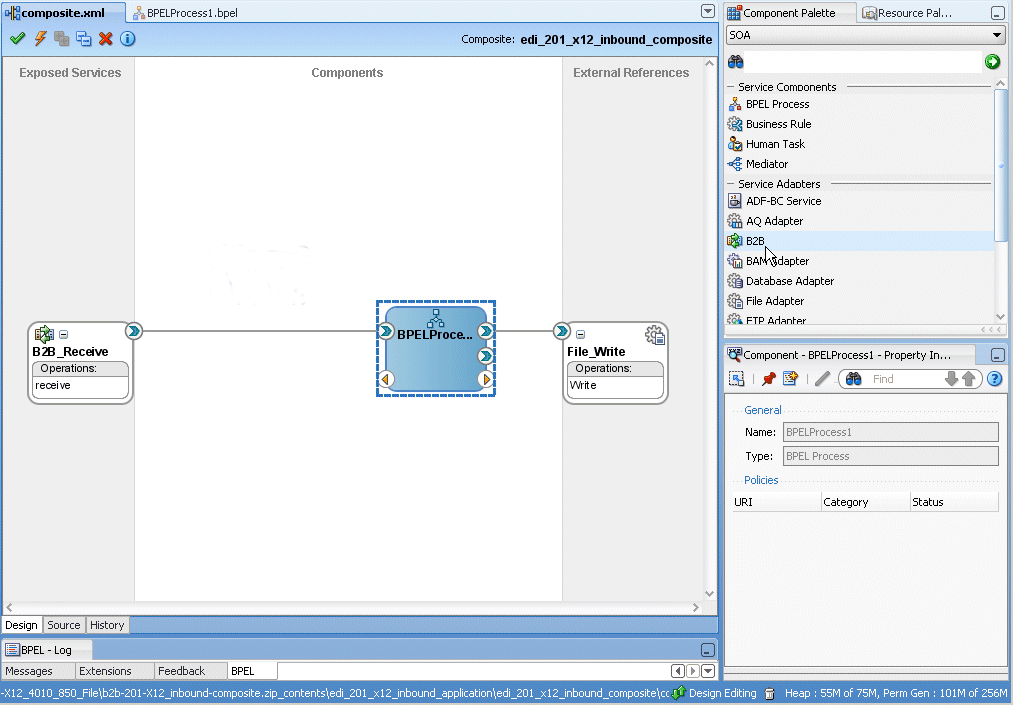
Use the standards-based templates of Oracle B2B Document Editor to create guideline files. Then, using Oracle B2B, you create and deploy the transaction as part of a B2B agreement. To include the B2B transaction in a SOA composite application, use Oracle JDeveloper, as shown in Figure 2-1.
Figure 2-1 Oracle JDeveloper: A SOA Composite Application with a B2B Binding Component
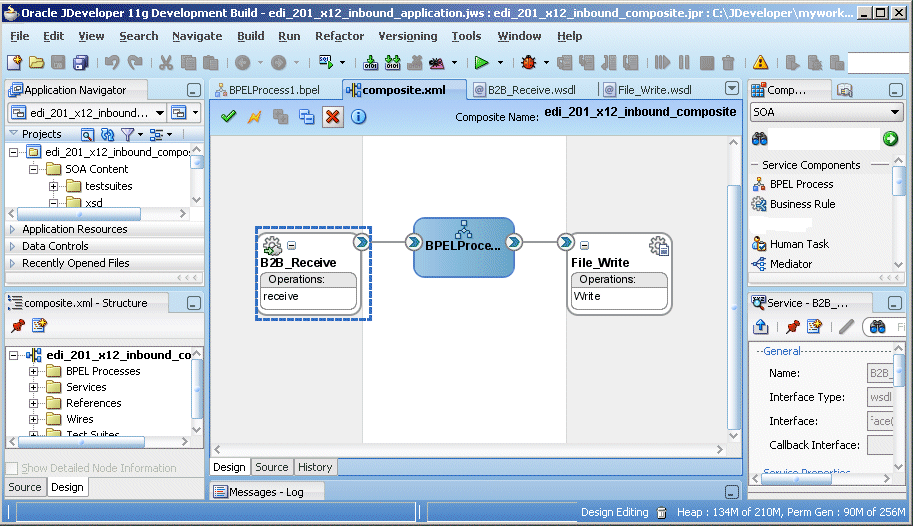
Description of "Figure 2-1 Oracle JDeveloper: A SOA Composite Application with a B2B Binding Component"
See the following for more information:
-
Oracle Fusion Middleware Installation Guide for Oracle SOA Suite for information on installing Oracle B2B as part of Oracle SOA Suite
-
Oracle B2B Document Editor Help menu
-
Oracle JDeveloper Help menu
2.2 Logging in to Oracle B2B
These instructions assume that you have installed Oracle SOA Suite, which includes Oracle B2B. See Oracle Fusion Middleware Installation Guide for Oracle SOA Suite for more information.
Use a supported Web browser:
-
Microsoft Internet Explorer 7.x
-
Mozilla Firefox 2.x
-
Mozilla Firefox 3.x
-
Open a supported Web browser and go to:
http://hostname:port/b2b
where:
-
hostnameis the name of the host on which Oracle SOA Suite is installed -
portis the port number used by the Managed Server to listen for regular HTTP (non-SSL) connections. (In a cluster environment, the port can be the router port.)See "Finding Port Information" for more information.
Note:
To access Oracle B2B when SAML is enabled or in Windows Native Authentication Environments, use the following protected servlet URL for automatic authentication:http://hostname:port/b2b/ssologin
-
-
On the log-in page, enter the following:
For This Field... Do... Username Enter the default administrator user name. Password Use the administrator password from your Oracle Fusion Middleware 11g installation.
2.2.1 Finding Port Information
You can find port number information in the following ways:
-
From Oracle WebLogic Server Administration Console
-
Log in to the console.
-
In the Domain Structure pane, expand Environment and click Servers.
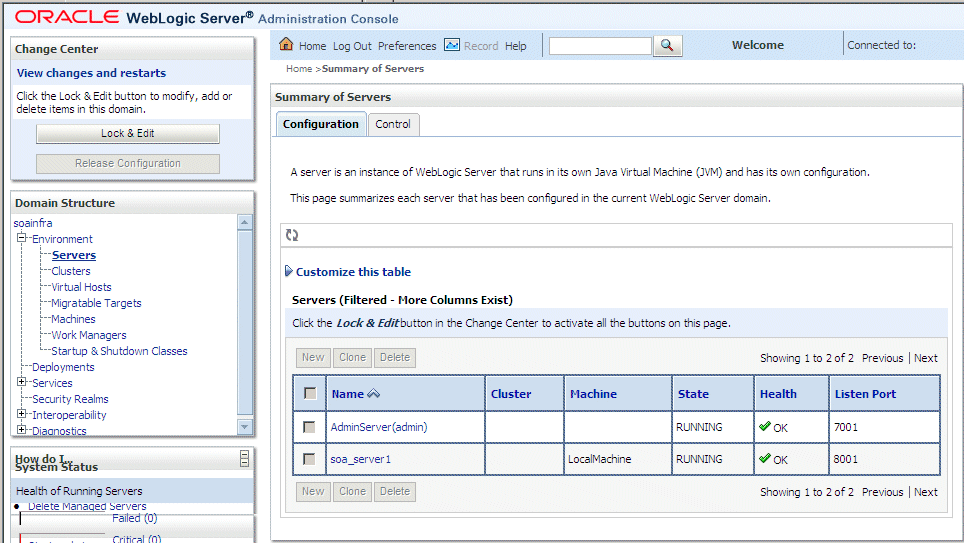
Description of the illustration bb_portnums.gif
-
Note the Listen Port column for your server.
-
-
From
FMW_HOME/user_projects/domains/your_domain_name/config/config.xml<server> <name>soa_server1</name> <ssl> <name>soa_server1</name> <listen-port>8002</listen-port> </ssl> <machine>LocalMachine</machine> <listen-port>8001</listen-port> <listen-address/> </server>
2.2.2 Enabling the weblogic User for Logging in to Oracle B2B
For the weblogic user in Oracle Internet Directory (OID) to log in to Oracle B2B as an administrator and search for users, the OID Authenticator must have an Administrators group, and the weblogic user must be a member of that group.
-
Create a weblogic user in OID using the LDAP browser. The
users.ldiffile is imported to OID as follows:dn: cn=weblogic,cn=Users,dc=us,dc=oracle,dc=com objectclass: inetorgperson objectclass: organizationalPerson objectclass: person objectclass: orcluser objectclass: orcluserV2 objectclass: top sn: weblogic userpassword: welcome1 uid: weblogic
-
Create an Administrators group in OID and assign the
weblogicuser to it. Thegroups.ldiffile is imported to OID as follows:dn: cn=Administrators,cn=Groups,dc=us,dc=oracle,dc=com objectclass: groupOfUniqueNames objectclass: orclGroup objectclass: top owner: cn=orcladmin,cn=Users,dc=us,dc=oracle,dc=com uniquemember: cn=weblogic,cn=Users,dc=us,dc=oracle,dc=com
2.3 Using the Oracle B2B Interface
B2B activities are grouped as follows:
2.3.1 Administration
Use the tabs of the Administration page, shown in Figure 2-2, to manage document protocols, deployments, types, importing and exporting, batching, callouts, purging, listening channels, and configuration.
See Part III, "Oracle B2B Administration" for more information.
2.3.2 Partners
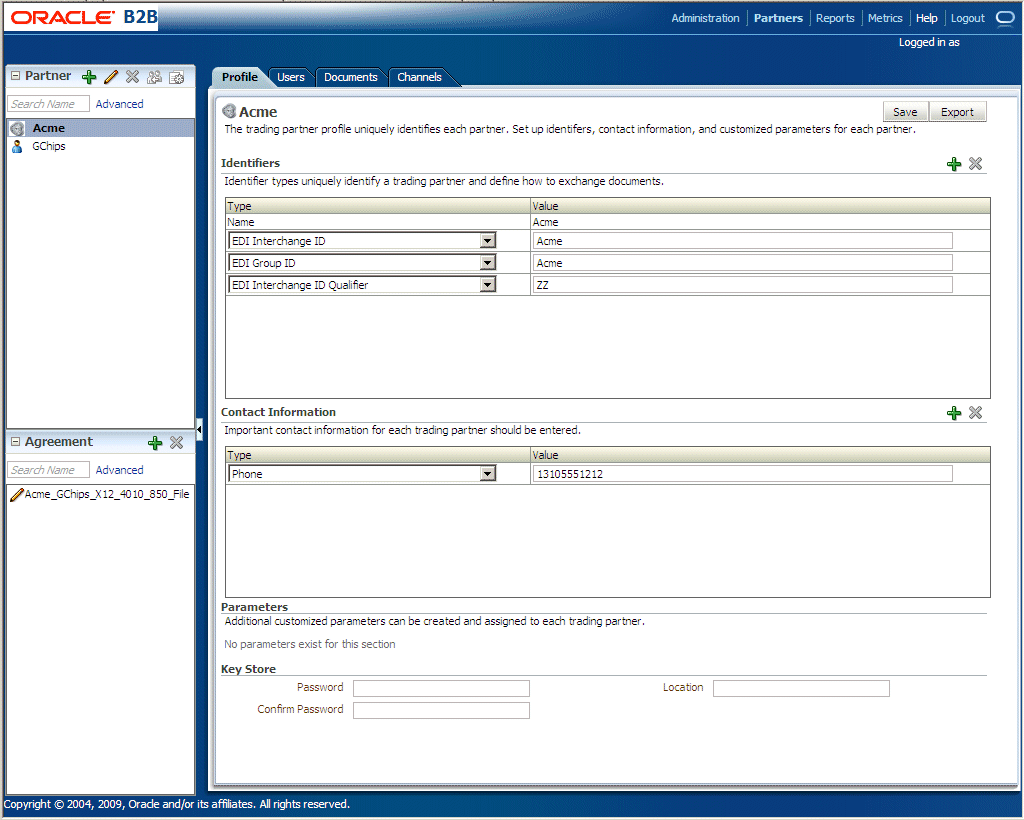
Use the tabs of the Partners page, shown in Figure 2-3, to create and update trading partner information, create and update agreement information, add user information, associate documents with trading partners, set up channels, and configure the key store.
See Part II, "Oracle B2B Process Flow" for more information.
2.3.3 Reports
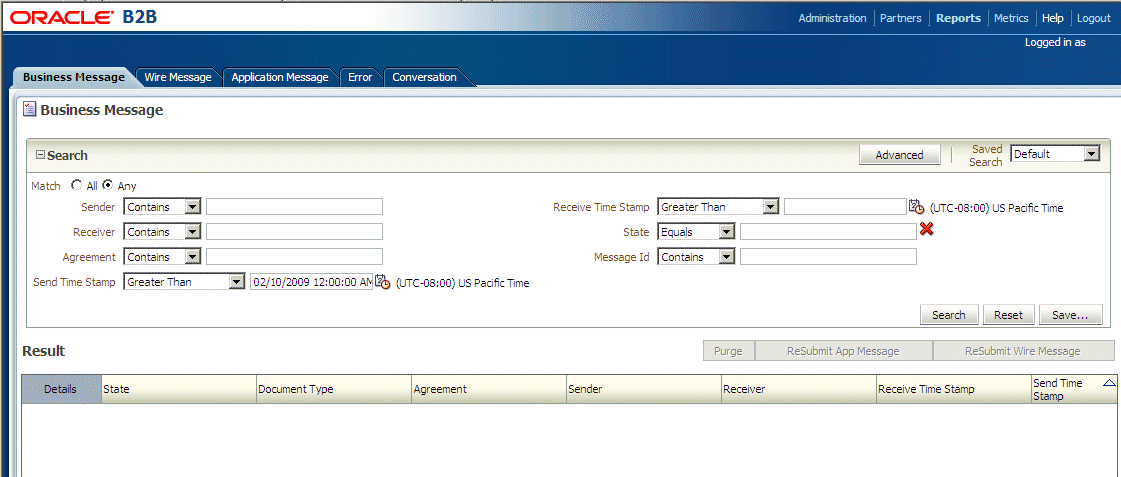
Use the tabs of the Reports page, shown in Figure 2-4, to create and view reports about the instance (run-time) data.
See Chapter 16, "Creating Reports," for more information.
2.3.4 Metrics
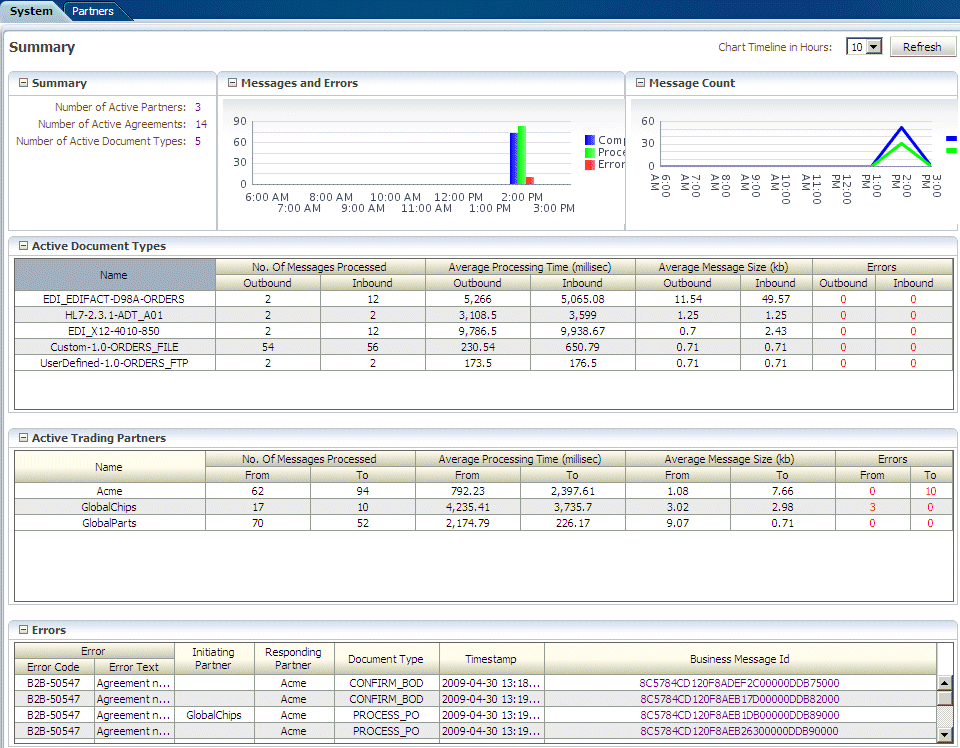
Use the tabs of the Metrics page, as shown in Figure 2-5, to see information about deployed agreements, such as lists of the active document types and trading partners, and run-time status, such as error messages and message counts.
See Chapter 17, "Using B2B Metrics," for more information.
2.4 Creating a B2B Transaction: An Overview of the Process Flow
Figure 2-6 shows the B2B process flow, which starts with creating B2B guideline files in Oracle B2B Document Editor and continues with using the Oracle B2B interface to create document definitions, configure trading partners, and create and deploy agreements.
Step 1: Create guideline files (ECS and optional XSD files) in Oracle B2B Document Editor
Using Oracle B2B Document Editor, shown in Figure 2-7, create transaction documents based on templates for hundreds of industry-standard protocols. The Oracle B2B Document Editor is required only when translation is needed. For XML documents, the editor is not used.
Figure 2-7 Creating a Document in Oracle B2B Document Editor
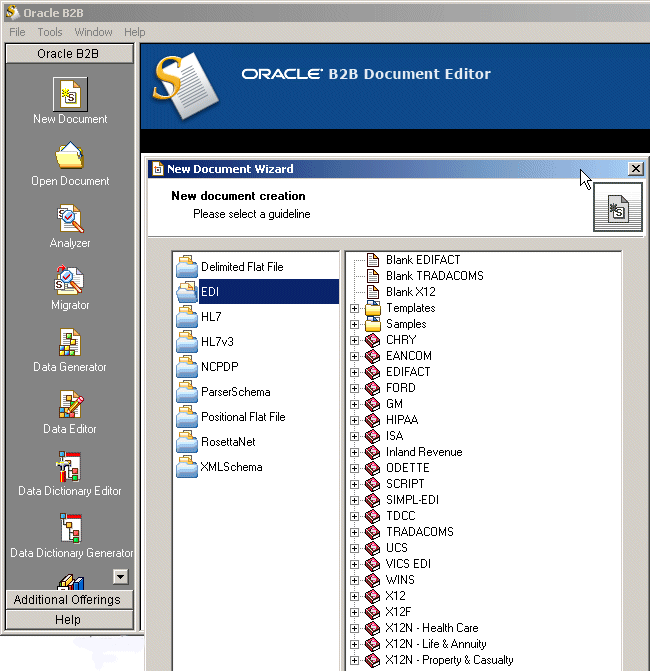
Description of "Figure 2-7 Creating a Document in Oracle B2B Document Editor"
For information on Oracle B2B Document Editor, see the following:
-
The Help menu of Oracle B2B Document Editor, as shown in Figure 2-8.
Figure 2-8 Oracle B2B Document Editor Help
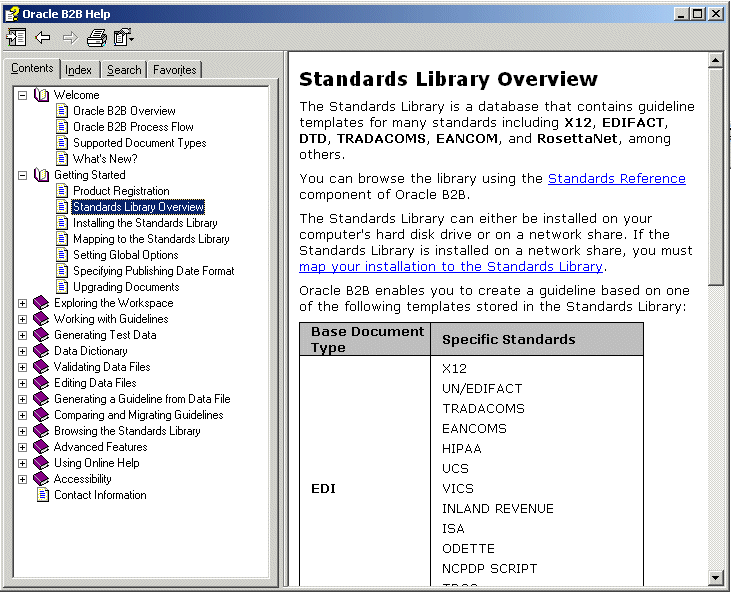
Description of "Figure 2-8 Oracle B2B Document Editor Help"
Step 2: Create document definitions
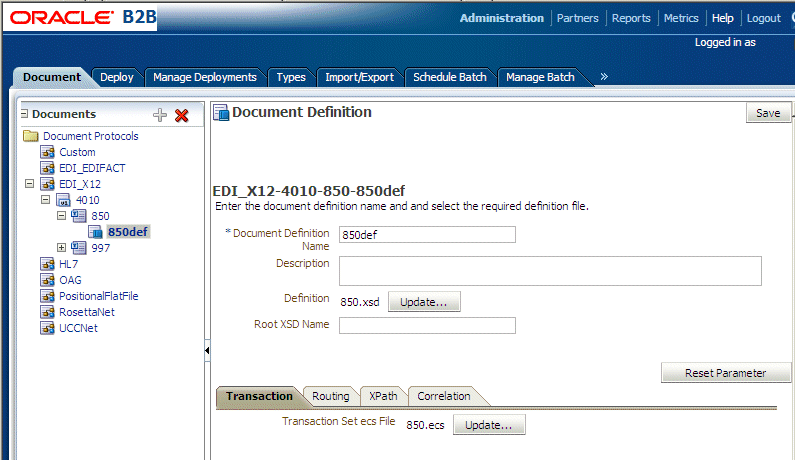
Using the Administration > Document tab of Oracle B2B, shown in Figure 2-9, select from a list of document protocols, and then provide a document protocol version name, a document type name, and a document definition name. (For a Custom document, rather than selecting from the list of document protocols, you add a custom protocol name to the list in the Document Protocols folder.)
Figure 2-9 Creating a Document Definition
Description of "Figure 2-9 Creating a Document Definition"
After selecting the ECS and optional XSD files you created in Step 1, you have created the document definition.
For more information, see Chapter 4, "Creating Document Definitions."
Step 3: Configure trading partners
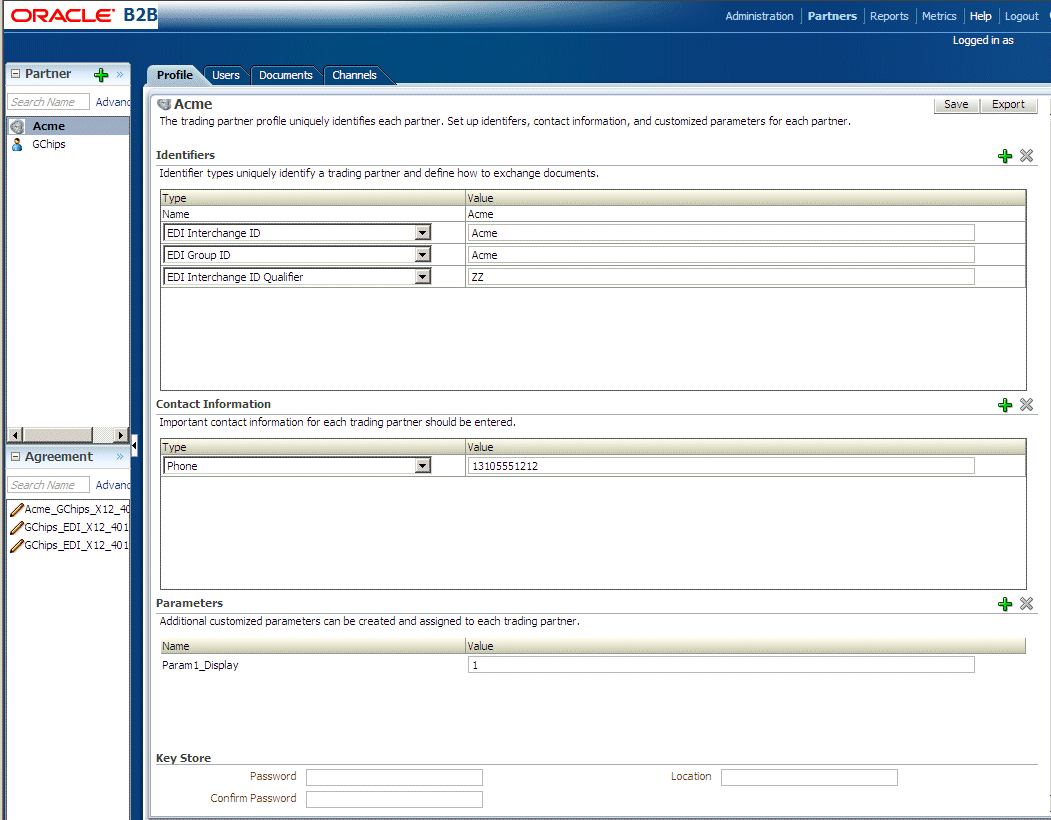
Using the tabs of the Partners page of Oracle B2B, shown in Figure 2-10, add or update trading partner names, add identifiers and optional contact information, view parameters, add documents and delivery channels, and add key store information.
For more information, see Chapter 5, "Configuring Trading Partners."
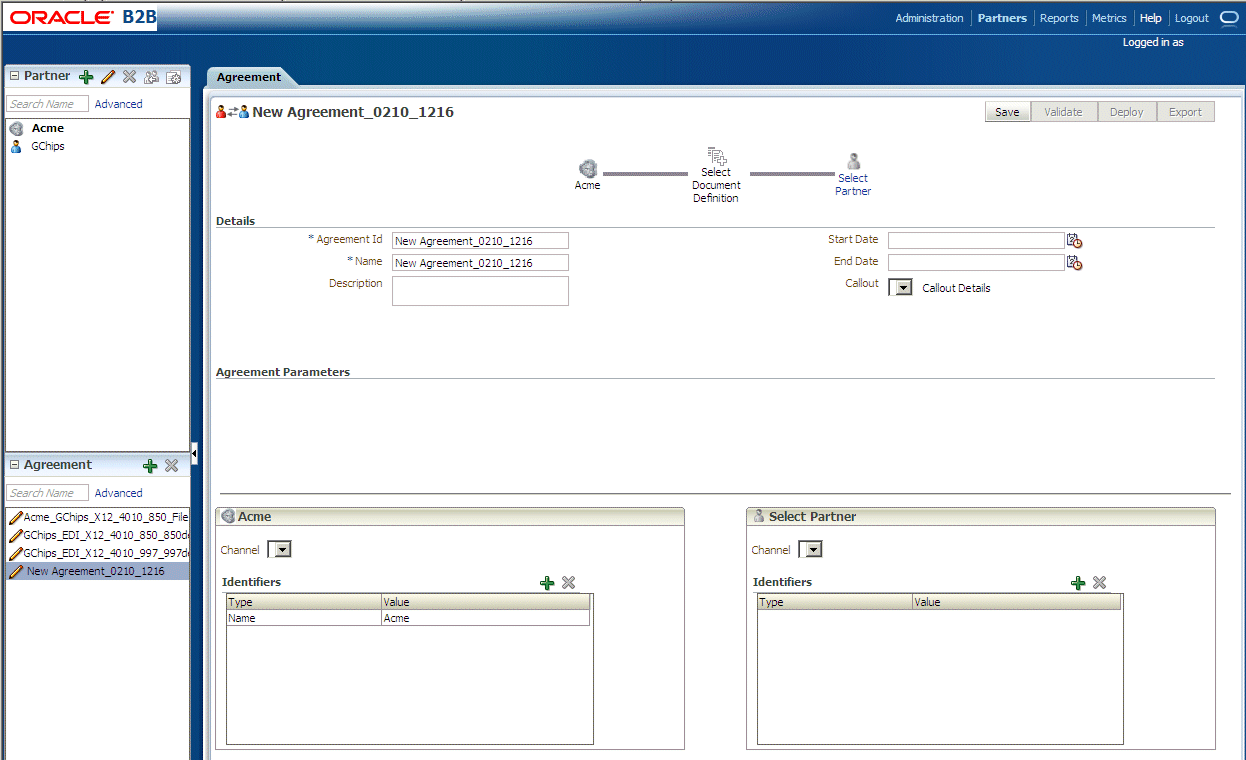
Using the Partners > Agreement tab of Oracle B2B, shown in Figure 2-11, create an agreement that specifies the trading partners involved and associates the document definitions, channels, and identifiers with the agreement.
Figure 2-11 Creating a Trading Partner Agreement
Description of "Figure 2-11 Creating a Trading Partner Agreement"
For more information, see Chapter 6, "Creating and Deploying Trading Partner Agreements."
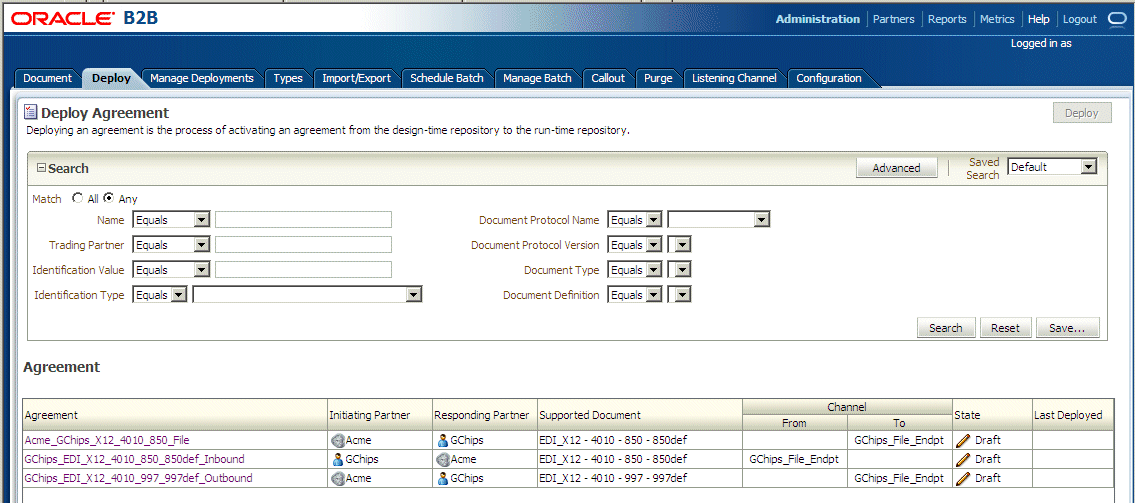
Using the Administration > Deploy tab of Oracle B2B, shown in Figure 2-12, search for and deploy agreements.
Figure 2-12 Searching for and Deploying Agreements
Description of "Figure 2-12 Searching for and Deploying Agreements"
2.5 Using Oracle B2B in the Oracle JDeveloper Environment
To include Oracle B2B in an SOA composite application, use the B2B Configuration Wizard as follows:
To access the B2B binding component:
-
In Oracle JDeveloper, open the composite for which you want to add a B2B binding component.
-
From the SOA > Service Adapters panel of the Component Palette, drag B2B to one of the following:
-
To the Exposed Services area when B2B is used as a service (inbound) to receive messages from trading partners and deliver them to SOA composite applications. Oracle B2B is the entry point to the SOA composite application.
-
The External References area when B2B is used as a reference (outbound) to send messages from the SOA composite application to partners.
Description of the illustration bb_jdev.gif
-
-
Follow the steps in the B2B Configuration Wizard of Oracle JDeveloper.
Select a document definition that was previously created in Oracle B2B. Or, you can launch Oracle B2B from the wizard to create a document definition.
Note:
The JMS option on the B2B Integration Type page of the B2B Configuration Wizard is in preview mode. If you want to use this option to communicate with Oracle B2B through JMS queues, start Oracle JDeveloper in preview mode as follows:
ORACLE_JDEV_HOME\jdeveloper\jdeveloper -J"-DPREVIEW_MODE=true"
2.6 What You May Need To Know About Using Oracle B2B
This section contains topics to help with troubleshooting.
2.6.1 Enabling Debug Mode at Run Time
Use Oracle Enterprise Manager 11g Fusion Middleware Control to enable logging (SOA Infrastructure > Logs > Log Configuration). See Oracle Fusion Middleware Administrator's Guide for Oracle SOA Suite for more information.
An alternative is to edit the logging.xml file at
DOMAIN_HOME/config/fmwconfig/server/managed_server
2.6.2 Logging Out: SSO Logout Configuration for Oracle Access Manager
In web.xml, the success_url parameter of oracle.adf.share.security.authentication.AuthenticationServlet must contain an SSO logout URL, such as ../access/oblix/lang/en-us/logout.html, to ensure that the URL is accessible and does not result in a 404 error.
See Oracle Fusion Middleware Security Guidefor information about Oracle Single Sign-On and Oracle Access Manager.

