The Virtual Content Repository allows you to connect to non-WLP repositories. When third-party repositories are connected to the Virtual Content Repository, their content can be accessed by portal tools such as content placeholders, content selectors, and so on.
Some third-party content management vendors have built integrations (Content Service Provider Implementations or SPIs) that allow you to connect third-party repositories to the Virtual Content Repository. Contact your third-party repository vendor to find out the details about their implementation.
If the third-party repository you are using is JSR 170 compliant, you can connect to it using WLP’s JSR 170 Connector> See Working with a JSR 170-Compatible Repository. For more information about JSR170, see the JSR 170 web site.
Note:
You cannot use WLP’s library services with third-party repositories.
If your third-party repository does not have a written an implementation for the Virtual Content Repository, you can write your own using WLP’s Service Provider Interface (SPI). For more information, see the Content Management SPI Development Guide.
Configuring a third-party repository to use with WebLogic Portal involves the following three steps:
Create or obtain an SPI implementation for accessing the third-party repository you want to use that integrates the functionality of your third-party repository with WebLogic Portal, as described in the Content Management SPI Development Guide. If you are connecting to a JSR 170-compatible repository, you do not need to write an SPI implementation.
Add the repository SPI JARs to your portal classpath to ensure your portal can communicate with the repository. For more information about adding a class to your classpath, see the WebLogic Server documentation.
Connect the third-party repository to the Virtual Content Repository using the WebLogic Portal Administration Console. Depending on your implementation, to connect with the Virtual Content Repository, you may need to set various repository properties for your repository. These repository properties are SPI-specific and should be described in the SPI documentation.
Note:
You cannot use WLP’s library services with third-party repositories.
Connecting to a Third-Party Repository
After creating an SPI implementation, you can connect your third-party repository to the Virtual Content Repository using WebLogic Portal Administration Console.
Tip:
If you want to test your repository connection, you can use the IVirtualRepositoryManager API.
Once you have connected a third-party repository to the Virtual Content Repository, you can use that repository’s content within your portal. If the third-party repository implementation includes write capabilities, you can also use the WebLogic Portal Administration Console to modify content within the repository.
An SPI can be deployed multiple times with different configuration parameters. From the application’s perspective, this appears as multiple repositories.
Note:
Library services cannot be used in conjunction with SPI implementations.
When you connect to a third-party repository, you may need to configure additional properties that match your third-party repository’s configuration. Consult your third-party documentation to verify the properties that you need to configure and the connection class you should use.
To connect a repository to the Virtual Content Repository (using the WebLogic Portal Administration Console):
From the main menu of the WebLogic Portal Administration Console, select Content > Content Management.
Select Manage | Repositories.
In the resources tree, select the Virtual Content Repository.
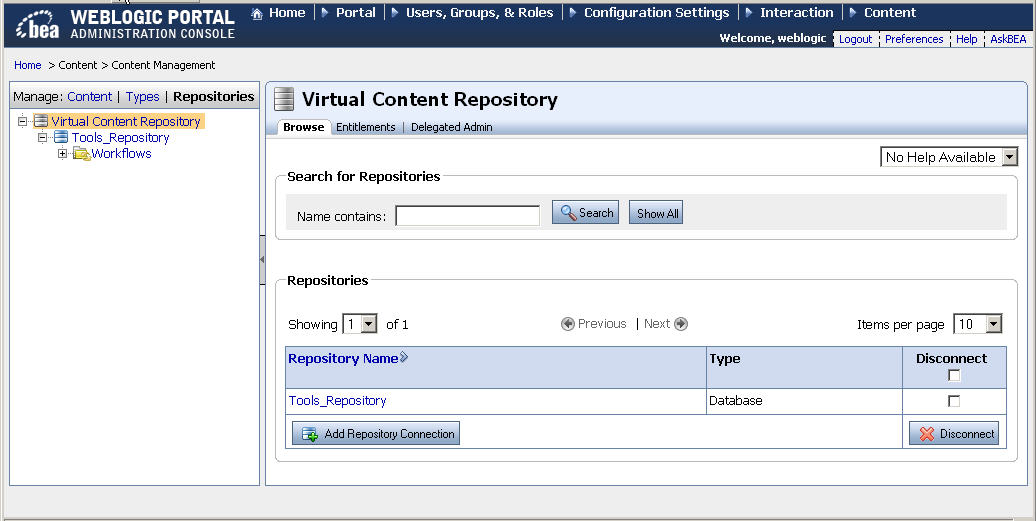
On the Browse tab, click Add Repository Connection. See Figure 8-1.
Figure 8-1 Browse Tab within the Manage Repositories Window
In the Add Repository Connection dialog, provide the following information:
Table 8-1 Repository Connection Information
Field
Description
Name
The name you give your new repository. For example: MyNewRepository
Connection Class
Use the SPI connection class you have created or that has been provided by your third-party vendor. The connection class is the fully qualified name of the class which implements com.bea.content.spi.flexspi.Repository. Be sure you have added this class to your application classpath.
Datasource JNDI Name
Not used for third-party repositories.
Username
If the SPI implementation requires a global username, enter it here. When configuring a WLP repository, you can leave this blank.
Password
If the SPI implementation requires a global password, enter it here. When configuring a WLP repository, you can leave this blank.
If you entered a global password, re-enter it here.
Enable Library Services
Not used for third-party repositories.
Click Save.
Within the Repositories section, click the repository you just created to verify that it has been created and view its Repository Summary.
Logging Into a Third-Party Repository
If the third-party repository connected to WLP’s Virtual Content Repository supports multiple user authentication, you can restrict users to specific content. Multiple user authentication lets users log in with global credentials or with unique user credentials. User credentials can control the content individual WebLogic Portal users can view. For example, content contributors could view only the content that they add or edit.
Repositories, such as SharePoint, that support the RepositoryMultipleUsers capability type can display the Login Options button. Multiple user authentication is available for content repositories that support the RepositoryMultipleUsers capability type, defined by the RepositoryFeatureCapability.RepositoryMultipleUsers (which is determined by the ICapabilityManager.checkRepositoryCapability() method).
The Login Options button appears automatically in the WebLogic Portal Administration Console if you connected the third-party repository to WLP’s Virtual Content Repository.
Caution:
Currently there are no third-party repositories that support multiple user authentication.
Perform the following steps to set up global credentials and log into the repository:
After you connect to a third-party repository that supports multiple user authentication, start the WebLogic Portal Administration Console.
From the main menu of the WebLogic Portal Administration Console, select Content > Content Management.
To set up global credentials, perform the following steps:
Click Manage | Repositories.
In the resources tree, select the repository.
In the Summary tab, click Change Password.
Enter a global user name, password, password confirmation, and then click Save.
To log into the third-party repository, click the Manage | Content tab and select the third-party repository. After you select the repository, the Login Options button appears, as shown in Figure 8-2.
Figure 8-2 The Login Options Button
Click Login Options, select one of the following:
Click Login with Global Credentials to log in with the global credentials that you set up earlier. All content in the third-party repository is visible.
Click Login with my saved credentials for user xyz to log in to see the content this user is authorized to view.
Click Update my credentials and login to enter a new user name and password. You must have logged in at least once to select this option.
Figure 8-3 Select Global or User Credentials to Log into the Third-Party Repository
User authentication persists across multiple portal sessions until you change it.
Working with a JSR 170-Compatible Repository
WebLogic Portal provides a connector to repositories that implement the JSR 170 specification such as Day Software’s CRX. If you want to access a repository using its JSR 170 interface, you do not need to write a custom SPI implementation.
When a repository is connected to the Virtual Content Repository, both content contributors and developers can search for content within the repository. However not all metadata provided by the Virtual Content Repository, such as system properties and MIME types, are supported by the JSR 170 specification; subsequently some searches may be invalid.
The following system properties cannot be used when searching JSR 170 repositories:
cm_binaryName
cm_nodeName
cm_createdBy
cm_modifiedBy
cm_createdDate
cm_modifiedDate
cm_contentType
cm_binarySize
The following search operators cannot be used:
containsall
likeignorecase
Connecting to a JSR 170 Repository
To connect to a JSR 170 repository, do the following:
From the main menu of the WebLogic Portal Administration Console, select Content > Content Management.
Select Manage | Repositories.
In the Repositories tree, click the Virtual Content Repository.
In the Browse tab, click Add Repository Connection. See Figure 8-4.
Figure 8-4 Browse Tab within the Manage Repositories Window
In the Add Repository Connection dialog, provide the information shown in Table 8-2:
Table 8-2 Add Repository Connection
Field
Description
Name
The name you give your new repository.
Connection Class
The name of the connector class which connects the repository to WebLogic Portal.
If connecting to the Day Software CRX repository, use the following connection class: com.day.content.spi.jsr170.JNDIRepository
Datasource JNDI Name
Used only for WLP repositories.
Username
Enter the user name required to connect to your third-party repository.
Password
Enter the password required to connect to your third-party repository.