


|
BEA AquaLogic Data Services Platform provides the tools and components that let you build physical data services around individual physical data sources, and then develop the logical data services and business logic that integrate data from multiple physical and logical data services. The environment also lets you test the data service and manage data service metadata, caching, and security.
The basic menus, behavior, and look-and-feel associated with the WebLogic Workshop environment apply to ALDSP. However, there are several tools and components within WebLogic Workshop that are especially relevant to ALDSP. In this lesson, you will learn about a few of those tools and components. In addition, you will learn how to complete several basic tasks, such as starting and stopping WebLogic Server, that are essential to using WebLogic Workshop.
As the first lesson within the AquaLogic Data Services Platform Samples Tutorial, there are no dependencies on other lessons. However, your familiarity with WebLogic Workshop is assumed. Workshop is fully described in online documentation, which you can view at:
http://download.oracle.com/docs/cd/E13226_01/workshop/docs81/index.html
After completing this exercise, you will be able to:
WebLogic Workshop consists of two parts: an Integrated Development Environment (IDE) and a standards-based runtime environment. The purpose of the IDE is to remove the complexity in building applications for the entire WebLogic platform. Applications you build in the IDE are constructed from high-level components rather than low-level API calls. Best practices and productivity are built into both the IDE and runtime.
The first step is starting WebLogic Workshop and opening the RTLApp sample application, which you will use in the next lesson.
 Programs
  BEA WebLogic Platform 8.1
  Examples
  WebLogic Workshop
  Start Workshop with Sample Applications.
  Open
Open  Application
<beahome>\weblogic81\samples\liquiddata\RTLApp\
| Note: | Depending on your computer settings, the .work extension may not be visible. |
In Listing 1-1 RTLApp in Design View for Case.ds, the RTLApp application opens in Design View for the Case data service. If this is not the view that you see, double-click Case.ds located at DataServices/RTLServices and select the Design View tab.
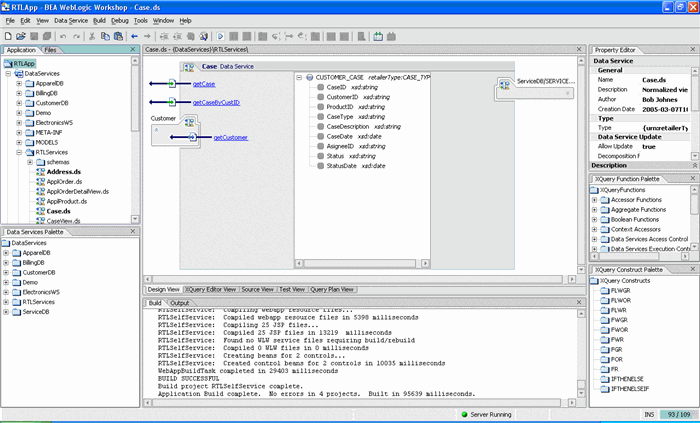
| Note: | The RTLApp application opens in the last active view. This action also resets the default WebLogic server home directory instance to the ldplatform sample domain. |
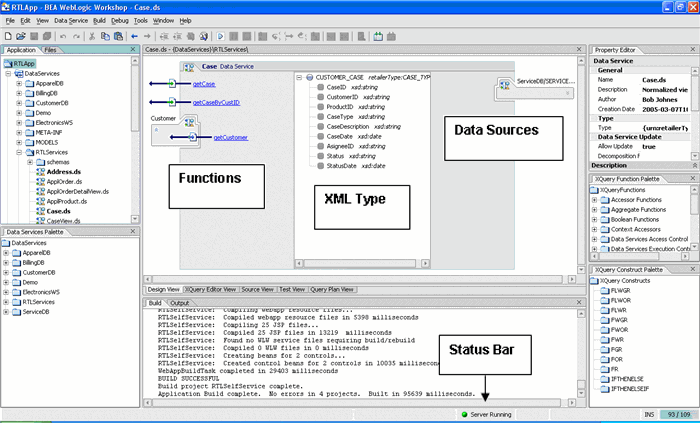
Within the WebLogic Workshop environment, there are several tools and components that are relevant to developing ALDSP applications and projects. Five of the most frequently used are:
Screenshots of the environment are taken from within the RTLApp application.
The Application pane displays a hierarchical representation of a ALDSP application.
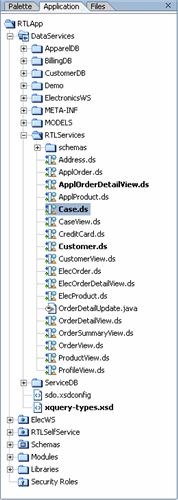
A Workshop application is a collection of all resources and components—projects, schemas, modules, libraries, and security roles—deployed as a unit to an instance of WebLogic Server. Only one application can be active at a time. Open files display in boldface type.
If the Application pane is not open, complete one of the following options:
Design View presents an editable, graphical representation of a data service. It is a single point of consolidation for a data service's query functions and other business logic. Using Design View, you can:
If Design View is not open, complete the following steps:
XQuery Editor View provides a graphical, drag-and-drop approach to constructing queries. Using this view, you can inspect or edit the query Return type and add the data source nodes, parameters, expressions, conditions, and source-to-target mappings that comprise data service query functions.
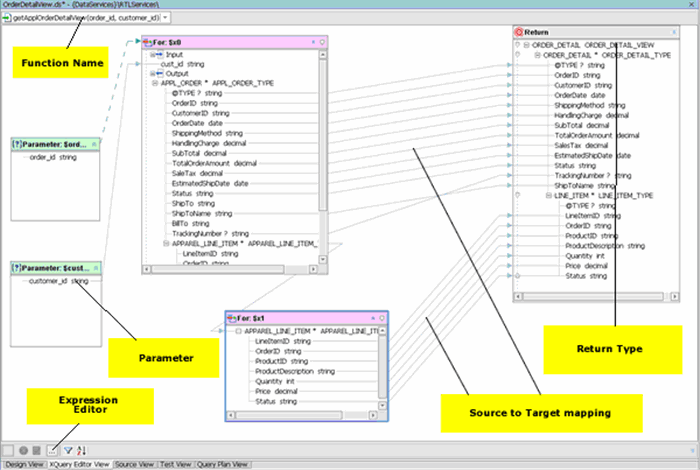
If XQuery Editor View is not open:
XQuery Editor View includes several editors and palettes that simplify the construction of queries:
To add data sources, drag and drop an item from the Data Services Palette into the XQuery Editor View work area. After you drop the node into XQuery Editor View, the node's data source schema (shape) displays in the XQuery Editor View.
If the Data Services Palette is not open, choose View  Windows
  Data Services Palette.
To add a built-in function, drag and drop the selected item into the Expression Editor.
If XQuery Function Palette is not open, choose View  Windows
  XQuery Function Palette.
Any work created in XQuery Editor View is immediately reflected in Source View, which permits you to augment the graphical approach to constructing queries with direct work on the XQuery syntax. Two-way editing is supported. Changes you make in Source View are reflected in XQuery Editor View, and vice versa.
Source View lets you view and/or modify a data service's XQuery annotated source code. Although ALDSP provides extensive visual design tools for developing a data service, sometimes you may need to work directly with the underlying XQuery syntax.
Two-way editing is supported. Changes you make in Source View are reflected in XQuery Editor View, and vice versa.
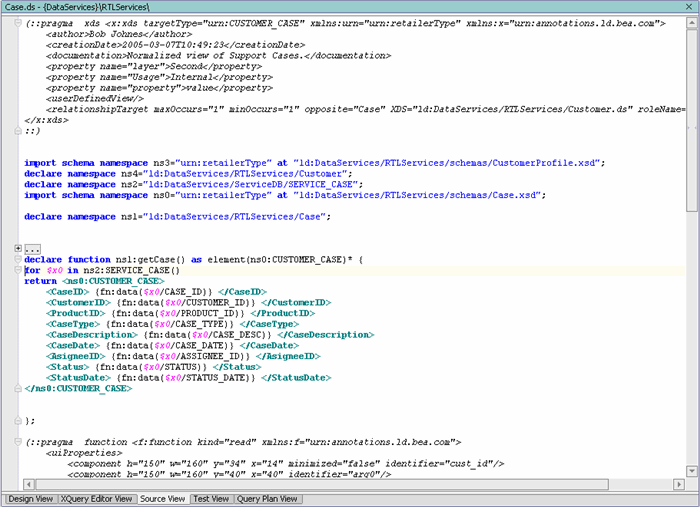
If Source View is not open, complete the following steps:
Within Source View, you can use the XQuery Construct Palette, which lets you add any of several built-in generic FLWOR statements to the XQuery syntax. You can then customize the generic statement to match your particular needs.
To add a FLWOR construct, drag and drop the selected item into the appropriate declare function space.
If XQuery Construct Palette is not open, choose View  Windows
  XQuery Construct Palette.
Test View provides a means of running developed query functions within the IDE. Options available in Test View depend on the query being tested. For example, if the query supports parameters, then the Parameters section appears, providing a field for each parameter required by the query.
Using Test View, you can select a specific function, specify appropriate parameters, and execute the query to determine that it is functioning properly. In addition, you can edit the results of the query and pass the modifications back to the underlying data source.
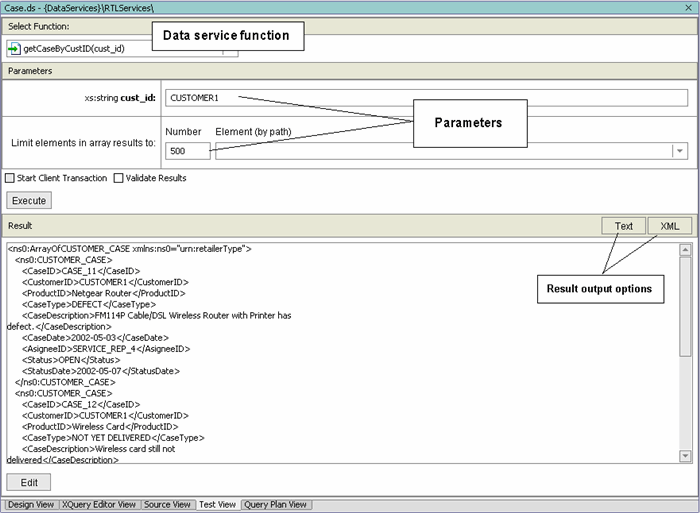
If Test View is not open, complete the following steps:
WebLogic Server need not be running while you are designing a ALDSP project. However, before you import source metadata or test a developed function, you must start an instance of WebLogic Server.
Any ALDSP projects that you create will run on your system's installation of WebLogic Server, at least until you deploy them.
| Note: | Multiple versions of WebLogic Server can exist, even on local, sample systems. If you have previously run an instance of WebLogic Server you should shut down that server and change your WebLogic Workshop server settings. This can be done through the Workshop ToolsApplication Properties dialog box. |
There are three ways to start WebLogic Server. Start the server using one of the following ways:
Starting the WebLogic Server may take some time. During the server startup sequence, you may see the following message box:
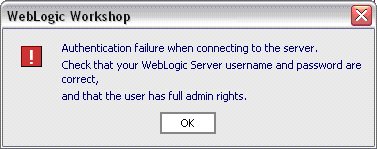
If this box displays, click OK.
When WebLogic Server is running, the WebLogic server icon, which appears on the WebLogic Workshop status bar, will turn green. 
There may be times when you want to stop WebLogic Server while still working within ALDSP for WebLogic Workshop.
You can stop WebLogic Server using any one of the following ways:
Check the WebLogic Server icon of WebLogic Workshop to determine whether WebLogic Server is stopped. If WebLogic Server is stopped, the icon will turn red. 
As you build your data services, you may want to save your work on a regular basis.
You can save your work using the following commands:
Save All is generally recommended for ALDSP applications. The Save As and Save All options are only available if you have made changes to your application.
In addition, if you exit WebLogic Workshop and there are any unsaved changes, you are provided with an option to save either specific or all edited files.
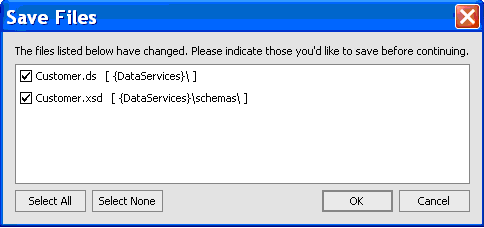
In this lesson, you learned how to:


|