
| Download Docs | Site Map | Glossary | |
|
|
|||
| bea.com | products | dev2dev | support | askBEA |
|
|
|
||||||||
| e-docs > WebLogic Platform > WebLogic Integration > DI Topics > DI Plug-In > Running the WebLogic Integration Sample Applications |
|
DI Plug-In
|
Running the WebLogic Integration Sample Applications
The data integration software includes two sample applications designed to illustrate the integration of business process management (BPM) in WebLogic Integration. This section describes these samples and give you step-by-step instructions for running them. The following topics are discussed:
Prerequisites
The instructions presented in this section are based on the assumption that you have a good working knowledge of WebLogic Integration, and that you understand how data integration and the WebLogic Integration process engine work. In addition, you should have successfully installed WebLogic Integration and run a sample workflow before you try to run the sample applications.
Running the Servlet Sample
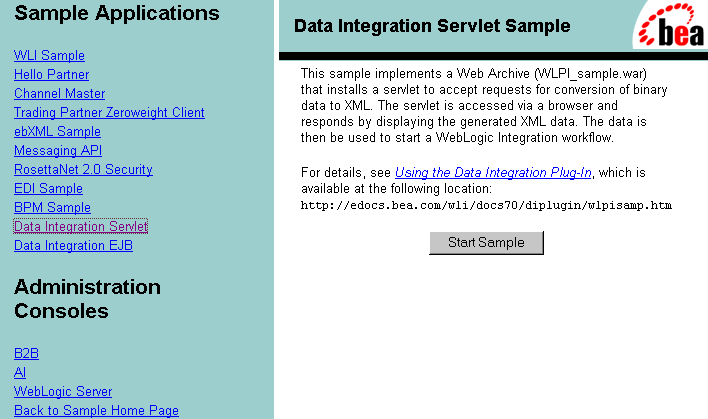
This sample application implements a Web archive file (WLPI_sample.war) that installs a servlet. The servlet accepts requests for conversion of binary data to XML. It is accessed via a browser and responds by displaying the generated XML data. In addition, the application posts the data to the WebLogic Integration event topic in either XML or binary format. The data may then be used to start a workflow.
What Is Included in the Servlet Sample
The servlet sample application resides in the SAMPLES_HOME\integration\samples\di\wlpi directory of your WebLogic Integration installation where SAMPLES_HOME is the samples directory in your WebLogic Platform installation. The following table describes the files included in the Servlet sample application.
How to Run the Servlet Sample To run the servlet sample, complete the procedure in this section. For instructions about the tasks specific to WebLogic Server and BPM functions, see the BEA documentation at http://www.oracle.com/technology/documentation/index.html. Step 1. Start the Sample Application Launcher For first-time users: Start the sample application launcher by completing the procedure appropriate for your platform:
Figure 3-1 Sample Application Launcher
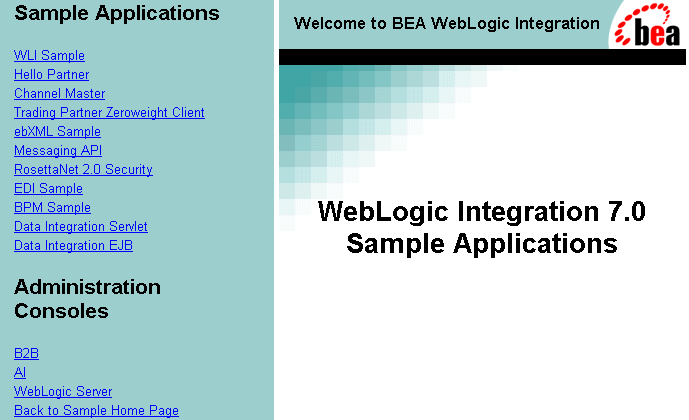
Figure 3-2 Data Integration Servlet Sample Page
cd /home/me/bea/weblogic700/integration
. setenv.sh
cd /home/me/bea/weblogic700/samples/integration/samples/bin
RunSamples
The WebLogic Integration repository has already been created
and populated, possibly from a previous run of this
RunSamples script. Do you want to destroy all the current
data in the repository and create and populate the
WebLogic Integration repository, again?
Y for Yes, N for No
If you answer N to this question, the RunSamples script skips the steps for creating and populating the repository and runs only the step for booting the sample instance of the WebLogic Server.
If you answer Y to this question, the RunSamples script recreates and repopulates the repository, and then it boots the sample instance of the WebLogic Server. When you answer Y the RunSamples script destroys all the data currently in the repository and loads an unaltered version of the sample data into the repository. Answer Y only when the current sample data has been altered or removed and you want a fresh or unaltered version of the sample data in the repository.
Now the RunSamples script starts an instance of the WebLogic Server (as a background process) and the samples launcher page is displayed.
If you have already configured samples:
Start the server and display the Samples Launcher by completing the procedure appropriate for your platform:
cd SAMPLES_HOME/integration/samples/bin
. ./startServer
StartServer execution successful
http://localhost:7001/index.html
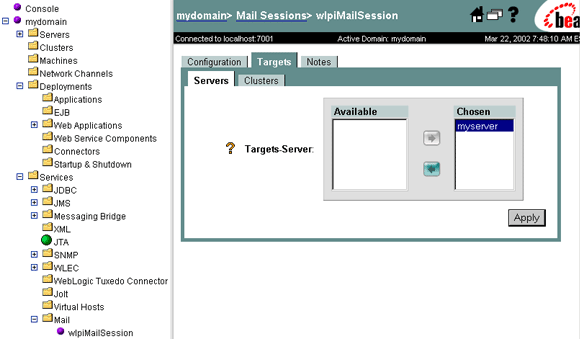
Step 2. Configure the Mail Session
This step is optional if you have already configured your mail host. You may want to perform it anyway, to verify your configuration.
Figure 3-3 Configuration Tab in the Mail Sessions Window
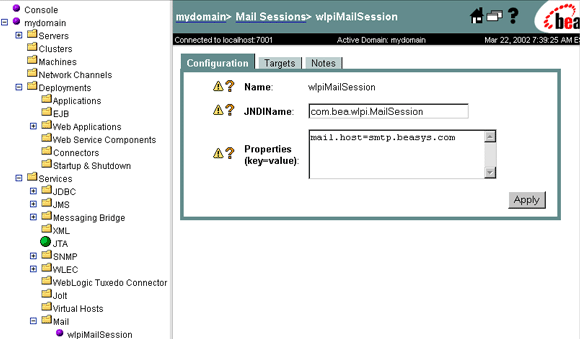
Figure 3-4 Server Tab in the Mail Sessions Window
Step 3. Update the Sample XML Data and Send Message
SAMPLES_HOME\integration\samples\di\wlpi\SampleData.data
Running the EJB Sample
This sample simulates a dataflow from an HR system to a payroll system, initiated by the entry of payroll data. Employee data is obtained from a legacy payroll system in which binary data is used. The data is translated to XML so that a calculation to determine the employee's pay information can be performed. The result of the calculation is translated back to binary format and sent on to the payroll system.
What Is Included in the EJB Sample
The EJB sample application resides in the SAMPLES_HOME\integration\samples\di\ejb directory of your WebLogic Integration installation. The following table describes the files included in the EJB sample application.
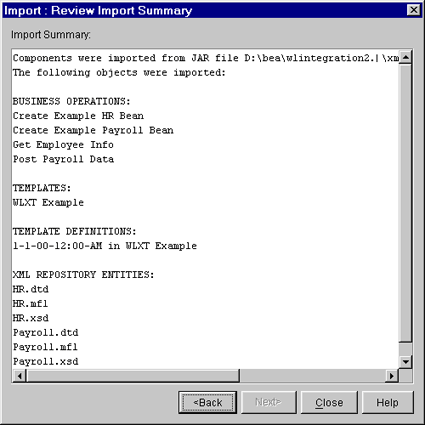
How to Run the EJB Sample To run the EJB sample, complete the steps described in the following sections. Step 1. Import the Workflow Definition
Figure 3-5 Import: Select File Dialog Box

Figure 3-6 Import: Select Components to Import
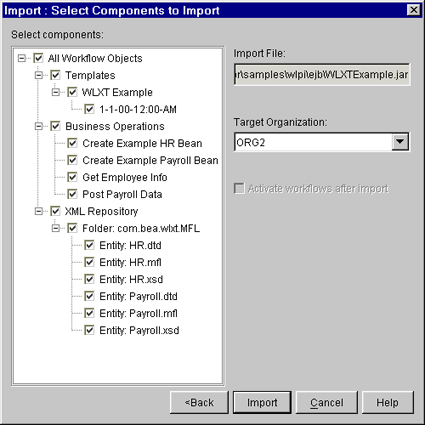
Figure 3-7 Import: Review Import Summary
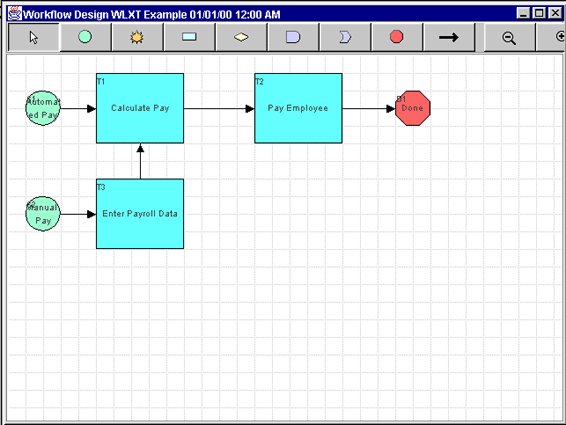
Step 2. Open the Template
Figure 3-8 Workflow for WebLogic Integration Example
Step 3. Start the Workflow
You can start the workflow created in the sample in either of two ways:
Once you start the workflow, you can use the Studio to monitor the simulated flow of data between the HR system and the payroll system.
From the WebLogic Integration Worklist
To start the sample workflow from the WebLogic Integration Worklist:
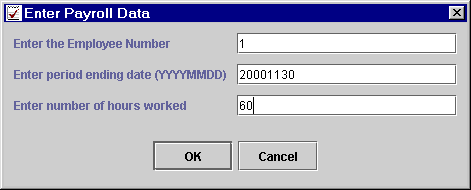
Figure 3-9 WLXT Example Worklist
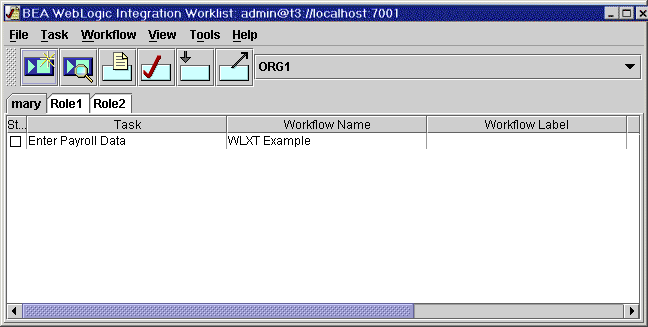
Figure 3-10 Enter Payroll Data
From the Command Line
To start the sample workflow from a command-line prompt:
set WL_HOME=c:\bea\weblogic700
set WLI_HOME=c:\bea\weblogic700\integration
Autopay 1 2000-11-30 60
Step 4. Examine the Variable Values
To monitor the sample dataflow, complete the following procedure:

|

|

|


