Tutorial: Building a Worklist Application
Step 6. Run the Resolution Approval Business Process
You can run and test the functionality of the business process you created using WebLogic Workshop's browser-based interface. Using the Workshop Test Browser, you play the role of the client, invoking the methods on the business process and viewing the responses.
You also use the Worklist user interface (UI) to play the role of QualityEngineerA at the SoftCo enterprise. This step describes how to test two scenarios; one in which QualityEngineerA approves the resolution of the bug, one in which QualityEngineerA appeals the resolution of the bug.
To Launch the Test Browser
- In the Application pane, select the business process you want to test, such as ResoutionApproval.jpd.
- If it not already selected, select the Design View tab. The business process you selected in the Application pane is displayed in the Design View.
- If WebLogic Server is running in the
worktutorial domain, the following indicator is visible in the status bar at the bottom of the WebLogic Workshop visual development environment:

If the server is not already running, from the WebLogic Workshop menu, start WebLogic Server. To do so, choose Tools—>WebLogic Server—>Start WebLogic Server.
- Build the application by pressing F7, or from the WebLogic Workshop menu, click Build—>Build Application. WebLogic Workshop builds your application.
- After the build is complete and the server is updated, click the Start button
 on the menu bar to run your business process. The Workshop Test Browser is launched, through which you can test your business process using sample input values.
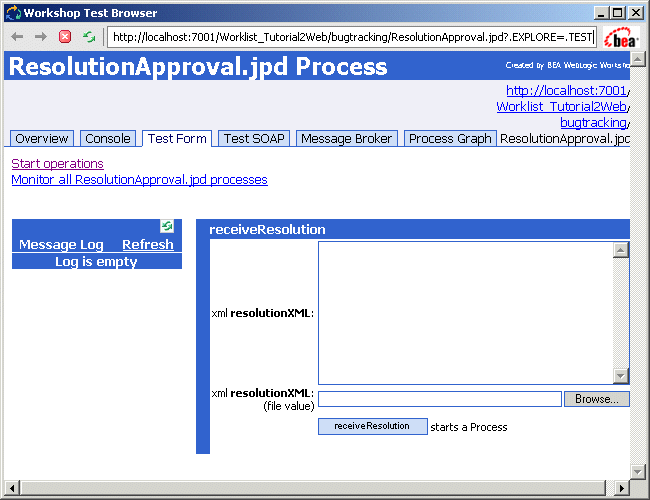
- In the Test Browser, if necessary, click the Test Form tab to open the Test Form page.
The Test Form page allows you to enter data that your business process can receive as part of a client request.
- Select the XML data provided in Listing 7-1, then copy it and paste it into the box labeled xml resolutionXML on the Test Form page.
Listing 7-1 sampleFixResolution.xml
<bug:bug-resolution
xmlns:bug="http://www.bea.com/WLIWorklistTutorial/BugResolution.xsd">
<bug:description>Null Pointer Exception while performing XYZ</bug:description>
<bug:resolution-code>FIXED</bug:resolution-code>
<bug:resolution-text>I forgot to check for null. Now we use a default in that case.</bug:resolution-text>
<bug:bug-creator>QualityEngineerA</bug:bug-creator>
</bug:bug-resolution>
- In the Test Browser, click the button labeled with the method name on your business process (receiveResolution) to invoke the method. The Test Form page refreshes to display a summary of your request parameters and the calls in the Message Log.
The first call is logged in the Message Log. It is the receiveResolution call you made to invoke the business process.
To Launch the Worklist User Interface
To drive the further execution of the business process, you must log into the Worklist UI and play the role of QualityEngineerA—the person who created the bug. See the bug-creator element in sampleFixResolution.xml, which is the test XML used to invoke the business process and one of the users you set up for the tutorial scenario.
- Log on to the Worklist UI in one of the following ways:
- Click Claimed Tasks to see the task. This task was assigned directly to QualityEngineerA, who claims it automatically.

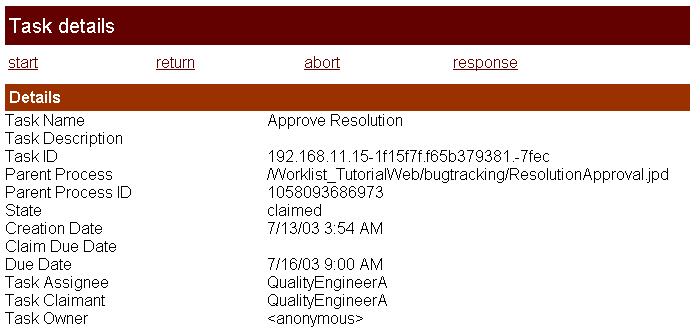
- Click details to open a page that displays the details of the claimed task.
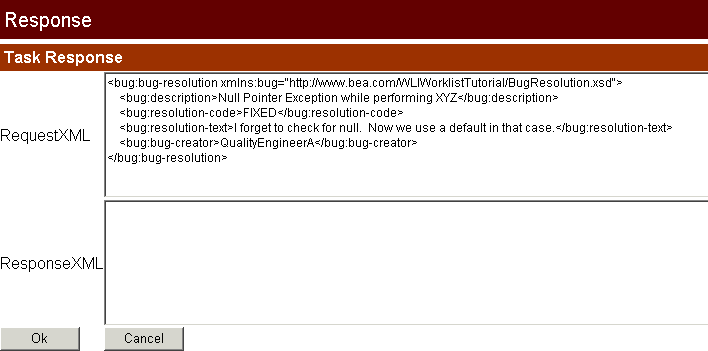
- Click response to open a page that displays the XML describing the resolution (the RequestXML).
- Click the Back button in your browser to go back to the Task details page.
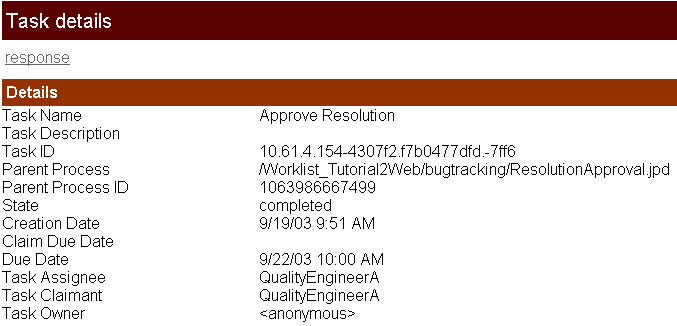
- On the Task details page, click start, then complete. In this way you complete the task to approve the resolution.
- Return to the Workshop Test Browser and click Refresh on the Message Log pane. Note that the business process runs to completion.

- Click
 . The Message Log resembles the following figure:

The following calls are logged in the Message Log:
- receiveResolution—the call you made (acting in the role of the client) to invoke the business process.
- taskCtrl:listener.onTaskEvent—the call from the Task Control to the Resolution Approval business process.
- callback.approved—the callback to the client that invoked the business process. In this case the method is the approved method you created on the Resolution Approved node in the business process.
Congratulations! You have successfully completed running and testing the Resolution Approval business process for a scenario in which the user (QualityEngineerA) approves the resolution of the bug.
The following steps describe the data and steps you need to run the business process again, but this time, QualityEngineerA appeals the task—that is, QualityEngineerA appeals the resolution of the bug.
Run ResolutionApproval.jpd Again
- Close the Test Browser, then run the ResolutionApproval.jpd business process again by clicking the Start button
 on the menu bar in WebLogic Workshop.
- Select the XML data provided in Listing 7-1, then copy it and paste it into the box labeled xml resolutionXML on the Test Form page.
- Click the button labeled with the method name on your business process (receiveResolution) to invoke the method. The first call is logged in the Message Log. It is the receiveResolution call you made to invoke the business process.
- Access the Worklist UI, again playing the role of QualityEngineerA, and once again select Claimed Tasks.
- Click details to open a page that displays the details of the claimed task.
Note: On the Details page, note the values in the Creation Date and the Due Date fields. Note that the owner of the task (QualityEngineerA) has two business days in which to accept or appeal the resolution of the software bug.

- Click response to open a page that displays the XML describing the resolution (the RequestXML).
Note: Recall that the SoftCo enterprise requires that users who appeal the resolution of a bug attach a document that describes the reason for their appeal. In this scenario, QualityEngineerA appeals the task and includes the document that describes why. The following steps describe how to test this scenario.
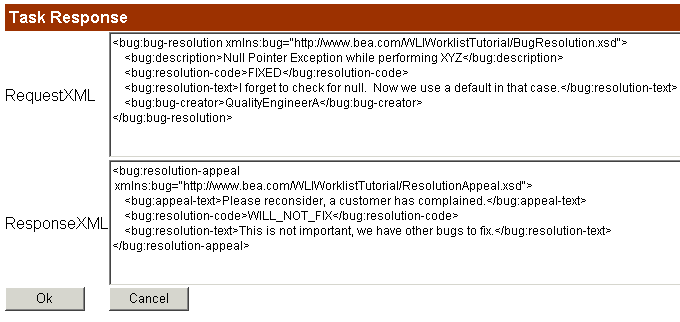
- Select the XML data provided in Listing 7-2, then copy it and paste it into the ResponseXML box on the Task Response page, as shown in Figure 7-1.
Listing 7-2 sampleAppeal.xml
<bug:resolution-appeal
xmlns:bug="http://www.bea.com/WLIWorklistTutorial/ResolutionAppeal.xsd">
    <bug:appeal-text>Please reconsider, a customer has complained.</bug:appeal-text>
    <bug:resolution-code>WILL_NOT_FIX</bug:resolution-code>
    <bug:resolution-text>This is not important, we have other bugs to fix.</bug:resolution-text>
</bug:resolution-appeal>
Figure 7-1 ResponseXML box
- Click Ok. The browser returns to the Task details page.
- On the Task details page, click start, then abort. In this way you abort the task to appeal the resolution.
- Return to the Workshop Test Browser and click Refresh on the Message Log pane. Note that the business process runs to completion.

Note that the final callback logged in the Message Log is callback.appealed (the callback to the client that invoked the business process). The method is the appealed method you created on the Resolution Appealed node in the onTaskAborted Message Event branch in the business process.
This completes running and testing the Resolution Approval business process for a scenario in which the user (QualityEngineerA) appeals the resolution of the bug.