Establishing Interportlet Communications
|
|
Establishing IPC by Using Custom and Page Flow Events
In A Simple Example of Establishing IPC, we showed a very basic example of establishing interportlet communications by using a portal framework event. Usually, you will want to provide more complex IPC in your applications; for example, you might want to handle an event that is not previously defined in WebLogic Portal, called a "custom" event, or one that is the result of a page flow action, or a "page flow" event. WebLogic Portal 8.1 with Service Pack 4 and later provide event handlers to accomplish both of these types of interportlet communications.
What is a Custom Event?
A custom event is simply an event you, as the developer, define to the application; in other words, it is not an event provided out-of-the-box with WebLogic Portal 8.1. A custom event can pass a developer-defined payload or fire any other predefined action and can be fired declaratively or based on a methods called in a backing file. A user will be able to specify that an event should be handled by a method in a backing file.
What is a Page Flow Event?
A page flow event is any occurrence during a page flow lifecycle that can trigger an action on another portlet. For example, if a user submits authentication information via a login portlet that uses a page flow, submission of the login form thereon can signal other portlets listening to it to query various databases and return information specific to the authenticated user and specific to the listening portlets.
Establishing Interportlet Communications by Using Custom and Page Flow Event Handlers: An Example
The following exercise will create a portal desktop that uses both custom and page flow events to achieve interportlet communications. When completed, the portal will contain three portlets:
- A Find Customer lookup portlet into which users will enter the name of a customer.
- A Find Customer Information portlet, which displays information about the customer whose name was submitted in the customer lookup portlet
- An Find Orders portlet, which displays order information for the customer whose name was submitted in the customer lookup portlet.
When initially rendered, the completed portal will look like the example in Figure 4-1.
Figure 4-1 Portal as Initially Rendered

Once the customer name is submitted from Customer Lookup portlet, the portal will look like the example in Figure 4-2
Figure 4-2 Portal with Customer Name Submitted

Creating this example requires these steps:
- Step 1: Create the File Structure
- Step 2: Create the Backing Files
- Step 3: Create the Customer Lookup Results Portlet
- Step 4: Create the Orders Lookup Portlet
- Step 5: Create the Customer Lookup Portlet
- Step 6: Create and Populate the Portal File
- Step 7: Test the Portal
How this Example Achieves IPC
All three portlets in this exercise use backing files to fire actions that establish and execute the interportlet communication between them. When a backing file is attached to a portlet, the action Invoke BackingFile Method is made available on the Event Handler tool. After you select the Invoke BackingFile Method action, you select the appropriate method from the backing file from the Method drop-down list. When the portlet detects the custom event for which it is listening, it invokes the attached backing file and executes the specified method. Backing files can have multiple methods, any of which are made available to the event handler.
Backing files are Java classes that implement the com.bea.netuix.servlets.controls.content.backing.JspBacking interface or extend the com.bea.netuix.servlets.controls.content.backing.AbstractJspBacking interface abstract class. They allow you to you to programatically add functionality to a portlet, enabling preprocessing (for example, authentication) prior to rendering the portal controls. Before attempting this exercise, we recommend that you refer to Understanding Backing Files.
Before You Begin
If you have not set up your development environment as described in Setting Up the Examples, please refer to that section and follow these steps:
- Step 1: Create the Domain
- Step 2: Create the Enterprise Application
- Step 3: Create the Portal Web Application (Project)
After completing these steps, you will have portal domain called ipcDomain and a portal application called ipcTest.
Note on Entering Text in Dialog Boxes
Because so much of the text you will enter in this exercise refers to case-sensitive names in the various JPF, JSP, and backing files used to establish IPC, please enter all text exactly as it appears in the procedure.
Step 1: Create the File Structure
Next, you need to create some additional folders on the file tree. These directories will contain the portlets and their components (for example JSPs and page flow files) necessary for successfully establishing IPC.
Note: While creating separate folders for each portal is optional, to do so is a best practice as it allows for better organization of the application and reduces clutter on the application root.
To create the folders necessary for the application, use this procedure:
- Right-click the project name (ipcTest) and select New>Folder (Figure 4-3).
The New Folder dialog box appears (Figure 4-4).
Figure 4-4 New Folder Dialog Box
The Customer_Lookup folder will appear in the file tree, at the project root (Figure 4-5):
Figure 4-5 File Tree with Customer_Lookup Folder Added
- Orders_LookUp (note the use of capitalization in "LookUp"; you must type this word exactly as shown here)
- portlets
When you are done creating the folders, the project root should look like the example in Figure 4-6.
Figure 4-6 FIle Tree with New Folders Added
- Next, create the
backingfolder. This folder will store the backing files you will create in a few moments. To do so, open theipcTest/WEB-INF/srcfolder and repeat steps 1 and 2 (Figure 4-7): The backing file will appear under
WEB-INF/srcin the file tree (Figure 4-8):Figure 4-8 File Tree with backing Folder Added
Figure 4-3 Creating a New Folder


Figure 4-7 Opening the ipcTest/WEB-INF/src Folder


Summary
With the completion of step 2, you have added all the new folders required by the application. Note that when you create the page flows in later steps, an additional folder for each page flow will be created under the folder that contains the page flow.
Step 2: Create the Backing Files
A backing file is a simple Java class implementing the JspBacking interface. Backing files work in conjunction with JSPs. The JSPs allow you to code the presentation logic, while the backing files allow you to code simple business logic. Backing files are always run before the JSPs. A backing file has a lifecycle with four methods that are run in order on all objects. You can effect the underlying object from the BackingContext. The BackingContext should be used from the backing file and the PresentationContext should be used from the JSPs. As described earlier, backing files should be stored in WEB-INF/src/backing.
In this step, you will create three backing files, one for each portlet in the application. To save time creating these files, we have provided the necessary code in this document. If you are reading this online, you can simply cut and paste the code into the appropriate empty file. If you are using a hardcopy or PDF version of this document and cannot obtain an online (HTML) copy, you can type the code exactly as it appears in the code samples.
To create the backing files for this exercise, use this procedure:
The New File dialog box appears (Figure 4-10).
Note: Common should be selected in the left pane and Java Class in the right pane. If not, select them now.
Figure 4-10 New File Dialog Box; Common and Java Class Selected
FindCustomerBacking.javaappears underWEB-INF/src/backing(Figure 4-11):Figure 4-11 FindCustomerBacking.java under WEB-INF/src/backing
and a file editor opens in WebLogic Workshop (Figure 4-12).
Figure 4-12 Backing File Template in the File Editor
- Delete all content in the file editor and replace it with the entire code in Listing 4-1.


Listing 4-1 FindCustomerBacking.java Sample Code
package backing;

import com.bea.netuix.servlets.controls.content.backing.JspBacking;
import com.bea.netuix.servlets.controls.content.backing.AbstractJspBacking;
import com.bea.netuix.events.Event;
import com.bea.netuix.events.GenericEvent;
import com.bea.netuix.events.PageFlowEvent;
import com.bea.netuix.servlets.controls.portlet.backing.PortletBackingContext;
import javax.servlet.http.HttpServletRequest;
import javax.servlet.http.HttpServletResponse;
public class FindCustomerBacking extends AbstractJspBacking
{
    public void foundCustomer(HttpServletRequest request, HttpServletResponse
       response, Event event)
	   {
        // Get result from form post and inject inside remote IPC

        PortletBackingContext context =
          PortletBackingContext.getPortletBackingContext(request);
        String message = request.getParameter(context.getInstanceLabel() +
          "{actionForm.name}");
        context.fireCustomEvent("myCustomEvent", message);
    }
}
The file is created (it will appear under
WEB-INF/src/backingin the file tree) and a backing file template appears in the file editor.- Delete all existing code in the file editor and replace it with the entire code in Listing 4-2.
Listing 4-2 ListenCustomerName.java Code Sample
package backing;
import javax.servlet.http.HttpServletRequest;
import javax.servlet.http.HttpServletResponse;
import javax.servlet.http.HttpSession;
import com.bea.netuix.events.Event;
import com.bea.netuix.events.CustomEvent;
import com.bea.netuix.servlets.controls.content.backing.AbstractJspBacking;
public class ListenCustomerName extends AbstractJspBacking
{
    public void listenCustomerName( HttpServletRequest request,
       HttpServletResponse response, Event event)
    {

        CustomEvent customEvent = (CustomEvent) event;
String message = (String) customEvent.getPayload();
HttpSession mySession = request.getSession();
mySession.setAttribute("customerName", message);
}
}
- Repeat steps a through c in step 1, above; however, in File name (step b) enter
ReceiveCustomerInfo. - Delete all existing code in the file editor and replace it with the entire code in Listing 4-2.
Listing 4-3 ReceiveCustomerInfo.java Code Sample
package backing;
import javax.servlet.http.HttpServletRequest;
import javax.servlet.http.HttpServletResponse;
import javax.servlet.http.HttpSession;
import com.bea.netuix.events.Event;
import com.bea.netuix.events.CustomEvent;
import com.bea.netuix.servlets.controls.content.backing.AbstractJspBacking;
public class ReceiveCustomerInfo  extends AbstractJspBacking
{
    public void listenCustomerName( HttpServletRequest request,
       HttpServletResponse response, Event event)
    {
CustomEvent customEvent = (CustomEvent) event;
String message = (String) customEvent.getPayload();
HttpSession mySession = request.getSession();
mySession.setAttribute("customerName", message);
}
}
Summary
With the completion of Step 3, you have created the necessary backing files and have stored them in the WEB-INF/src/backing folder. That folder should look like the example in Figure 4-13.
Figure 4-13 WEB-INF/src/backing with All Backing Files Created

Step 3: Create the Customer Lookup Results Portlet
In this step, you will create the first of the three portlets. This portlet will listen to the customer lookup portlet and when it hears a specific event (in this case, a customer name being submitted), will fire an action in response (in this case, return information about the requested customer).
To create this portlet you will create four files: one page flow file, two JSP files, and the .portlet file. The .portlet file is simply a container for the other three files; however, this is the file upon which critical properties are set, specifically the backing file and the event handlers.
Note: To save you time and to reduce the chance of entry errors when creating these files, we have provided the necessary code in this document. If you are reading this online (HTML), you can simply cut and paste the code into the appropriate empty file. If you are using a hardcopy or PDF version of this document and cannot obtain an online copy, you can type the code exactly as it appears in the code samples.
Create the Page Flow (FindCustomerController.jpf)
The FindCustomer page flow (FindCustomerController.jpf) establishes the order in which pages are rendered in the Customer Lookup Results portlet. This page flow executes after a name is submitted on the Customer Lookup Portlet.
To create the FindCustomer page flow, use this procedure (the procedure assumes that WebLogic Workshop is running):
- On the file tree, right-click Customer_Lookup and select New > Page Flow (Figure 4-14).
The Page Flow Wizard appears (Figure 4-15).
- In Page Flow Name, enter findCustomer; note that the same text replaces the string Newpageflow1 in the Controller Name field, so that this field reads "FindCustomerController" (the lowercase "f" in Page Flow Name is translated to a capital "F" in Controller Name).
The Select Page Flow Type dialog box appears (Figure 4-16).
Figure 4-16 Select Page Flow Type Dialog Box
A basic page flow design appears in the Page Flow Designer (Figure 4-17):
Figure 4-17 FindCustomerController.jpf in Page Flow Designer — Flow View
and
FindCustomerController.jpf(Figure 4-18) appears in the file tree. Note that when you create this page flow, a new folder bearing the page flow name (findCustomer) appears in theCustomer_Lookupfolder (Figure 4-18) and an additional JSP,index.jspis created. ThefindCustomerfolder will host the files that comprise this portlet andindex.jspwill serve as a template for theresult.jspfile.Figure 4-18 FindCustomerController.jpf in findCustomer Folder
The view in the Page Flow Designer changes to that shown in Figure 4-19.
Figure 4-19 Default Page Flow Code in Source View
- Copy the code sample in Listing 4-4 and paste it into the empty Page Flow Designer Source View.
Figure 4-14 New>Page Flow Selected


Listing 4-4 FindCustomerController.jpf Code Sample
package Customer_Lookup.findCustomer;
import com.bea.wlw.netui.pageflow.FormData;
import com.bea.wlw.netui.pageflow.Forward;
import com.bea.wlw.netui.pageflow.PageFlowController;
/**
 * @jpf:controller
 * @jpf:view-properties view-properties::
 * <!-- This data is auto-generated. Hand-editing this section is not
 * recommended. -->
 * <view-properties>
 * <pageflow-object id="pageflow:/Customer_Lookup/findCustomer/
 * FindCustomerController.jpf"/>
 * <pageflow-object id="action:begin.do">
 *   <property value="80" name="x"/>
 *   <property value="100" name="y"/>
 * </pageflow-object>
 * <pageflow-object id="action:findCustomerInfo.do#Customer_Lookup.
 * findCustomer.FindCustomerController.FindCustomerInfoForm">
 *   <property value="680" name="x"/>
 *   <property value="100" name="y"/>
 * </pageflow-object>
 * <pageflow-object id="action-call:@page:findCustomer.jsp@#@action:
 * findCustomerInfo.do#Customer_Lookup.findCustomer.FindCustomerController.
 * FindCustomerInfoForm@">
 *   <property value="276,460,460,644" name="elbowsX"/>
 *   <property value="92,92,92,92" name="elbowsY"/>
 *   <property value="East_1" name="fromPort"/>
 *   <property value="West_1" name="toPort"/>
 * </pageflow-object>
 * <pageflow-object id="page:findCustomer.jsp">
 *   <property value="240" name="x"/>
 *   <property value="100" name="y"/>
 * </pageflow-object>
 * <pageflow-object id="page:result.jsp">
 *   <property value="560" name="x"/>
 *   <property value="100" name="y"/>
 * </pageflow-object>
 * <pageflow-object id="forward:path#success#findCustomer.
 * jsp#@action:begin.do@">
 *   <property value="116,160,160,204" name="elbowsX"/>
 *   <property value="92,92,92,92" name="elbowsY"/>
 *   <property value="East_1" name="fromPort"/>
 *   <property value="West_1" name="toPort"/>
 *   <property value="success" name="label"/>
 * </pageflow-object>
 * <pageflow-object
 * id="forward:path#success#result.jsp#@action:
 * findCustomerInfo.do#Customer_Lookup.findCustomer.FindCustomerController.
 * FindCustomerInfoForm@">
 *   <property value="644,620,620,596" name="elbowsX"/>
 *   <property value="81,81,81,81" name="elbowsY"/>
 *   <property value="West_0" name="fromPort"/>
 *   <property value="East_0" name="toPort"/>
 *   <property value="success" name="label"/>
 * </pageflow-object>
 * <pageflow-object id="formbeanprop:Customer_Lookup.findCustomer.
 *    FindCustomerController.FindCustomerInfoForm#name#java.lang.String"/>
 * <pageflow-object id="formbean:Customer_Lookup.findCustomer.
 * FindCustomerController.FindCustomerInfoForm"/>
 * <pageflow-object id="action-call:@page:result.jsp@#@action:
 * findCustomerInfo.do#Customer_Lookup.findCustomer.FindCustomerController.
 * FindCustomerInfoForm@">
 *   <property value="596,620,620,644" name="elbowsX"/>
 *   <property value="92,92,81,81" name="elbowsY"/>
 *   <property value="East_1" name="fromPort"/>
 *   <property value="West_0" name="toPort"/>
 * </pageflow-object>
 * </view-properties>
 * ::
 */
public class FindCustomerController extends PageFlowController
{
    // Uncomment this declaration to access Global.app.
    //
    //     protected global.Global globalApp;
    //
    // For an example of page flow exception handling see the example "catch" and "exception-handler"
   // annotations in {project}/WEB-INF/src/global/Global.app
    /**
     * This method represents the point of entry into the pageflow
     * @jpf:action
     * @jpf:forward name="success" path="findCustomer.jsp"
     */
    protected Forward begin()
    {
        return new Forward("success");
    }
    /**
     * @jpf:action
     * @jpf:forward name="success" path="result.jsp"
     */
    protected Forward findCustomerInfo(FindCustomerInfoForm form)
    {
        return new Forward("success");
    }
    /**
     * FormData get and set methods may be overwritten by the Form Bean editor.
     */
    public static class FindCustomerInfoForm extends FormData
    {
        private String name;
        public void setName(String name)
        {
            this.name = name;
        }
        public String getName()
        {
            return this.name;
        }
    }
}
Note: You might see two "File could not be found" warnings (indicated by a green squiggle) in the Page Flow Designer. You can ignore them, as they refer to files that you will create in the next two steps.
Create findCustomer.jsp
To create findCustomer.jsp, use this procedure:
- Right-click findCustomer in the file tree and select New > JSP file (Figure 4-20).

The New File dialog box appears (Figure 4-21).
Figure 4-21 New File Dialog Box; JSP File Selected

The file is created; a new JSP template will appear in the JSP Designer (Figure 4-22):

and the new file appears in the findCustomer folder (Figure 4-23).
Figure 4-23 findCustomer.jsp File in findCustomer Folder

- Copy the code in Listing 4-5 and paste it into the empty JSP Designer.
Listing 4-5 findCustomer.jsp Sample Code
<%@ page language="java" contentType="text/html;charset=UTF-8"%>
<%@ taglib uri="netui-tags-databinding.tld" prefix="netui-data"%>
<%@ taglib uri="netui-tags-html.tld" prefix="netui"%>
<%@ taglib uri="netui-tags-template.tld" prefix="netui-template"%>
<netui:html>
    <body>
        <p> Find Support Information </p>
        <netui:form action="findCustomerInfo">
            <div>
                Name:
                <netui:textBox dataSource="{actionForm.name}" defaultValue=
                    ""></netui:textBox>
                <br/>
            </div>
            <netui:button value="Find Support Info" type="submit"/>
        </netui:form>
    </body>
</netui:html>
Create result.jsp
result.jsp contains the presentation logic for the final page of the successful execution of the findCustomer page flow (findCustomerController.jpf). This page renders after the name submitted in the Customer Lookup portlet is authenticated and will present specified customer data.
To create result.jsp, use this procedure.
- Locate and right-click
index.jspunderCustomer_Lookup/findCustomerto open the file's context menu (Figure 4-24). - Select Rename to open the file rename function and replace
index.jspwithresult.jsp (Figure 4-25). - Copy the code listing in Listing 4-6 and paste it into the JSP designer.
Figure 4-24 index.jsp Context Menu
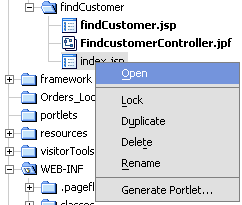 index.jsp Context Menu" title="
index.jsp Context Menu" width="246" height="209" align="middle" border="0" hspace="0" vspace="0">
Figure 4-25 result.jsp Replaces index.jsp in File Tree
 result.jsp Replaces
 index.jsp in File Tree" title="result.jsp Replaces index.jsp in File Tree" width="248" height="94" align="middle" border="0" hspace="0" vspace="0">
Listing 4-6 Code Sample for result.jsp
<%@ page language="java" contentType="text/html;charset=UTF-8"%>
<%@ taglib uri="netui-tags-databinding.tld" prefix="netui-data"%>
<%@ taglib uri="netui-tags-html.tld" prefix="netui"%>
<%@ taglib uri="netui-tags-template.tld" prefix="netui-template"%>
<netui:html>

    <body>
        <p>
            Support Case Information
        </p>

        Customer Name:

        <%=session.getAttribute("customerName")
        %>

       <%
        session.setAttribute("customerName", "");
       %>

        <netui:form action="findCustomerInfo">
            <netui:label value="{actionForm.name}"/>
        </netui:form>

            <div>

         <br>

                Support Case 001<br/>
                Support Case 002<br/>
                Support Case 003<br/>
                Support Case 004<br/>
            </div>

    </body>
</netui:html>
Note: If you reopen FindCustomerController.jpf after saving both JSPs, you will see that the warnings described in the note following Listing 4-4 do not appear.
Create the Customer Lookup Portlet
The Customer Lookup portlet is the container for the page flow and the JSPs that you just created. This is the file to which you'll attach the backing file and implement the event handlers necessary to achieve interportlet communications.
To create the Customer Lookup portlet, use this procedure.
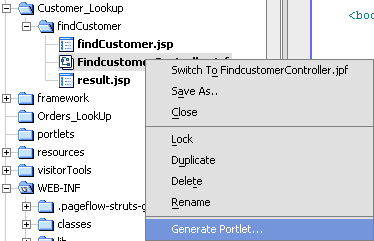
- Under Customer_Lookup/findCustomer, right-click FindCustomerController.jsp to open the file's context menu (Figure 4-26).
The Portlet Details dialog box appears (Figure 4-27).
Figure 4-27 Portlet Details Dialog Box
Note that Title and Content URL are already filled in (Figure 4-28) based upon the page flow name.
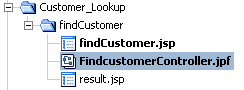
The new portlet appears in the Customer_Lookup/findCustomer folder (Figure 4-29).
Figure 4-29 FindCustomerController Portlet on File Tree
Figure 4-26 FindCustomerController.jpf Context Menu
 FindCustomerController.jpf Context Menu" title="
FindCustomerController.jpf Context Menu" width="351" height="260" align="middle" border="0" hspace="0" vspace="0">

Figure 4-28 Portlet Details Detail


Attach the Backing File
Now, you will attach the backing file receiveCustomerInfo.java to the portlet (FindCustomerController.portlet). As described in Step 2: Create the Backing Files, this file contains business logic that will fetch a payload containing information regarding the customer whose name was submitted in the Customer Lookup portlet.
To attach the backing file, use this procedure:
The portlet appears in the Portlet Designer (Figure 4-30).
Figure 4-30 Portlet in Portlet Designer
The field opens to accept text entry (Figure 4-31).
Figure 4-31 Property Editor; Backing File Selected


Note: Do not include the filetype (.java). WebLogic Workshop interprets the dot-separators in this field as filepath separators and, if .java is included, it will look for a file called java in a non-existent folder called backing/FindCustomerBacking.
Create the Event Handlers
Finally, you need to create the event handlers for this portlet. In this step, you will select the event handler types, identify the portlets to which they will listen, and define the actions they will fire when they detect the prescribed event.
To create the event handlers, use this procedure:
- With the portlet open in the Portlet Designer (Figure 4-30), locate in the Portlet Window section of the Property Editor the property Event Handlers.
- Mouse over the Event Handlers data entry field (it will read "No event handlers") to open the field for edit (Figure 4-32).
The Event Handler tool appears (Figure 5.).
Figure 4-33 Event Handler Tool
A menu opens, listing the available event handlers (Figure 4-34).
Figure 4-34 Event Handler Menu
Handle Custom Event appears in the Events list and additional fields appear on the dialog box (Figure 4-35).
Figure 4-35 Event Handler Tool with Handle Custom Event Selected
- Fill out the Handle Custom Event fields as described in Table 4-1.
A list of actions appears (Figure 4-36).
Figure 4-32 Event Handler Property Open for Edit


|
handleCustomEvent1 (this default value should appear when you select Handle Custom Event from the Add Handler list) |
|

Note: This option appears only if a backing file is attached to the portlet; if it does not appear, ensure that you completed Attach the Backing File successfully.
Invoke BackingFile Method appears in the Event Handler list, and the right pane of the dialog box reformats as shown in Figure 4-37.
Figure 4-37 Event Handler with Invoke BackingFile Method Added as Action

- Click the Method drop-down control to display a list of available methods (Figure 4-38).
The Event Handler tool should look like the example in Figure 4-39.
Figure 4-39 Event Handler Tool Completed for findCustomer Portlet
Figure 4-38 Invoke BackingFile Method Available Method List


Step 4: Create the Orders Lookup Portlet
The Orders Lookup Portlet surfaces information about orders pertaining to the customer submitted in the Customer Lookup portlet. This portlet is constructed identically to the Customer Lookup portlet, with some different data necessary for it to execute properly.
Note: To save you time and to reduce the chance of entry errors when creating these files, we have provided the necessary code in this document. If you are reading this online (HTML), you can simply cut and paste the code into the appropriate empty file. If you are using a hardcopy or PDF version of this document and cannot obtain an online copy, you can type the code exactly as it appears in the code samples.
Create the Page Flow (FindOrderController.jpf)
The FindOrder page flow (FindOrderController.jpf) establish the order in which pages are rendered in the Order Lookup portlet. This page flow executes after a name is submitted on the Customer Lookup Portlet. You create the Find Order page flow (FindOrderController.jpf), exactly as you create the Find Customer page flow, described in Create the Page Flow (FindCustomerController.jpf), although obviously with different data included.
To create the FindOrderController.jpf, use this procedure:
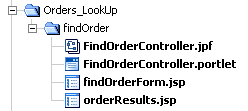
- A folder called
findOrderappears underOrders_LookUp. - Two files,
FindOrderController.jpfandindex.jspappear underOrders_LookUp/findOrder. - A schematic representation of the default page flow appears in the Page Flow Designer (Figure 4-40).
Figure 4-40 Default Page Flow Schematic in Page Flow Designer — Flow View

At the bottom of the Page Flow Designer, click Source View
The Page Flow Designer Source View appears, revealing the code for the default page flow (Figure 4-41).
Figure 4-41 Default Page Flow Code in Source View

Select the entire code listing and delete it.
Copy the code sample in Listing 4-7 and paste it into the Page Flow Designer Source View.
Listing 4-7 FindOrderController.jpf Code Sample
package Orders_LookUp.findOrder;
import com.bea.wlw.netui.pageflow.FormData;
import com.bea.wlw.netui.pageflow.Forward;
import com.bea.wlw.netui.pageflow.PageFlowController;
/**
 * @jpf:controller
 * @jpf:view-properties view-properties::
 * <!-- This data is auto-generated. Hand-editing this section is not
 * recommended. -->
 * <view-properties>
 * <pageflow-object id="pageflow:/Orders_LookUp/findOrder/
 *    FindOrderController.jpf"/>
 * <pageflow-object id="action:begin.do">
 *   <property value="80" name="x"/>
 *   <property value="100" name="y"/>
 * </pageflow-object>
 * <pageflow-object id="action:findOrders.do#Orders_LookUp.findOrder.
 *    FindOrderController.FindOrdersForm">
 *   <property value="420" name="x"/>
 *   <property value="100" name="y"/>
 * </pageflow-object>
 * <pageflow-object id="action-call:@page:findOrderForm.jsp@#@action:
 *    findOrders.do#Orders_LookUp.findOrder.FindOrderController.
 *    FindOrdersForm@">
 *   <property value="276,330,330,384" name="elbowsX"/>
 *   <property value="92,92,92,92" name="elbowsY"/>
 *   <property value="East_1" name="fromPort"/>
 *   <property value="West_1" name="toPort"/>
 * </pageflow-object>
 * <pageflow-object id="page:findOrderForm.jsp">
 *   <property value="240" name="x"/>
 *   <property value="100" name="y"/>
 * </pageflow-object>
 * <pageflow-object id="page:orderResults.jsp">
 *   <property value="600" name="x"/>
 *   <property value="100" name="y"/>
 * </pageflow-object>
 * <pageflow-object id="forward:path#success#findOrderForm.jsp#@action:
 *    begin.do@">
 *   <property value="116,160,160,204" name="elbowsX"/>
 *   <property value="92,92,92,92" name="elbowsY"/>
 *   <property value="East_1" name="fromPort"/>
 *   <property value="West_1" name="toPort"/>
 *   <property value="success" name="label"/>
 * </pageflow-object>
 * <pageflow-object id="forward:path#success#orderResults.jsp#@action:
 *    findOrders.do#Orders_LookUp.findOrder.FindOrderController.
 *    FindOrdersForm@">
 *   <property value="456,510,510,564" name="elbowsX"/>
 *   <property value="92,92,92,92" name="elbowsY"/>
 *   <property value="East_1" name="fromPort"/>
 *   <property value="West_1" name="toPort"/>
 *   <property value="success" name="label"/>
 * </pageflow-object>
 * <pageflow-object id="formbeanprop:Orders_LookUp.findOrder.
 *    FindOrderController.FindOrdersForm#customer_name#java.lang.String"/>
 * <pageflow-object id="formbeanprop:Orders_LookUp.findOrder.
 *    FindOrderController.FindOrdersForm#order_id#java.lang.String"/>
 * <pageflow-object id="formbean:Orders_LookUp.findOrder.FindOrderController.
 *    FindOrdersForm"/>
 * <pageflow-object id="action-call:@page:orderResults.jsp@#@action:findOrders.
 *    do#Orders_LookUp.findOrder.FindOrderController.FindOrdersForm@">
 *   <property value="564,510,510,456" name="elbowsX"/>
 *   <property value="92,92,81,81" name="elbowsY"/>
 *   <property value="West_1" name="fromPort"/>
 *   <property value="East_0" name="toPort"/>
 * </pageflow-object>
 * </view-properties>
 * ::
 */
public class FindOrderController extends PageFlowController
{
    // Uncomment this declaration to access Global.app.
    //
    //     protected global.Global globalApp;
    //
    // For an example of page flow exception handling see the example
    // "catch" and "exception-handler"
    // annotations in {project}/WEB-INF/src/global/Global.app
    /**
     * This method represents the point of entry into the pageflow
     * @jpf:action
     * @jpf:forward name="success" path="findOrderForm.jsp"
     */
    protected Forward begin()
    {
        return new Forward("success");
    }
    /**
     * @jpf:action
     * @jpf:forward name="success" path="orderResults.jsp"
     */
    protected Forward findOrders(FindOrdersForm form)
    {
        return new Forward("success");
    }

    /**
     * FormData get and set methods may be overwritten by the Form Bean editor.
     */
    public static class FindOrdersForm extends FormData
    {
        private String order_id;

        private String customer_name;

        public void setCustomer_name(String customer_name)
        {
            this.customer_name = customer_name;
        }
        public String getCustomer_name()
        {
            return this.customer_name;
        }
        public void setOrder_id(String order_id)
        {
            this.order_id = order_id;
        }
        public String getOrder_id()
        {
            return this.order_id;
        }
    }
}
Note: You might see two "File could not be found" warnings (indicated by a green squiggle) in the Page Flow Designer. You can ignore them, as they refer to files that you will create in the next two steps.
Create findOrderForm.jsp
Next, you need to create one of the two JSPs required for the page flow to run successfully. findOrder.jsp provides the presentation logic for the initial portlet view. From this portlet, you can launch the page flow by submitting a customer name. In this example, the page flow is launched when the Order LookUp portlet hears a name submitted on the Customer Lookup portlet.
To create findOrderForm.jsp, use this procedure.
- The file
findOrderForm.jspappears in the file tree underOrders_LookUp/findOrders. - The text "New Web Application Page" appears in the JSP Designer (Figure 4-42). This is the default JSP.
- Copy the code sample in Listing 4-8 and paste it into the JSP Designer.
Figure 4-42 JSP Designer with Default JSP Design View

Listing 4-8 findOrderForm.jsp Sample Code
<%@ page language="java" contentType="text/html;charset=UTF-8"%>

<%@ taglib uri="netui-tags-databinding.tld" prefix="netui-data"%>
<%@ taglib uri="netui-tags-html.tld" prefix="netui"%>
<%@ taglib uri="netui-tags-template.tld" prefix="netui-template"%>

<netui:html>
    <head>
        <title>
            Find Order
        </title>
    </head>
    <body>
        <p> Find Order </p>

       <%= //session.getAttribute("customerName")
       %>
<netui:form action="findOrders">
<table>
<tr valign="top">
<td>Customer_name:</td>
<td>
<netui:textBox dataSource="{actionForm.customer_name}"/>
</td>
</tr>
<tr valign="top">
<td>Order_id:</td>
<td>
<netui:textBox dataSource="{actionForm.order_id}"/>
</td>
</tr>
</table>
<br/>
<netui:button value="Find Orders" type="submit"/>
</netui:form>
</body>
</netui:html>
Create orderResults.jsp
The second JSP you need to create is orderResults.jsp. This file provides the presentation logic for displaying the results of the order lookup for the customer specified in the Customer Name or Order ID fields; however, in this example, it will return order information for the customer name submitted in the Customer Lookup portlet.
To create orderResults.jsp, use this procedure.
- Copy the code sample in Listing 4-9 and paste it into the JSP Designer.
Listing 4-9 orderResults.jsp Code Sample
<%@ page language="java" contentType="text/html;charset=UTF-8"%>
<%@ taglib uri="netui-tags-databinding.tld" prefix="netui-data"%>
<%@ taglib uri="netui-tags-html.tld" prefix="netui"%>
<%@ taglib uri="netui-tags-template.tld" prefix="netui-template"%>
<netui:html>
    <head>
        <title>
            Web Application Page
        </title>
    </head>
    <body>
        <p>
       Customer Name: <%=session.getAttribute("customerName")
       %>
       <%
        session.setAttribute("customerName", "");
       %>
        <netui:form action="findOrders">

            <netui:label value="{actionForm.customer_name}"/>
        </netui:form>
        <br>
        Order 001<br>
        Order 002<br>
        Order 003<br>
        Order 004<br>
        <br>

    </body>
</netui:html>
Note: If you reopen FindCustomerController.jpf after saving both JSPs, you will see that the warnings described in the note following Listing 4-7 no longer appear.
Create the Portlet File
The portlet file, FindOrderController.portlet, is the container for the page flow and the JSPs you just created. This is the file to which you'll attach the backing file and implement the event handlers necessary to achieve interportlet communications.
To create the Order Lookup portlet, use this procedure.
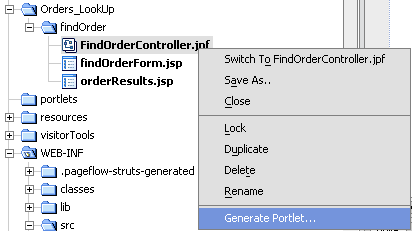
- Right-click
FindOrderController.jpfto open a context menu and select Generate portlet... (Figure 4-43)
Figure 4-43 Generating FindOrderController.portlet
 FindOrderController.portlet" title="Generating
 FindOrderController.portlet" width="403" height="247" align="middle" border="0" hspace="0" vspace="0">
Attach the Backing File
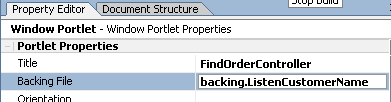
Now, you will attach the backing file ListenCustomerName.java to the portlet (FindOrderController.portlet). As described in Step 2: Create the Backing Files, this file contains business logic that will fetch information regarding the orders posted by the customer whose name was submitted in the Customer Lookup portlet.
To attach the backing file, use this procedure:
Figure 4-44 Attaching ListenCustomerName.java to the Portlet
 ListenCustomerName.java to the Portlet" title="Attaching
 ListenCustomerName.java to the Portlet" width="395" height="121" align="middle" border="0" hspace="0" vspace="0">
Note: Do not include the filetype (.java). WebLogic Workshop interprets the dot-separators in this field as filepath separators and, if .java is included, will look for a file called java in a non-existent folder called backing/FindCustomerBacking.
Create the Event Handlers
Finally, you need to create the event handlers for this portlet. In this step, you will select the event handler types, identity the portlets to which they will listen, and define the actions they will fire upon detecting the prescribed event.
To create the event handlers, use this procedure:
- With the portlet open in the Portlet Designer (Figure 4-30), locate in the Portlet Window section of the Property Editor the property Event Handlers.
- Mouse over the Event Handlers' data entry field (it will read "No event handlers") to open the field for edit.
The Event Handler tool appears (Figure 4-45).
Figure 4-45 Event Handler Tool
A menu opens, listing the available event handlers (Figure 4-46).
Figure 4-46 Event Handler Menu
Handle Custom Event appears in the Events list and additional fields appear on the dialog box (Figure 4-47).
Figure 4-47 Event Handler Tool with Handle Custom Event Selected
- Fill out the Handle Custom Event fields as described in Table 4-2.
A list of actions appears (Figure 4-48).
|
handleCustomEvent1 (this default value should appear when you select Handle Custom Event from the Add Handler list) |
|
Note: This option only appears if a backing file is attached to the portlet; if it does not appear, ensure that you completed Attach the Backing File successfully).
Invoke BackingFile Method appears in the Event Handler list and the right pane of the dialog box reformats as shown in Figure 4-49.
Figure 4-49 Event Handler with Invoke BackingFile Method Added as Action
The Event Handler tool should look like the example in Figure 4-50.
Figure 4-50 Event Handler Tool Completed for findCustomer Portlet

Summary
At this point, you have completed the Order Lookup Portlet for the ipcText Web application. To verify that you've created all files necessary, compare the Orders_LookUp folder in your file tree with that in Figure 4-51. Your file tree should match the tree in the example.
Figure 4-51 Orders_LookUp Folder with Order Lookup Portlet Complete
 Orders_LookUp Folder with Order Lookup Portlet Complete" title="
Orders_LookUp Folder with Order Lookup Portlet Complete" width="252" height="115" align="middle" border="0" hspace="0" vspace="0">
Step 5: Create the Customer Lookup Portlet
The Customer Lookup portlet is the last portlet you will create for this exercise. This portlet is where a user will enter a customer's name and submit it to the system. This submission will create events that the portlets created in Step 3: Create the Customer Lookup Results Portlet and Step 4: Create the Orders Lookup Portlet will hear and fire appropriate actions.
Note: To save you time and to reduce the chance of entry errors when creating these files, we have provided the necessary code in this document. If you are reading this online (HTML), you can simply cut and paste the code into the appropriate empty file. If you are using a hardcopy or PDF version of this document and cannot obtain an online copy, you can type the code exactly as it appears in the code samples.
Create the Page Flow (FindCustomerController.jpf)
FindCustomerController.jpf establishes the order in which pages are rendered in the Customer Lookup portlet. This page flow executes after a name is submitted on this portlet. You create the Customer Lookup page flow exactly as you create the other page flows in this exercise, although obviously with different data included.
Note: Do not confuse this FindCustomerController.jpf with FindCustomerController.jpf created in Step 3: Create the Customer Lookup Results Portlet. The identical names are an idiosyncrasy of this demonstration.
To create the FindCustomerController.jpf, use this procedure:
- A folder called
findCustomerappears underportletsin the file tree. - Two files,
FindCustomerController.jpfandindex.jspappear underportlets/findCustomer. - A default page flow schematic appears in the Page Flow Designer.
- Highlight the entire contents of the Page Flow Designer and delete it, so that the Source View is empty.
- Copy the code sample in Listing 4-10 and paste it into the empty Page Flow Designer Source View.
Listing 4-10 FindCustomerController.jpf Code Sample (Second Version)
package portlets.findCustomer;
import com.bea.wlw.netui.pageflow.FormData;
import com.bea.wlw.netui.pageflow.Forward;
import com.bea.wlw.netui.pageflow.PageFlowController;

/**
 * @jpf:controller
 * @jpf:view-properties view-properties::
 * <!-- This data is auto-generated. Hand-editing this section is not
 * recommended. -->
 * <view-properties>
 * <pageflow-object id="pageflow:/portlets/findCustomer/
 * FindCustomerController.jpf"/>
 * <pageflow-object id="action:begin.do">
 *   <property value="80" name="x"/>
 *   <property value="100" name="y"/>
 * </pageflow-object>
 * <pageflow-object id="page:index.jsp">
 *   <property value="240" name="x"/>
 *   <property value="100" name="y"/>
 * </pageflow-object>
 * <pageflow-object id="forward:path#success#index.jsp#@action:begin.do@">
 *   <property value="116,160,160,204" name="elbowsX"/>
 *   <property value="92,92,92,92" name="elbowsY"/>
 *   <property value="East_1" name="fromPort"/>
 *   <property value="West_1" name="toPort"/>
 *   <property value="success" name="label"/>
 * </pageflow-object>
 * <pageflow-object id="page:result.jsp">
 *   <property value="580" name="x"/>
 *   <property value="100" name="y"/>
 * </pageflow-object>
 * <pageflow-object id="action:findCustomer.do#portlets.findCustomer.
 * FindCustomerController.FindCustomerForm">
 *   <property value="420" name="x"/>
 *   <property value="100" name="y"/>
 * </pageflow-object>
 * <pageflow-object id="forward:path#success#result.jsp#@action:findCustomer.
 *    do#portlets.findCustomer.FindCustomerController.FindCustomerForm@">
 *   <property value="456,500,500,544" name="elbowsX"/>
 *   <property value="92,92,92,92" name="elbowsY"/>
 *   <property value="East_1" name="fromPort"/>
 *   <property value="West_1" name="toPort"/>
 *   <property value="success" name="label"/>
 * </pageflow-object>
 * <pageflow-object id="formbean:portlets.findCustomer.FindCustomerController.
 *    FindCustomerForm"/>
 * <pageflow-object id="formbeanprop:portlets.findCustomer.
 *    FindCustomerController.FindCustomerForm#name#java.lang.String"/>
 * <pageflow-object id="formbeanprop:portlets.findCustomer.
 *    FindCustomerController.FindCustomerForm#company#java.lang.String"/>
 * <pageflow-object id="action-call:@page:index.jsp@#@action:findCustomer.
 *    do#portlets.findCustomer.FindCustomerController.FindCustomerForm@">
 *   <property value="276,330,330,384" name="elbowsX"/>
 *   <property value="92,92,92,92" name="elbowsY"/>
 *   <property value="East_1" name="fromPort"/>
 *   <property value="West_1" name="toPort"/>
 * </pageflow-object>
 * </view-properties>
 * ::
 */
public class FindCustomerController extends PageFlowController
{

    // Uncomment this declaration to access Global.app.
    //
    //     protected global.Global globalApp;
    //
    // For an example of page flow exception handling see the example
    // "catch" and "exception-handler"
    // annotations in {project}/WEB-INF/src/global/Global.app

    /**
     * This method represents the point of entry into the pageflow
     * @jpf:action
     * @jpf:forward name="success" path="index.jsp"
     */
    protected Forward begin()
    {
        return new Forward("success");
    }

    /**
     * @jpf:action
     * @jpf:forward name="success" path="result.jsp"
     */
    protected Forward findCustomer(FindCustomerForm form)
    {
        return new Forward("success");
    }

    /**
     * FormData get and set methods may be overwritten by the Form Bean editor.
     */
    public static class FindCustomerForm extends FormData
    {
        private String company;

        private String name;

        public void setName(String name)
        {
            this.name = name;
        }

        public String getName()
        {
            return this.name;
        }

        public void setCompany(String company)
        {
            this.company = company;
        }

        public String getCompany()
        {
            return this.company;
        }
    }
}
Note: You might see a "File could not be found" warning (indicated by a green squiggle) in the Page Flow Designer. You can ignore this warning, as it refers to a file, result.jsp, that you will create in Create result.jsp.
Update index.jsp
Since this is the "launching pad" for the three page flows in the Web application (that is, when a name is submitted in this portlet, through interportlet communications, page flow actions will occur on the portlets created in Step 3: Create the Customer Lookup Results Portlet and Step 4: Create the Orders Lookup Portlet, as well as this one), this exercise will conform to the best practice of beginning this page flow with index.jsp file.
This JSP provides the presentation logic for the Customer Lookup portlet before a customer name is submitted. Once a name is submitted, that logic will be superseded by the presentation logic in result.jsp, which we will create in the next step. When you created the page flow in Create the Page Flow (FindCustomerController.jpf), the template for index.jsp was also created and placed in portlets/findCustomer.
To create index.jsp, use this procedure.
Copy the code sample in Listing 4-11 and paste it into the JSP Designer.
Listing 4-11 index.jsp Code Sample
<%@ page language="java" contentType="text/html;charset=UTF-8"%>
<%@ taglib uri="netui-tags-databinding.tld" prefix="netui-data"%>
<%@ taglib uri="netui-tags-html.tld" prefix="netui"%>
<%@ taglib uri="netui-tags-template.tld" prefix="netui-template"%>
<netui:html>
<head>
<title>
Web Application Page
</title>
</head>
<body>
<p> New Web Application Page </p>
<netui:form action="findCustomer">
<table>
<tr valign="top">
<td>Company:</td>
<td>
<netui:textBox dataSource="{actionForm.company}"/>
</td>
</tr>
<tr valign="top">
<td>Name:</td>
<td>
<netui:textBox dataSource="{actionForm.name}"/>
</td>
</tr>
</table>
<br/>
<netui:button value="findCustomer" type="submit"/>
</netui:form>
</body>
</netui:html>
Create result.jsp
Next, create the result.jsp file. This file contains the presentation logic that will format the display of information returned to this portlet upon successful rendering of the FindCustomerController page flow. This logic will supersede that contained in index.jsp.
To create result.jsp, use this procedure.
The New File dialog box appears. Ensure that Web User Interface and JSP File are selected. If not, select them now.
result.jspappears underportlets/findCustomer.- A default JSP (characterized by the text "New Web Application Page" appears in the JSP Designer.
- Copy the code sample in Listing 4-12 and paste it into the JSP Designer.
Listing 4-12 result.jsp Code Sample
<%@ page language="java" contentType="text/html;charset=UTF-8"%>
<%@ taglib uri="netui-tags-databinding.tld" prefix="netui-data"%>
<%@ taglib uri="netui-tags-html.tld" prefix="netui"%>
<%@ taglib uri="netui-tags-template.tld" prefix="netui-template"%>
<netui:html>
    <head>
        <title>
            Find Customer Result
        </title>
    </head>
    <body>
        <br>
            Customer Information:
        <br>
        <br>

        <netui:form action="findCustomer">

        <b>Name: <netui:label value="{actionForm.name}"/>
        <br>
        Address: 4001 Discovery Drive<br>
        City: Boulder<br>
        State: CO<br></b>
        </b>
        </netui:form>
    </body>
</netui:html>
Note: If you reopen FindCustomerController.jpf after saving result.jsp, you will see that the warning described in the note following Listing 4-10 is gone.
Create the Portlet File
The portlet file, FindOrderController.portlet, is the container for the page flow and the JSPs you just created. This is the file to which you'll attach the backing file and implement the event handlers necessary to achieve interportlet communications.
To create the Customer Lookup portlet, use this procedure.
- Under
portlets/findCustomer, right-clickFindCustomerController.jpfto open the file's context menu.
Attach the Backing File
Now, you will attach the backing file FindCustomerBacking.java to the portlet (FindCustomerController.portlet).
To attach the backing file, use this procedure:
Note: Do not include the filetype (.java). WebLogic Workshop interprets the dot-separators in this field as filepath separators and, if .java is included, will look for a file called java in a non-existent folder called backing/FindCustomerBacking folder.
Create the Event Handler
Finally, you need to create the event handler for this portlet (unlike the portlets created in Step 3: Create the Customer Lookup Results Portlet and Step 4: Create the Orders Lookup Portlet, this portlet uses only one event handler). In this step, you will select the event handler type, identity the portlets to which it will listen, and define the action it will fire upon detecting the prescribed event.
To create the event handler, use this procedure:
- With the portlet open in the Portlet Designer, locate in the Portlet Window section of the Property Editor the property Event Handlers.
- Mouse over the Event Handlers' data entry field (it will read "No event handlers") to open the field for edit.
The Event Handler tool appears (Figure 4-45).
Figure 4-53 Event Handler Tool
A menu opens, listing the available event handlers (Figure 4-54).
Figure 4-54 Event Handler Menu
Handle PageFlow Event appears in the Events list and additional fields appear on the dialog box (Figure 4-55).
Figure 4-55 Event Handler Tool with Handle PageFlow Event Selected
- Fill out the Handle Custom Event fields as described in Table 4-3.
A list of actions appears (Figure 4-56).


|
handlePageFlowEvent1 (this default value should appear when you select Handle Custom Event from the Add Handler list) |
|
Note: This option only appears if a backing file is attached to the portlet; if it does not appear, ensure that you completed Attach the Backing File successfully).
Invoke BackingFile Method appears in the Event Handler list and the right pane of the dialog box reformats as shown in Figure 4-57.
Figure 4-57 Event Handler with Invoke BackingFile Method Added as Action

The Event Handler tool should look like the example in Figure 4-58.
Figure 4-58 Event Handler Tool Completed for findCustomer Portlet

Summary
With the event handlers created for the Customer Lookup portlet, you have finished creating all three portlets for this exercise. To verify that you have created all of the necessary files, please compare the file tree in your current version of WebLogic Workshop to the example in Figure .
Figure 4-59 File Tree After All Portlets are Complete

The next step is to add the three portlets you just created to a portal, as described in Step 6: Create and Populate the Portal File.
Step 6: Create and Populate the Portal File
In this step, you will create the portal, characterized by a .portal file, that will contain the conversant portlets and add these portlets to the portal.
Create the Portal File
To create the portal file, use this procedure.
- In the file tree, right-click the Web application name (ipcTest) and select New>Portal (Figure 4-60).
The New File dialog box appears (Figure 4-61).
Figure 4-61 New File Dialog Box Configured for Creating a New Portal
- A portal schematic will appear in the Portal Designer (Figure 4-62).
- The three portlets created for this exercise appear in the Data Palette (Figure 4-63).
- The file
AW.portalappears in the file tree at the same level as the individual portlet folders (Figure 4-64).
Figure 4-60 Creating a New Portal


Figure 4-62 Portal Schematic Appears in the Portal Designer

Figure 4-63 Data Palette Showing New Portlets

Figure 4-64 AW.portal in the File Tree

Add Portlets to the Portal
The last step in actually creating the portal application is to add the newly created portlets to the newly created portal. To do so, use this procedure.
- Select each portlet in the Data Palette and drag it to the appropriate position in the portal, as illustrated in Figure 4-65.
Figure 4-65 Adding Portlets to the Portal

Step 7: Test the Portal
This final step will determine if you have achieved interportlet communications as intended by this exercise. You will start WebLogic Server, run the portal, and submit a user's name. When you submit the name, the portlets should communicate between themselves and return data particular to that user.
To test the portal, use this procedure.
Note: Ensure that AW.portal is open in WebLogic Workshop.
A progress meter (Figure 4-66), indicating that the server is starting, appears.
Figure 4-66 Server Startup Progress Meter
The server takes a few moments to start. When the progress meter closes, the server is running. Note the green Server Running indicator at the bottom of WebLogic Workshop (Figure 4-67).
Figure 4-67 Server Running Indicator
- Run the Portal by clicking the Run icon on the Toolbar (Figure 4-68).
The portal opens in a test browser (Figure 4-69).
Figure 4-69 Portal Opens in a Test Browser


Note: Clicking this icon causes the debugger to run before the portal renders.
To test the portal (that is, to demonstrate the IPC has been successfully achieved), do the following:
All three portlets refresh with Bob Smith's customer and order information (Figure 4-70).
Figure 4-70 Test Browser with Customer and Order Information