In this step, you will create a simple "hello world" web application: a project and a JSP.
The tasks in this step are:
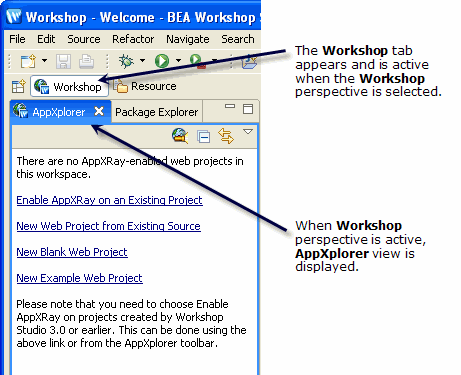
Depending on how you installed Workshop Studio, it may start in Resource perspective (the Eclipse standard starting perspective) or Workshop perspective (the Workshop Studio perspective).
Before starting to work with Workshop Studio features, you should set Workshop perspective. To do this:
The Eclipse IDE requires that all web application files be grouped into a project--a single top-level folder. Eclipse then generates metadata files and uses the project folder as a basis for building the web application and deploying it to a server. When projects are created, the features that the project will use (called facets) are specified so that the appropriate libraries and settings are added to the project.
Workshop Studio requires that web applications be created in a Dynamic Web Project in order to access the features of Workshop Studio.
By default, the project is created as a folder in the current workspace folder. If you wish, you may change the workspace before starting the tutorial by clicking File > Switch Workspace.
For this tutorial, we will create a new (empty) project. To create a new project:

Enter the name of your project folder into the Project name field. The project is created by default in the current workspace.
Click Next to continue.

The project files are created and appear in the AppXplorer view.

To create a JSP file:

Double click on the project folder name to expand it and select the WebContent subfolder as the parent folder for the JSP. Then fill in the file name in the File name field. Click Finish to create the JSP.
Click one of the following arrows to navigate through the tutorial:
|
|
|