7 Setting Up Inventory
This chapter contains the following topics:
|
Note: This chapter contains important information that you need if you use JD Edwards EnterpriseOne Inventory Management to manage parts inventories. |
7.1 Understanding Inventory
You can plan for future parts needs by reviewing information that the system provides about parts and part quantities. For example, you can monitor quantity information about how many parts are on demand, available in supply, and available to be promised. To use quantity information to determine the current and future inventory needs, you must understand these concepts.
7.1.1 Stocking Types
In most inventory environments, such as a manufacturing, nonstock parts are rare. Within the maintenance organization, however, the demand for parts is often not predictable; it is impractical to stock every part for which a future demand might exist. Generally, maintenance planners consider inventory as a way to handle emergency replacement parts, and as a temporary holding area for stock and nonstock parts.
This table lists the three stocking types that exist within the maintenance organization:
| Stocking Type | Description |
|---|---|
| Stock parts | The most vital parts for which you know predictable demand exists, such as parts required for routinely scheduled maintenance tasks. Typically, you need to maintain a physical inventory of these parts. |
| Pseudo nonstock parts | Parts for which you do not need to keep a physical on-hand quantity, such as parts that are required for future maintenance tasks, or parts that are easily and quickly acquired. Typically, you do not need to maintain a physical inventory of these parts; but you do want to maintain inventory records to help with planning and to simplify purchasing. You can set up pseudo nonstock parts with an inventory master record and indicate an on-hand quantity of zero. |
| Nonstock parts | Parts for which you rarely have a need and for which you do not need an inventory master record. |
7.1.2 On-Hand Quantity Versus Available Quantity
On-hand quantity refers to the number of parts that are physically in stock in the primary unit of measure. On-hand quantity of parts can be affected by:
-
Variances recorded following a physical inventory.
-
Daily removals, additions, or transfers of parts.
-
Shipment confirmations or updated sales information.
-
Locations with lots on hold, such as parts requiring inspection or placed in quarantine.
Available quantity refers to the number of parts that you can use, based on user-defined calculations. You determine how the system calculates part availability by defining the factors that subtract from, or add to, the available quantity of a part. This calculation can include quantities that do not immediately affect on-hand amounts.
For example, you can set up the availability calculation to subtract any quantities that are committed to work orders, and to add any quantities that are included in purchase orders or in transit.
7.1.3 Commitments
When you set up general planning constants, you can specify whether the system uses hard or soft commitments to commit parts to a work order.
When you specify hard commitment, the system:
-
Indicates an actual reduction in inventory at the point that the maintenance task creates a demand for the part.
-
Specifies a location from which to remove the part.
When you specify soft commitment, the system:
-
Does not indicate an actual reduction in inventory at the point that the maintenance task creates a demand for the part.
-
Does not specify a location from which to remove the part.
This diagram illustrates how JD Edwards EnterpriseOne Inventory Management commits inventory:
Figure 7-1 How Inventory Management commits inventory
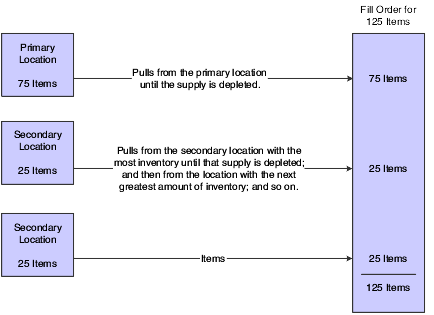
Description of ''Figure 7-1 How Inventory Management commits inventory''
7.1.4 Supply and Demand Quantities
The system uses supply and demand inclusion rules to calculate the supply and demand quantities for an inventory part. Unlike a manufacturing environment, where work orders create a supply of parts or materials, work orders in a maintenance environment create a demand for parts.
Starting with the requested date on the work order parts list, the system calculates the demand quantity from these sources:
-
Work order requirements and parts lists: the quantity required minus the quantity issued.
-
Safety stock: any quantity reserved as protection against fluctuations in demand and supply.
Starting with the requested date on the purchase order, the system calculates the supply quantity from these sources:
-
On-hand inventory: the quantity on hand minus hard commitments and quantities on work orders.
-
Purchase orders: the quantity that is entered on purchase orders.
7.2 Setting Up Inventory in the Item Master
To ensure that maintenance planning features function properly, several fields on Item Master Revisions and Item/Branch Plant Information require special attention. You can access both forms within JD Edwards EnterpriseOne Inventory Management.
This section discusses how to:
-
Enter item master records.
-
Enter item/branch plant information.
-
Enter additional system information.
-
Assign parts to a master planning family.
7.2.1 Forms Used to Set Up Inventory in the Item Master
| Form Name | FormID | Navigation | Usage |
|---|---|---|---|
| Work With Item Master Browse | W4101E | Inventory Master/Transactions (G4111), Item Master | Locate and select existing inventory items. |
| Item Master Revisions | W4101A | Click Add on the Work with Item Master Browse form, or select an item and click Select. | Enter Item Master records. |
| Work With Item Branch | W41026E | Select an item on the Work With Item Master Browse form, and then select Item Branch from the Row menu. | Locate existing branch/plant information for an item. |
| Item/Branch Plant Info | W41026A | Click Add on the Work With Item Branch form, or select a branch record and click Select. | Enter item branch/plant information. |
| Additional System Information | W4101C | Select an item on the Work With Item Master Browse form, and then select Addl System Info from the Row menu. | Enter additional system information.
Specify the rules by which the system plans for, orders, and issues parts. |
| Category Codes | W4101B | Select an item on the Work With Item Master Browse form, and then select Category Codes from the Row menu. | Assign parts to a master planning family.
To aid in parts planning and inquiry functions, you can assign each part to a master planning family. If you did not enter a planner number or a buyer number on either the Item Master Revisions form or Item/Branch Plant Info. form, you must enter a value for the master planning family. |
7.2.2 Entering Item Master Records
Access the Item Master Revisions form.

- G/L Class (general ledger class)
-
Enter a value from user-defined code (UDC) table 41/9 (G/L Posting Category) that identifies the general ledger offset that the system uses when it searches for the account to which it posts the transaction.
If you do not want to specify a class code, you can enter **** (four asterisks) in this field.
You can use automatic accounting instructions (AAIs) to predefine classes of automatic offset accounts for:
-
JD Edwards EnterpriseOne Inventory Management.
-
JD Edwards EnterpriseOne Procurement.
-
JD Edwards EnterpriseOne Sales Order Management.
Here are some examples of general ledger class codes that you might assign:
IN20: Direct Ship Orders
IN60: Transfer Orders
IN80: Stock Sales
The system can generate accounting entries based upon a single transaction. For example, a single sale of a stock item can initiate the generation of accounting entries similar to these:
-
Sales-Stock (Debit) xxxxx.xx.
-
A/R Stock Sales (Credit) xxxxx.xx.
-
Posting Category: IN80.
-
Stock Inventory (Debit) xxxxx.xx.
-
Stock COGS (Credit) xxxxx.xx.
The system uses the class code and the document type to find the AAI.
-
- Line Type
-
Enter a code that controls how the system processes lines on a transaction.
The line type controls the systems with which the transaction interfaces, such as these:
-
JD Edwards EnterpriseOne General Ledger.
-
JD Edwards EnterpriseOne Job Cost.
-
JD Edwards EnterpriseOne Accounts Payable.
-
JD Edwards EnterpriseOne Accounts Receivable.
-
JD Edwards EnterpriseOne Inventory Management.
The line type also specifies the conditions under which a line prints on reports, and it is included in calculations. Values include:
S: Stock item
J: Job cost
N: Nonstock item
F: Freight
T: Text information
M: Miscellaneous charges and credits
W: Work order
You should select a line type according to the stocking method for the part. For example, if you are creating a master for a pseudo-nonstock item (one for which you do not want to maintain physical on-hand quantity but that you want to track as an inventory item), select a line type that interfaces with inventory.
Line type N has special logic that the system uses to process parts that are truly nonstock and for which you do not maintain inventory master information.
-
You must complete these fields for each maintenance part that needs a master record.
|
Note: The values that you enter in these fields are the default values in the same fields on the Item/Branch Plant Information form. |
To use parts planning functions in CAM, you must enter a value in at least one of these fields for each part:
-
Planner Number
-
Buyer Number
-
Master Planning Family
The Planner Number and Buyer Number fields are located on the Item Master form, as well as on the Item/Branch Plant Info. form. The Master Planning Family field is located on the Category Codes form.
7.2.4 Entering Additional System Information
Access the Additional System Information form.
You must complete the fields on this form to specify the rules by which the system plans for, orders, and issues parts.
- Order Policy Code
-
Enter a value from UDC H41/OP (Order Policy Code) that specifies the rules for inventory reordering in the Requirements Planning and Procurement systems. Values are:
0: Reorder point (Not planned by MPS/MRP/DRP)
1: Lot-for-lot or as required.
2: Fixed order quantity.
3: Economic order quantity (EOQ).
4: Periods of supply.
5: Rate scheduled item.
Note:
These values are hard-coded.You should enter a 1 in this field.
- Issue Type Code
-
Enter a value from UDC 41/IT (Issue Type Code) that indicates how the system issues each component in the bill of material from stock.
In Shop Floor Management, the issue type code indicates how the system issues a part to a work order. Values are:
Blank: Shippable end item.
I: Manual issue.
F: Floor stock (there is no issue).
B: Backflush (when the part is reported as complete).
P: Preflush (when the parts list is generated).
U: Super backflush (at the pay-point operation).
S: Subcontract item (send to supplier).
You can issue a component in more than one way within a specific branch/plant by using different codes on the bill of material and the work order parts list. The bill of material code overrides the branch/plant value.
Note:
With the exception of floor stock items, such as small hardware, fasteners, and so on, you should enter an I in this field to indicate a manual issue for maintenance parts. - Planning Fence Rule
-
Enter a value from UDC 34/TF (Time Fence Rule) that the system uses in conjunction with the Planning Time Fence Days field to determine how forecast demand or actual customer demand is used. For example, you can enter these values:
S: Tells the system to plan using customer demand before the time fence and forecast after the time fence.
F: Tells the system to plan using forecast before the time fence and forecast plus customer demand after the time fence.
If you enter 5 in the Planning Time Fence Days field and S in this field, then the system uses only customer demand for the regeneration for the first five days. After five days, the system uses the forecast for the regeneration.
Values are:
C: Customer demand before, greater of forecast or customer demand after.
F: Forecast before, forecast plus customer demand after.
G: Greater of forecast or customer demand before, forecast after.
S: Customer demand before, forecast after.
1: Zero before, forecast after 3 Zero before, forecast plus customer demand after.
- Planning Fence
-
Enter the number of days that the system uses in conjunction with the time fence rule to determine how the forecast is used.
Enter the number of days after the start date when the time fence rule changes from the first rule to the second rule. For example, if the time fence rule is S (customer demand before the time fence, forecast after the time fence), the generation start date is January 03, and the planning time fence is 3 days, the system plans using customer demand through January 06. Beginning on January 07, the system plans using the forecast.
Note:
Notice that the system does not count the generation start date; that is, the day after the generation start date is day one.For manufactured items, the system counts working days, as defined in the Shop Floor Calendar form.
For purchased items, the system counts calendar days.
- Freeze Fence
-
Enter the number of days from the generation start date within which the system does not generate action messages.
For example, if the generation start date is January 03, and the freeze time fence is 3 days, the JD Edwards EnterpriseOne Requirements Planning system does not generate messages with required dates that are less than or equal to January 06.
Note:
The system does not count the generation start date; that is, the day after the generation start date is day one.For manufactured items, the system counts working days, as defined in the Shop Floor Calendar form.
For purchased items, the system counts calendar days.
7.2.5 Assigning Parts to a Master Planning Family
Access the Category Codes form.
- Commodity Class
-
Enter a value from UDC 41/P1 (Commodity Class Code) that represents an item property type or classification, such as commodity type, planning family, or so forth.
The system uses this code to sort and process like items. This field is one of six classification categories available primarily for purchasing purposes.
- Master Planning Family
-
Enter a value from UDC 41/P4 (Master Planning Family) that represents an item property type or classification, such as commodity type or planning family.
The system uses this code to sort and process like items. This field is one of six classification categories available primarily for purchasing purposes.
7.3 Setting Up Inventory Management and Procurement for CAM Users
The JD Edwards EnterpriseOne Inventory Management and JD Edwards EnterpriseOne Procurement setup tasks described in this section have special implications for JD Edwards EnterpriseOne CAM users.
This section provides overviews of line types and stocking type codes and discusses how to:
-
Set up line types.
-
Set up branch/plant constants.
7.3.1 Understanding Line Types
Line types control how parts transactions interface with the JD Edwards EnterpriseOne General Ledger and JD Edwards EnterpriseOne Inventory Management. Specifically, the line type that you assign to a part is a code that:
-
Controls with which of four systems the transaction interfaces, such as JD Edwards EnterpriseOne General Ledger, JD Edwards EnterpriseOne Inventory Management, JD Edwards EnterpriseOne Accounts Receivable, and JD Edwards EnterpriseOne Accounts Payable.
-
Specifies the conditions for printing a line on reports.
-
Specifies the conditions for including a line in calculations.
You set up line types in JD Edwards EnterpriseOne Procurement. Depending on the planning and reporting needs, you might need to set up an additional line type to differentiate pseudo-nonstock part transactions from genuine nonstock part transactions.
|
Important: You need to be thoroughly familiar with order line types before you add or modify them. Extreme damage to the system can occur if you do not set up order line types with precision and logic. |
7.3.2 Understanding Stocking Type Codes
When setting up stocking type codes from the UDC 41/I (Stocking Type Code), do not use hard-coded stocking types. Instead, create your own stocking type and enter an M or P in the second description line. Do not enter a K (kit); this code is reserved for sales order processing.
|
Note: You can use the hard-coded stocking types if you are actually using the parts for their intended purposes. |
7.3.3 Forms Used to Set Up Inventory Management and Procurement for CAM Users
| Form Name | FormID | Navigation | Usage |
|---|---|---|---|
| Line Type Constants Revisions | W40205B | Procurement System Setup (G43A41), Order Line Types
Click Add on the Work With Line Types form, or select a line type and click Select. |
Set up line types. |
| Branch/Plant Constants | W41001H | Inventory Setup (G4141), Branch/Plant Constants
Click Add on the Work With Branch/Plant Constants form, or select a branch/plant and click Select. |
Set up branch/plant constants.
Ensure that inventory transactions create journal entries in the general ledger. In addition, you can specify a description for inventory transactions. |
7.3.4 Setting Up Line Types
Access the Line Type Constants Revisions form.
These fields have special significance for JD Edwards EnterpriseOne CAM users:
- G/L Interface (general ledger interface)
-
Enter a code that indicates whether the system reflects the monetary amount or unit value of any activity containing this order line type in the general ledger.
A check mark indicates that the system reflects the monetary amount or unit value of any activity containing this order line type in the general ledger.
JD Edwards EnterpriseOne CAM users should select this option.
- Inv. Interface (inventory interface)
-
Enter a value from UDC H40/IV (Inventory Interface) that identifies the type of interface to JD Edwards EnterpriseOne Inventory Management. Values are:
Y: The dollar or unit value of any activity containing this line type will be reflected in inventory. The system also edits the item that you enter to ensure that it is a valid item. Y is the default value.
A: The system recognizes the number that you enter as a general ledger account number. The system uses this code in purchasing only.
B: The system performs edits when using format 4 in purchase order entry.
The system retrieves price data from the inventory tables, but does not update the quantity on the purchase order. This code is valid only when you have set the G/L Interface field to Y (yes). Budget checking is fully functional when you use this interface code.
D: The item in this line is an inventory item that will not affect availability or quantities.
N: The item is not an inventory item.
To verify whether the item exists in the Item Master file, use Inventory Interface N in conjunction with the Edit the Item Master for Non-Stock Items flag.
7.3.5 Setting Up Branch/Plant Constants
Access the Branch/Plant Constants form.
- Interface G/L (Y/N) [interface general ledger (yes/no)]
-
Enter a code that indicates whether inventory transactions that are processed through this branch/plant create general ledger entries.
A check mark indicates that the system creates general ledger entries for inventory transactions for this branch/plant.
- Write Units to Journal Entries
-
Enter a code that indicates whether the system moves units to the general ledger after the system records a journal entry from these programs:
-
P31111 (Work Order Inventory Issues).
-
P31112 (Work Order Completions).
-
P31802 (Work Order Journal Entries).
-
P31842 (Rate Base Journal Entries).
-
P4112 (Inventory Issues).
-
P4113 (Inventory Transfers).
-
P4114 (Inventory Adjustments).
-
P4116 (Item Re-Classification).
-
P41413 (Cycle Count Update).
-
P41610 (Tag Update).
-
P42800 (Sales Update).
-
P4312 (Receipts).
-
P4314 (Voucher Match).
-
P415021 (Update Operational Reconciliation).
-
P415101 (General Stock Movements).
-
P41514 (Bulk Manufacturing Gains/Losses).
-
P49800 (Sales Update - A7.3 ECS Version).
-
P49700 (Cycle Billing).
-
P49510 (Bulk Load Confirmation - XT49799).
-
P49515 (Bulk Load Confirm Batch - XT49799).
-
P49530 (Package Load Confirm - XT49799).
-
P49572 (Upload Gantry Data - XT49799).
-
P49710 (Bulk Delivery Confirm - XT49799).
-
P49711 (Bulk Delivery Confirm Milk Run - XT49799).
-
P49715 (Bulk Disposition - XT49799).
-
P49720 (Package Delivery Confirm - XT49799).
-
P49731 (Mass Confirm Batch - XT49799).
-
- General Ledger Explanation
-
Enter a value from UDC H41/PR (General Ledger Explanation) that Inventory Management uses to select the default description that appears on the second line of a journal entry in the general ledger. Values are:
1: Item master description (the default).
2: Primary item number.