9 Using Lot Processing
This chapter contains the following topics:
9.1 Understanding Lot Processing
Lot processing enables you to manage and maintain information about groups of items. For example, you can have the system assign lot numbers to groups of perishable items based on receipt dates to identify the items that you must sell first. You can view current information about each lot, such as the quantity of available items and the transactions that have affected the lot.
Lot control is beneficial for identifying groups of items that are components of a final product. For example, if you assign lot numbers to both bicycle tires and bicycles that are assembled from the tires, you can:
-
Identify the lot number for the tires that were used to build a specific bicycle.
-
Identify all bicycles that were assembled from a specific lot of tires.
If you later find that a particular lot of tires is defective, you can immediately identify and recall all bicycles that were assembled with the defective tires.
A lot usually contains one type of item, but you can set up system constants to enable different types of items in the same lot. If a lot contains different items, the system maintains lot information for each lot number and item. You can also set up system constants to restrict a lot to one type of item and still enable that lot to exist in multiple warehouses.
You can use one of these methods to assign lot number to items:
-
Allow the system assign lot numbers.
-
Assign the owner lot numbers.
-
Assign supplier lot numbers.
After you create a lot, the system adds a record to the Lot Master table (F4108).
9.2 Entering Lot Information
This section provides overviews of lot information and mass updates for lot expiration dates and discusses how to:
-
Set processing options for Lot Master (P4108).
-
Enter lot information for items.
-
Create lots.
-
Enter availability information.
9.2.1 Understanding Lot Information
By assigning items to lots, the system enables you to manage and maintain information about groups of items. For example, you can have the system assign lot numbers to groups of perishable items based on receipt dates to identify the items that you must sell first. You can view current information about each lot, such as the quantity of available items and the transactions that have affected the lot.
Using lots, you can:
-
Assign a lot number to an item or have the system assign it upon receipt of the item.
Lot numbers are frequently used to track inventory items. Tracking by lot numbers enables a company to manage inventory in situations such as a manufacturer's recall or to rotate perishable product.
-
Place a lot on hold when a problem occurs within the lot.
-
Assign a status to a lot, for example, to indicate that it is in quarantine or inspection.
-
Review transactions by lot.
-
Identify perishable lots so that you can sell the oldest goods first.
-
Track items that were bought or produced at the same time in case you have to retrieve those goods from the customers.
Lot control is beneficial for identifying groups of items that are components of a final product. For example, if you assign lot numbers to both bicycle tires and bicycles that are assembled from the tires, you can:
-
Identify the lot number for the tires that were used to build a specific bicycle.
-
Identify all bicycles that were assembled from a specific lot of tires.
If you later find that a particular lot of tires is defective, you can immediately identify and recall all bicycles that were assembled with the defective tires.
A lot usually contains one type of item, but you can set up system constants to enable different types of items in the same lot. If a lot contains different items, the system maintains lot information for each lot number and item. You can also set up system constants to restrict a lot to one type of item and still enable that lot to exist in multiple warehouses.
You can use one of these methods to assign lot number to items:
-
Allow the system assign lot numbers.
-
Assign the owner lot numbers.
-
Assign supplier lot numbers.
You must determine how to identify item locations and lots in the system to enable you to locate items quickly and perform daily operations efficiently. After you create a lot, the system adds a record to the Lot Master table (F4108).
9.2.1.1 Lot Information for Items
When you enter master information or branch/plant information for an item, you can specify:
-
Whether the item requires a lot number at the time of receipt.
-
The method by which lot numbers are assigned to the item.
-
Whether the system commits the inventory for the item based on lot numbers.
-
The number of days that the item can remain in inventory before expiring.
You can further specify lots by assigning serial numbers to items within the lots.
9.2.1.2 Information for New Lots
After you assign a new lot number to an item, the system creates a lot. You can enter information for the new lot on the Lot Master Revisions form of the Lot Master (P4108) program. You also can assign new lot numbers to items when you receive purchase order receipts, adjust inventory, and complete work orders. You can also assign new lot numbers for items on the Locations Revisions form of the Location Revisions (P41024) program.
You can also create a lot for items that you expect to receive in the future. Lot information can include the expiration date, grade and potency values, supplier information, and so on. You can also assign up to 10 category codes to each lot for reporting purposes.
The system maintains separate lot information for each type of item in a lot. For example, if Lot 1 contains Item A and Item B, you can enter separate lot information for each item. A lot can contain multiple items only if you set up system constants to enable more than one type of item in a lot.
Also, you can set up system constants to process a lot that contains only one type of item, but those quantities are located in multiple warehouses. For example, Lot 234 consists of one type of item; bicycle tires. In addition, Warehouse A represents the bulk warehouse, where the majority of the tires are stored. However, Warehouses B and C receive partial quantities of the same item so that Warehouse A has adequate space. When you receive the tires at Warehouses B and C, you can assign them to Lot 234 and track them through the unique lot number.
9.2.2 Understanding Mass Updates for Lot Expiration Dates
You can update lot dates for all branch/plant records when any date of any lot changes. When you enter a lot date, the system synchronizes that date across all the branches in which the item and lot reside. The system issues a warning if the lot exists in other branches or displays a window with all the dates and branches that will be changed, depending on how you set the processing option value.
You use Lot Master program (P4108) to update lot dates. Depending on how you set the Mass Update of Lot Dates processing option on the Process tab, the system updates the lots in the branch/plant records. For example, if you set the processing option to 1, all branch/plants with a specified item and specified lot are updated with the new dates. If you set the processing option to 2, the system enables you to select one or more of the date records to be updated. If you leave the processing option blank, the system updates only one of the branch/plant records that you select and does not perform a mass update.
|
Note: For the system to update all lot dates in all branches, you must set the Enable Duplicate Lots option for the branch/plant record in the system constants to 2, which enables you to have the same item and lot number in multiple branch plants. The system does not update a lot that exists in multiple branches if the item numbers that are associated with that lot are different. |
9.2.3 Forms Used to Enter Lot Information
| Form Name | FormID | Navigation | Usage |
|---|---|---|---|
| Work With Item Master Browse | W4101E | Inventory Master/Transactions (G4111), Item Master | Review items. |
| Item Master Revisions | W4101A | On the Work With Item Master Browse form, click Add. | Enter lot information for items. |
| Work With Lot Master | W4108B | Lot Control (G4113), Lot Master Revisions | Review lots. |
| Lot Master Revisions | W4108A | On the Work With Lot Master form, click Add. | Create lots. |
| Lot Dates and Quantities | W4108F | On the Work With Lot Master form, select a lot and then select Qty/Dates from the Row menu. | Enter availability information. |
9.2.4 Setting Processing Options for Lot Master (P4108)
Processing options enable you to specify the default processing for programs and reports.
9.2.4.1 Process
- 1. Update lot status
-
Specify whether to update the lot status. Values are:
Blank: Update.
1: Do not update.
- 2. Update lot grade
-
Specify whether to update the lot grade. Values are:
Blank: Update.
1: Do not update.
- 3. Update lot potency
-
Specify whether to update the lot potency. Values are:
Blank: Update.
1: Do not update.
- 4. Mass update of lot dates
-
Specify whether and how the system performs mass updates on lot dates. Values are:
Blank: The system does not perform mass updates.
1: The system automatically updates all modified dates in all branch/plants.
2: The system displays all branch/plants and enables selection of dates and branch/plants to update.
- 5. Update Country of Origin
-
Specify whether the system updates the Country of Origin field. Updating the Country of Origin field after the lot has been created poses an integrity risk. This processing option allows you to minimize the integrity risk posed by updates to the country of origin value after you create a lot. Values are:
Blank: The system allows updates to the Country of Origin field. Leave this option blank if you do not want to use Country of Origin .
1: The system issues a warning before allowing updates to the Country of Origin field.
2: The system issues a warning before allowing update to the Country of Origin field only when there is a quantity on hand for the lot.
3: The system disables the Country of Origin field for any changes.
4: The system disables the Country of Origin field for any changes only when there is a quantity on hand for the lot.
9.2.4.2 Defaults
- 1. Document type to be used when updating lot grade
-
Specify a user-defined code from UDC table (00/DT) that identifies the document type to use when updating lot grade. If you leave this processing option blank, the system uses default document type CG.
- 2. Document type to be used when updating lot potency
-
Specify a user-defined code from UDC table (00/DT) that identifies the document type to use when updating lot potency. If you leave this processing option blank, the system uses default document type CP.
9.2.4.3 Lot Options
- 1. Display Percent of Life Remaining
-
Specify whether to display the percent of life remaining. Values are:
Blank: Do not display.
1: Display.
- 2. Display Number of Days Remaining
-
Specify whether to display the number of days remaining. Values are:
Blank: Do not display.
1: Display.
- 3. Calculation Date
-
Specify the calculation date. If you leave this processing option blank, the system uses today's date.
9.2.5 Entering Lot Information for Items
Access the Item Master Revisions form.
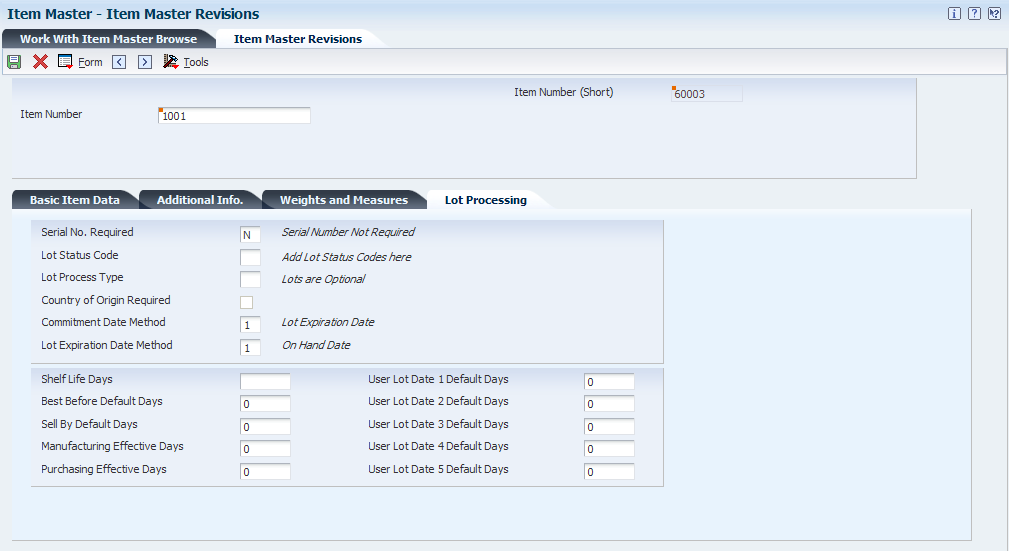
9.2.5.1 Lot Processing
Select the Lot Processing tab.
- Serial No. Required (serial number required)
-
Enter a code that specifies whether you must attach a serial number to this item at receipt or sale for basic serial number processing, or whether memo lot information is required for advanced serial number processing. Advanced serial number processing enables you to use a serial number to track an item through purchasing and sales. For basic serial number processing, values are:
Y: The system requires a serial number for all transactions pertaining to this item in related inventory, sales, and purchase order programs.
N: The system does not require a serial number.
To specify lots for items with serial numbers, the values are:
3: Supplier lot number is required (purchasing only).
4: Supplier lot number is required (purchasing only). Memo lot 1 is also required.
5:: Supplier lot number is required (purchasing only). Memo lot 1 and memo lot 2 are also required.
6: Nonserialized item number
Values 3 through 5 specify whether lot assignment is required for items with serial numbers. You can require assignment of up to three lot numbers, including supplier lot, memo lot 1, and memo lot 2.
- Lot Status Code
-
Enter a code from UDC table (41/L) that indicates the status of the lot. If you leave this field blank, the lot is approved. All other codes indicate that the lot is on hold.
You can assign a different status code to each location in which a lot resides on the Item/Location Information form or the Location Lot Status Change form.
- Lot Process Type
-
Enter a code that indicates whether lot or serial number is assigned. Lot and serial number processes use the F4108 table. Values are:
0: Lot assignment is optional. You can manually assign numbers. Quantity can be greater than one. (default.)
1: Lot assignment is required. The system assigns numbers using the system date in YYMMDD format. Quantity can be greater than one.
2: Lot assignment is required. The system assigns numbers in ascending order using Next Numbers. Quantity can be greater than one.
3: Lot assignment is required. You must manually assign numbers. Quantity can be greater than one.
4: Serial number assignment is optional except during shipment confirmation. Quantity must not exceed one.
5: Serial number assignment is required. The system assigns numbers using the system date in YYMMDD format. Quantity must not exceed one.
6: Serial number assignment is required. The system assigns numbers in ascending order using Next Numbers. Quantity must not exceed one.
7: Serial number assignment is required. You must manually assign numbers. Quantity must not exceed one.
- Commitment Date Method
-
Enter a code from UDC table (H40/CD) that specifies which date the system uses to commit inventory when an item is committed by date. The default value is 01 (lot expiration date). The date fields are stored in the Lot Master table (F4108).
- Shelf Life Days
-
Enter the number of days that an item can remain in inventory before it expires. The system adds this number to the date that the item is received to determine the expiration date for the item. If you do not enter a value here, you must enter an expiration date each time that you receive the lot item.
9.2.6 Creating Lots
Access the Lot Master Revisions form.
- Lot / Serial
-
Enter a number that identifies a lot or a serial number. A lot is a group of items with similar characteristics.
- Lot Expiration Date
-
Enter the date on which a lot of items expires.
The system automatically enters this date if you have specified the shelf life days for the item on Item Master Information form or Item Branch/Plant Information form.
The system calculates the expiration date by adding the number of shelf life days to the date that you receive the item.
You can commit inventory based on the lot expiration date for items. You select how the system commits inventory for an item on the Item Master Information or Item Branch/Plant Information forms.
- Lot Grade
-
Enter a code that indicates the grade of a lot. The grade indicates the quality of the lot. Examples include:
A1: Premium grade
A2: Secondary grade
The grade for a lot is stored in the F4108 table.
- Lot Potency
-
Enter a code that indicates the potency of the lot expressed as a percentage of active or useful material (for example, the percentage of alcohol in a solution). The actual potency of a lot is defined in the F4108 table.
- Supplier
-
Enter the address book number of the preferred provider of this item.
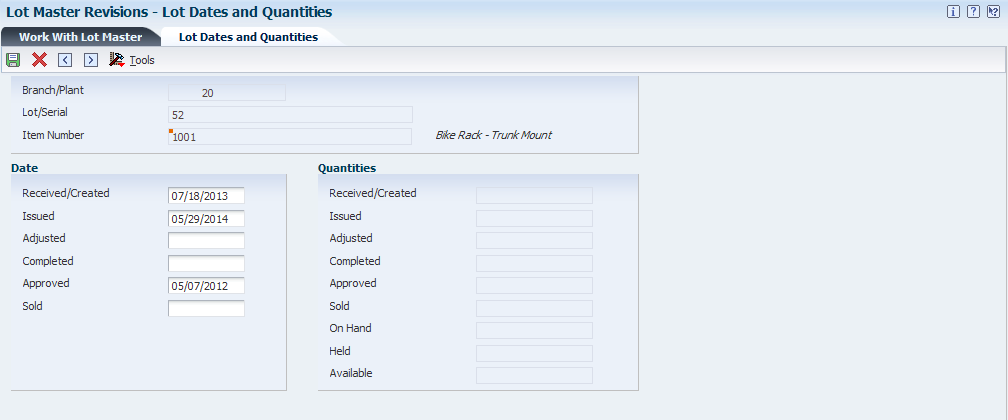
9.2.7 Entering Availability Information
Access the Lot Dates and Quantities form.

After you create a lot and enter lot control information, you can enter and modify dates, such as when the item was received.
- Received/Created
-
Enter a type of quantity. This field represents quantity category 1. You specify the document types that update this category in UDC table (40/LQ).
The system updates user-defined quantities in the F4111 table.
- Issued, Sold, Adjusted, Completed, and Approved
-
Enter the last date that a particular activity occurred. You determine the type of activity that the category represents (for example, issues to work orders).
This field represents date category 2. You specify the document types that update this category in UDC table (40/LD).
9.3 Working with Lot Availability
This section discusses how to:
-
Set processing options for Lot Master Availability (P41280).
-
View lot availability.
-
Review lot quantities.
-
Revise lot activity dates.
-
Assign lot status codes.
9.3.1 Forms Used to Work with Lot Availability
| Form Name | FormID | Navigation | Usage |
|---|---|---|---|
| Work With Lot Availability | W41280B | Lot Control (G4113), Lot Availability | View lot availability. |
| Lot Dates and Quantities | W4108F | Lot Control (G4113), Lot Master Revisions
On the Work With Lot Master form, select a lot and then select Qty/Dates from the Row menu. |
|
| Location Lot Status Update | W4108C | On the Work With Lot Master form, select a lot and then select Location Lot Status from the Row menu. | Assign lot status codes. |
9.3.2 Setting Processing Options for Lot Master Availability (P41280)
Processing options enable you to specify the default processing for programs and reports.
9.3.2.1 Versions
- 1. Trace/Track Inquiry
-
Specify the version of the Trace/Track Inquiry program to use.
- 2. Item Master Revisions
-
Specify the version of Item Master Revisions program to use.
- 3. Work Order Entry
-
Specify the version of Work Order Entry program to use.
- 4. Item Branch/Plant Item
-
Specify the version of Branch/Plant Item Information program to use.
9.3.2.2 Display
- 1. Lot Status
-
Specify whether to update the lot status. Values are:
Blank: Update.
1: Do not update.
- 2. Grade Range
-
Specify whether to display the grade range. Values are:
Blank: Do not display.
1: Display.
- 3. Potency Range
-
Specify whether to display the potency range. Values are:
Blank: Do not display.
1:: Display.
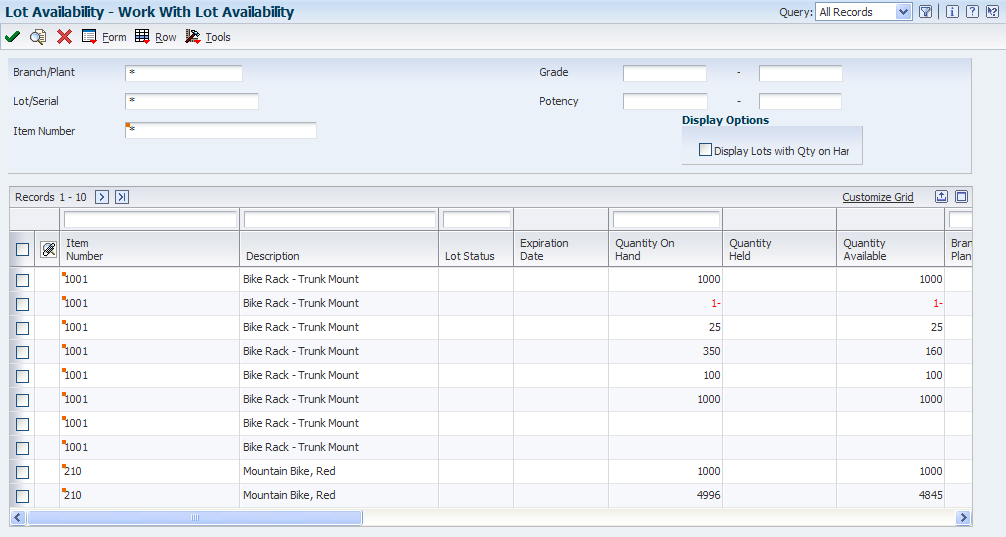
9.3.3 Viewing Lot Availability
Access the Work With Lot Availability form.
Figure 9-4 Work With Lot Availability form
Description of "Figure 9-4 Work With Lot Availability form"
You can view the availability of items in a lot as well as the activity dates, item quantities, and hold statuses that pertain to the lot. Activity dates and item quantities reflect receipts, issues, sales, and so on for items in a lot
You can view lot availability for:
-
All items in a lot.
-
All lots that contain a specific item.
You can select to view only those items or lots for which on-hand balances are available. If the same item or lot appears more than once, each item or lot exists in a different location.
- Display Lots with Qty on Hand (display lots with quantity on hand)
-
Enter an option that indicates whether the system displays all lots or lots with quantity on hand. A check mark indicates that the system displays only lots with quantity on hand.
- Lot Status
-
Enter a code from UDC table (41/L) that indicates the status of the lot. Leaving this field blank indicates that the lot is approved. All other codes indicate that the lot is on hold.
You can assign a different status code to each location in which a lot resides on Item/Location Information or Location Lot Status Change.
- Expiration Date
-
Enter the date on which a lot of items expires.
The system automatically enters this date if you specified the shelf life days for the item on the Item Master Information or Item Branch/Plant Information forms.
The system calculates the expiration date by adding the number of shelf life days to the date that you receive the item.
You can commit inventory based on the lot expiration date for items. You select how the system commits inventory for an item on the Item Master Information or Item Branch/Plant Information forms.
- Quantity On Hand
-
Enter the number of units that are physically in stock. The system displays the quantity on-hand in the primary unit of measure.
- Quantity Available
-
Enter a number that indicates the quantity that is available. For example, the available quantity might consist of the on-hand quantity minus commitments, reservations, and backorders.
Availability is user-defined. You can set up availability in the Branch/Plant Constants (P41001) program.
9.3.4 Reviewing Lot Quantities
Access the Lot Dates and Quantities form.
You can view the on-hand quantity, the available quantity, and the quantity that is held for each lot. You can also view up to six other quantity types, which you set up in UDC table (40/LQ). These quantity types might reflect the quantity of items:
-
Received
-
Issued
-
Adjusted
-
Completed
-
Approved
-
Sold
You set up UDC table (40/LQ) to indicate for which document types the system tracks lot quantities. You must associate each document type with one of the quantity type categories in the Lot Master (P4108) program.
For example, if you specify the Received category for document type OP (purchase orders) each time that you receive items on a purchase order, the system records the quantity to the Received category for the lot.
For certain items, you should enter grade and potency information. If you do not specify a grade or potency for items that require this information, the system uses the standard grade or potency from the Grade & Potency Profile Revisions form.
9.3.5 Revising Lot Activity Dates
Access the Lot Dates and Quantities form.
You can view up to six activity dates for a lot that you set up in UDC table (40/LD). These activity dates might reflect the last time that activities such as these occurred for an item:
-
Received/Created
-
Issued
-
Adjusted
-
Completed
-
Approved
-
Sold
You set up UDC table (40/LD) to indicate for which document types that the system tracks lot activity dates. You must associate each document type with one of these date categories.
For example, you specify the Sold category for the document type SO (sales orders). Then, each time that you confirm shipments for a sales order, the system records the date to the Sold category for the lot.
You can also enter lot activity dates manually instead of having the system track them for you.
9.3.6 Assigning Lot Status Codes
Access the Location Lot Status Update form.
Figure 9-6 Location Lot Status Update form
Description of "Figure 9-6 Location Lot Status Update form "
Set up lot status codes to identify the reasons that a lot is on hold. After you set up the codes, you can assign them to items and lots on Item Master Revisions, Work With Item Branch, Lot Master Revisions, and other forms. You cannot process items from lots on hold.
Assign different status codes to a single lot based on the different locations in which the lot resides. ou can assign status codes to locations as well as lots. The system verifies that a lot is on hold before verifying that the location is on hold. The system might process items out of locations on hold, depending on the program in which you are working and the way that processing options are set.
Run the Hold Expired Lots program (R41082) to place expired lots on hold. You can preview a list of all lots that will be placed on hold by running the program in proof mode.
- New Lot Status
-
Enter a code from UDC table (41/L) that indicates the status of the lot. If you leave this field blank, it indicates that the lot is approved. All other codes indicate that the lot is on hold.
You can assign a different status code to each location in which a lot resides on Item/Location Information or Location Lot Status Change forms.
9.4 Setting Up Allowed Lot Status Codes
This section provides an overview of lot status codes and discusses how to add allowed lot status codes.
9.4.1 Understanding Lot Status Codes
You can define a set of allowed, nonblank lot status codes using the Allowed Lot Status Setup program (P41081). The allowed lot status code enables you to manage lot status processes manually to consume the inventories from the lots that are on hold. The system uses the Allowed Lot Status table (F41081) to process allowed lot status information when you run these programs:
| Program | Description |
|---|---|
| Shipment Confirmation (P4205) | You can ship on-hold items that have an allowed lot status assigned. Use the Enter Allowed Lot Status Group to Validate processing option on the Edits tab to validate the lot status group. |
|
You can commit items with an allowed lot status. Use the Enter Allowed Lot Status Group processing option on the Edits tab to specify the lot status group. |
| Location Selection Driver (R46171) | You can transfer on-hold items that have the allowed lot status. Use the Enter Allowed Lot Status Group processing option on the Edits tab to specify the lot status group. |
| Warehouse Movement Confirmations (P4617) | You can move items with an allowed lot status in Warehouse. Use the Enter Allowed Lot Status Group processing option on the Edits tab to specify the lot status group. |
| Backorder Release (P42117) | You can release backorder items with allowed lot status. Use the Enter Allowed Lot Status Group processing option on Edits to specify the lot status group. |
| Backorder Release and Report (R42118) | You can release backorder items with allowed lot status. Use the Enter Allowed Lot Status Group processing option on the Edits tab to specify the lot status group. |
| Sales Order Entry (P4210) | You can process an on-hold item with allowed lot status. Use the Enter Allowed Lot Status Group processing option on the Commitment tab to specify the lot status group. |
| Kit Selection (P41351) | You can use sales orders to process on-hold kit components with allowed lot status. The system uses the same processing option that was specified in the Sales Order Entry (P4210) program. |
| Configured Item Revisions (P3210) | You can validate the lot status code against specified lot status group. You can use sales orders to process configured on-hold components with allowed lot status. The system uses the same processing option that was specified in the Sales Order Entry (P4210) program. |
| Configured Item Segment Search (P32202) | You can use sales orders to process configured on-hold components with allowed lot status. The system uses the same processing option that was specified in Sales Order Entry (P4210) program. |
| Select Configured Items (P32053) | You can use sales orders to process configured on-hold components with allowed lot status. The system uses the same processing option that was specified in the Sales Order Entry (P4210) program. |
| Order Processing (R31410) | You can release on-hold items with allowed lot statuses. Use the Enter Allowed Lot Status Group processing option on the Edits tab to specify the lot status group. |
| WO Component Shortage List Report (R31418) | The system uses the same processing option that was specified in the Order Processing (R31410) report. |
| Work Order Inventory Issue (P31113) | You can issue on-hold items with allowed lot statuses to a work order. Use the Enter Allowed Lot Status Group processing option on the Edits tab to specify the lot status group. |
| Work Order Parts List (P3111) | You can hard commit on-hold items with allowed lot statuses. Use the Enter Allowed Lot Status Group processing option on the Edits tab to specify the lot status group. |
| Work Order Completions (P31114) | You can require the user to enter a nonblank lot status code for a finished lot when on-hold items were consumed. Use the Hold Code Requirement processing option on the Edits tab to specify the lot status group. |
| Item/Branch Locations (P41LOCN) | You can enable item/branch locations to display available quantity for items with an allowed lot status. |
| Inventory Transfers (P4113) | You can process on-hold items with allowed lot statuses. Use the Enter Allowed Lot Status Group processing option on the Process tab to specify the lot status group. |
| Inventory Issues (P4112) | You can process on-hold items with allowed lot statuses. Use the Enter Allowed Lot Status Group processing option on the Process tab to specify the lot status group. |
| Inventory Adjustments (P4114) | You can process on-hold items with allowed lot statuses. Use the Enter Allowed Lot Status Group processing option on the Process tab to specify the lot status group. |
During the print pick slip, ship confirmation, and warehouse location selection processes, the system validates the nonblank lot status codes against the user-defined status code values. If nonblank lot status codes exist in the F41081 table, the system considers the user-defined lot status codes as blank and the on-hold item continues through these processes.
9.4.2 Forms Used to Set Up Allowed Lot Status Codes
| Form Name | FormID | Navigation | Usage |
|---|---|---|---|
| Work With Allowed Lot Status Setup | W41081A | Lot Control (G4113), Allowed Lot Status Setup | Locate lot status codes. |
| Allowed Lot Status Setup Revision | W41081B | On Work With Allowed Lot Status Setup, click Add. | Add allowed lot status codes. |
9.4.3 Adding Allowed Lot Status Codes
Access the Allowed Lot Status Setup Revision form.
Figure 9-7 Allowed Lot Status Setup Revision form
Description of "Figure 9-7 Allowed Lot Status Setup Revision form "
- Lot Status Code
-
Enter the code from UDC table (41/L) that indicates the status of the lot. If you leave this field blank, the system indicates that the lot is approved. All other codes indicate that the lot is on hold. You can assign a different status code to each location in which a lot resides on Item/Location Information or Location Lot Status Change.
- Lot Group
-
Enter a lot group. This value is the name of a user-defined list of allowed nonblank lot status codes. If you enter a value in this processing option, the system uses the Allowed Lot Status table (F41081) to validate lots for which lot status code is nonblank against the specified lot group name.
- Branch/Plant
-
Enter the alphanumeric code that identifies a specific entity within a business, such as a warehouse location, branch, or plant.
9.5 Viewing Lot Transactions
This section provides overviews of tracking and tracing and faulty lot tracing and discusses how to:
-
Set processing options for Trace/Track Inquiry (P41203).
-
Review lot trace and track information.
9.5.1 Understanding Tracking and Tracing
You might want to view the transactions that have affected a lot, such as:
-
The receipts and inventory issues that were generated as a result of assigning items to the lot.
-
The inventory issues, work order completions, and sales that were generated as a result of removing items from the lot.
Use lot tracing to view the transactions in which items were assigned to the lot. If the lot contains kit or assembled items, you can identify the parts that were used to assemble items in the lot and the lots from which the parts came.
Use lot tracking to view the transactions in which items were removed from the lot. You can identify items that have been assembled using parts from the lot and the lots to which the assembled items were assigned.
You provide information about how you want the system to trace and track lots. For example, you specify the document types that the system monitors to trace and track lots. You also specify whether you want to view transactions for assembled items or nonassembled items by specifying a trace and track mode.
9.5.2 Understanding Faulty Lot Tracing
You can trace a component or ingredient lot back to the immediate supplier in those cases in which faults are found with the lot. You also must identify active orders that are associated with lots containing faulty or recalled components, assess the impact, and process product recalls effectively. This procedure lets you reduce unnecessary scrap or recalls on orders that were already shipped to customers.
The Lot Management Workbench form in the Track/Trace Inquiry program (P41203) enables you to search from an internal lot, supplier lot (recall situation), or memo lot. After you locate active orders that are associated with the faulty lot, you can assess the impact of the product recall. You can also access respective order management programs from the order tabs on this form and make necessary changes to the order.
The system stores the supplier and supplier lot number along with other purchase order receipt information to the F4111 table and displays this information on these forms:
-
Work with Item Ledger
-
Lot Supplier Inquiry
-
Transaction Information
The system also uses the F4108 table for processing information.
9.5.3 Understanding Electronic and Device Quality Records
Products such as pharmaceuticals, biotech, and medical devices require an audit trail for each batch, work order, or medical device manufactured.
An audit trail traces the manufacture of an item from design approval through manufacturing. The audit trail includes engineering changes introduced during the manufacture of the product. A quality assurance group must review the product prior to its release for sale or use.
You can review production records for a specific product and track defects. When you review records that are out of conformance, you can open a case for internal personnel to resolve the conformance issue.
You can use any value in the Enter Trace/Track processing option on the Display tab of the Track/Trace Inquiry program (P41203) as it is not significant if you trace or track an item when performing a product audit.
The system uses the document type entered in the Enter WO Document Type to Inquire processing option on the Defaults tab to determine whether to enable the As Built Comparison, Engineering History, and Production History buttons when you select a row on the Lot Management Workbench form. For example, the system enables all three buttons when the processing option is set to WO for work order.
When you access the Lot Management Workbench form for the first time, the system disables all buttons except the Signature and Audit button. On the Lot Management Workbench form, you enter an item number and lot/serial number to trace or track a specific item. You then select the parent line for the Lot B/P (lot branch/plant) and the system enables the Item Information and Quality Results buttons.
You next select the line that contains an inventory completion (IC). The system enables the As Built Comparison, Engineering History, and Production History buttons based on the document type setting in the Enter WO Document Type to Inquire processing option on the Defaults tab.
9.5.3.1 Item Information
On the Lot Management Workbench form, you click the Item Information button to access the Item Master Revisions form. The system calls the version of the Item Master program (P4101) specified in the Enter Item Master (P4101) Version processing option on the Version tab of the Track/Trace Inquiry program. You review the item information and then click OK to return to the Lot Management Workbench form.
9.5.3.2 Quality Results
On the Lot Management Workbench form, you click the Quality Results button to access the Test Results Revisions form. The system calls the version of the Enter Test Results program (P3711) specified in the Enter Test Results Revisions (P3711) Version processing option on the Version tab of the Track/Trace Inquiry program.
The system populates the Branch/Plant, Document Number, Order Type, Item Number, Lot/SN, and Location fields on the Test Results Revisions form with the values from the Lot Management Workbench form.
After you review the test information, click OK to return to the Lot Management Workbench form.
9.5.3.3 As Built Comparison
On the Lot Management Workbench form, you click the As Built Comparison button to access the Work With Comparisons form. The system calls the version of the Bill of Material Comparison program (P30204) specified in the Enter Bill of Material Comparison (P30204) Version processing option on the Version tab of the Track/Trace Inquiry program.
The system populates the Order Number, Item Number, and Branch/Plant fields on the PL to BOM tab of the Work With Comparisons form with the values from the Lot Management Workbench form.
|
Note: The version of the Bill of Material Comparison program specified in the Enter Bill of Material Comparison (P30204) Version processing option on the Version tab of the Track/Trace Inquiry program must specify that the PL to BOM tab displays as the default tab. The ZJDE0003 version of the Bill of Material Comparison program is configured for this requirement. |
You click Find and evaluate the comparison on the Display Comparisons form. You click Close on both the Display Comparisons and Work With Comparisons forms to return to the Lot Management Workbench form.
9.5.3.4 Engineering History
On the Lot Management Workbench form, you click the Engineering History button to access the Work With ECO Workbench by Item form. The system calls the version of the ECO Workbench program (P30225) specified in the Enter ECO Workbench (P30225) Version processing option on the Version tab of the Track/Trace Inquiry program.
The system populates the Item Number and Branch/Plant fields on the Work With ECO Workbench by Item form with the values from the Lot Management Workbench form.
You click Find and review the engineering history. You click Close to return to the Lot Management Workbench form.
9.5.3.5 Production History
On the Lot Management Workbench form, you click the Production History button to access the Production Cost Inquiry form. The system calls the version of the Production Cost Inquiry program (P31022) specified in the Enter Production Cost Inquiry (P31022) Version processing option on the Version tab of the Track/Trace Inquiry program.
The system populates the Document Number field on the Production Cost Inquiry form with the order number from the Lot Management Workbench form.
You click Find and review the work order information. You click Close to return to the Lot Management Workbench form.
9.5.3.6 Audit and Signature
On the Lot Management Workbench form, you click the Audit and Signature button. The system displays the Work with Audit and Signature Information form which enables you to access specific audit information. You click Cancel to return to the Lot Management Workbench form.
See JD Edwards EnterpriseOne Tools Auditing Administration Including 21 CFR Part 11 Administration Guide.
9.5.4 Forms Used to View Lot Transactions
| Form Name | FormID | Navigation | Usage |
|---|---|---|---|
| Lot Management Workbench | W41203D | Lot Control (G4113), Trace/Track Inquiry | Review lot trace and track information. |
| Lot Supplier Inquiry | W41203C | On the Lot Management Workbench form, select Supplier Lot Inquiry from the Form menu. | Search for lots by supplier or supplier lot number. |
| Item Master Revisions | W4101A | On the Lot Management Workbench form, click the Item Information button. | Review item information. |
| Test Results Revisions | W3711B | On the Lot Management Workbench form, click the Quality Results button. | Review test results. |
| Work With Comparisons | W30204A | On the Lot Management Workbench form, click the As Built Comparison button. | Review the bill of material comparison. |
| Work With ECO Workbench by Item | W30225A | On the Lot Management Workbench form, click the Engineering History button. | Review engineering history. |
| Production Cost Inquiry | W31022A | On the Lot Management Workbench form, click the Production History button. | Review work order information. |
| Work with Audit and Signature Information | W9500005A | On the Lot Management Workbench form, click the Audit and Signature button. | Review audit information. |
9.5.5 Setting Processing Options for Track/Trace Inquiry (P41203)
Processing options enable you to specify the default processing for programs and reports.
9.5.5.1 Display
- 1. Enter Track/Trace
-
Specify which method the system uses to trace or track lot usage. If you select to trace the lot, the system traces, from the time of shipment to the time of manufacture, all of the items that made up the current item. If you select to track the item, the system determines all of the assemblies of which this item is to be a component, from the time of manufacture to the time of shipment. Values are:
Blank: Trace lot usage.
1: Track lot usage.
- 2. Enter Display Level
-
Specify the level at which the trace/track result appears. Values are:
Blank: Display all transactions, but exclude IB, IX, and IZ types.
1: Display only those transactions that may have created new derivative lot.
9.5.5.2 Document Type
Specify a user-defined codes from UDC table (00/DT) in the following processing options:
- 1. Enter WO Issue Document Types
-
If you leave this processing option blank, the system uses default document type IM.
- 2. Enter WO Completion Document Types
-
If you leave this processing option blank, the system uses default document type IC.
- 3. Enter WO Scrap Document Types
-
If you leave this processing option blank, the system uses default document type IS.
- 4. Enter PO Receipt Document Types
-
If you leave this processing option blank, the system uses default document type OV.
- 5. Enter Invoice Sales Document Types
-
If you leave this processing option blank, the system uses default document type RI..
- 6. Enter Transfer Order (Sales) Document Types
-
If you leave this processing option blank, the system uses default document type ST.
- 7. Enter Transfer Order (Purchase) Document Types
-
If you leave this processing option blank, the system uses default document type OT.
- 8. Enter Inventory Reclass Document Types(enter inventory reclassification document types)
-
If you leave this processing option blank, the system uses default document type IR.
9.5.5.3 Defaults
- 1. Enter PO Document Type to Inquire
-
Specify a user-defined code from UDC table (00/DT) that identifies the purchase order document type on which to inquire. If you leave this processing option blank, the system uses default document type OP.
- 2. Enter PO Last Status FROM THRU
-
Specify a user-defined codes from UDC table (40/AT) that identify order status range for the purchase order inquiry. Use this processing option to specify the beginning status. If you leave this processing option blank, the system uses all.
- 3. Enter PO Received Date FROM THRU
-
Specify date range for the purchase order inquiry. Use this processing option to specify the beginning date. If you leave this processing option blank, the system uses all.
- 4. Enter Work Order Document Type to Inquire
-
Specify a user-defined code from UDC table (00/DT) that specifies the work order document type on which to inquire. If you leave this processing option blank, the system uses default document type WO.
- 5. Enter WO Status FROM THRU
-
Specify a user-defined code from UDC table (00/SS) that identifies the order status range for the work order inquiry. Specify the beginning status. If you leave this processing option blank, the system uses all.
- 6. Enter WO Request Date FROM THRU
-
Specify the date range for the work order inquiry. If you leave this processing option blank, the system uses all.
- 7. Enter SO Document Type to Inquire
-
Specify a user-defined code from UDC table (00/DT) that identifies the sales order document type on which to inquire. If you leave this processing option blank, the system uses default document type SO.
- 8. Enter SO Last Status FROM THRU
-
Specify a user-defined code from UDC table (40/AT) that identifies the status range for the sales order inquiry. If you leave this processing option blank, the system uses all.
- 9. Enter SO Request Date FROM THRU
-
Specify the date range for sales order inquiry. If you leave this processing option blank, the system uses all.
- 10. Enter Number of Prior Transaction Days
-
Specify the number of prior transaction days. To limit the scope of the lot trace or track, the system uses transaction FROM and THRU dates. As a default value, THRU date is today's date and FROM date is calculated using this value. Values are:
Blank: 360 days.
User Entry: Enter a value that is a positive integer number.
9.5.5.4 Version
- 1. Enter Lot Master (P4108) Version
-
Specify a version of the Lot Master program to use. If you leave this processing option blank, the system uses version ZJDE0001.
- 2. Enter Purchase Receipts Inquiry (P43214) Version
-
Specify a version of the Purchase Receipts Inquiry program to use. If you leave this processing option blank, the system uses version ZJDE0001.
- 3. Enter Manufacturing Work Order Processing (P48013) Version
-
Specify a version of the Manufacturing Work Order Processing program to use. If you leave this processing option blank, the system uses version ZJDE0001.
- 4. Enter Sales Order Entry (P4210) Version
-
Specify a version of the Sales Order Entry program to use. If you leave this processing option blank, the system uses version ZJDE0001.
- 5. Enter Warehouse Putaway Request Inquiry (P4600) Version
-
Specify a version of the Warehouse Putaway Request Inquiry program to use. If you leave this processing option blank, the system uses version ZJDE0001.
- 6. Enter Warehouse Pick Request Inquiry (P4600) Version
-
Specify a version of the Warehouse Pick Request Inquiry program to use. If you leave this processing option blank, the system uses version ZJDE0002.
- 7. Enter Item Master (P4101) Version
-
Specify a version of the Item Master program (P4101) to use when you click the Item Information button. If you leave this processing option blank, the system uses version ZJDE0001.
- 8. Enter Test Results Revisions (P3711) Version
-
Specify a version of the Test Results Revisions program (P3711) to use when you click the Quality Results button. If you leave this processing option blank, the system uses version ZJDE0001.
- 9. Enter Bill of Material Comparison (P30204) Version
-
Specify a version of the Bill of Material Comparison program (P30204) to use when you click the As Built Comparison button. If you leave this processing option blank, the system uses version ZJDE0003.
- 10. Enter ECO Workbench (P30225) Version
-
Specify a version of the ECO Workbench program (P30225) to use when you click the Engineering History button. If you leave this processing option blank, the system uses version ZJDE0001.
- 11. Enter Production History (P31022) Version
-
Specify a version of the Production Cost Inquiry program (P31022) to use when you click the Production History button. If you leave this processing option blank, the system uses version ZJDE0001.
9.5.6 Reviewing Lot Trace and Track Information
Access the Lot Management Workbench form.
You can use the PO Receipt, Work Order, and Sales Order tabs to inquire on orders that have the selected item, branch, location, and lot in the detail line.
9.5.6.1 Driver
- Trace Backward
-
Select to trace specified lot backward across multiple branch plants and multiple levels within manufacturing and transfer process to the initial purchase receipt.
- Trace Forward
-
Select to track specified lot forward across multiple branch plants and multiple levels within manufacturing and transfer process to last shipment made.
- System/Supplier/Memo1
-
Enter the type to indicate that the lot that you entered is a supplier lot, or select Memo1 type to indicate that it is a lot memo 1. The system type indicates that it is internal lot number.
9.5.6.2 Additional Filter
- Detail
-
Select to specify the level at which the system displays track/trace results. The system displays all transactions except IB, IX, and IZ types.
- Derivative Lots Only
-
Select to display only those transactions that created new lot numbers out of specified item/lot. Examples of these transactions are transfer orders, reclassifications, and WO completions.
- Branch/Plant
-
Enter the branch/plant as an additional filter.
- Trans Date FROM/THRU
-
Enter the date that an order was entered into the system.
9.5.6.3 Additonal Elements
- Item Information
-
Click to access the Item Master Revisions form.
- Quality Results
-
Click to acces the Test Results Revisions form.
- As Built Comparison
-
Click to access the Work With Comparisons form.
- Engineering History
-
Click to access the Work With ECO Workbench by Item form.
- Production History
-
Click to access the Production Cost Inquiry form.
- Audit and Signature
-
Click to access the Work with Audit and Signature Information form.
See JD Edwards EnterpriseOne Tools Auditing Administration Including 21 CFR Part 11 Administration Guide.
9.6 Reclassifying Lots
This section provides an overview of lot reclassification, lists prerequisites, and discusses how to:
-
Set processing options for Item Reclassifications (P4116).
-
Reclassify items and lots.
9.6.1 Understanding Lot Reclassification
You can reclassify an item and any associated lot when the item properties change. You can reclassify only uncommitted quantities of items and lots. You can review uncommitted quantity information for the item and related lot in the Item Availability (P41202) program. When you reclassify in the Reclassifications Transactions program (P4116), you create new item numbers and combine or split existing lots within locations.
For example, property changes that occur over time in technical grade sulfuric acid can result in a less potent grade of acid. You can create a new lot for this acid by specifying a different potency and grade. Similarly, if you blend several lots of sulfuric acid together and dilute them with water, you can create a new lot with a new potency and grade.
You can change a lot and any of the associated items in these ways:
-
Change the item number, location, lot, and lot status.
-
Create a new lot from an existing lot.
-
Combine several lots into a single lot.
-
Split one lot into several lots.
-
Combine several lots and create several new lots.
Important:
Use the Reclassifications Transactions program (P4116) only for reclassifying items and lots. Using any other programs to reclassify items or lots can adversely affect information throughout the JD Edwards EnterpriseOne Sales Order Management system and the JD Edwards EnterpriseOne Procurement system.
After you reclassify an item and lot, the system displays the document type, batch number, and document number that you use to locate the transaction. The system then adjusts inventory balances and performs related tracking and accounting tasks. The system updates these tables with item and lot change information:
-
F4111
-
F0911
-
F41021
-
F4602 (if you are using the JD Edwards EnterpriseOne Warehouse Management system)
You can view detailed or summarized journal entries for these transactions on the Journal Entries and the Item Ledger Inquiry forms.
After you enter several reclassifications, you can group them together for processing. After you group transactions, the system assigns the same number to each transaction in the group and processes all of the From and To lines with the same transaction number. Depending on how you have set the processing options, the system validates that the From and To quantities balance.
If you make an error when you reclassify an item or lot, you can correct the mistake by entering a reversing entry. The system reverses the item in the same document number and batch as the original reclassification. Because the system stores records of each reclassification for accounting purposes, you cannot delete the record.
|
Note: You cannot use the P4116 program to reclassify bulk inventory. |
9.6.1.1 Effective Date Calculations
When reclassifying lots, you can manually override or enter an effective date. If you do not specify an effective date, the system automatically calculates the effective date using the default values from the Manufacturing Effective Days and Purchasing Effective Days fields in the Item Branch table (F4102).
To calculate the value in the Lot Effective Date field, the system determines the stocking type of the item being reclassified. If the item has a manufactured stocking type, the system uses the value from the Manufacturing Effective Days field and adds those days to the on-hand date to calculate the effective date. If the item has a purchased stocking type, the system uses the value from the Purchasing Effective Days field and adds those days to the on-hand date to calculate the effective date.
The system calculates effective dates differently when you split, blend, and combine lots:
| Description | Calculation of Effective Dates |
|---|---|
| Split a lot | When splitting a lot, you create multiple lots from a single parent lot. Each child lot inherits the effective date and lot creation date from the parent lot. If some properties of the lot have changed to necessitate a different effective date, you can override this date. |
| Blend a lot | When blending multiple lots into a single lot, you can specify whether the new lot inherits the on-hand date or the effective date. |
| Combine a lot | When combining lots, child lots can inherit the on-hand date and the effective date. For example, when combining lots, you can specify whether child Lot 1 and Lot 2 inherit information from Lot A or Lot B. |
9.6.2 Prerequisites
Before you complete the tasks in this section, you must verify that:
-
The general ledger accounts are set up in the F0901 table.
-
AAIs for distribution are set up.
9.6.3 Forms Used to Reclassify Lots
| Form Name | FormID | Navigation | Usage |
|---|---|---|---|
| Work With Item Reclassifications | W4116A | Inventory Master/Transactions (G4111), Reclassifications | Review items and lots. |
| Item Reclassifications | W4116B | On the Work With Item Reclassifications form, click Add. | Reclassify items and lots. |
9.6.4 Setting Processing Options for Item Reclassifications (P4116)
Processing options enable you to specify the default processing for programs and reports.
9.6.4.1 Defaults
- 1. Document Type
-
Specify a user-defined code from UDC table (00/DT) that identifies the default document type. If you leave this processing option blank, the system does not provide a document type.
- 2. Assign Expiration Dates
-
Specify how expiration dates are assigned to new lots. Enter 1 to use the transaction date plus the shelf life to calculate the expiration date for new lots. If you leave this processing option blank, you must manually assign the expiration date to new lots.
9.6.4.2 Versions
If you leave any of the following processing options blank, the system uses version ZJDE0001.
- 1. Journal Entries (P0911)
-
Specify the version of the Journal Entries program to use.
- 2. Item Search (P40ITM2)
-
Specify the version of the Item Search program to use.
- 3. Item Ledger (P4111)
-
Specify the version of the Item Ledger program to use.
- 4. Warehouse Request (P46100) (FUTURE)
-
Future use.
9.6.4.3 Process
- 1. Cost Entry
-
Specify whether the system displays and protects costs. Values are:
Blank: Display cost and enable the cost to be updated.
1: Display cost, but do not enable the cost to be updated.
2: Do not display cost.
- 2. Journal Entries
-
Specify how the system processes GL accounts. Values are:
Blank: Run in detail mode.
1: Summarize by account number.
- 3. Lots on Hold
-
Specify whether the system enables transfers from held lots. Values are:
Blank: Do not enable transfers from held lots.
1: Enable transfers from held lots.
- Enter Allowed Lot Status Group to Validate
-
Specify the lot group. The lot group is the name of a user-defined list of allowed nonblank lot status codes. Entry of a lot group name enables the system to process lots for which the lot status code is defined within the specified lot group name. If the nonblank lot status codes exist in the F41081 table, then the system treats the user-defined lot status codes as blank and the on-hold item continues through the reclassification process.
- 4. Reclassification Quantity
-
Specify whether the system enables the reclassification of a quantity to be greater than the quantity that is available. Values are:
Blank: Do not enable the reclassification of quantity to be greater than the quantity that is available.
1: Enable the reclassification of quantity to be greater than the quantity that is available.
- 5. Quantity Validation
-
Specify which method of quantity validation the system uses for from and to quantities in a transaction. Values are:
Blank: Do not validate quantities.
1: Display a warning if the quantity is out of balance.
2: Display an error if the quantity is out of balance.
9.6.4.4 Interop
- 1. Transaction Type
-
Specify a user-defined code from UDC table (00/TT) that identifies a type of transaction, such as an invoice or a sales order. If you leave this processing option blank, the system does not perform export processing.
9.6.4.5 Agreement
- 1. Agreement Assignment (FUTURE)
-
Future use.
9.6.5 Reclassifying Items and Lots
Access the Item Reclassifications form.

The system processes the transaction and displays a document number, document type, and the batch number for the transaction.
- Transaction Date
-
Enter the date that the transaction occurred.
- From Branch/Plant
-
Enter the lowest value of the range that a given user is authorized to view and process data. This value is used in conjunction with the Business Unit Through Code, which defines highest value. If no record exists for a user and file, the user is completely authorized to the file. If the file name is blank for a given user, the business unit range applies to all users of the file.
- To Branch/Plant
-
Enter an alphanumeric code that identifies a separate entity within a business for which you want to track costs. For example, a business unit might be a warehouse location, job, project, work center, branch, or plant.
- From/To
-
Enter a code that indicates whether a line in a transaction is a From line or a To line. This field enables you to combine multiple existing products or locations into a single product or location. For example, you can create three From lines and one To line. You can also split one existing product or location into several new products or locations. Or, you can create one From line and two To lines. The information that is contained in a From transaction line is always existing item location information.
- Transaction Group No.
-
Enter a value that identifies the lines that were grouped when the system performed multiple reclassification transactions.
- Related From Line No.
-
Enter the number of the line item from which this line inherits lot and quality data.
- Lot Effectivity Date
-
Enter the date on which a lot becomes available. The system uses this date for availability and commitment processing to indicate that the lot is available on or after the date that you specify. You must complete this field when inventory first becomes an on-hand quantity for the lot. If you leave this field blank, the system calculates the effective date of the lot by using the value for effective days in the F4102 table or the current date if the value for effective days is zero.
9.7 Setting Up Dates for Lots
This section provides an overview of lot date information, lists a prerequisite, and discusses how to:
-
Enter lot date information.
-
Calculate active components or ingredients.
9.7.1 Understanding Lot Date Information
You can track various types of dates that are associated with a lot and select which date to use for committing inventory and tracking availability. These dates include expiration date, sell by date, best before date, effective date, and depending on industry standards, lot date information for user-defined purposes. For example, certain materials may require that a lot be retested for potency or integrity. Other types of materials might need to be reagitated or compounded. You can define a date type, such as retest date, and store that information in the supplemental database by item and lot.
Similarly, you can specify which date to use during the sales commitment. For example, you can define customer preferences that specify whether a customer wants inventory based on the sell by date or the expiration date.
Establish the default dates on the Item Master Revisions form. The system uses these tables to process multiple lot dates:
-
F4108
-
F4101
-
F4102
-
F4801
-
F4311
-
F43121
-
F4211
-
F4111
9.7.1.1 Expiration Date Calculation Method
You can select the calculation method for lot expiration dates. Typically, the system calculates the lot expiration date using shelf life days when a product is completed. Another type of lot expiration date calculation is based on the active components of a parent item. For example, a parent lot can inherit the lowest expiration date of the active components.
If an item begins to expire during manufacturing, you can assign expiration date based on routing steps of that item. The Based On Date field represents the point from which shelf life days should be used to calculate the expiration date for the item.
This table presents the three methods for calculating a lot expiration date:
| Method | Description |
|---|---|
| Shelf Life Days + Work Order Completion Date | If you use this method, the expiration date of the item is calculated by adding the date that it was completed plus the shelf life days that are defined for the item. If Shelf Life Days field is blank, then the default value for the Lot Expiration Date is the latest system date. You can override this value during work order completions. |
| Shelf Life Days + Based On Date | If you use this method, the expiration date of the item is calculated by adding the shelf life days plus the based-on date. You can specify the based-on date when you run the Work Order Completions (P31114) program. This type of calculation is required when the end product starts to expire before the last step of the routing process. |
| Shelf Life Days + Least Expiration Date of Active Ingredients or Components | If you use this method, the expiration date of the item is calculated for the manufactured parent lot based on a lower-level component. For example, if milk is used to produce ice cream, the expiration date for the lot of ice cream can be based on the expiration date of milk.
Use this method in conjunction with the Active Ingredient option on the Additional System Information form (Manufacturing Data or Plant Manufacturing), where you specify whether the component is an active ingredient. |
9.7.2 Prerequisite
Before you complete the tasks in this section, you must verify that UDC table (40/VF) contains the value 03 CPGLC with a special handling code of Y.
9.7.3 Forms Used to Set Up Dates for Lots
| Form Name | FormID | Navigation | Usage |
|---|---|---|---|
| Item Master Revisions | W4101A | Select an item on the Work With Item Master Browse form. | Enter lot date information. |
| Additional System Information | W4101C | On the Work With Item Master Browse form, select Addl System Info from the Row menu. | Calculate active components or ingredients. |
9.7.4 Entering Lot Date Information
Access the Item Master Revisions form.
9.7.4.1 Lot Processing
Select the Lot Processing tab.
- Commitment Date Method
-
Enter a code from UDC table (H40/CD) that specifies which date the system uses to commit inventory when an item is committed by date. The default value is 01 (lot expiration date). The date fields are stored in the F4108 table.
- Lot Expiration Date Method
-
Enter a code that indicates which method the system uses for calculating the expiration date for a lot. Values are:
1: On-hand date + shelf life days.
2: Based-on date + shelf life days.
3: Least expiration date of active components.
If you enter 3, you must also activate the Active Ingredients option at the branch level.
- Shelf Life Days
-
Enter the number of days that an item can remain in inventory before it expires. The system adds this number to the date that the item is received to determine the expiration date for the item. If you do not enter a value here, you must enter an expiration date each time that you receive the lot item.
- Best Before Default Days
-
Enter the number of days that an item can remain in inventory before it should be consumed. The system uses the number that you enter to calculate the best before date using two different methods, depending on whether the number that you enter in this field is positive or negative. If the value is positive, the system adds the days to the based-on date to determine the best before date for the lot. If the number is negative, the system subtracts the days from the lot expiration date to determine the best before date.
- Sell By Default Days
-
Enter the number of days that an item can remain in inventory before it should be sold. The system uses the number that you enter to calculate the sell by date using two different methods, depending on whether the value that you enter in this field is positive or negative. If you enter a positive value, the system adds the days to the based-on date to determine the sell by date for the lot. If you enter a negative value, the system subtracts the days from the lot expiration date to determine the sell by date.
- User Lot Date 1 Default Days through User Lot Date 5 Default Days
-
Enter the number of days that the system uses to calculate the value for these fields of the Lot Master table (F4108). The system calculates the value for these fields using one of two methods, depending on whether the number that you enter in this field is positive or negative. If you enter a positive value, the system adds the days to the based-on date to determine the value for the field. If you enter a negative value, the system subtracts the days from the lot expiration date to determine the value for the field.
9.7.5 Calculating Active Components or Ingredients
Access the Additional System Information form.
Figure 9-11 Additional System Information form
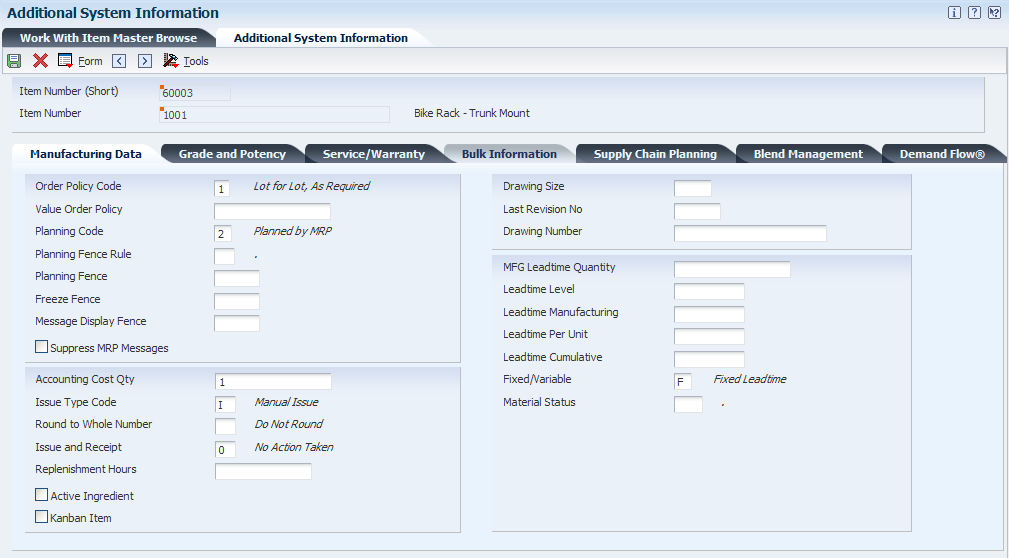
Description of "Figure 9-11 Additional System Information form"
9.7.5.1 Manufacturing Data
Select the Manufacturing Data tab.
- Active Ingredient
-
Select this check box to indicate that an item is an active component of a parent item. When the item is an active component, the system can calculate a parent item's expiration date by comparing all component expiration dates and choosing the earliest date. Values are:
Blank: The item is not an active component of a parent item.
1: The item is an active component of a parent item.
9.8 Defining Effective Dates for Future Availability
This section provides an overview of future availability dates and discusses how to:
-
Define effective days.
-
Run the Update Effective Lots program.
-
Set processing options for Update Effective Lots (R41083).
9.8.1 Understanding Future Availability Dates
You can use an effective date to indicate the future availability of a lot. For example, in the wine industry, a certain type of wine may need to ferment for 600 days before it is sellable to the winery's distributors or to customers. In this case, the effective days for the batch of wine is 600 days. If you work with conformance lots that require acceptable quality assurance testing before becoming available, the inventory can be held with a future availability date.
Future availability dates enable you to know information such as:
-
The quantity of finished goods that are expected from work order completions.
-
The quantity of purchased goods from purchase orders.
-
The quantity of inventory that is currently committed to sales and work orders.
-
The quantity of inventory that is available for commitment to new sales and work orders.
With this information, you can negotiate realistic delivery dates for sales orders by calculating the expected quantity available and accounting for commitments on existing on-hand inventory.
|
Note: For a lot to be considered available by the system, the effective date must be the current or a past date, and the lot must not have a hold code associated with it. You can remove a lot status code either manually or automatically using the Hold Expired Lots (R41082) or Update Effective Lots (R41083) programs. |
You can view or override a lot's effective date in these programs:
-
Lot Master (P4108)
-
Inventory Adjustments (P4114)
-
Item Reclassifications (P4116)
-
Work Order Completions (P31114)
-
Work Order Process Resource Revisions (P3111P)
-
Work Order Inventory Issues (P31113)
-
Co/By Product Completion Window (P31115)
-
Manufacturing Work Order Processing (P48013)
-
Purchase Orders (P4310)
-
PO Receipts (P4312)
-
MRP/MPS Detail Message Revisions (P3411)
-
Supply and Demand Inquiry (P4021)
-
MPS Time Series (P3413)
The system uses the F4108 table to store and process effective dates.
9.8.1.1 Effective Days Calculations
Effective days are the number of days (including weekends) that you estimate before a lot will be available for commitments to sales or work orders when the lot is placed in on-hand inventory. For the system to calculate a future effective date to a lot, you must define the number of days before the lot becomes effective. You can override the system-calculated effective date as necessary.
When calculating effective days, the system assigns to all lots an effective date that is equal to the lot on-hand date, plus the number of days that is defined in the Manufacturing Effective Days or Purchasing Effective Days fields. If you create a lot using a purchase order receipt, the effective date equals the purchase order receipt date, plus the number of days that is specified in the Purchasing Effective Days field. If the lot is created through a work order completion, the effective date equals the work order completion date plus the number of days that is specified in the Manufacturing Effective Days field.
You assign and maintain default values for the manufacturing and purchasing effective days in both the Item Master (P4101) and Item Branch (P41026) programs. When you specify this value in the Item Master, the system updates the value in the item branch. However, when calculating the effective date for a lot, the system retrieves effective days values only from the item branch/plant record.
9.8.1.2 Availability and Commitment Calculations
The system calculates inventory availability using on-hand inventory, purchase orders, and work orders. During calculation, the system validates the effective date against the transaction date. That is, the system ensures that the transaction or requested date is greater than or equal to the effective date and less than the expiration date. If the lot is on hold and has an effective date assigned to it, the system does not process the lot.
9.8.1.3 Purchasing Commitments
When calculating effective days, the system assigns to all lots an effective date that is equal to the lot on-hand date, plus the number of days specified in the Purchasing Effective Days field. If you create a lot using a purchase order receipt, the effective date equals the purchase order receipt date, plus the number of days specified in the Purchasing Effective Days field.
9.8.1.4 Manufacturing Commitments
When committing items from a lot for manufacturing processes, the system compares the parts list request date (the default value from the work order start date) to the effective date and expiration date for the lot. For automatic commitments, if the request date is less than the effective date or greater than the lot expiration date, the system cycles to another lot and performs the same validation on a new lot. This process continues until the system locates a lot that meets the date criteria and is available to be committed.
For manual commitments, the system checks the part list request date against the effective date and the expiration date when the request is committed. If the lot does not meet the criteria, the system generates a warning.
9.8.1.5 Material Requirements Planning (MRP)
To accurately reflect inventory status, the system accounts for a lot's effective date when calculating time-phased supply inventory and the ability of that supply to satisfy demand during time periods. This table describes this process for MRP:
| MRP Element | Use of Effective Dates |
|---|---|
| On-Hand Inventory | When calculating the available quantities from on-hand inventory, the system uses the effective date of the lot to determine whether the quantity that is associated with the lot is available. If the lot effective date is greater than the period in which supply is being calculated, then the system does not consider the quantity that is associated with the lot to be available for planning purposes in that period.
However, if the effective date is less than or equal to the planning period, the system considers the quantity of item that is available to satisfy demand in that period. The quantity in the lot continues to be able to satisfy demand in subsequent periods until the quantity in the lot reaches zero or the lot expires. |
| Purchase Orders | If the lot's effective date is greater than the period in which supply is being calculated, then the system does not consider the quantity that is associated with the lot to be available for planning purposes in that period. However, if the effective date is less than or equal to the planning period, then the quantity of item in the lot is considered available to satisfy demand in that period. The quantity in the lot continues to be able to satisfy demand in subsequent periods until the quantity in the lot reaches zero or the lot expires. At this time, the system no longer considers the lot available for any purpose.
The system searches for an effective date on all purchase order lines. If a purchased item is not lot controlled, the item's purchasing effective days equal zero or blank. In this case, the system adds zero to the promised delivery date, and the planned effective date is equal to the promised delivery date. |
| Work Orders | The system uses the value in the Planned Effective Date field (DPL) to calculate planned supply availability from work orders. This calculation is based on the work order request date and the manufacturing effective days for the item on the work order as defined in the F4102 table.
The system adds the item's manufacturing effective days to the work order's planned completion date to obtain the planned effective date. If the planned effective date is greater than the period in which supply is being calculated, then the quantity of inventory that is associated with the lot is not considered available to satisfy demand in that period. However, if the planned effective date is less than or equal to the planning period, then the system considers the quantity of inventory that is associated with the lot to be available to satisfy demand in that period. The quantity in the lot will continue to satisfy demand in subsequent periods until the quantity in the lot reaches zero or the lot expires. At this time, the system no longer considers the lot available for any purpose. |
| Time Series | The system considers the effective date when performing the netting operation for planning and when applying supply inventory to the appropriate date. For example, if a lot of 100 of Part A is created on August 1, but does not become effective until August 15, the system does not display the lot as part of the inventory until August 15. |
| Supply/Demand Inquiry | The system considers the inventory as available based on the planned effective date of the items on the order. When calculating supply from a purchase order, the system calculates availability based on the value in the expected effective date on the purchase order detail line. When calculating supply inventory from a work order, the system calculates availability based on the planned effective date of the work order. |
9.8.2 Form Used to Define Effective Dates for Future Availability
| Form Name | FormID | Navigation | Usage |
|---|---|---|---|
| Item Master Revisions | W4101A | On the Work With Item Master Browse form, select an item. | Define effective days. |
9.8.3 Defining Effective Days
Access the Item Master Revisions form.
9.8.3.1 Lot Processing
Select the Lot Processing tab.
- Manufacturing Effective Days
-
Enter the number of days that an item must remain in inventory before the system considers the item to be available for sales and manufacturing commitments. To calculate the lot effective date, the system adds the number that you enter in this field to the based-on date that appears in the F4108 table.
- Purchasing Effective Days
-
Enter the number of days after a purchased item is received that a lot becomes available. The system uses this number when calculating and displaying the effective date in the Purchase Orders (P4310) and the PO Receipts (P4312) programs.
9.8.4 Running the Update Effective Lots Program
Select Lot Control (G4113), Update Effective Lots.
You can remove a lot status code either manually or automatically using Update Effective Lots (R41083) batch program. This batch program controls whether the system removes a lot status code from a lot if the effective date has been reached, and which lot hold codes to remove.
9.8.5 Setting Processing Options for Update Effective Lots (R41083)
Processing options enable you to specify the default processing for programs and reports.
9.8.5.1 Defaults
- 1. Lot Effective Date
-
Specify the effective date. If the effective date of a lot is less than or equal to the date that you enter here, the system changes the status code of the lot to the new lot status code. If you leave this processing option blank, the system uses the current date.
- 2. New Lot Status Code
-
Specify a user-defined code from UDC table (41/L) that identifies the new lot status code that the system uses to update effective lots.
- 3. Reason Code
-
Specify a user-defined code from UDC table (42/RC) that identifies the reason code for changing the lot status. If you leave this processing option blank, the system does not provide a default reason code.
9.8.5.2 Omit
- 1.–5. Excluded Lot Status Code
-
Specify a user-defined code from UDC table (41/L) that identifies the lot status code that the system omits while updating the effective lots.
9.8.5.3 Process
- 1. Proof/Final Mode
-
Specify whether to run the program in proof or final mode. Values are:
Blank: Proof mode.
1: Final mode.
- 2. Print Mode
-
Specify whether to generate a report. Values are:
Blank: Do not generate.
1: Generate.
9.9 Setting Up Lot Shipment Ascending Dates
This section provides an overview of shipment ascending date rules, lists prerequisites, and discusses how to:
-
Set up preference names for advanced lots.
-
Attach preference names to schedules.
-
Set up lot shipment ascending date rules.
9.9.1 Understanding Shipment Ascending Date Rules
Shipment ascending date rules enable you to ship product based on lot dates that are greater than or equal to the dates of the last shipment. These dates include the expiration date, best before date, or sell by date. You can specify date ascending rules for any combination of customer, customer group, product, or product group.
You can use these criteria to review recent shipments to a customer:
-
Last lot number
-
Last expiration date
-
Last best before date
-
Last sell by date
-
Highest lot number
-
Highest expiration date
-
Highest sell by date
-
Highest best before date
The system uses values from the expiration date, sell by date, best before date, or user-defined date options 1 through 5 in the F4239 table to compare the dates on the item that is being hard committed, depending upon the commitment date method that is specified on Item Master Revisions form or the Preference Values Revisions form. When you hard commit a lot, the system edits the ship ascending rules with the specified lot using the Last Customer Shipment table during these events:
-
Sales order entry
-
Pick confirmation override
-
Manual planner
-
Ship confirmation
The system stores ascending rules in the F49211 table. The system might also use these tables when processing information:
-
F40721
-
F4009
-
F4600
Note:
After you set up ascending date rules for lot shipment, verify that Lot Shipment Ascending Dates is enabled in the system constants, as well as the Display Warning/Error for Ascending Date Rule Check processing option on the Process tab in Sales Order Entry program (P4210). The system displays a warning when you manually enter a lot number on the order. You can also override the schedule for advanced preferences on the Preferences tab in processing options for the P4210 program.
9.9.2 Prerequisites
Before you complete the tasks in this section, you must:
-
Select the Ship Ascending Date Rule check box for the branch/plant and assign the preference schedule in UDC table (40/AP) on the System Constants form.
See Setting Up Constants.
-
Enter 1in the Preference Profile Processing processing option on the Preference tab in the Sales Order Entry (P4210) program.
9.9.3 Forms Used to Set Up Lot Shipment Ascending Dates
| Form Name | FormID | Navigation | Usage |
|---|---|---|---|
| Work with Preference Types | W4071B | Advanced Preferences (G40311), Advanced Preferences Name Revisions | Review preference types. |
| Preference Definition Revisions | W4071A | On the Work with Preference Types form, click Add. | Set up preference names for advanced lots. |
| Work with Preference Schedules | W4070A | Advanced Preferences (G40311), Advanced Preferences Schedule Revisions | Review preference schedules. |
| Preference Schedule Revisions | W4070C | On the Work with Preference Schedules form, select a schedule. | Attach preference names to schedules. |
| Work with Preference Detail | W4072B | Advanced Preferences (G40311), Advanced Preferences Detail Revisions | Enter an adjustment name. |
| Preference Hierarchy Selection | W40073F | On the Work with Preference Detail form, enter a preference name and click Add. | Select a preference description. |
| Preference Detail Revisions | W4072A | On the Preference Hierarchy Selection form, select a preference type. | Enter preference details. |
| Preference Values Revisions | W4072D | On the Preference Detail Revisions form, select a record and select Pref Details from the Row menu. | Set up lot shipment ascending date rules. |
9.9.4 Setting Up Preference Names for Advanced Lots
Access the Preference Definition Revisions form.
- Advanced Preference Type
-
Enter a code from UDC table (40/AP) that specifies how the system processes an advanced preference price adjustment. Use advanced preference type 23 for advanced lots.
9.9.5 Attaching Preference Names to Schedules
Access the Preference Schedule Revisions form.
- Seq No.(sequence number)
-
The system uses a default sequence number if one is not entered. This number determines the order in which the system resolves the preferences.
- Preference Name
-
Enter a code from UDC table (40/TY) that specifies an adjustment definition. You define adjustments on Price Adjustment Names.
9.9.6 Setting Up Lot Shipment Ascending Date Rules
Access the Preference Values Revisions form.
Figure 9-12 Preference Values Revisions form
Description of "Figure 9-12 Preference Values Revisions form"
- Check Best Before Date
-
Enter an option that specifies whether the system ensures that the lot that you are shipping to a customer has a value in the Best Before Date field that is greater than or equal to the value for the last lot that you shipped.
- Commitment Date Method
-
Enter a code from UDC table (H40/CD) that specifies which date the system uses to commit inventory when an item is committed by date. The default value is 01 (lot expiration date). The date fields are stored in the F4108 table.
- Check Expiration Date
-
Enter an option that determines whether the system ensures that a lot be shipped in ascending order in relation to other lots that have already been shipped. When you select this option, the system enforces the ship ascending lot rule based on the expiration date to ensure that the lot that is being shipped has an expiration date that is greater than that of the lots that have been previously shipped.
- Check Sell By Date
-
Enter an option that indicates whether the system ensures that a lot that is being shipped to a customer is shipped in ascending order by the sell by date. If you select this option, the system ensures that each lot that is being shipped has a sell by date that is greater than or equal to the date on which the last lot was shipped.