Oracle® Enterprise Manager Ops Center
Quick Start Guide
11g Release 1 (11.1.3.0.0)
E24504-02
November 2011
Oracle Enterprise Manager Ops Center is an enterprise-level data center automation software tool. This guide walks you through how to quickly install and configure the software for a basic monitoring setup. After it is configured, you'll be able to add assets for monitoring and edit monitoring rules to generate an alert.
For an overview of the software and features, see the Oracle Enterprise Manager Ops Center Concepts Guide.
Get Ready
Many configurations are possible, but we've simplified it for a quick start.
You can install Oracle Enterprise Manager Ops Center on an Oracle Solaris or Linux operating system. We have a lightweight utility, called the OCDoctor, that verifies that your system meets the requirements to successfully install and run the software.
What You'll Need
You'll need the following:
-
A system to run the software:
-
SPARC or x86 platform that is running a supported Oracle or Linux OS, such as Oracle Solaris 10 9/10 or Oracle Linux 5.5
-
72 GB of disk space
-
6 GB Swap Space
-
Root access
-
Make a /var/tmp/OC directory
-
-
One or more systems to monitor:
-
Root access to a SPARC or x86 platform that is running a recent operating system version, such as Oracle Solaris 10 or Linux 5.5
-
System should be a newer Oracle Sun server (at least 2006)
-
The ssh services are enabled on the OS and know the port number (the default is 22)
-
-
OCDoctor utility to test for requirements
-
See Run the OCDoctor for where to download the file.
-
-
The Oracle Enterprise Manager Ops Center 11g software
-
See Get the Software for where to download the software bundle.
-
Run the OCDoctor
The OCDoctor quickly identifies potential issues before you download and install the software. In some cases, it provides a fix.
To check the computer compatibility before downloading the software:
-
Go to
http://java.net/projects/oc-doctorand download the OCDoctor to /var/tmp/OC on the system. -
Unzip the file and run the utility with the --ec-prereq option.
./OCDoctor.sh --ec-prereq
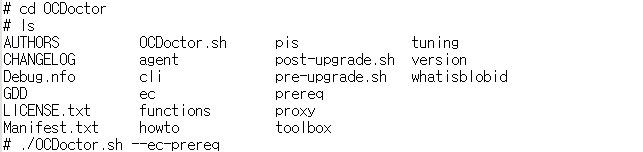
Description of the illustration ocdr.jpg
The utility checks for conditions and returns an OK or Warning.
-
If you receive any warnings, fix them before installing the software.
For example, a warning appears if you use NIS and you already have a groupip 60 in your NIS group. To temporarily bypass, comment out the NIS entries during the installation.
passwd: files # nisgroup: files # nis
Get the Software
The software bundle is approximately 2.4 GB.
-
Go to
http://www.oracle.com/technetwork/oem/ops-center/oem-ops-center-188778.html. Read and accept the license at the top of the page. -
Download the Enterprise Controller for your OS platform.
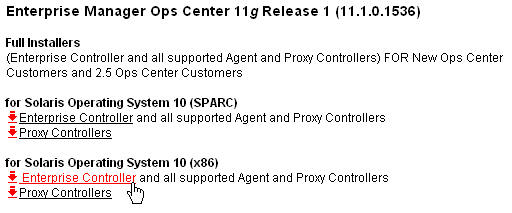
Description of the illustration download.jpg
-
Save the bundle in /var/tmp/OC on the system and unzip it.
Install and Configure the Software
The software is easy to install, just launch the script. Once installed, open the application in a browser and answer the configuration questions about how you want to run the software, then you're ready to start adding assets to monitor.
You'll be asked to provide a My Oracle Support (MOS) account during setup. The account is needed to register the software with Oracle, to obtain OS updates, and to file service requests through the software. We'll skip these steps because the account is not required for installation or basic monitoring. If you'd like, you can register and provide a MOS account later in the UI.
Install
-
Go to /var/tmp/OC/xvmoc_full_bundle and run the install script.
#
./install -
Press Enter to skip this step. You do not need to enter your e-mail address or My Oracle Support (MOS) credentials to register for this basic installation.
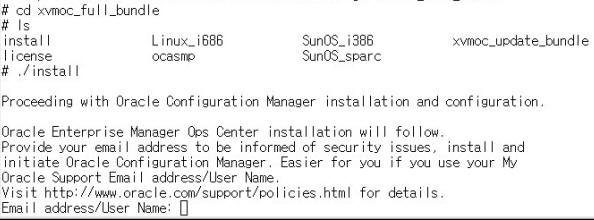
Description of the illustration start_install.jpg
-
A notice stating that you have not provided an e-mail address for notification of security issues appears. When asked if you want to remain uninformed of security issues, answer Y
Do you wish to remain uninformed of security issues ([Y]es, [N]o) [N]: Y
The script takes about 15 minutes to run. When completed, you'll be asked to log in to the software from a browser window. See Step 1 in Configure.
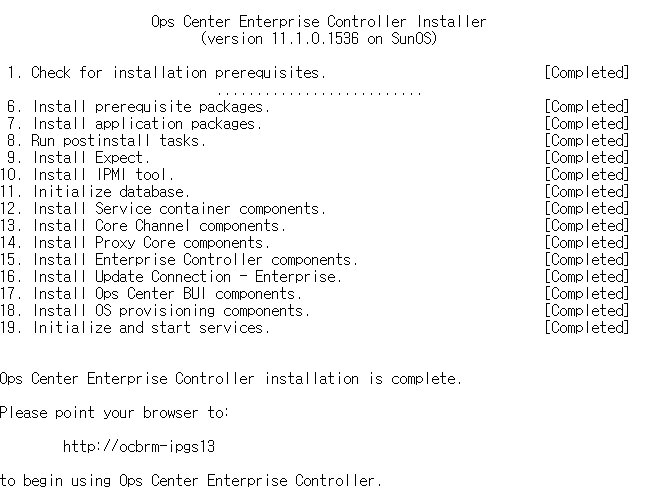
Description of the illustration install_complete.jpg
Configure
Log into the system and the Configuration wizard will take you through the steps to configure the software. The number of steps changes based on your answers. We will skip a number of the more complex configuration options.
-
The first two steps provide an overview, click Next to skip Steps 1 and 2. On Step 3, change the host name from the IP address to the system name, add a description, then click Next.

Description of the illustration step3b.jpg
-
Several steps provide an overview of the deployment options. Click Next to skip those steps. On the Choose Deployment step, select the Simple Deployment option.
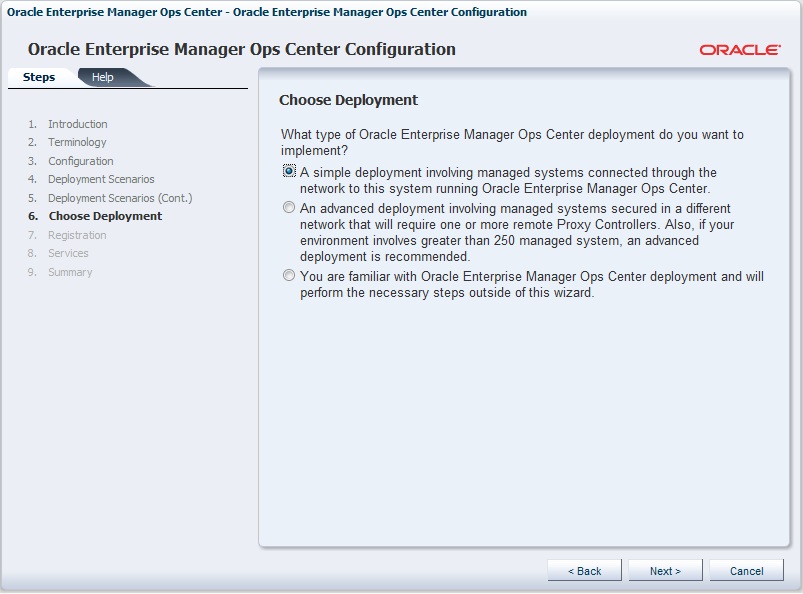
Description of the illustration choosedeployment.jpg
-
Close the window when the Proxy Controller configuration is finished.
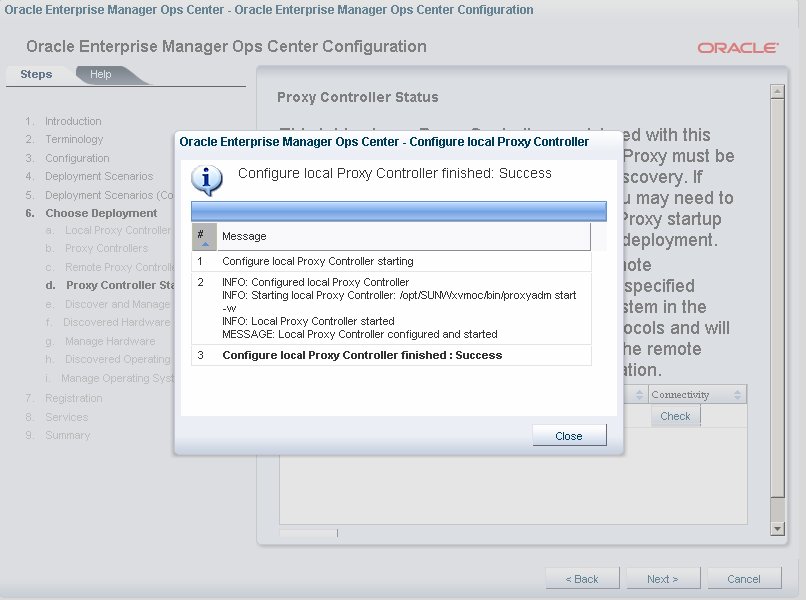
Description of the illustration configured.jpg
-
Select Discover/Manage Systems Later.
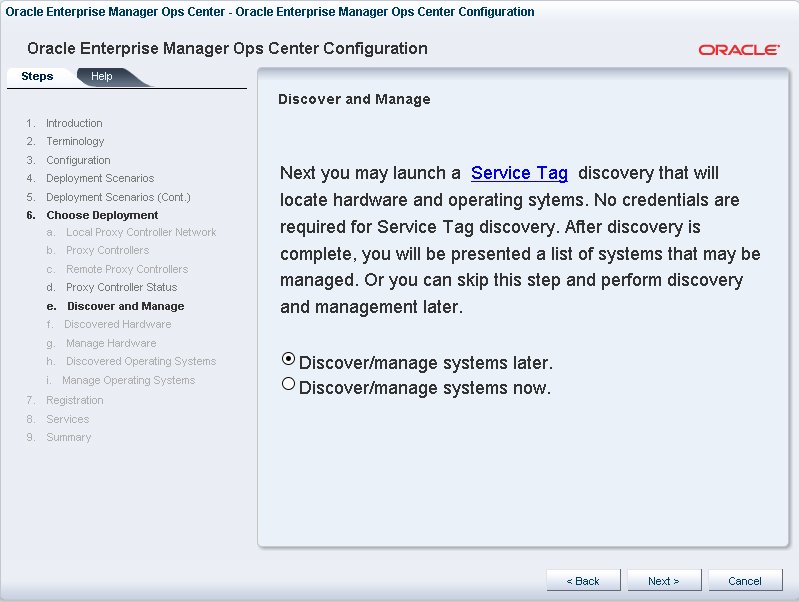
Description of the illustration discoverlater.jpg
-
Skip the Software Update Service configuration by selecting Perform configuration later.
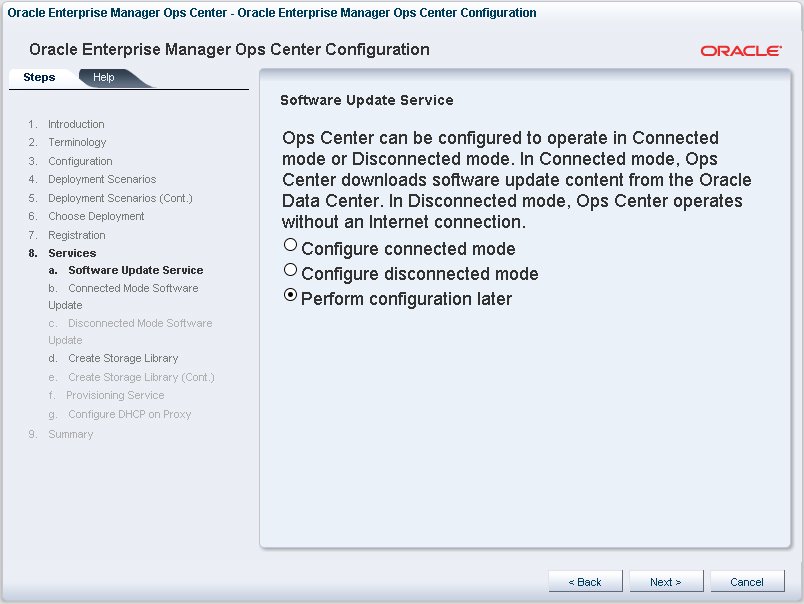
Description of the illustration connectedmodelater.jpg
-
Skip the Storage Library step by selecting Configure library later.
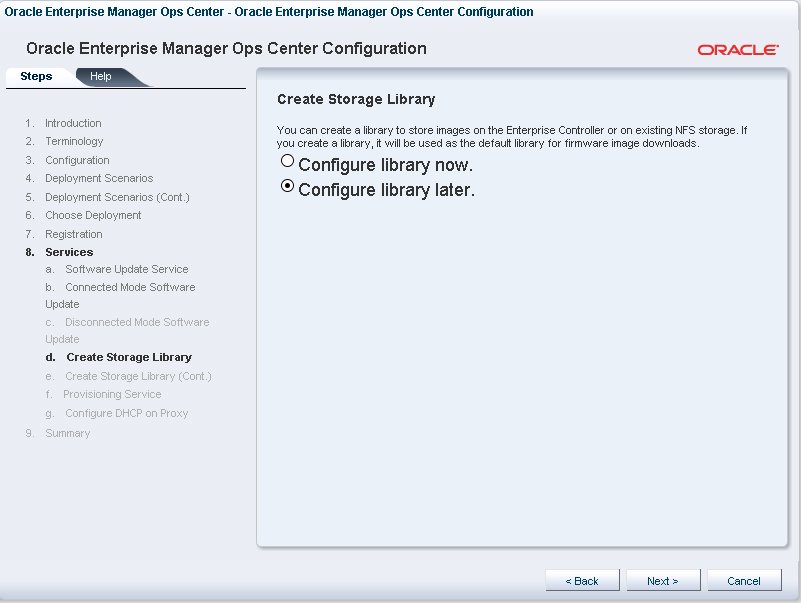
Description of the illustration library_later.jpg
-
Skip the Provisioning Service step by selecting Perform Configuration Later.
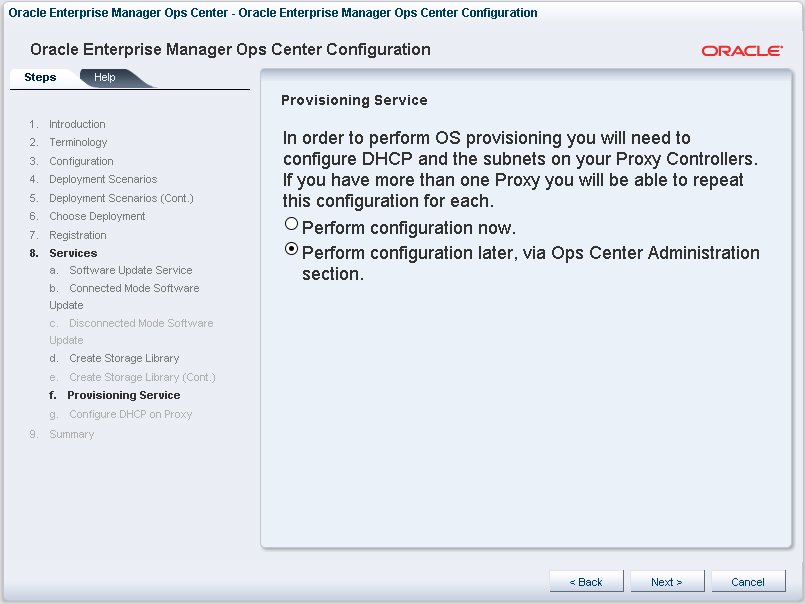
Description of the illustration configure_prov_later.jpg
-
Click Finish.
Congratulations! You've completed the installation and configuration. You can now add your systems to the UI and begin monitoring them.
Add Assets
Several methods are available to add systems, or assets, to the UI. Because we're only adding a few assets, we'll use the Custom Discovery method. Once discovered, we will manage the OS assets to enable monitoring.
-
Click Assets in the Navigation pane, then click Custom Discovery in the Actions pane.
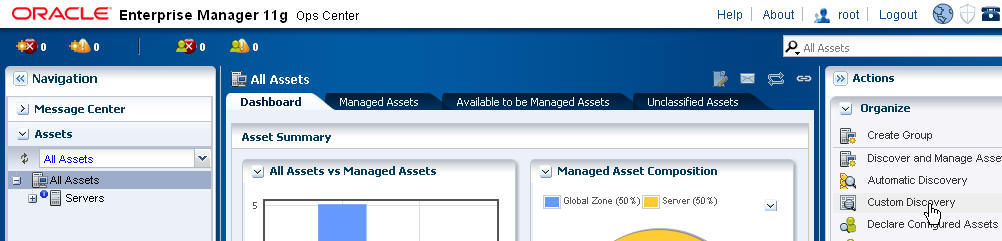
Description of the illustration customdisc.jpg
-
Click the New Criteria icon.
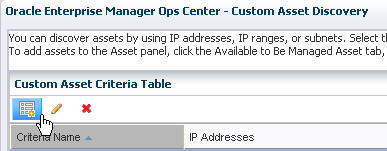
Description of the illustration new_criteria.jpg
-
Type one or more IP addresses or host names and select All in the search.
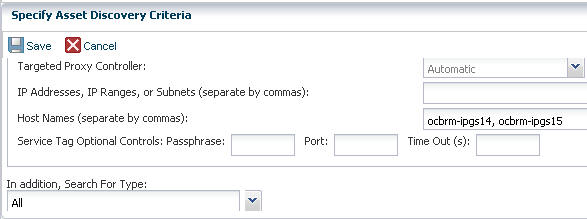
Description of the illustration discover_host.jpg
-
Enter the SSH root credentials. Click Save.
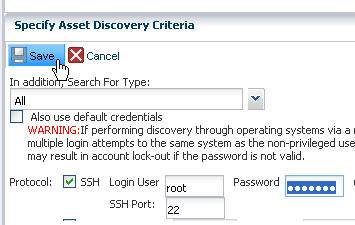
Description of the illustration credentials.jpg
-
-
Click Discover Assets.
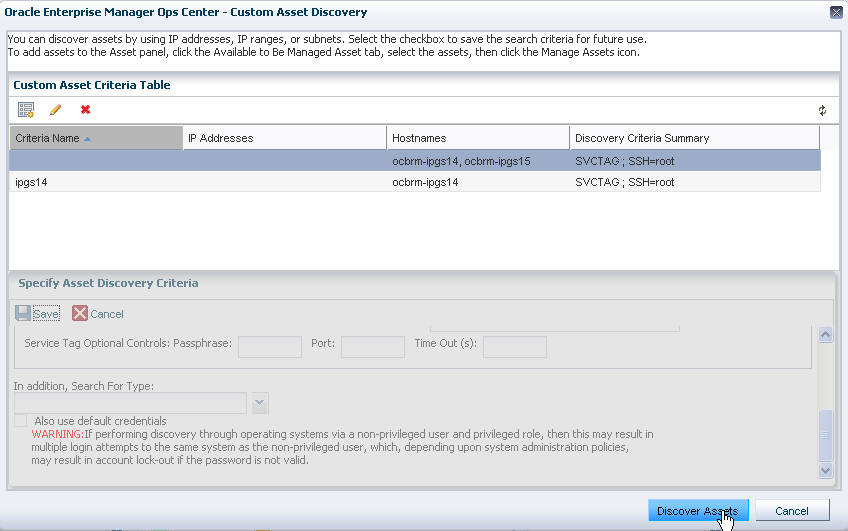
Description of the illustration discover.jpg
A job is started to locate the asset. The job bar is at the bottom of the page. The status is in the lower left corner.

Description of the illustration jobstatus.jpg
-
When the discovery job completes, click the Available to be Managed Assets tab. Select one or more assets, then click the check mark icon to install the Agent.
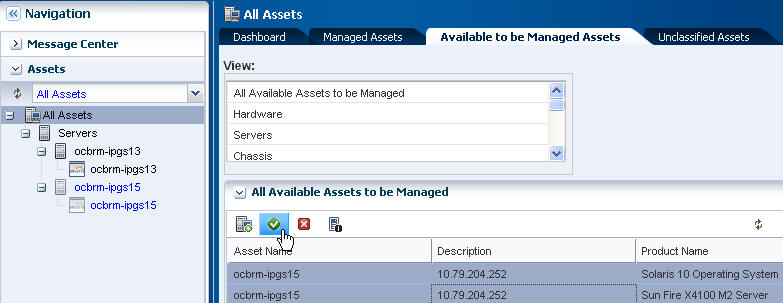
Description of the illustration manage.jpg
-
Click through the Manage Asset Wizard.
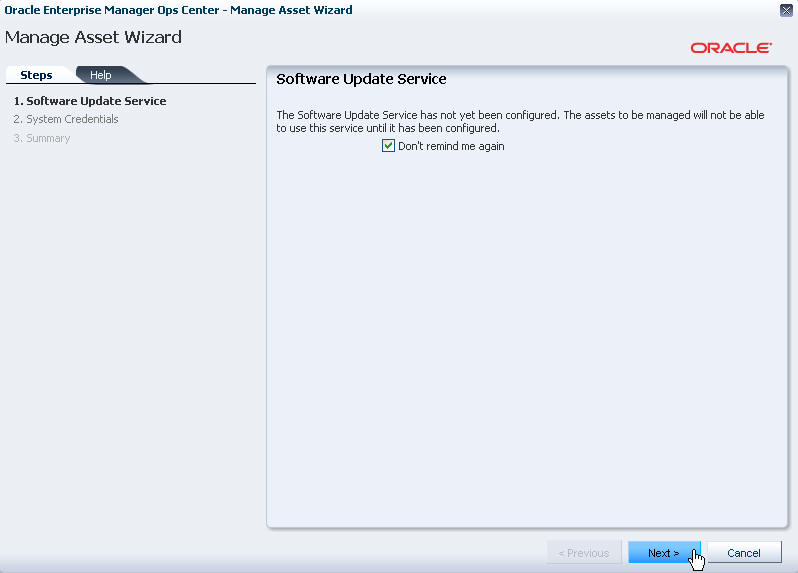
Description of the illustration manage1.jpg
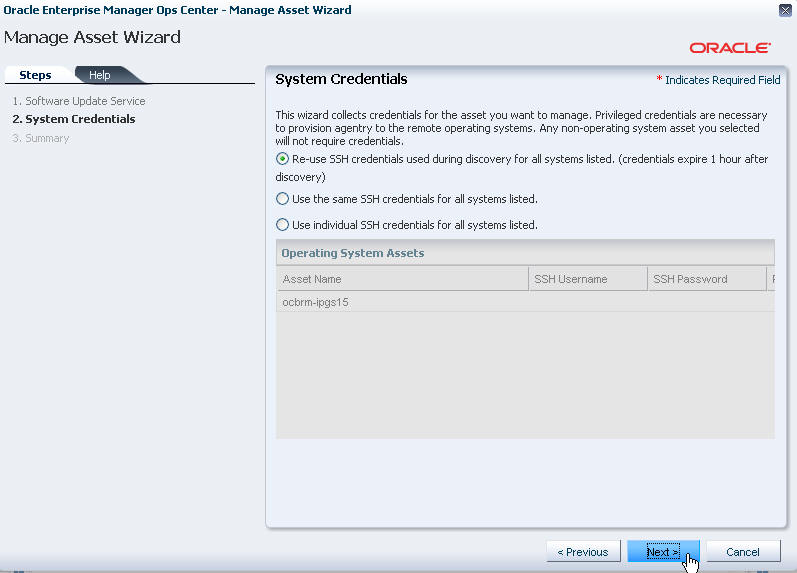
Description of the illustration manage2.jpg
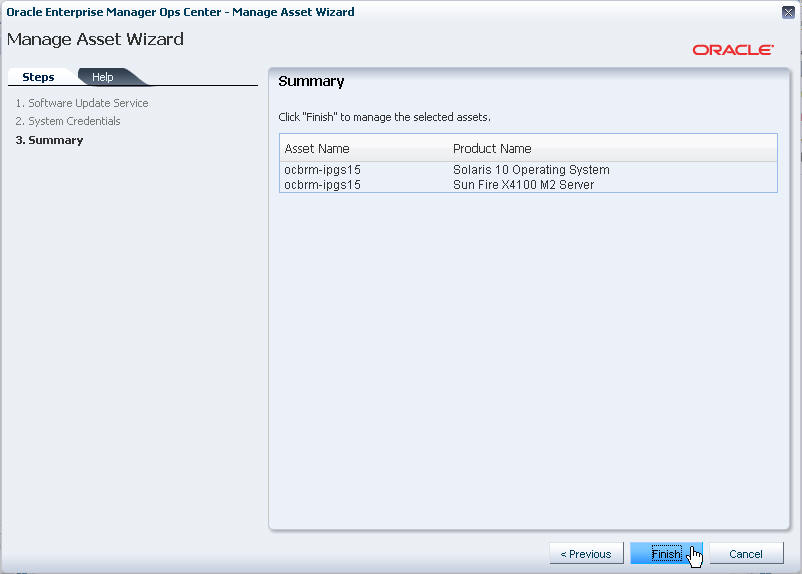
Description of the illustration manage3.jpg
Monitoring
The software has a set of default monitoring rules for many types of assets. When you discover and manage an asset, such as an OS or system, the software begins monitoring the status based on the default rules.
How Does Monitoring Work?
Many assets have a default monitoring profile. Different types of monitoring profiles are available, depending on the asset type. Some profiles contain individual monitoring rules, thresholds and alert levels. These alert levels are editable for Critical, Warning, and Informational problem notification. Some profiles, such as system-defined rules, are not editable but you can disable them. You can customize the alerts and monitoring profiles for each asset or group of assets.
To view or edit the default monitoring rules for an asset, click a managed asset from the Assets tree in the Navigation pane, then click the Monitoring tab in the center pane.
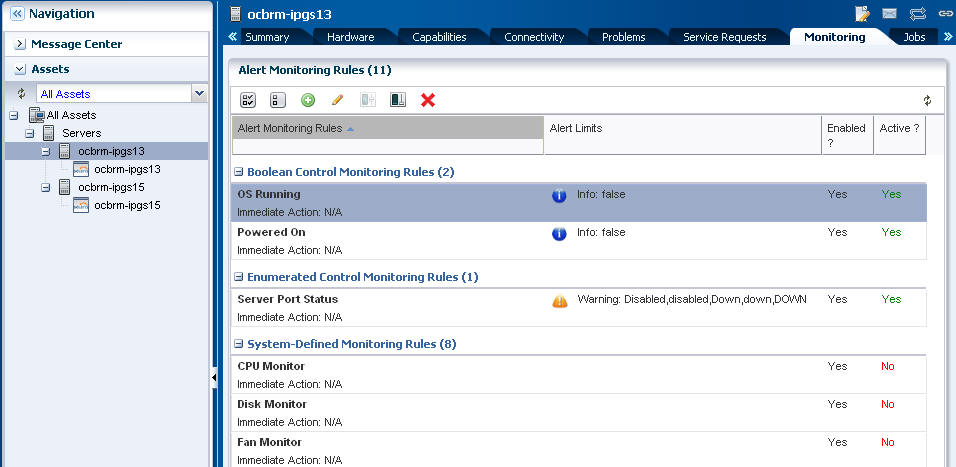
Description of the illustration monitoring.jpg
The icons at the top of the center pane enable you to add, edit, enable, disable, or delete rules.
When an asset first meets or exceeds a monitoring threshold or state, an alert and a problem are generated. Subsequent alerts are aggregated under the existing problem.
How do I Create an Alert and Problem
An easy way to generate an alert and problem is to shutdown a monitored system. The shutdown generates a critical status alert. The System Down problem appears in the Message Center and a red warning badge appears next to the asset in the Asset tree to indicate that there is a critical problem.
How do I View and Assign Problems?
When a problem is generated, a severity status badge appears next to the asset in the Asset tree. You can see a list of All Problems in the Message Center.
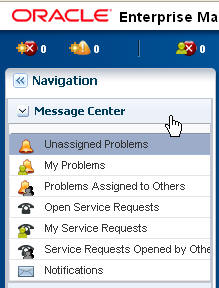
Description of the illustration messagectr1.jpg
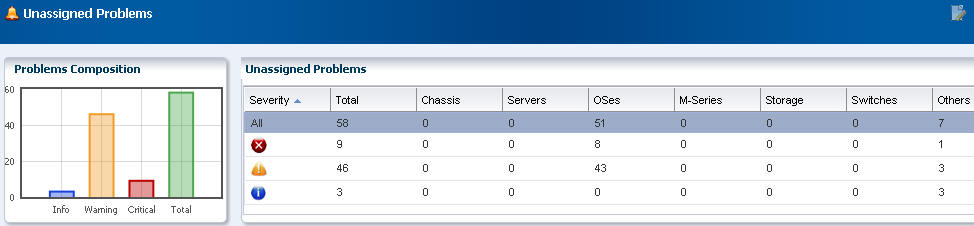
Description of the illustration messagectr2.jpg
You can also see problems and the associated alerts for each asset in the Problems tab. For more about viewing and managing problems, see the Oracle Enterprise Manager Ops Center User's Guide and Oracle Enterprise Manager Ops Center Advanced User's Guide at http://download.oracle.com/docs/cd/E11857_01/nav/management.htm.
Where Do I Go From Here?
For more details on these and other features, see the Oracle Enterprise Manager Ops user documentation. For a more complex installation, see the Site Preparation Guide and Installation Guides. The documentation is available at http://download.oracle.com/docs/cd/E11857_01/nav/management.htm or from the Help link in the user interface (UI).
Your comments and suggestions are welcome. Please send your feedback to oc-writers-direct-reports_ww@oracle.com.
Join the Community
The Oracle Enterprise Manager Ops Center community is a collaborative space to view, ask, and answer questions related to the Oracle Enterprise Manager Ops Center software. Everyone is invited to use the community and add to the knowledgebase.
Join the community at https://communities.oracle.com/portal/server.pt/community/oracle_enterprise_manager_ops_center.
Documentation Accessibility
For information about Oracle's commitment to accessibility, visit the Oracle Accessibility Program website at http://www.oracle.com/pls/topic/lookup?ctx=acc&id=docacc.
Oracle customers have access to electronic support through My Oracle Support. For information, visit http://www.oracle.com/pls/topic/lookup?ctx=acc&id=info or visit http://www.oracle.com/pls/topic/lookup?ctx=acc&id=trs if you are hearing impaired.
Oracle Enterprise Manager Ops Center Quick Start Guide, 11g Release 1 (11.1.3.0.0) &platform;
E24504-02
Copyright © 2007, 2011, Oracle and/or its affiliates. All rights reserved.
This software and related documentation are provided under a license agreement containing restrictions on use and disclosure and are protected by intellectual property laws. Except as expressly permitted in your license agreement or allowed by law, you may not use, copy, reproduce, translate, broadcast, modify, license, transmit, distribute, exhibit, perform, publish, or display any part, in any form, or by any means. Reverse engineering, disassembly, or decompilation of this software, unless required by law for interoperability, is prohibited.
The information contained herein is subject to change without notice and is not warranted to be error-free. If you find any errors, please report them to us in writing.
If this is software or related documentation that is delivered to the U.S. Government or anyone licensing it on behalf of the U.S. Government, the following notice is applicable:
U.S. GOVERNMENT RIGHTS Programs, software, databases, and related documentation and technical data delivered to U.S. Government customers are "commercial computer software" or "commercial technical data" pursuant to the applicable Federal Acquisition Regulation and agency-specific supplemental regulations. As such, the use, duplication, disclosure, modification, and adaptation shall be subject to the restrictions and license terms set forth in the applicable Government contract, and, to the extent applicable by the terms of the Government contract, the additional rights set forth in FAR 52.227-19, Commercial Computer Software License (December 2007). Oracle America, Inc., 500 Oracle Parkway, Redwood City, CA 94065.
This software or hardware is developed for general use in a variety of information management applications. It is not developed or intended for use in any inherently dangerous applications, including applications that may create a risk of personal injury. If you use this software or hardware in dangerous applications, then you shall be responsible to take all appropriate fail-safe, backup, redundancy, and other measures to ensure its safe use. Oracle Corporation and its affiliates disclaim any liability for any damages caused by use of this software or hardware in dangerous applications.
Oracle and Java are registered trademarks of Oracle and/or its affiliates. Other names may be trademarks of their respective owners.
Intel and Intel Xeon are trademarks or registered trademarks of Intel Corporation. All SPARC trademarks are used under license and are trademarks or registered trademarks of SPARC International, Inc. AMD, Opteron, the AMD logo, and the AMD Opteron logo are trademarks or registered trademarks of Advanced Micro Devices. UNIX is a registered trademark of The Open Group.
This software or hardware and documentation may provide access to or information on content, products, and services from third parties. Oracle Corporation and its affiliates are not responsible for and expressly disclaim all warranties of any kind with respect to third-party content, products, and services. Oracle Corporation and its affiliates will not be responsible for any loss, costs, or damages incurred due to your access to or use of third-party content, products, or services.