Setup
This chapter covers the following topics:
- Overview
- Deployment Configurations
- Setup with Oracle e-Business Suite
- Standalone Setup
- Setting Up Multi-Tier Collaboration in Oracle Collaboration Planning
- Loading and Publishing Data
- Run Data Collections
- Orders
- Order Types
- Assign Planner Codes to Items
- Security Rules
Overview
Your implementation of Oracle Collaborative Planning depends on the application(s) you integrate with. Depending on the system, if any, you integrate Oracle Collaborative Planning with, you load data using different methods. Consider whether the following apply to your implementation:
-
Implementation with Oracle e-Business Suite
-
Implementation with Oracle Advanced Planning and Scheduling
-
Implementation with Legacy systems
-
Standalone setup
The following table depicts the setup steps necessary to implement Oracle Collaborative Planning, depending on your implementation type.
Deployment Configurations
Begin your setup process by deciding on your deployment hardware configuration. Oracle Collaborative Planning supports one, two and three machine implementations. These different deployment configurations enable planning calculations to be performed on different machines than the machine that performs transactions. This results in better system response.
The following are types of deployment configurations:
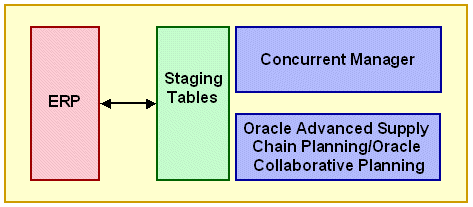
Single Machine Implementation
For small implementations, source and destination can reside on the same machine and in the same instance. The following image illustrates this configuration:
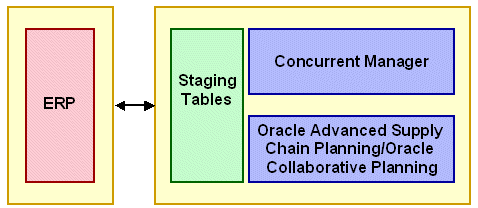
Two Machine Implementation
For larger implementations various instances can be deployed on separate machines. The following image depicts a two machine implementation:
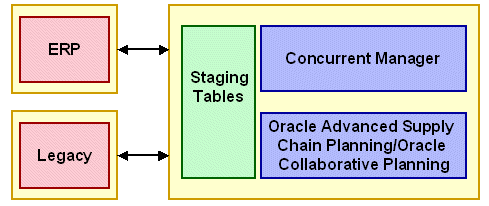
Three Machine Implementation
A three-machine deployment allows for the manipulation of high-dimensionality, large-scale demand planning data to occur on a machine separate from the planning calculations done on the planning server. The following image depicts this type of implementation:
For all deployment configurations, a collection process brings data from the source to the destination instance.
Setup with Oracle e-Business Suite
The setup for a deployment with the Oracle e-Business Suite or with Oracle Advanced Planning and Scheduling requires the same steps.
When you deploy Oracle Collaborative Planning with Oracle Advanced Supply Chain Planning, or as part of the Oracle e-Business Suite:
-
Key entities are set up in source ERP instances
-
Oracle Advanced Planning and Scheduling collection programs are used to enable setups in Oracle Collaborative Planning
-
Supplies and demands in the source instance are collected to Oracle Collaborative Planning
-
Trading partner supplies and demands are uploaded using flat files
Set up Profile Options
Set profile options to correctly use Oracle Collaborative Planning in your business. For example, if you configure Oracle Collaborative Planning with Oracle iSupplier Portal, you must set the MSC: Configuration profile option to include Oracle Collaborative Planning and Oracle iSupplier Portal.
Complete the following steps to set up profile options:
-
Log in under the System Administrator responsibility.
-
Navigate to Profile > System.
-
In the Find System Profile Values window, select Application.
-
Search and select Oracle Advanced Supply Chain Planning in the Application field.
-
In the Profile field, enter MSC% and select Find.
-
On the System Profile Values window, set the necessary profile options. The following table lists the profile options, their necessary values, and profile option descriptions.
Profile Option Value Description MSC: Configuration: APS & CP Indicates that the APS data model is activated. MSC: Operator Company Name Your company name Name issued by the company deploying Oracle Collaborative Planning. MSC: Vertical View Default Query Yes Ensures that the vertical view displays a default set of results. MSC: VMI Default Query Yes Ensures that the VMI screen displays a default set of results. Note: If Oracle Collaborative Planning and Oracle Advanced Supply Chain Planning are installed on a different server than the rest of your Oracle ERP applications, you must set two additional profile options:
Note: FND: Debug Log Enables = Blank or No
Note: ICX: Session Timeout = Blank
-
Save your work.
For more information about the profile options used in Oracle Collaborative Planning, refer to Profile Options.
Define Customers, Suppliers, and Sites
Create customers, suppliers, and in the source instance, then collect them to Oracle Collaborative Planning. After you set up your information in an Oracle ERP system, the data is collected into Oracle Advanced Supply Chain Planning and Oracle Collaborative Planning.
Define Customers and Customer Sites
Customers are defined in Oracle Order Management, using the Customers - Standard window. When defining a customer, enter the customer site in the location column. After defining your customers, run a targeted trading partners data collection to collect new customers into Oracle Collaborative Planning.
For more information about defining customers, refer to the Oracle Order Management Implementation Suite.
Define Suppliers and Supplier Sites
Suppliers are defined in Oracle Purchasing using the Supply Base - Suppliers window. When defining a supplier, enter the supplier site in the location column. After defining your suppliers and their sites, run a targeted trading partners data collection to collect new suppliers into Oracle Collaborative Planning.
For more information about defining suppliers, refer to the Oracle Payables User Guide.
Define Users and Assign Responsibilities
The system administrator of the Oracle ERP system sets up new accounts for users. You must specify the contact persons when defining customers in Oracle Order Management or suppliers in Oracle Purchasing. After specifying the contact persons the system administrator defines the user. Provide the following information:
-
Username
-
Contact Person
-
Description
Define Users
You can define users that belong to your company, your supplier's company, or your customer's company. You must set up supplier users as contacts for supplier sites before they can be registered as users. Customer users must be setup as contacts for customer sites before they can be registered as users. After establishing the users in the Oracle ERP system, run a targeted user company association data collection to collect new users. Select the option to create and enable user company association.
-
Using the System Administrator responsibility, in an Oracle application, navigate to Security > User > Define. The following image depicts this navigational path:
-
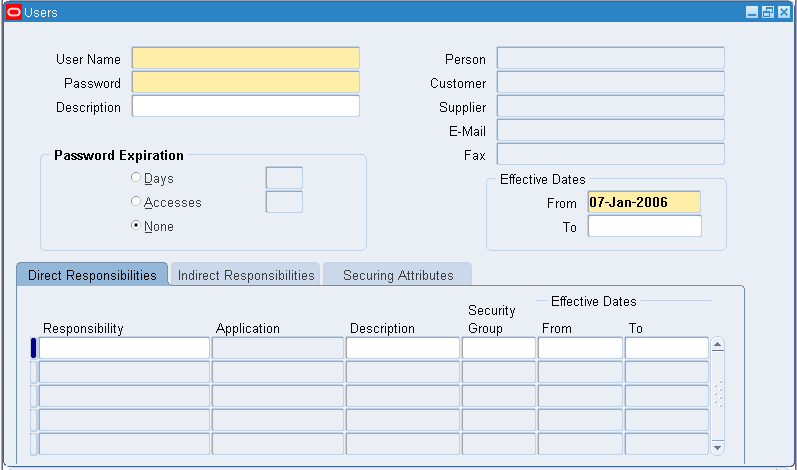
In the Users window, enter the username you created in the source instance and assign the user the Supply Chain Collaboration Planner responsibility. The following image depicts the Users window:
Users Window
-
A user must be a member of your company or a member of an established customer or supplier in the Oracle ERP system. Customers are maintained in the Oracle Order Management system. You must have certain responsibilities to create a new user. To establish a customer user in Oracle Collaborative Planning, you must complete the following in the Oracle ERP system:
-
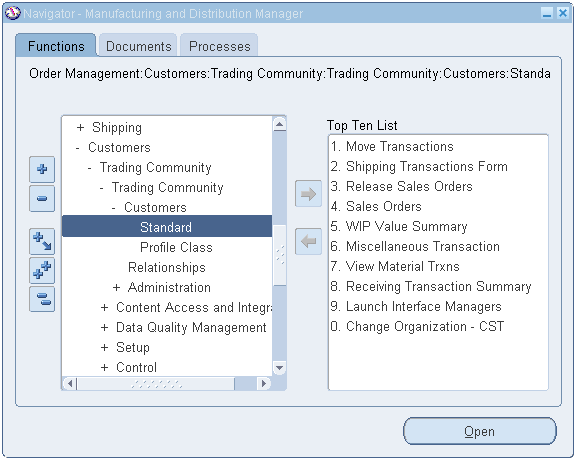
In Oracle Order Management, navigate to Order Management > Customer > Trading Community > Trading Community > Customers > Standard. The following image depicts this navigational path:
Navigator - Manufacturing and Distribution Manager Window
-
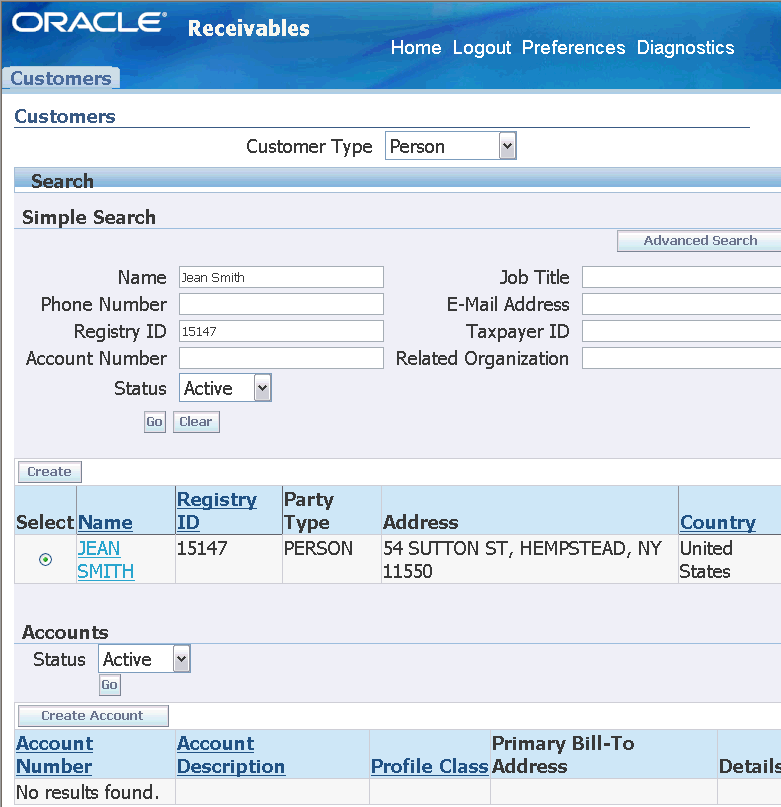
In the Customers screen, search for a customer and select Create. The following image depicts the Customers screen:
Customers Screen
-
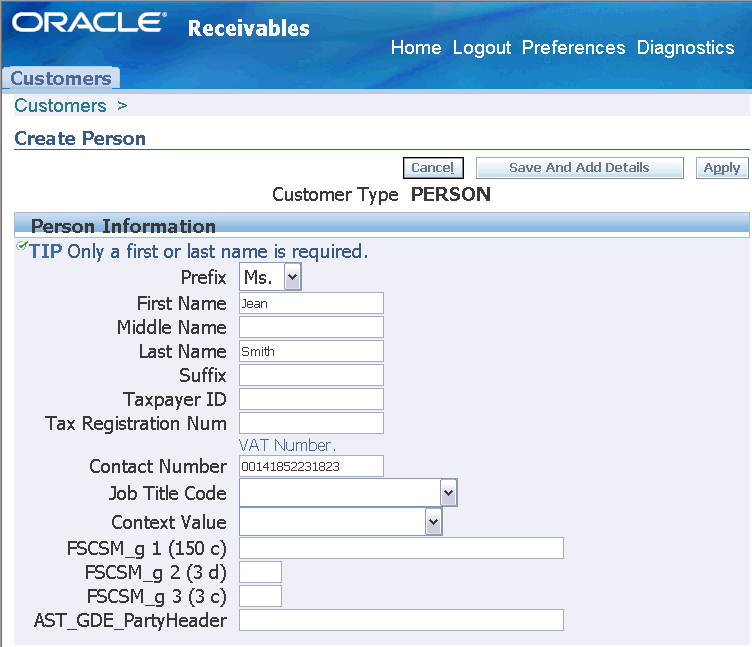
In the Customers screen, enter a customer name and contact information. The following image depicts the Customers screen:
Customers Screen
-
Save your work.
-
Change the responsibility to System Administrator and navigate to Security > User > Define.
-
In the Users window enter a user name, description, and contact person.
Supplier information is maintained in Oracle Purchasing.
To establish a supplier user in Oracle Collaborative Planning, enter the following in your source instance:
-
In the Oracle Purchasing system, navigate to Purchasing > Supply Base > Suppliers. The following image depicts this navigational path:
Navigator - Manufacturing and Distribution Manager Window

-
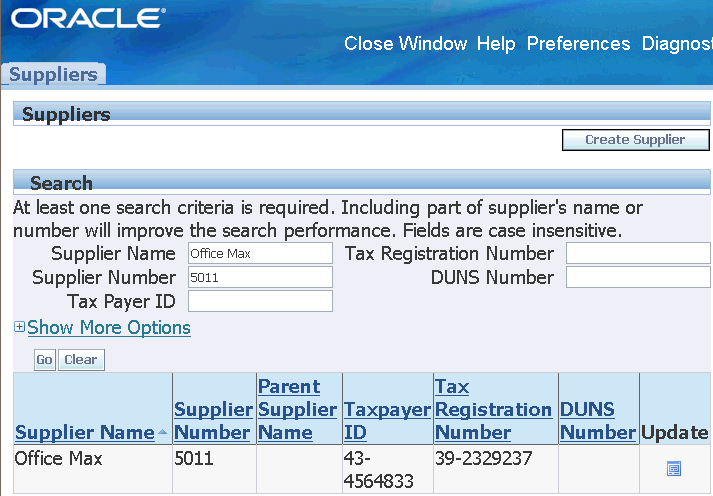
In the Suppliers screen, search for Supplier Name and select the supplier site. The following image depicts the Suppliers screen:
Suppliers Screen
-
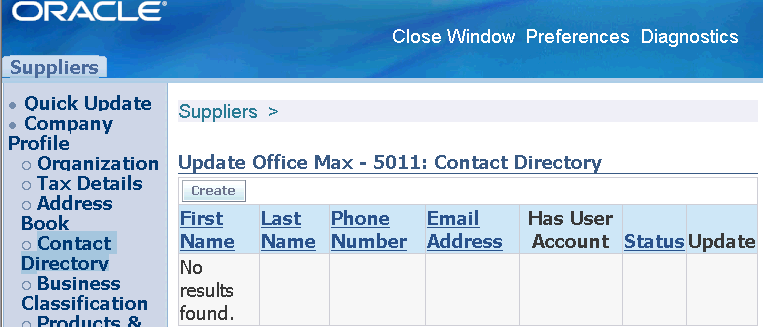
After you select the supplier site, select Address Book > Contact Directory on the left hand pane and enter information for a contact person. The following image depicts the Contact Directory screen for a supplier site:
Contact Directory Screen
-
Save your work.
-
Switch to the System Administrator responsibility and navigate to Security > User > Define.
-
On the Users window, enter a user name, description, and assign the Supply Chain Collaboration Planner responsibility.
-
Search and select a contact name. Oracle Collaborative Planning links the contact supplier information to the new user.
-
-
If your implementation of Oracle Collaborative Planning exists on a separate machine from the Oracle ERP system, then customer or supplier users must be established in the Oracle Collaborative Planning system.
To establish a customer or supplier user in Oracle Collaborative Planning, you must complete the following steps:
-
Define a new user by navigating to Security > User > Define. The System Administrator creates new accounts.
-
In the Users window, enter the same username you created in the Oracle ERP system and assign the Supply Chain Collaboration Planner responsibility.
-
Run a targeted data collection to collect company user association from the Oracle ERP system into the Oracle Collaborative Planning system. Set the flag on the Company User Association parameter to enable user company association. For more information on running data collections, see refer to Run Data Collections.
-
Maintain the company site information in the Oracle ERP system and collect data to Oracle Collaborative Planning.
-
Customers and suppliers can post their supplies and demands into the Oracle Collaborative Planning system.
To create users and enable user company association:
-
Switch to the Advanced Supply Chain Planner responsibility. Navigate to Collections > Oracle Systems > Data Collection.
-
In the Planning Data Collections window, select the Parameters field.
-
In the Parameters window, complete the following fields:
-
Instance
-
Purge Previously Collected Data = No
-
Collection Method = Target Refresh
-
User Company Association = Create Users and Enable User Company Association
-
Select OK.
-
Start data collections. After successfully collecting data to the Oracle Collaborative Planning system, new users can log into Oracle Collaborative Planning and view or create new transactions. For more information on running data collections, Run Data Collections.
-
Assign Responsibilities
Reserve the Supply Chain Collaboration Administrator responsibility for a system administrator who has responsibility for the whole deployment. The following table lists the different types of users, which responsibilities you can assign to them, and the responsibility description:
| Responsibility | Company Users | Supplier Users | Customer Users | Responsibility Description |
|---|---|---|---|---|
| Supply Chain Collaboration Planner | Yes | Yes | Yes | Provides users access to planner tasks. |
| Supply Chain Collaboration Manager | Yes | Yes | Yes | Provides users access to planner and administrative tasks. |
| Supply Chain Collaboration Administrator | Yes | No | No | Provides users access to planner and administrative tasks. The user can create security rules that apply to supplies and demands posted by all companies. |
Set Up Calendar
The calendar in Oracle Collaborative Planning is a 7-0 calendar, where all days are workdays, the week begins on Monday, and the month begins on the first day of the calendar month. Set up the calendar for Oracle Collaborative Planning by running the concurrent program Build Collaborative Planning Calendar.
Complete the following steps to set up the calendar in Oracle Collaborative Planning.
-
Log in using the Advanced Supply Chain Planner responsibility.
-
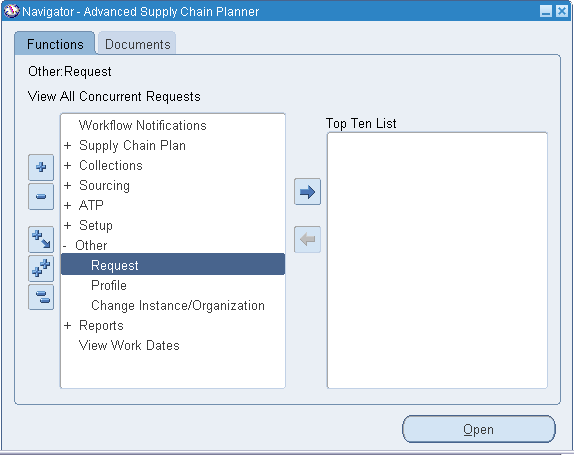
Navigate to Other > Request. The following image depicts this navigational path:
Navigator - Advanced Supply Chain Planner Window
-
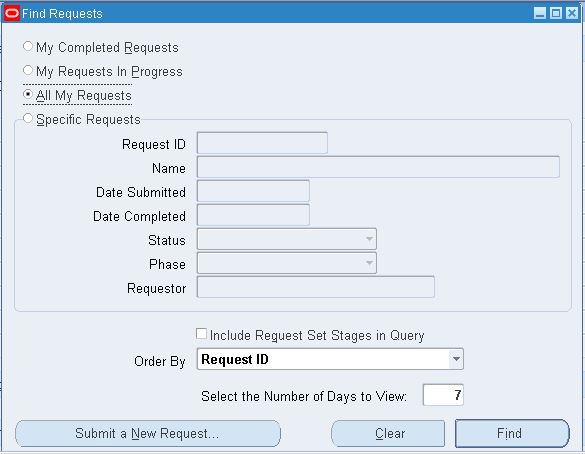
In the Find Requests window, select Submit a New Request. The following image depicts the Find Requests window:
Find Requests Window
-
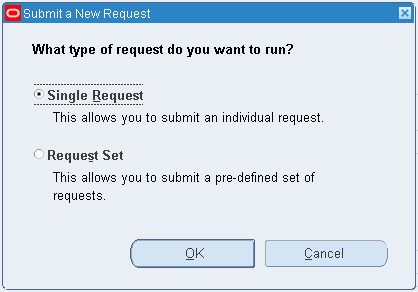
On the Submit a New Request window, select Single Request and select OK. The following image depicts the Submit a New Request window:
Submit a New Request Window
-
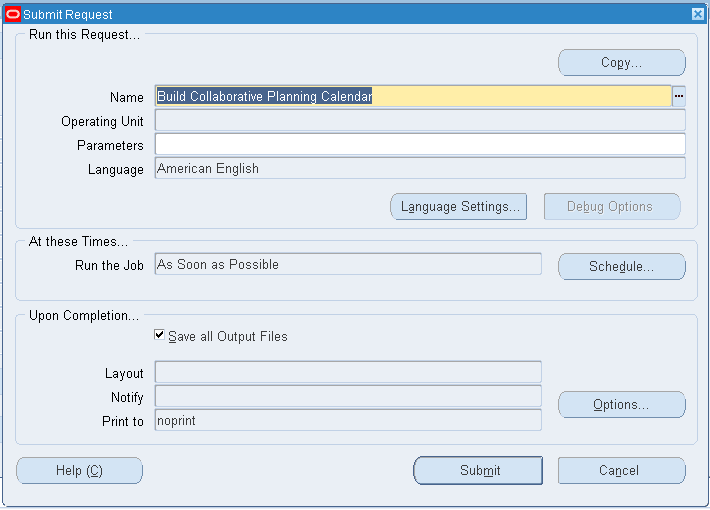
In the Submit Request window select Build Collaborative Planning Calendar. The following image depicts the Submit Request window:
Submit Request Window
-
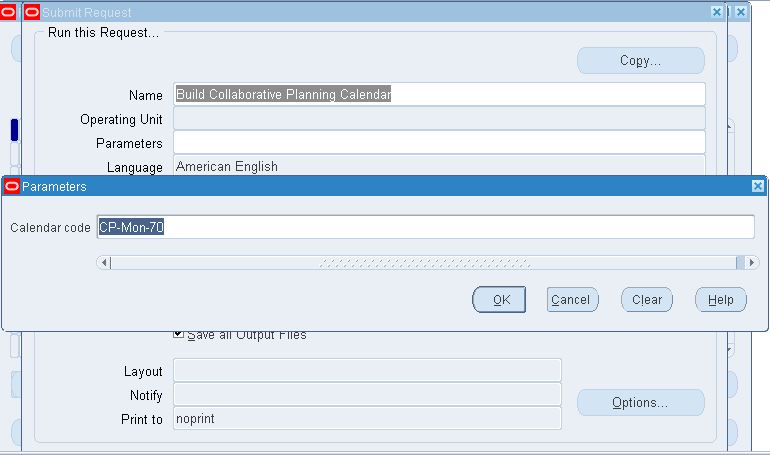
In the Parameters window, select OK. The following image depicts the Parameters window:
Parameters Window
-
In the Submit Request window, select Submit.
Set Up Items
If you deploy Oracle Collaborative Planning with the Oracle e-Business Suite, you create items in the Oracle ERP system and collect them into the Oracle Collaborative Planning system.
Items are created in Oracle Inventory. Run an items data collection to receive items into Oracle Collaborative Planning. You must run a data collection to collect any new items that may be part of your collaboration with your customers and suppliers.
Complete the following steps to set up items:
-
Log in using the Manufacturing and Distribution Manager responsibility.
-
In the Manufacturing and Distribution Manager window, navigate to Inventory > Items > Master Items.
-
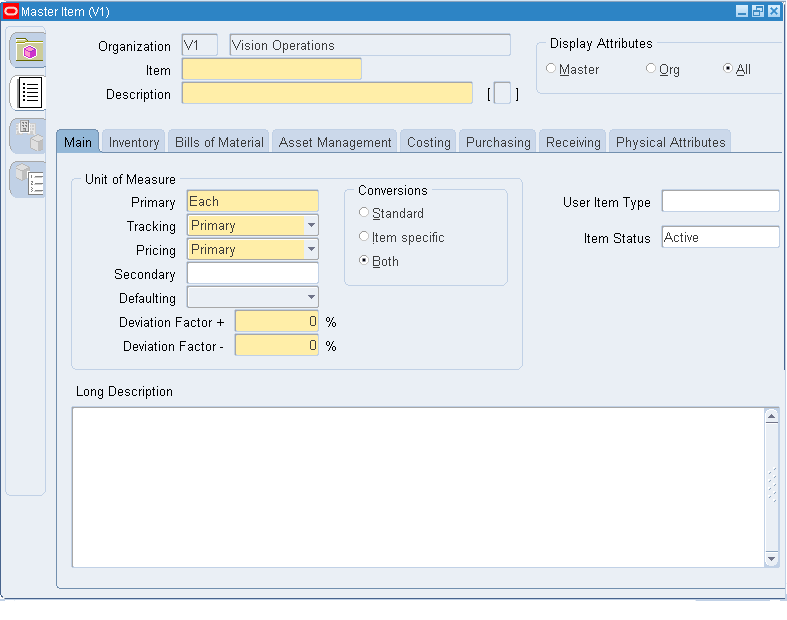
In the Master Item window, enter your item information. For more information about item setup, refer to the Oracle Inventory User's Guide. The following image depicts the Master Item window:
Master Item Window
-
Save your work.
-
Run a data collection to load the items into Oracle Advanced Supply Chain Planning and Oracle Collaborative Planning. For more information on running data collections, refer to Run Data Collections.
Setup Oracle iSupplier Portal
When you deploy Oracle iSupplier Portal and Oracle Collaborative Planning together, your supplier users can access both applications through a combined portal. This is accomplished by assigning supplier users the Supplier Collaboration Full Access responsibility. After creating Supplier Collaboration responsibility, you can then access a combined home page that features the functionality of both Oracle iSupplier Portal and Oracle Collaborative Planning.
To setup Oracle iSupplier Portal and Oracle Collaborative Planning together, you must install Oracle Collaborative Planning on the same instance as your Oracle ERP system. You must have the System Administrator responsibility to assign responsibility to users.
Complete the following steps to set up users for access to Oracle iSupplier Portal and Oracle Collaborative Planning:
-
Log in under the Supplier User Management responsibility.
-
Navigate to supplier User Management > Register Supplier User.
-
Provide registration details.
-
Save your work.
Set Up Buyer Code and Item Category for Advanced Search
Setup in Oracle Inventory
To enable the search by buyer code, you must associate a buyer with an item on the Purchasing tab on the Master Items window or the Organization Items window. For more information about associating a buyer with an item, see Oracle Inventory User's Guide.
Setup in Oracle Advanced Supply Chain Planning
To categorize supply/demand data based on item categories, set up the MSC: Category set for the CP Horizontal View profile option. This profile option indicates a category set that planners might use for queries in the Oracle Collaborative Planning Horizontal View. This profile option restricts queries to specific categories as selected by the planner. For more information about setting this profile option, see Oracle Advanced Supply Chain Planning Implementation and User's Guide.
OEM User Setup
An OEM user is a member of your company that uses Oracle Collaborative Planning. This person will have access to your company data. Complete the following steps to create this type of user.
-
Log in under the System Administrator responsibility.
-
Navigate to Security > Users > Define.
-
Enter a username and assign the Supply Chain Collaboration Planner responsibility. If the user already exists, add the Supply Chain Collaboration Planner responsibility to the user and save your changes. If your implementation of Oracle Collaborative Planning exists on a separate machine from your Oracle ERP system, then you must create the user in the Oracle ERP system first.
-
Switch responsibilities to Advanced Supply Chain Planner > Collections > Oracle Systems > Data Collection
-
To perform a targeted collection, set the parameter value Purge Previously Collected Data to No. Set all other values to No. Set the value for the User Company Association parameter to Enable User Company Association.
-
Select Submit.
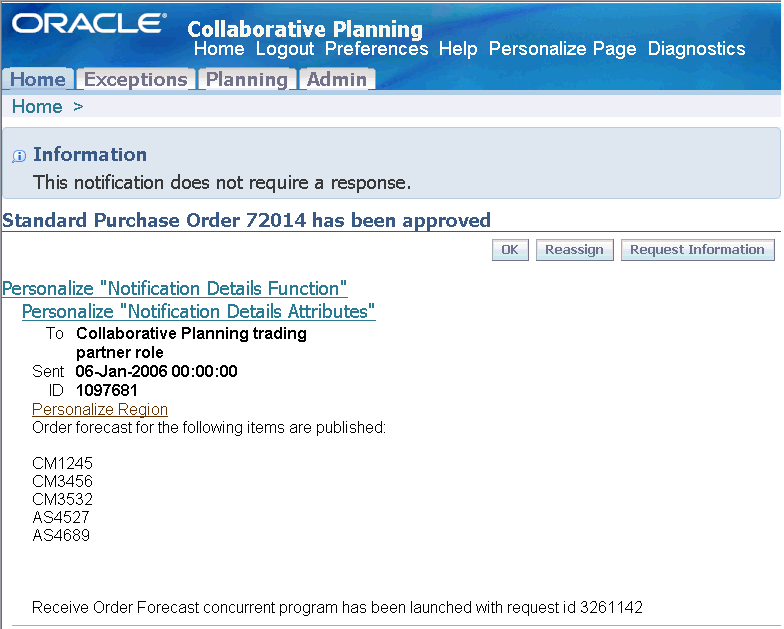
You can set up site-level contacts for your trading partners, so that the planning engine generates a notification for the related trading partner after the user publishes a supply or demand statement. This enables the related trading partner to be aware of the change in supply and demand information on time and to perform required actions without unnecessary delay. The notification contains a summary of:
-
Items published
-
Publisher
-
Order type published
The following image depicts a notification to the supplier site contact for an order forecast that was published:
Notification after Publishing Order Forecast
Complete the following steps to set up the site level contacts for your trading partners.
Steps in Oracle Purchasing
Set up supplier site-level contacts in the Requisition Preferences window in Oracle Purchasing. For more information about setting up site-level contacts for suppliers, see "Entering Requisition Preferences" in Oracle Purchasing User's Guide.
Steps in Oracle Order Management
Set up customer level contacts in the Add Customer window in Oracle Order Management.
Note that you cannot create site-level contacts using the Add Customer window. However, customer-level contacts can be used as site level contacts for orders or returns.
For more information about setting up customer-level contacts for, see "Adding Customers using the Add Customer window" in Oracle Order Management User's Guide.
Note: You cannot notify the site contacts for the related trading partners if you are using a standalone Collaborative Planning application because you must set up the site contacts in Oracle Purchasing and Oracle Order Management.
Standalone Setup
Set Up the Legacy Instance
To set up Oracle Collaborative Planning as a standalone product, you must first set up the legacy instance and then load planning organizations, customers, and suppliers.
Complete the following steps to set up the legacy instance:
-
Apply the legacy integration patch on the concurrent manager node on which you installed Oracle Collaborative Planning. If you have multiple concurrent manager nodes that are not NFS mounted, you must apply this patch on all the nodes. The patch copies all the control files to the $MSC_TOP/patch/120/import directory. You must enter the complete path of this directory as a value for the Control Files Directory parameter of the flat file load stage when you run the legacy system data collection.
Use steps 2 through 6 to create a partition for a new instance.
-
Log in using the System Administrator responsibility.
-
Select Requests > Run.
-
Select Single Request and select OK.
-
In the Name field, enter Create APS Partitions and select OK.
-
Enter the number of plan partitions and instance partitions and select OK.
-
Change to the Advanced Planning Administrator responsibility. Select Admin > Instances.
Set Up Profile Options
Profile options setup for a standalone implementation is the same as for an integrated implementation.
Complete the following steps to set up profile options:
-
Log in under the System Administrator responsibility.
-
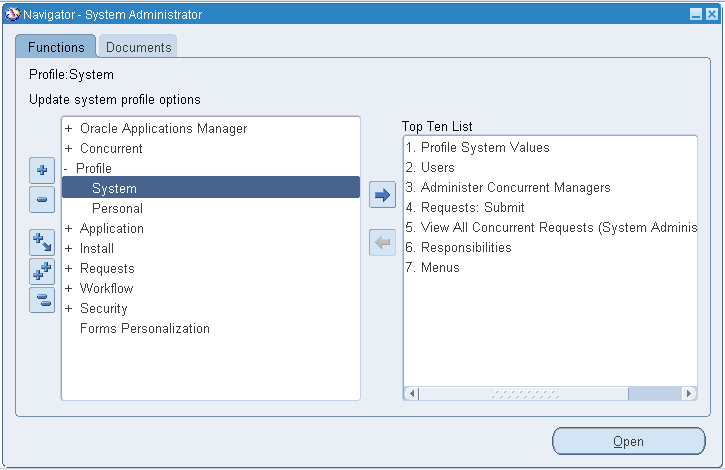
Navigate to Profile > System. The following image depicts this navigational path:
Navigator - System Administrator Window
-
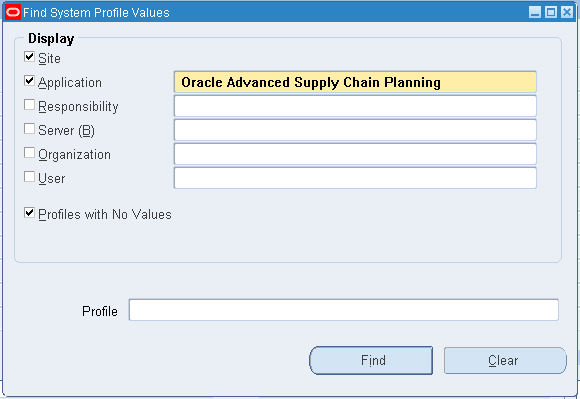
In the Find System Profile Values window, select Application. The following image depicts the Find System Profile Values window:
Find System Profile Values Window
-
Search and select Oracle Advanced Supply Chain Planning in the Application field.
-
Specify the Instance Code for the Legacy Instance and set the Instance Type as Other. Leave the fields From Source to APS and From APS To Source blank. Fill the other fields for the instance as specified in the on-line help.
You can now use the batch load solution. Upload the Calendar data for this instance.
Note: The batch upload and legacy instance setup steps can occur parallel to script for data upload creation. The instance code is required to retrieving data files from the scripts.
-
In the Profile field, enter MSC% and select Find.
-
On the System Profile Values window, set the necessary profile options. The following table lists the profile options, their necessary values, and profile option descriptions.
Profile Option Value Description MSC: Configuration: CP Indicates that collection programs are used. MSC: Operator Company Name Your company name Name issued by the company deploying Oracle Collaborative Planning. MSC: Vertical View Default Query Yes Ensures that the vertical view displays a default set of results. MSC: VMI Default Query Yes Ensures that the VMI screen displays a default set of results. -
Save your work.
For more information about the profile options used in Oracle Collaborative Planning, refer to Profile Options.
Define Customers, Suppliers, and Sites
For a standalone setup of Oracle Collaborative Planning, customers, suppliers, and sites must be loaded using flat files. Use the flat file tradingpartner.dat to load customers, and tradingpartnersite.dat to load customer sites. Use the flat file tradingpartner.dat to load suppliers, and tradingpartnersite.dat to load supplier sites. When defining sites, upload tradingpartner.dat and tradingpartnersite.dat in a single zip file.
For more information about uploading data into Oracle Collaborative Planning refer to Loading and Publishing Data.
Define Users and Assign Responsibilities
For a standalone setup of Oracle Collaborative Planning, define users and assign responsibilities through flat file loads.
Define Users
Upload the partnercontact.dat flat file to define contacts for trading partner sites. To set up users, you must provide the following information:
-
Username
-
Customer or supplier information
For more information about uploading data into Oracle Collaborative Planning, refer to Loading and Publishing Data.
Assign Responsibilities
You can assign the following responsibilities for a standalone setup:
-
Supply Chain Collaboration Planner
-
Supply Chain Collaboration Manager
The Supply Chain Collaboration Planner responsibility provides users with access to planner tasks. The Supply Chain Collaboration Manager responsibility provides users with access to planner and administrative tasks.
Set Up Calendar
The calendar in Oracle Collaborative Planning is a 7-0 calendar, where all days are workdays, the week begins on Monday, and the month begins on the first day of the calendar month. Set up the calendar for Oracle Collaborative Planning by running the concurrent program Build Collaborative Planning Calendar.
Complete the following steps to set up the calendar in Oracle Collaborative Planning.
-
Log in using the Advanced Supply Chain Planner responsibility.
-
Navigate to Other > Request. The following image depicts this navigational path:
Navigator - Advanced Supply Chain Planner Window
-
In the Find Requests window, select Submit a New Request. The following image depicts the Find Requests window:
Find Requests Window
-
In the Submit a New Request window, select Single Request and select OK. The following image depicts the Submit a New Request window:
Submit a New Request Window
-
In the Submit Request window select Build Collaborative Planning Calendar. The following image depicts the Submit Request window:
Submit Request Window
-
In the Parameters window, select OK. The following image depicts the Parameters window:
Parameters Window
-
In the Submit Request window, select Submit.
Set Up Items and Other Entities
For a standalone setup of Oracle Collaborative Planning, defining items and other entities is achieved using flat file loads. Upload the item.dat flat file to set up your items. Upload the supplieritems.dat flat file to cross-reference a supplier item with one of your items. Upload the customeritems.dat flat file to cross-reference a customer item with one of your items.
For more information about uploading flat files, refer to Loading and Publishing Data.
Setting Up Multi-Tier Collaboration in Oracle Collaboration Planning
To enable multi-company collaboration for your organization, you must set up the following key elements in Oracle E-Business Suite.
Setup Steps in Oracle Order Management
Register the customer
You can register a customer in Oracle Order Management using Add Customers window that is accessible from the Sales Order Header window. You can define new entities for customers and related entity details (customer details) here. Alternatively, you can enter appropriate values in the respective fields in the Sales Order Header window and send the existing customer or contact details to the Add Customer window. You can apply the following process to open the Add Customers window:
-
From the Orders, Returns menu in the Order Management Navigator, select Sales Orders. This opens the Sales Orders - [New] window.
-
With your cursor in any field, right-click and select Add Customer from the Customer submenu.
For more information on "Adding customers using the Add Customer window," see Oracle Order Management User's Guide.
Setup Steps in Oracle Inventory
Set up the internal inventory organizations and define the items
Before defining external inventory organization you need to define one or more internal inventory organizations. These inventory organizations describe distinct entities in your company and act as prerequisites to items and any related transaction. You can assign a unique short code to your inventory organization and use this code to identify the organization with which you want to work. For more information on creating internal inventory organizations see Oracle Inventory User's Guide.
After defining the inventory organizations:
-
Define item catalog groups to group your items according to certain descriptive elements. An item catalog group consists of descriptive elements to which you assign certain sets of values that can be assigned to an item.
-
Define an item template to list a standard set of attribute values that you use to define or update items. When you apply a template to an item, you set the item attribute values to the template attribute values for those attributes that you enable in the template.
-
Define items and the attributes associated with them, such as description, lead-time, units of measure, lot control, and so on.
For more information on creating internal inventory organizations, item category groups, item templates, and items, see Oracle Inventory User's Guide.
Setup Steps in Oracle Purchasing
Create inventory organizations to represent suppliers and supplier sites
Define one or more inventory organizations to describe separate suppliers and supplier sites associated with your organization. To fully reap the benefits of multi-company collaborative planning, additional modeling for contract manufacturers is required. A contract manufacturer is a special case of a supplier, and it requires special modeling to collaborate at a more detailed level. For more information on defining inventory organizations and associating them with suppliers and supplier sites, see Oracle Purchasing User's Guide.
Create an external organization to associate with the supplier site representing the contract manufacturer's site
You can follow either of the two approaches:
-
Create CM inventory organization in Oracle E-Business Suite and associate it with the contract manufacturer.
Follow this approach if any of the following conditions are true:
-
Execution transactions such as WIP completions at the CM's site affect financial accounting at the OEM organization.
-
CM maintains transaction and reference data.
-
-
Create CM inventory organization in Legacy instance on planning server.
Follow this approach if any of the following conditions are true:
-
Producing an accurate picture of supply and demand at the CM's site is more important than costing and tracking financial transactions.
-
CM is not required to enter transaction data through standard Oracle E-Business Suite interfaces.
-
Note that, both the CM and supplier must be registered in Purchasing before proceeding with the rest of the setup steps. For more information on associating the contract manufacturer's site to an inventory organization, see "Setup: Associate the contract manufacturer's site to an inventory organization."
Associate a supplier site with an inventory organization
Once you have registered the contract manufacturer and its site in Purchasing and created the inventory organization, you must associate the contract manufacturer's site with the organization. When an inventory organization is designated as a supplier's site, the planning system creates orders which source material from this site as external orders. ASCP treats this inventory organization similar to an internal organization with a few exceptions:
-
A planned order sourcing material from this inventory organization may be released from the planner's workbench to create an external requisition to the supplier. The requisition becomes a purchase order when it is approved in Purchasing.
-
The planning process will explode the bill of material for an item on a purchase order when the item is sourced from the contract manufacturer's inventory organization. For this to occur, the "Accept Demands from Unmet PO" parameter of the Create Instance-Org Supplier Association concurrent program (described below) must be set to Yes.
-
A sales order posted by the contract manufacturer into its inventory organization can be pegged to a purchase order from the OEM.
-
Purchase order supplies for procured materials posted by the contract manufacturer into its inventory organization are firm supplies in the planning system.
-
Work orders posted by the contract manufacturer are firm supplies for materials that the contract manufacturer intends to build or presently is producing.
Before associating a supplier site to an inventory organization you must:
-
Define a supplier site.
-
Define an organization of type External.
Complete the following steps to associate a supplier's site with an inventory organization:
-
From the Setup menu in the Inventory Navigator, select Organizations. From the Organizations menu, select Organizations. This opens the Find Organizations window.
The Find Organizations Window
-
Find the appropriate inventory organization.
-
In the Organization window, click in the Organization Classifications region to add the Inventory Organization classification.
-
Click the Others button.
-
In the Additional Organization Information dialog box, select Customer/Supplier Association.
-
Enter the supplier and supplier site, and save your changes.
Loading and Publishing Data
You can load all of your setup data into the system if you are not using Oracle Advanced Supply Chain Planning. If you are using Advanced Supply Chain Planning in conjunction with Oracle Collaborative Planning, set up the majority of your information in the system. You can, however, add files using flat file loads. You can bulk load the following into the Oracle Collaborative Planning:
-
Calendar Information
-
Calendar Exception Information
-
Category Sets
-
Company Users
-
Customer Items
-
Item Categories
-
Items
-
Planners
-
Shift Exceptions
-
Shift Times
-
Supplier Items
-
Supply/Demand Information
-
Trading Partners
-
Trading Partner Sites
-
Unit of Measure
-
Workday Patterns
For all collaborative processes and order types, demand and supply data are uploaded through a flat file. Download this template in the Admin page of Oracle Collaborative Planning.
Oracle Collaborative Planning supports flat file data loads for the following supply/demand order types:
-
Historical sales
-
Negotiated capacity
-
Order Forecast
-
Purchase order
-
Supply Commit
-
Purchase requisition
-
Safety stock
-
Sales forecast
-
Sales order
-
Sell through forecast
-
Purchase order acknowledgement
-
Safety stock
-
Projected available balance
During flat file uploads specify sync indicators to identify whether you are deleting or inserting records. The following table lists the available sync indicators and their definitions.
| Sync Indicator | Definition |
|---|---|
| D (Delete) | Enables you to delete rows that match the item, publisher, publisher site, supplier, supplier site, order type, order number, release number, line number, end order number, or end order line number. |
| R (Replace) | For a row in the upload file the system searches for all records in Oracle Collaborative Planning that match the item, publisher, publisher site, supplier, supplier site (or customer, customer site for sales orders), order type, order number, release number, line number, end order number, and end order line number and delete them. This is done for each row in the uploaded file, at the end of which the new rows are inserted into Oracle Collaborative Planning. |
To upload flat files into Oracle Collaborative Planning, complete the following steps:
-
Access the Oracle Collaborative Planning application.
-
Select the Admin tab.
-
On the Admin page, select Load Setup Data link. The following image depicts the Admin window in Oracle Collaborative Planning.
Setup and Administration Window
-
Download the template.
-
View the Readme document to learn how to fill in the spreadsheet.
-
Complete the spreadsheet.
-
Upload the template on the Load Setup Data page.
Note: You must load trading partners (customers and suppliers) before loading company users. Trading partners establish companies, and company users assign specific users to their companies. All companies in Oracle Collaborative Planning must have a trading partner relationship with your company.
Publish Data Using Oracle Advanced Supply Chain Planning
When Oracle Advanced Supply Chain Planning is installed, you can use with Oracle Collaborative Planning to publish and receive order information. Generate supply information using Oracle Advanced Supply Chain Planning prior to publishing its contents to Oracle Collaborative Planning. Filters enable you to publish information selectively to your trading partners. You can publish order forecasts and supply commits, and receive supplier capacities.
The Publish program honors the planning time bucket specified in the supply chain plan options while publishing or receiving demand and supply information from a supply chain. The Publish program assigns a time bucket of day, week, or month to the data posted to Oracle Collaborative Planning from Oracle Advanced Supply Chain Planning. For more information on time bucketing, see Horizontal and Advanced Horizontal View: Time Bucketing in Collaborative Planning.
Complete the following steps to publish or receive demand and supply information:
-
Log in using the Advanced Planning Administrator role.
-
Select Collaboration.
-
Select one of the following:
-
Publish Order Forecast (if you are publishing an order forecast to your suppliers)
-
Publish Supply Commits (if you are publishing a supply commit to your customers)
-
Receive Supplier Capacity (if you are receiving a supplier capacity from your suppliers)
-
-
In the Parameters window, complete any of the fields and select OK.
-
In the Publish Order Forecast, Publish Supply Commits, or Receive Supplier Capacity window, enter any additional information.
-
Select Submit.
Publish Data Using Oracle Demand Planning
When Oracle Demand Planning is installed, you can use it with Oracle Collaborative Planning to publish and receive sales forecasts to and from your customers. Generate and commit to forecasts using Oracle Demand Planning prior to publishing its contents to Oracle Collaborative Planning. Filters enable you to publish information selectively to your customers.
Complete the following steps to publish or receive a sales forecast:
-
Log in using the Advanced Planning Administrator role.
-
Select Collaboration.
-
Select one of the following:
-
Publish Forecast to Customer (if you are publishing a forecast)
-
Receive Forecast from Customer (if you are receiving a sales forecast)
-
-
In the Parameters window, complete any of the fields and select OK.
-
In the Publish Forecast to Customer or Receive Forecast from Customer window, enter any additional information.
-
Select Submit.
Run Data Collections
To run data collections you must assign yourself the Advanced Supply Chain Planner responsibility. To run data collections, complete the following steps:
-
Change responsibilities to Advanced Supply Chain Planner. Navigate to Collections > Oracle Systems > Data Collections.
-
On the Planning Data Collections window, select the Parameters field.
-
On the Parameters window you must enter information in several fields. The following table identifies these fields and the values you must enter:
Field Value Instance Desired instance Purge Previously Collected Data No Collection Method Target Refresh User Company Association Enable User Company -
Select OK.
-
Start data collections. After the system loads the data to Oracle Collaborative Planning, the new user can log into Oracle Collaborative Planning and view or create new transactions.
For more information about running data collections, refer to the Advanced Supply Chain Planning Implementation and User's Guide.
Orders
This section discusses orders in Oracle Collaborative Planning. The following topics are discussed:
Create an Order
You can use the following method for posting demand or supply information. This procedure is additional to uploading files. You edit demand or supply information manually using the Enter Order Details page.
-
From the Home page in Oracle Collaborative Planning, select the Planning tab.
-
Select Create Order.
-
In the Enter Order Details page, enter information in the following fields:
-
Orders
-
Item
-
Trading partners
-
Dates
-
Shipping
-
Pegging
-
Comments
-
-
Select Add.
Note: To reference field definitions, select Hint.
Add Orders
In addition to bulk loading order information, you can add an order manually within the system. You can only update or delete existing transactions by loading the SupplyDemand.dat flat file. For an order, you can enter the following information:
-
Orders
-
Item
-
Trading partners
-
Dates
-
Shipping
-
Pegging
-
Comments
You can access the Enter Order Details page by selecting Create Order from the Planning tab in Oracle Collaborative Planning.
View Order History
Oracle Collaborative Planning enables you to view versions of an order, make changes as necessary to current orders, and track those changes. You can make changes to any planning (for example, sales or order forecasts) or execution (for example, purchase or sales orders) documents you view in a vertical view. For example, you might need to know what the previous quantity was for a particular order. Oracle Collaborative Planning enables you to view that order information and make any necessary revisions to your order. You changes any of the following parts of an order:
-
Quantity
-
Receipt date (for an execution document only)
-
Revision date information (view only)
-
Updated by information (view only)
-
Comments
Complete the following steps to view an order history:
-
From the Home page of Oracle Collaborative Planning, select the Planning tab.
-
On the Planning page, select Vertical View.
-
Enter your search criteria and select Search.
-
Choose an order and select View History in that order's row.
-
On the Auditing Details page, view your order.
Order Types
This section discusses order types used in Oracle Collaborative Planning. The following topics are discussed:
Supported Order Types
Oracle Collaborative Planning comes seeded with several different order types. The following table lists theses order types and their descriptions.
| Order Type | Description |
|---|---|
| Sales Forecast | Expected future customer shipments. Suppliers can post expected customer future shipments. Quantity and Comments can be edited using vertical view. |
| Order Forecast | Anticipated future customer orders for a specific item, period, and location. Customers post when supplier should ship the goods. Quantity and Comments can be edited using vertical view. |
| Supply Commit | Anticipated future supplier shipments to customers. Suppliers post when customers should receive the goods. Quantity and Comments can be edited using vertical view. |
| Historical Sales | Actual customer sales for a specific item, period, and location. Quantity and Comments can be edited using vertical view. |
| Sell through Forecast | Same as Sales Forecast. Quantity and Comments can be edited using vertical view. |
| Negotiated Capacity | Supplier capability to produce quantities of an item for particular period and location. Quantity and Comments can be edited using vertical view. |
| Safety Stock | Supplier inventory quantity at present time or customer inventory quantity at the present time. Quantity and Comments can be edited using vertical view. |
| Allocated Onhand | Trading partner inventory quantity in stock. Stock is intended for a specific supplier or customer. Quantity and Comments can be edited using vertical view. |
| Unallocated Onhand | Trading partner's inventory quantity physically in stock that can be designated for any request or order. Quantity and Comments can be edited using vertical view. |
| Purchase Order | Customer commitment to procure an item from a supplier. Customer can post when the supplier should make shipment. You can edit Quantity, Requested Ship Date, Requested Receipt Date, Original Promise Date, and Comments fields using vertical view. |
| Purchase Order Acknowledgment | Supplier's acceptance of the customer's purchase order. Also supplier can post when the customer should receive the goods. You can edit Quantity, Ship Date, Receipt Date, and Comments fields using vertical view. |
| Purchase Requisition | Customer intent to procure an item from the supplier. If purchase request is for a VMI item, the system submits the requisition to an Oracle Purchasing requisition import manager. You can edit Quantity, Requested Ship Date, Requested Receipt Date, Original Promise Date, and Comments fields using vertical view. |
| Replenishment Order | Used for an order created through by either the customer or supplier VMI to replenish a VMI item. A replenishment order does not appear in the list of values on the manual order entry page. |
| Sales Order | Supplier response to the customer purchase order. The supplier can post when the customer can expect to receive the goods. You can edit Quantity, Ship Date - Promised, Receipt Date - Promised, Requested, and Comments fields using vertical view. |
| ASN (Advanced Shipment Notice) | Supplier posts when a shipment is coming for the customer. Also supplier can post when the customer should expect the goods. You can edit the Quantity, Ship Date - Actual, Receipt Date - Planned, and Comments fields using vertical view. |
| Shipment Receipt | Customer's physical acceptance of a shipment. You can edit the Quantity, Delivery Date, and Comments fields in the vertical view. |
| Work Order | Your suppliers can provide you with visibility into their work in process inventory. Suppliers can upload supplies of order type Work Order and provide quantity, order number, start date, and completion dates. |
| Purchase Order From Plan | Represents purchase orders that exist in the plan as of the publish process, with receipt date as displayed date. Order type published through the Publish Order Forecast program. Published whenever the program runs. Available for selection in the horizontal view preference set. Available for search using vertical view and horizontal view. Not part of the system default preference set. |
| Released Planned Order | Represents planned orders released in the Oracle Advanced Supply Chain Planning plan as of the time of publishing. Published only through the Publish Order Forecast program. Is published anytime the program runs. Displays receipt date. Cannot be uploaded manually through UI or through flat file loads. Is not included in the planned order quantity. Available for selection in the horizontal view preference set. Available for search using vertical view and horizontal view. Not part of the system default preference set. |
| Planned Order | Represents planned orders in Oracle Advanced Supply Chain Planning as of publishing time. Published only through the Publish Order Forecast program. Is published anytime the program runs. Displays receipt date. Cannot be uploaded manually through UI or through flat file loads. Is not included in the planned order quantity. Available for selection in the horizontal view preference set. Available for search using vertical view and horizontal view. Not part of the system default preference set. |
| Safety stock | Enables the Publish Safety Stock program to publish the following information for a given time horizon:
The Display Buckets field on the User Preference Sets screen enables the planner to update only those records between the horizon dates without making changes to other preexisting data. |
| Project available balance | Enables the Publish Safety Stock program to publish the comparison between the projected available balance and the safety stock values in a given bucket. Note that Projected Available Balance is published whenever the Safety Stock is published. Note that both of these order types are published only by the customer company for the selected item. By using horizon start date, horizon end date, and overwrite options, planners can further limit the time window to be published. |
Renaming Order Types
System Administrators can rename any seeded order type. This is completed at the time of implementation. After an order type is renamed, all users within the system see the renamed order type. Users can load renamed order types and view the data through the Planning and Exceptions tabs. If any data was entered using an old order type, that data is displayed with the new order type. You can load data for a renamed order type using any of the current loading methods.
Note: To rename an order type you must have the Advanced Planning System Administrator responsibility assigned to your username.
Complete the following steps to rename an order type:
-
Access the Oracle Applications System.
-
Log in under the Advanced Planning Administrator responsibility.
-
In the Oracle Applications window, select Admin, then Lookups.
-
In the Oracle Manufacturing Lookups window, place your cursor on the Type field and select the search icon.
-
In the Lookup Types search window, select MSC_X_ORDER_TYPE. Select OK.
-
In the Oracle Manufacturing Lookups window, you see the order types and their descriptions. Select the order type you wish to change and edit the value in the meaning column.
-
Save your changes.
You can return to Oracle Collaborative Planning and view the renamed order type. You must now use the order type's new name to load transactional data or create orders.
Assign Planner Codes to Items
Exception notifications are sent to the individuals who have been identified as planners for a give item in an exception. The supplier or customer contact is also notified. To assign planners to items, first create a planner in the organization. Next, assign the planner to the item. You can set up planners in an organization as follows:
-
Using the Manufacturing & Distribution responsibility, navigate to Inventory.
-
Navigate to Setup > Planners.
-
Select the organization in which your item exists.
-
Create and save a planner code.
-
Save your work.
Complete the following steps to assign planners to items:
-
Using the Manufacturing & Distribution responsibility, navigate to Inventory.
-
Navigate to Items > Organization Items.
-
Query your item.
-
Navigate to the General Planning tab.
-
Assign a planner in the Planner field.
-
Save your work.
Security Rules
You can define security rules to grant access of data to other trading partners. You can create, edit, and view security rules. A security rule has three components:
-
Objects that identify the set of transactions on which the security rule applies
-
Grantee to whom the access is given by the security rule
-
Scope in which the security rule is applicable
Create Security Rules
You can create security rules related to transactions owned by your company. Administrators can create any security rules within the scope of their company.
Complete the following steps to create security rules:
-
Log in to Oracle Collaborative Planning.
-
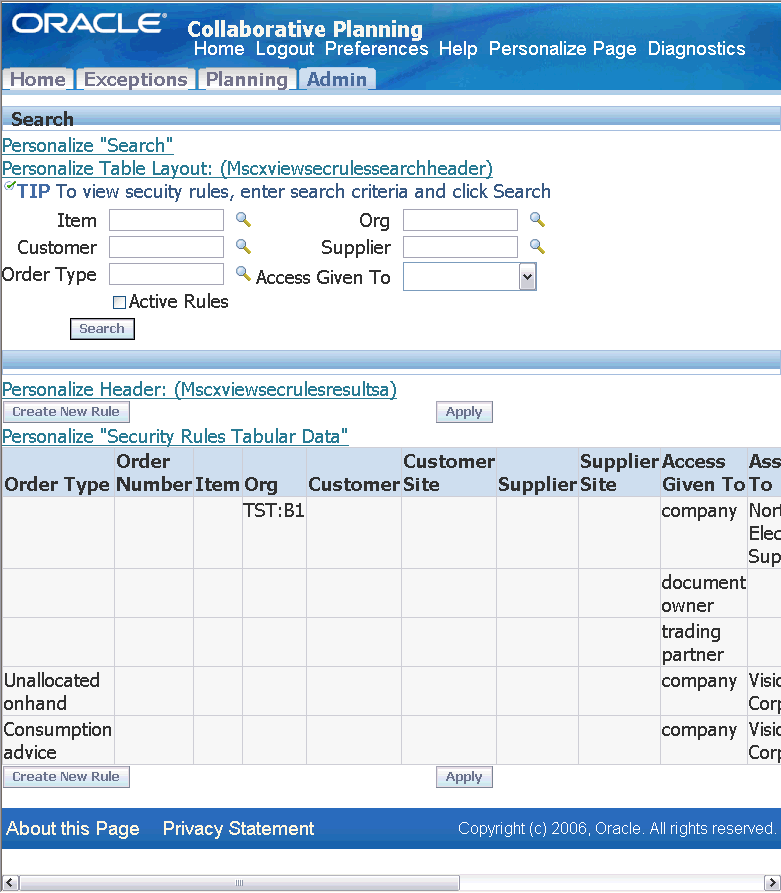
Select the Admin tab. The following image depicts the Admin tab in Oracle Collaborative Planning:
Setup and Administration Window
-
From the Admin tab, select View/Define Security Rules. The following image depicts the View Security Rules window in Oracle Collaborative Planning:
View Security Rules Window
-
Select Create New Rule.
-
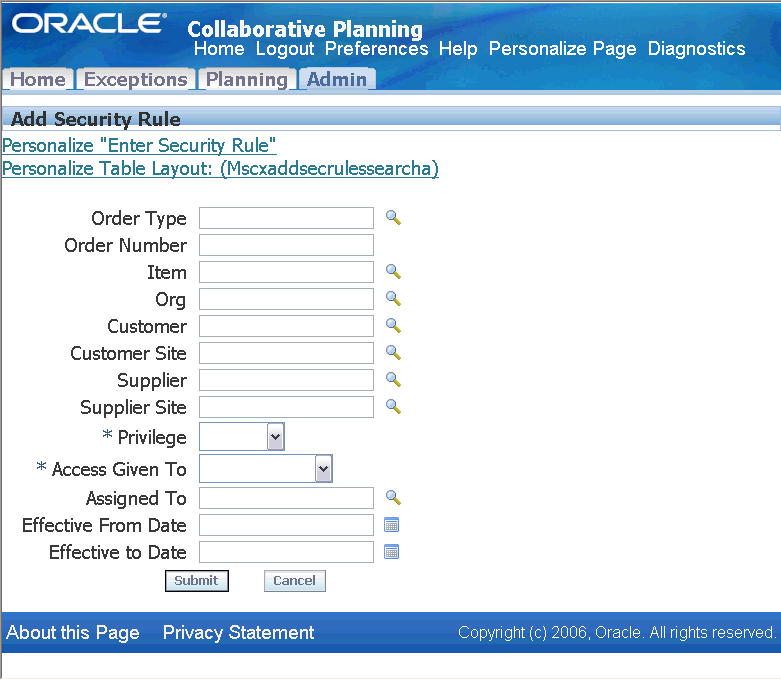
Enter the required information in the Add Security Rule window. The following fields are required:
-
Access Given By
-
Privilege
-
Access Given To
-
Assigned To
The following image depicts the Add Security Rule window:
Add Security Rule Window
-
-
Select Submit.
Edit Security Rules
You can edit security rules as transactions change with your trading partners. You can edit only those rules for which you have authority. You can enable or disable any of the security rules by editing the effective From Date and the Effective To Date. Administrators can edit all security rules.
Complete the following steps to edit security rules:
-
Select View/Define Security Rules from the Admin window.
-
Enter your search criteria and select Search.
-
Select a security rule you want to edit and select Edit.
-
On the Edit Security Rule window, complete or update the required fields and select Submit. The following fields are required:
-
Access Given By
-
Privilege
-
Access Given To
-
Assigned To
-
-
Select Submit.
Edit Effective Dates
Complete the following steps to edit effective dates:
-
Select View/Define Security Rules in the Admin window.
-
Enter your search criteria and select Search.
-
Select the security rule you want to edit and edit the following fields:
-
Effective From Date
-
Effective To Date
-
-
Select Apply Changes.
View Security Rules
You can view security rules to monitor existing rules within the scope of your company. Administrators can view all security rules.
Complete the following steps to view security rules:
-
Select View/Define Security Rules in the Admin window
-
Enter your search criteria and select Search.
-
Review your security rule(s) in the View Security Rules section.