Case Management User Procedures
This chapter, which is relevant to Case Management only, provides examples of user procedures.
This chapter covers the following topics:
About the Sample Case Management User Procedures
Because user procedures and user interface configurations vary greatly from implementation to implementation, Oracle cannot provide end-user help for Case Management.
This chapter uses an example to provide application implementers and administrators with an introduction to typical user procedures for creating and resolving cases.
The example details how the fictitious Vision Enterprises creates a case to track a security breach at an airport.
The topics covered include:
Creating a Case
Security has just apprehended a passenger who was in the possession of a knife at the airport boarding gate.
-
Security agent Ted Crilly starts by searching the database for any information on the suspect.
-
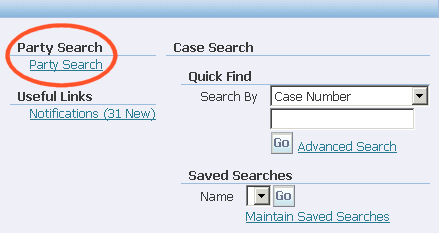
Mr. Crilly selects the Party Search link located at the bottom right of the agent dashboard (highlighted in the partial image of the Agent Dashboard below.)
-
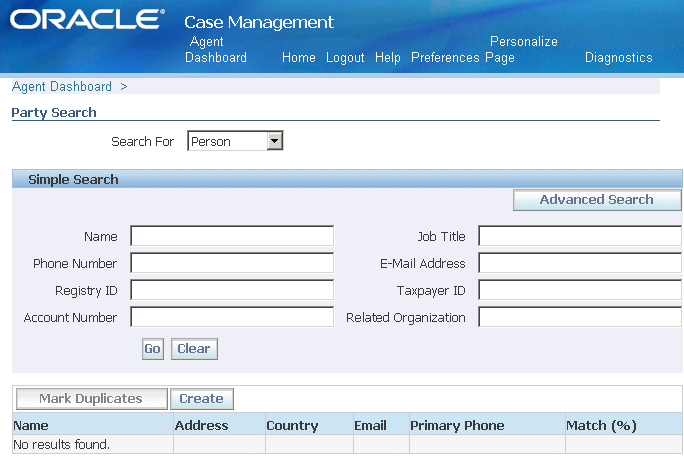
The Party Search page appears.
-
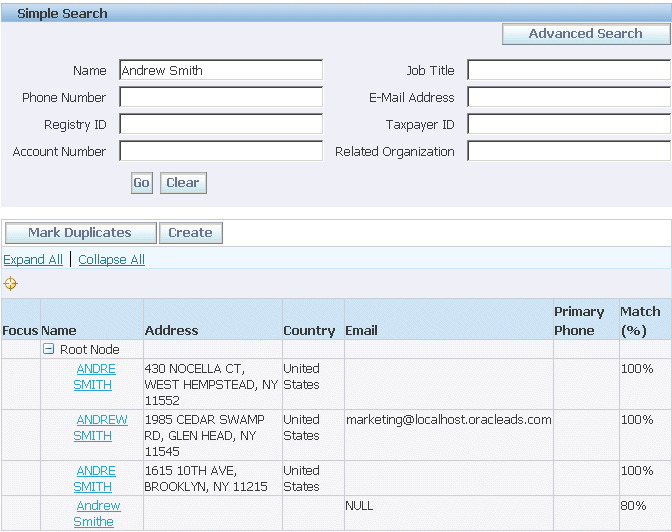
The agent chooses Person from the Search For drop-down list, enters any available identifying information about the suspect, and clicks Go.
In this example, the name the suspect has given “Andre Smith” yields three matches.
Additional search criteria are available in advanced search.
Note: If the suspect is unknown, the agent can choose an Unknown party that is set up by the application administrator. See Setting Up the Capture of Unknown Associated Parties.
-
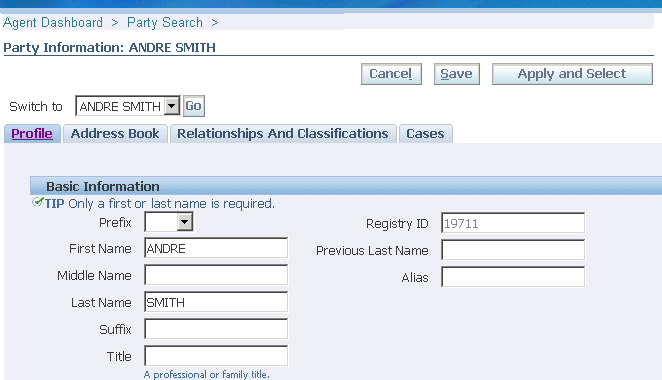
Selecting the Name link displays more information about any of the parties in the database. Agent Crilly chooses the first name on the list based on the address the suspect has provided.
-
Agent Crilly verifies the basic information about the suspect on the Profile tab and addresses and contact points on the Address Book tab.
The Relationships And Classifications tab captures relationships between Andre Smith and other parties. It is here that Mr. Crilly could enter information about Smith's wife or children or his relationship to a criminal organization.
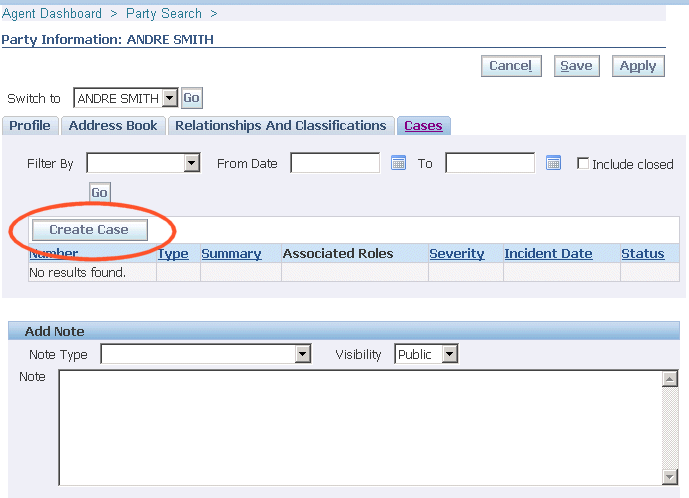
The Cases tab displays any other cases pending for the person. There are no pending cases against Andre Smith.
-
Mr. Crilly clicks the Create Case button to start the case creation process.
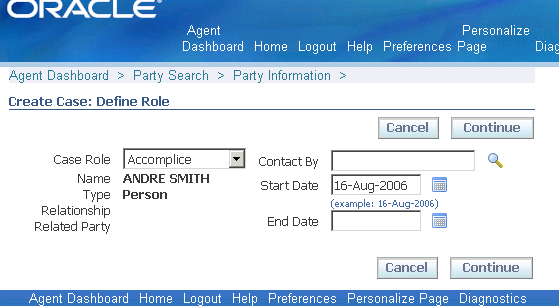
The Create Case: Define Role page appears.
-
From the Case Role drop-down list, agent Crilly chooses “Suspect” to indicate Andre Smith's role in the case.
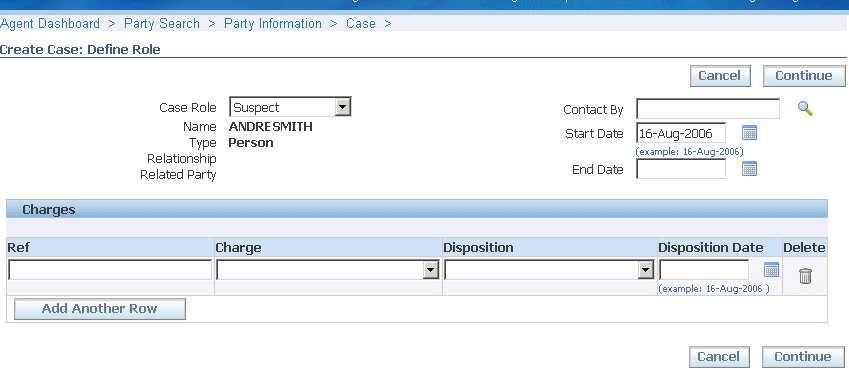
The Create Case: Define Role page refreshes to display the additional attributes the application administrator has set up for this role.
-
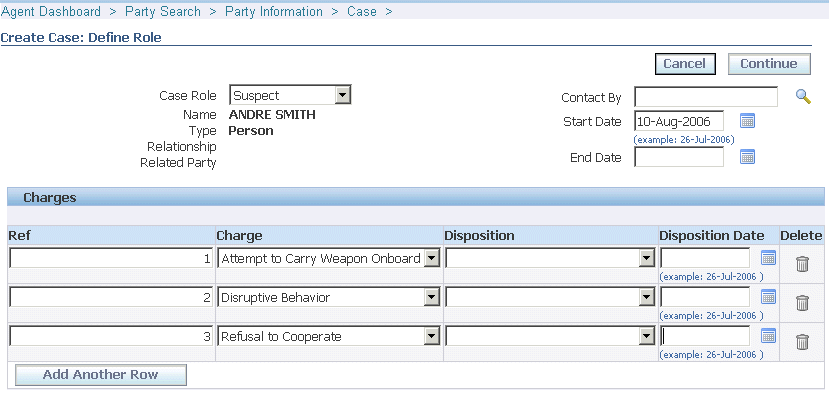
Mr. Crilly specifies the charges against the suspect in the fields provided. He can specify multiple charges by clicking the Add Another Row button.
Note: You can capture different information for each different role in the case by setting up extensible attributes. See Setting Up Associated Party Extensible Attributes.
-
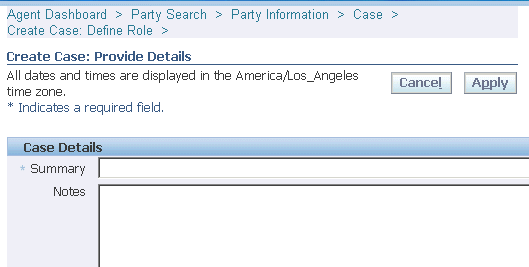
Clicking Continue displays the Create Case: Provide Details page. (The following image shows only the upper left corner of the page.)
-
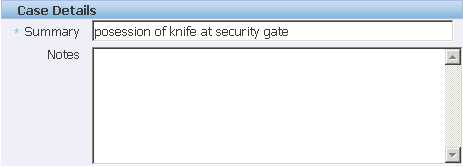
Mr. Crilly fills in the case summary in the Case Details region: “possession of knife at security gate”.
-
Agent Crilly classifies the case by choosing the case type: “Security Investigation” and an issue type: “Weapon”. For status, he chooses “Investigation”.
Note: Issue types use the same setup as problem codes for service requests.

-
Because he is going to continue working on the case for the time being, Agent Crilly enters his name into the Individual Owner field.
-
He clicks Apply to create the case.
The application creates the case and displays it in the Update Case page. (The image below shows the top left hand side of the page only.)
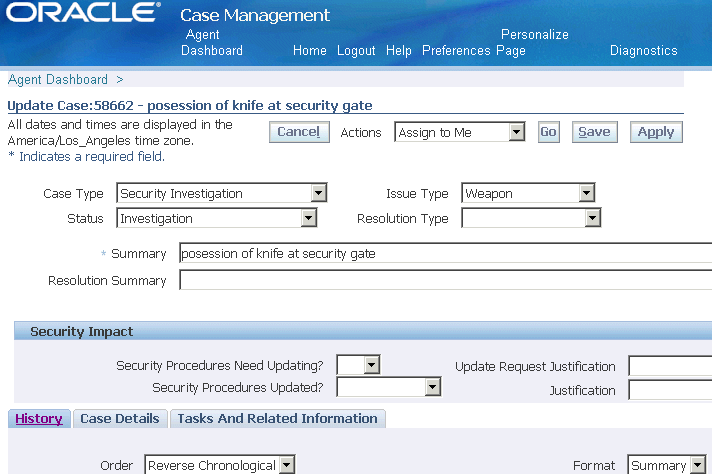
Agent Crilly is now ready to enter additional information from one of the security screeners who witnessed the incident.
-
In the Associated Parties region of the Case Details tab (shown in the image below), he chooses “Witness” from the Add drop-down list and clicks Go.

-
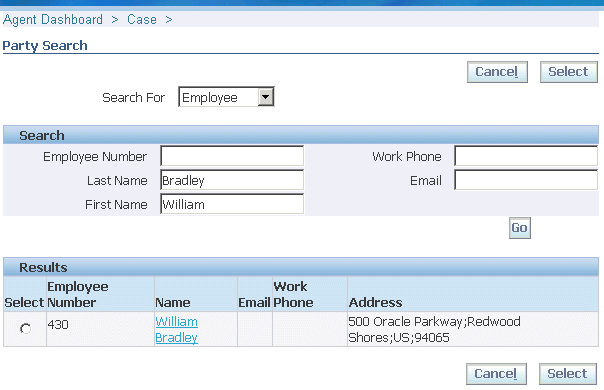
In the Party Search page, he chooses “Employee” as the witness is a fellow airport employee, and enters the name in the Party Search page. Clicking Go initiates the search.
-
Mr. Crilly selects the employee using the Select radio button and clicks Select.
The application displays the Update Case page with the witness now associated to the case.
Note: You can capture additional information about the witness or any other associated party role by setting up extensible attributes. If you do, the application displays the Add Party Enter Attributes page requiring agents to make entries before returning to the Update Case page.

-
Crilly adds a note about what the witness reported at the bottom of the Case Update page.

-
Agent Crilly generates a task for his associate to investigate the suspect's background. He navigates to the Tasks And Related Information tab, chooses the task type, and clicks Go.
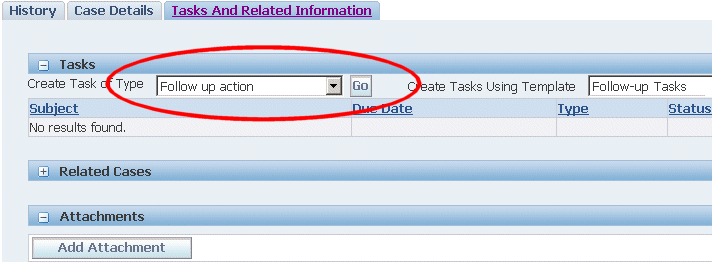
Note: You can set up task templates your agents can use to create tasks for common types of cases. You can have these tasks created automatically based on the case type, issue type and other attributes. See Generating Tasks Automatically.
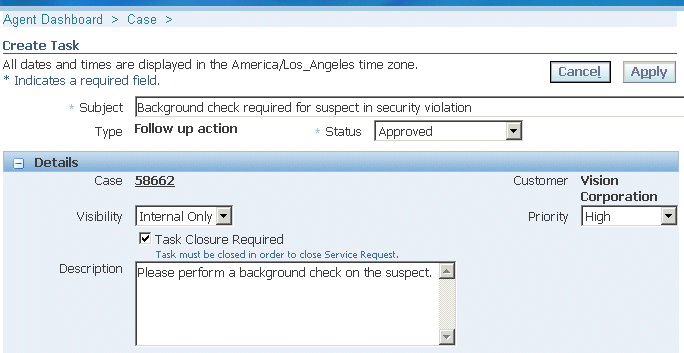
The Task Creation page appears.
-
Agent Crilly enters the task and description and checks the Task Closure Required check box to ensure the case is not closed before this task is completed.
-
Mr. Crilly clicks Apply to create the task and returns to the Update Case page.
Note: The application automatically assigns the task to the appropriate agent based on service territories and availability. For details on setting up task assignment, see Implementing Work Assignment and Distribution.
Both the note and new task are recorded on the case History tab.
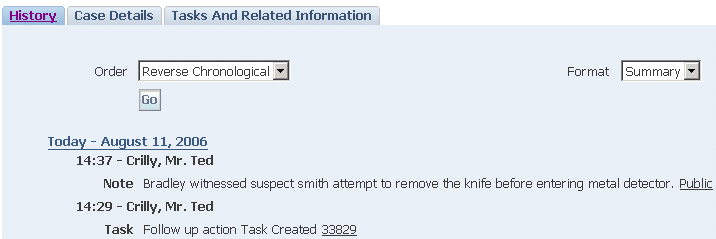
Note: By setting up notifications, you can have the application keep all the required parties automatically informed when the case is updated. SeeSetting Up Notifications.
Searching Cases
Case Management offers agents multiple ways of searching for cases from the Agent Dashboard.
This topic discusses:
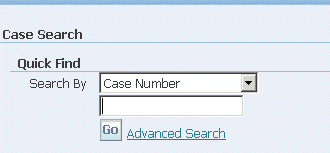
Quick Find
The QuickFind feature makes it possible for you to find cases by case number.
Note: Some implementations may want to expose additional search criteria by modifying the lookup CSZ_SRCH_QUICKFIND_CODE_CASE. For details, see Case Management Lookups.
Advanced Searches
Selecting the Advanced Search link under QuickFind on the Agent Dashboard permits complex searches, including searches by the different party roles and party role attributes.
This section highlights two advanced searches:
-
A party search: What cases am I involved in?
-
An associated party search: What cases is employee Wiliam Bradley involved in as a witness where Andre Smith is the suspect?
What cases am I involved in?
William Bradley calls agent Crilly to get a list of all cases he is involved in.
-
On the Advanced Search page, agent Crilly first adds Employee Name as a search term by choosing it from the Add Attribute drop-down list and clicking Add.
Note: Using Oracle Applications Personalization you can eliminate this step and minimize user entries by specifying which search terms display as fields on the search page by default. This is possible for all search terms except for party roles and extensible attributes. See Personalizing the Advanced Search Page.
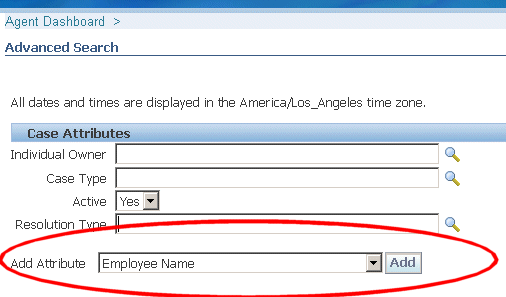
-
The agent enters the employee name and clicks Search.
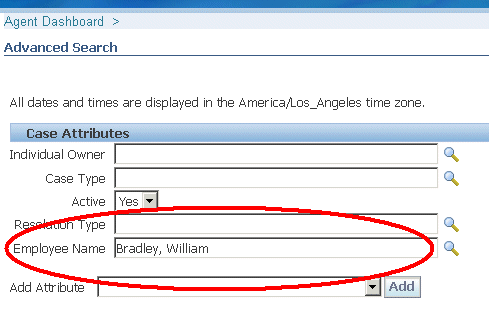
The application displays the results on the Advanced Search Results page.
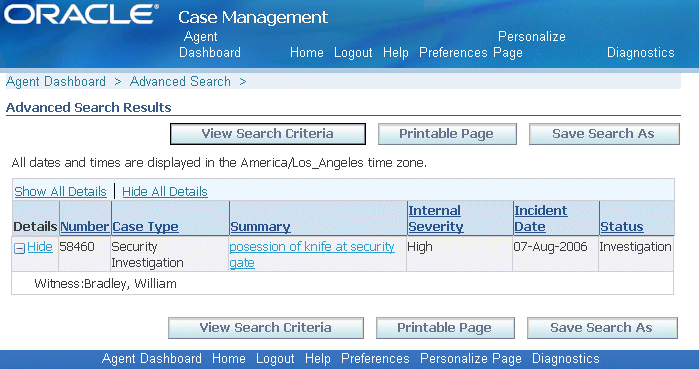
In this example, Bradley is a witness in case 58460, the knife possession at the security gate case.
What cases is employee William Bradley involved in as a witness where Andre Smith is the suspect?
You can also search for cases involving one or more associated parties with specific roles. Here is how agent Crilly searches for all the cases where employee William Bradley is a witness and Andre Smith is a suspect.
-
On the Advanced Search page, Crilly clicks Add Party (the button highlighted in the image below).
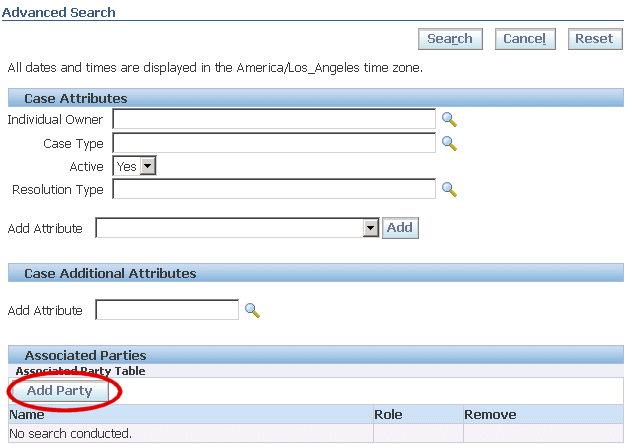
The Party Search page appears.
-
To add “William Bradley”, he chooses “Employee” from the Search For drop-down list and enters the name.
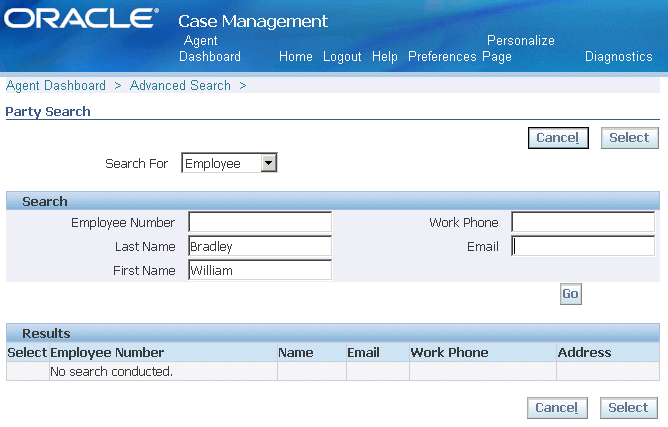
-
Clicking Go performs the search and displays the results.
-
Agent Crilly selects the record: selecting the Select radio button (region 1 in the image below) and clicking Select (region 2).
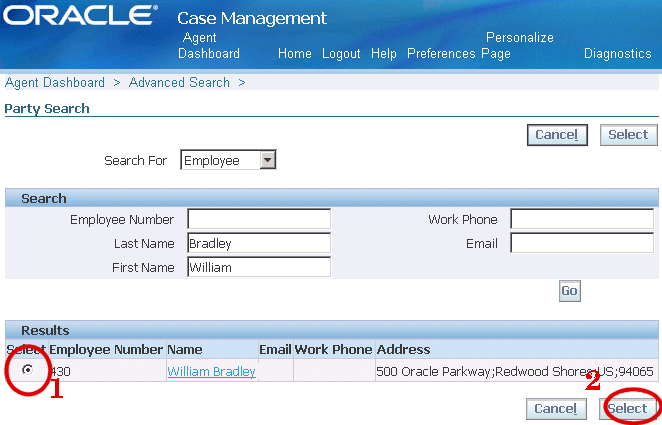
“William Bradley” appears in the Associated Parties region of the Advanced Search window.
-
Agent Crilly chooses the role for this associated party: “Witness”.

-
Agent Crilly clicks Add Party to add the second associated party: the suspect Andre Smith to the search.
-
Agent Crilly chooses “Person” for Search For and enters Andre Smith in the Name field.
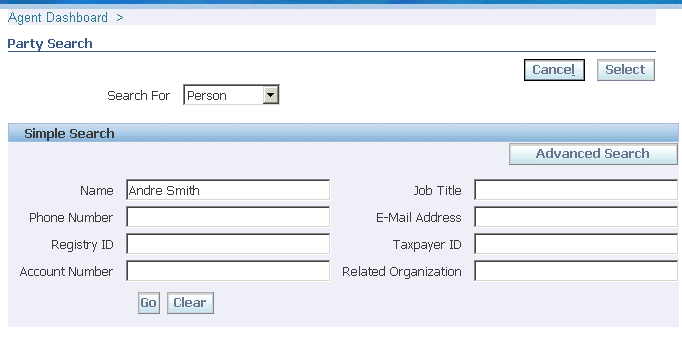
-
Clicking Go searches for all parties with a similar name. The application displays the result below.
-
Agent Crilly selects the party as shown below.
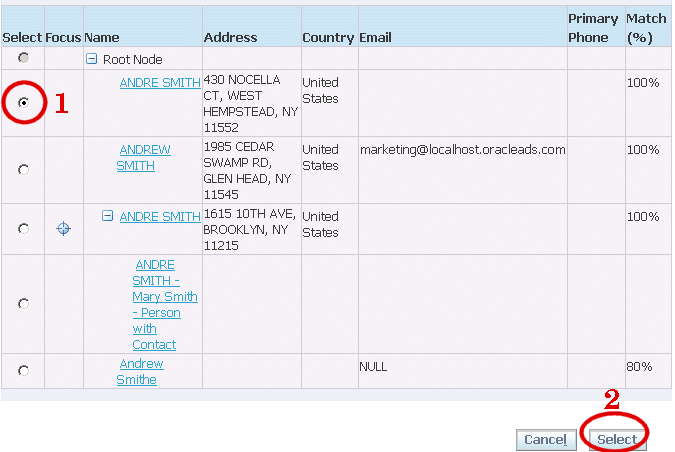
Andre Smith appears as the second associated party in the Advanced Search window.
-
Agent Crilly chooses the role: “Suspect”.

-
And clicks Search.
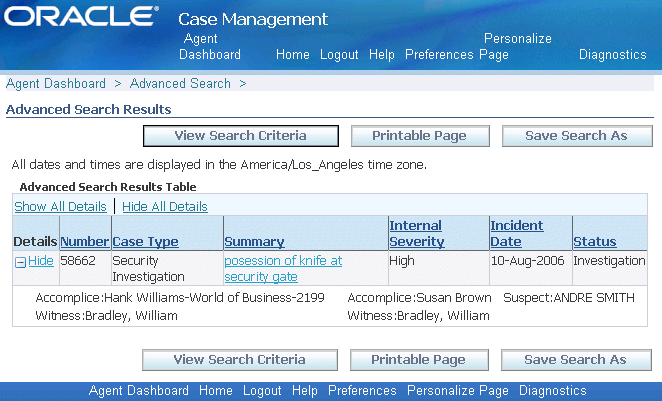
The application displays the result of the search below. William Bradley is involved as a witness and Andre Smith as a suspect in case 58662: the security investigation involving the possession of a knife at the airport security gate.
Saved Searches
You can save your advanced search criteria for reuse. Agents can use saved searches to track service requests of a colleague who left on vacation, for example, or to track open cases for their work team.
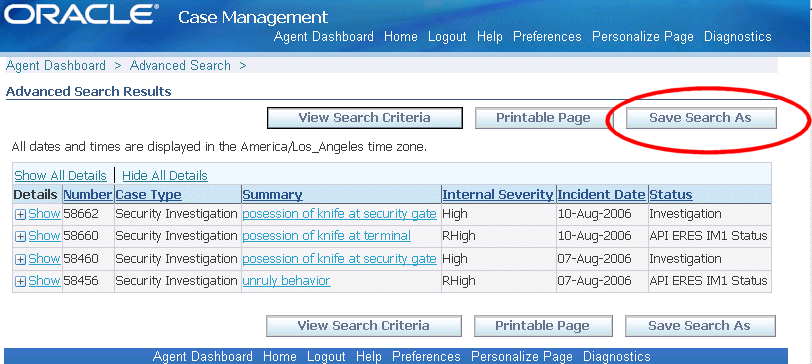
To create a saved search, perform an advanced search and click Save Search As on the results page.
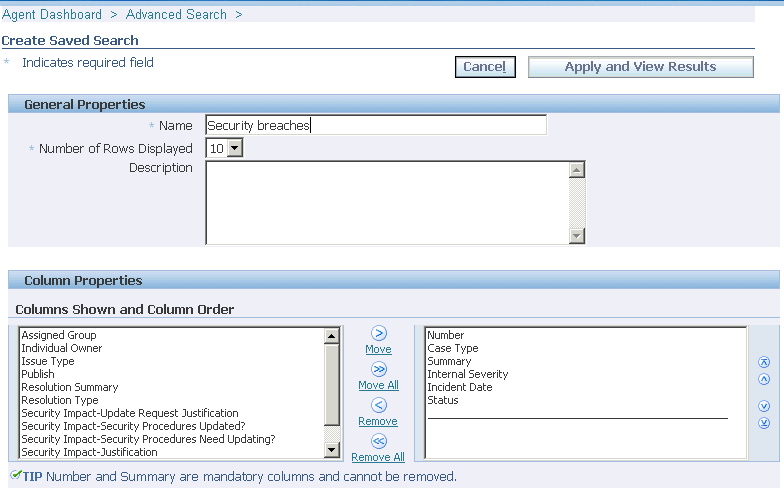
The Create Saved Search page makes it possible for you to name the search and to modify the display of results or the search criteria themselves. (The image below shows part of the page only).
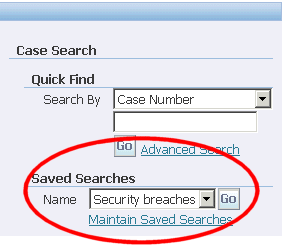
Saved searches appear on the Agent Dashboard right underneath Quick Find.
Application Search
An agent can search for a service request from the Application Search region in the Agent Dashboard. The agent must select Cases from the Enterprise Search LOV, enter a keyword, and click Go. The application displays the results on the Apps Search Results page. The agent can further narrow down the search by using the filter criteria provided. The agent can then click on the Service Request number, to view or update the service request details in the Update Service Request page.