 Read more...
You will use wizards to create create the business components that will provide access to data in existing database
tables and implement the business logic. Then create a frame that contains code for enabling Oracle ADF data binding in
the application; the frame is the databound Business Components client form that you will later run.
You will drag and drop from the Data Controls panel to create a master edit form panel for Orders records and a
detail panel for viewing and browsing OrderItems records in a table format.
You will also modify the view object's attributes to add meaningful labels for each attribute displayed on the
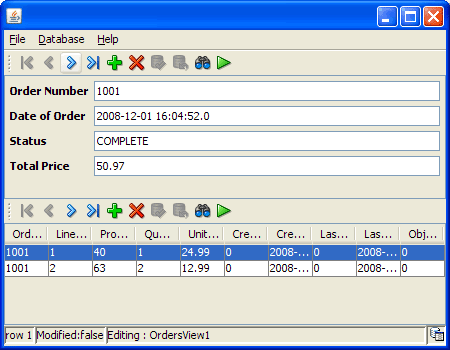
master edit form, then compile and run the application to see how the master-detail client form displays.
| Purpose | Duration | Application |
|---|---|---|
This tutorial shows you how to develop and test run a Java application that is built with
Oracle ADF Swing and Oracle ADF Business Components technologies. To see the complete application you will create, click the Download button to download a zip of the final application, and then unzip it in your JDeveloper mywork folder. |
40 minutes |  |
 Read more...
do the following before you run the application:
Follow all the instructions in Step 1: Install the Schema.
-
Open the application in JDeveloper. In the Application Navigator, expand the Application Resources panel. Then expand Connections > Database. Right-click FOD and choose Properties. Modify only the following properties so that they point to the database where you installed the FOD schema: Host Name, Port, SID. Then click Test Connection to confirm that you can connect. Click OK if the connection was successful.
-
To run the application, follow the instruction in Step 8, substep #5.
Download the schema.zip file from OTN.

Unzip the file to a convenient location (for example,
c:\temp).From the File menu, choose Open. Open the workspace
c:\temp\Infrastructure\Infrastructure.jws.If you are prompted to migrate the project, click Yes to confirm, then click OK.
In the Application Navigator, expand the MasterBuildScript project. Under Resources double-click build.properties to open it in the editor.
Set the appropriate values in the build.properties file (
jdeveloper.home, and all thejdbc.*anddb.*settings). Keep all other properties set to their default values. The demo user must be named FOD.
The relevant settings are:Setting Description jdeveloper.home The /jdeveloperdirectory where you have JDeveloper installed, for example,c:/JDeveloper_11/jdeveloper/jdbc.urlBase Base URL for your database, for example, jdbc:oracle:thin:@localhostjdbc.port Port number for your database, for example, 1521jdbc.sid Database System Identifier, for example, XEorORCLdb.adminUser Database user with admin privileges, for example, systemdb.demoUser.tablespace Tablespace name where the FOD user will be installed, for example, USERSIn the MasterBuildScript project, select the build.xml file.
In the Structure window, right-click the refreshSchema target and choose Run Target "refreshSchema".
When prompted, enter the password for the database user with admin privileges.
After running the Ant task, you should see a build successful message in the JDeveloper Log window.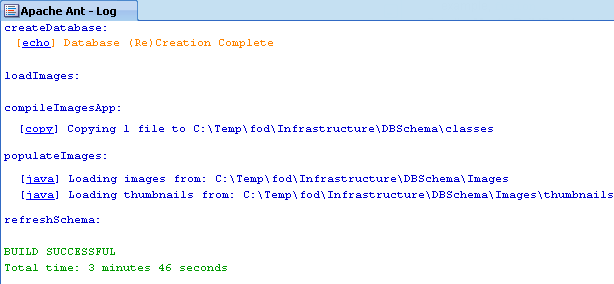
If there are errors, you should verify that your database is running (try connecting through SQL*Plus), and that the values you provided in thebuild.propertiesfile are correct. Also, make sure that the DBA user you specified has the CREATE USER privilege.
 Read more...
It will be convenient to have this schema installed, and you only need to do it once. If you have already installed the FOD schema, you can skip this step and go directly to the next. To install the schema, you will also need to have an Oracle database and access to a privileged (DBA) user which has permissions to create users. Any Oracle 10g version (or later) of the database should work for this schema. To install the schema, you will download and expand a zip file, then use Ant to perform the installation.
-
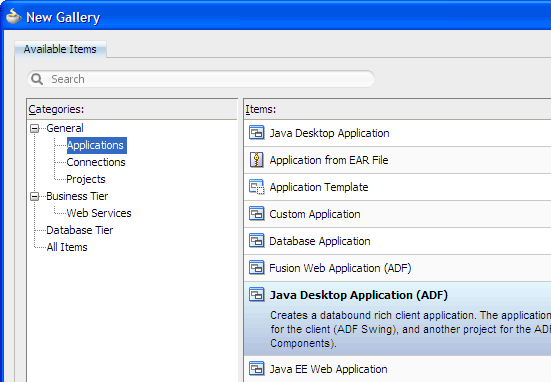
From the main menu, choose File > New. In the New Gallery, expand the General category and select Applications. Then in the Items list, select Java Desktop Application (ADF) and click OK.
-
To follow along with the example, enter
OrdersApplicationas the application name.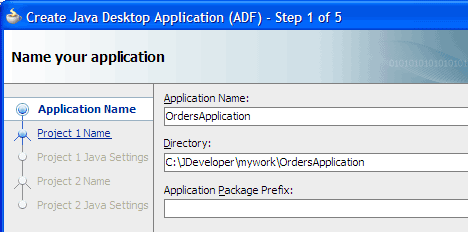
Accept the defaults and click Finish.
The Projects panel in the Application Navigator should look like this: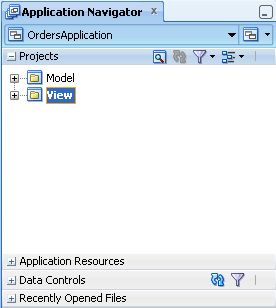
 Read more...
At the same time, it keeps track of your projects and all
environment settings.
Read more...
At the same time, it keeps track of your projects and all
environment settings.Based on prebuilt templates, a JDeveloper application allows you to specify a predefined type of environment, depending on the type of application you want to create (web application, Java application, and so on). Application templates provide you with a quick way to create the project structure for standard applications with the appropriate combination of features already specified. The application template also filters the work you do in JDeveloper such that the choices available are focused only on the features you are working with.
In this tutorial, you will use the Java Desktop Application (ADF) template, which is configured for building a databound Java ADF Swing application.
Once you have created an application using a suitable template, you can still add new projects to the application and specify what features are to be included. To do this, in the Application Navigator, right-click the application name and choose New Project. In the New Gallery, you can select any type of project in the Items list.
 Read more...
The project or projects in the application define the associated features.
A JDeveloper project, which is used to logically group files that are related, keeps track of the source files, packages, classes, images, and other elements that your program may need. Projects manage environment variables such as the source and output paths used for compiling and running your program. Projects also maintain compiler, runtime, and debugging options so that you can customize the behavior of those tools per project.
You can add multiple projects to your application to easily access, modify, and reuse your source code. Different projects might contain files representing different tiers of a multi-tier application, for instance, or different subsystems of a complex application. These files can reside in any directory and still be contained within a single project.
 Read more...
Projects are displayed as the top level in the hierarchy in the Application Navigator.
The Java Desktop Application (ADF) template that you used for your application creates one project for the view components
(ADF Swing and Java) and another project for the data model (ADF Business Components), using default project names or
the project names you entered.
In the Application Navigator you can collapse and expand any panel. You adjust the size of panels by dragging the splitter between two panels. To group and sort items in the Projects panel, use the
JDeveloper has the capability of recognizing many different file types, displaying each in its appropriate viewer or editor when you double-click the file in the Application Navigator. Closing an application or project closes all open editors or viewers for files in that application or project and unloads the files from memory.
Note: Nodes in italics in the Application Navigator mean that the elements have not yet been saved. A project node is bold when a file in the project is selected.
From the main menu, choose Application > Show Overview. The Application Overview window opens in the editor window area.
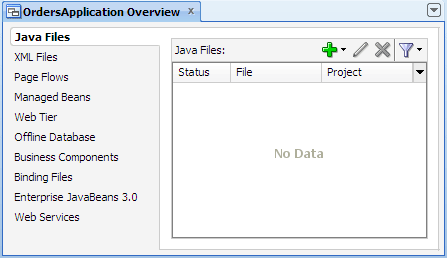
All objects that you create within JDeveloper appear in the Application Overview file summary pages, arranged by object type. As you create new files and artifacts, you can view them filtered by status and project.
You can optionally close the Application Overview window, since you will not be using it to create objects for this application.
You will establish a connection to the database you installed, to use the Fusion Order Demo (FOD) schema.
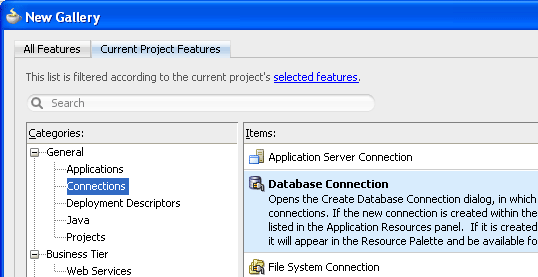
From the main menu, choose File > New > General > Connections > Database Connection, then click OK to open the Create Database Connection dialog.
-
Select Application Resources as the Create Connection In option.
-
Enter a name for the connection, select the connection type, and enter the username and password. To follow along with this example, use
FODfor the connection name andfodfor the username.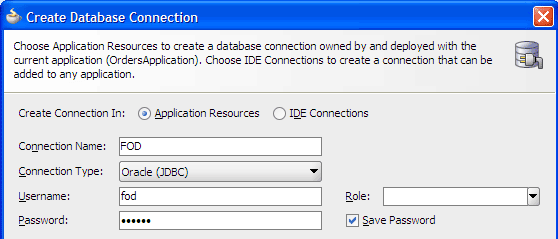
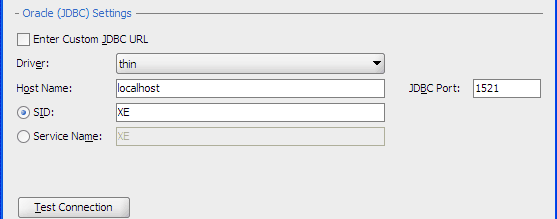
Enter the Oracle JDBC settings to point to the host, port and SID for your database.
-
Click Test Connection to confirm that you can connect. Click OK if the connection was successful.
-
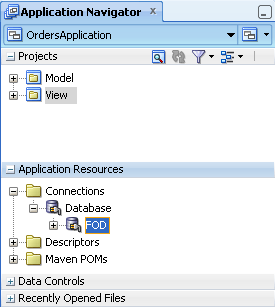
In the Application Navigator, expand the Application Resources panel, then expand the Connections and Database nodes to see the database objects.
 Read more...
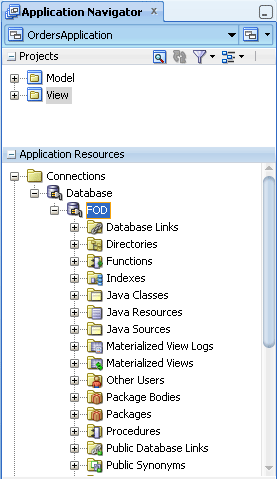
Expand the connection node you created, then click the various + icons to see the schema and database objects.
After adding the database connection to the application resources, you can optionally contract the Application Resources panel to increase the size of the Projects panel in the Application Navigator.
-
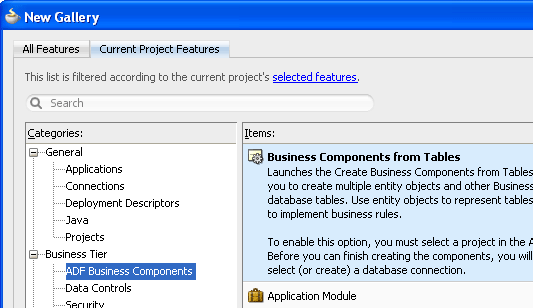
In the Application Navigator, right-click the Model project and choose New > Business Tier > ADF Business Components > Business Components from Table, then click OK.
It automatically handles O/R mappings and persistence for instances of its own library classes
It allows you to make complex requests for data retrieval using SQL
It automatically handles transaction management, including optimistic or pessimistic locking
It provides a framework for implementing complex business logic
It automatically implements many Java EE design patterns
It has a powerful caching and data passivation system for increasing the performance and scalability of applications
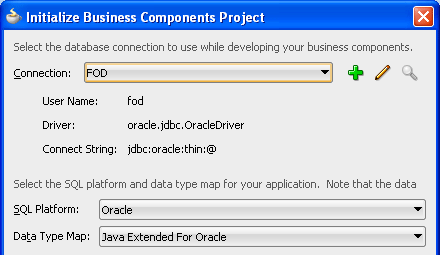
In the Initialize Business Components Project dialog, ensure that FOD is the currently selected database connection. Then click OK.
On step 1, Entity Objects, click Query to populate the Available list.

If your schema has many tables, you may experience a short delay.Select the tables, ORDERS and ORDER_ITEMS, from the Available list and click
 to move them to the
Selected list. Then click Next.
The tables are related by a foreign key so the resulting business components represent a one-to-many relationship.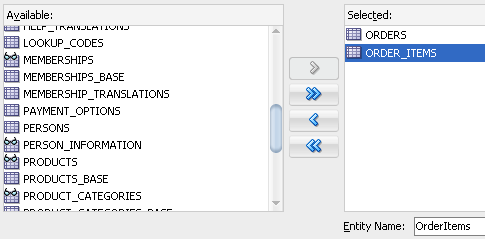
-
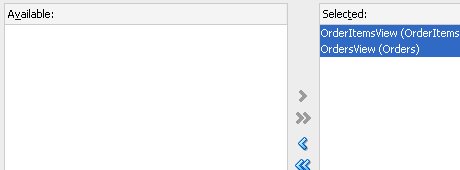
On step 2, Entity-based View Objects, click
 to move both business components, OrderItems (ORDER_ITEMS) and Orders (ORDERS), from the Available list to the Selected list.
Then click Next.
-
Click Next to skip step 3, Query-based View Objects, which aren't needed.
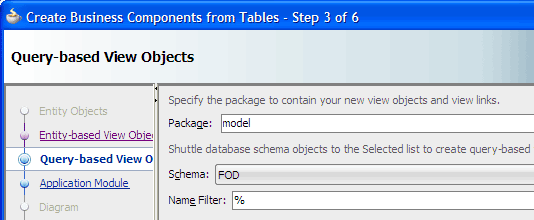
On step 4, Application Module, accept the default application module name and click Finish.
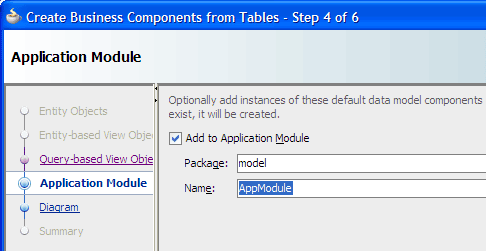
Click
 Save All to save your work.
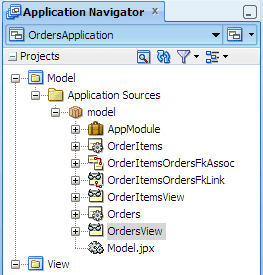
After completing the Create Business Components from Tables wizard, the Model project in the Application Navigator should look similar to this: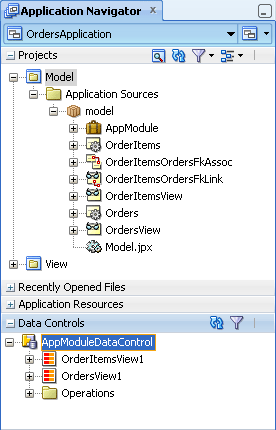
Entity objects, like Orders and OrderItems, which represent objects in the data source (usually tables, views, and synonyms in a database)
Associations like OrderItemsOrdersFkAssoc, which represent relationships between these objects (such as foreign key relationships)
View objects, like OrdersView and OrderItemsView, which collect data from the data source (usually by using a SQL query)
View links, like OrderItemsOrdersFkLink, which represent relationships (such as master-detail relationships) between view object result sets
Application modules, like AppModule, which provide a single point of access to the view objects and view links
 Read more...
The particular database objects that you choose in the wizard are important. Your selections will determine how the generated business components will be related. For instance, if two tables define a one-to-many relationship through their foreign key column, the business components generated by the wizard will also describe this relationship. In the business components terminology, a one-to-many relationship is also known as a master-detail relationship. In the example, the two tables will be used to display data in a master-detail form.
JDeveloper also provides business component wizards that let you edit any business components you create with this wizard, and add new business components later.
The Create Business Components from Tables wizard does not create a user interface (this is governed by the "view" portion of the application), nor does it determine other application logic such as control flow. It just provides a representation of, and access to, data, and implements business logic.
Specifically, Oracle ADF Business Components technology handles all aspects of application plumbing automatically:
 Read more...
The Data Controls panel is a data binding tool that lets you add databound UI controls to user interfaces by dragging and dropping. In a step, you will use the Data Controls panel to design the master portion of a master-detail form.
In the Model project, the navigator displays the business components that you created in this series of steps: entity objects, view objects, associations, view links, and application modules. To display the business components sorted by type, select Sort By Type in the
Your wizard selections produced these business domain components that represent features of the data source:
-
In the Application Navigator, right-click the View project and choose , then click to open the Create ADF Swing Empty Form dialog.
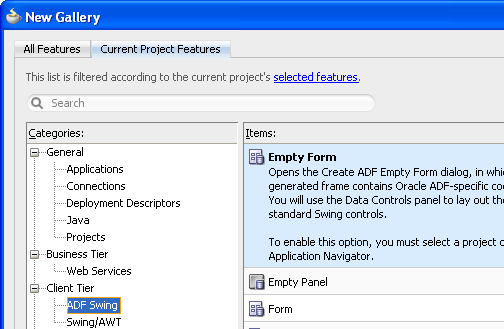
-
Accept
Formas the form name, andviewas the package name. Confirm that Generate a Menu Bar is selected. Then click OK.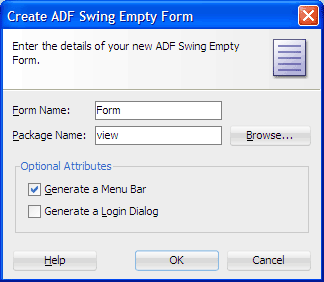
In the Application Navigator, expand the Data Controls panel and the AppModuleDataControl node. Drag and drop the collection OrdersView1 in the center of the empty form in the visual editor. Choose Add Edit Form from the context menu.
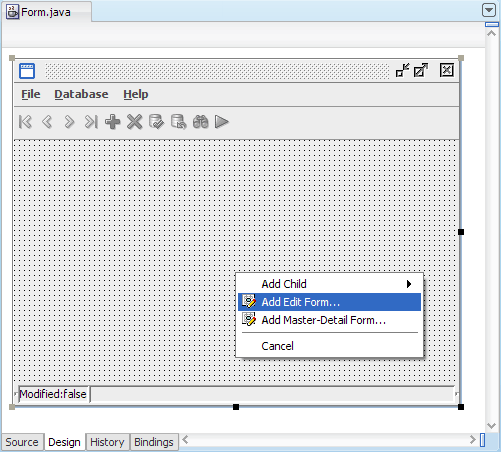
-
In the Create ADF Swing Edit Form dialog, hold down the Ctrl key and multi-select all the attributes except the following: OrderId, OrderDate, OrderStatusCode, OrderTotal. Then click
 to delete the selected attributes.
 Select OrderId, and click
 to move the attribute to the top
of the list. Accept the default file name. Deselect Create Navigator Bar, then click
OK.
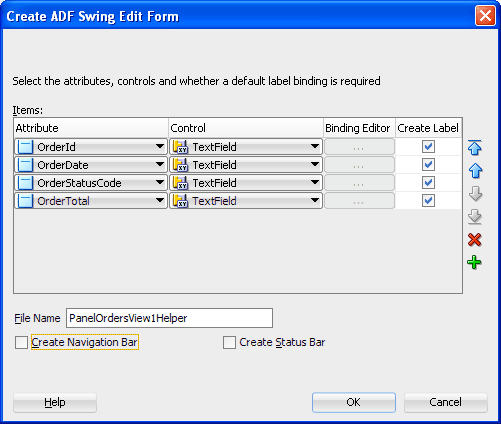
JDeveloper creates and displays the edit form panel inside the data panel of the client form.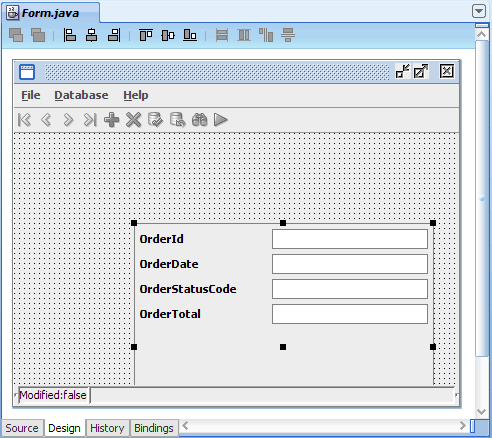
In the visual editor, click in the client form outside the top left corner of the edit form you just added.
In the Structure window, make sure dataPanel (which is below navBar) is selected. In the Property Inspector, Visual section, select BorderLayout from the layout dropdown list.
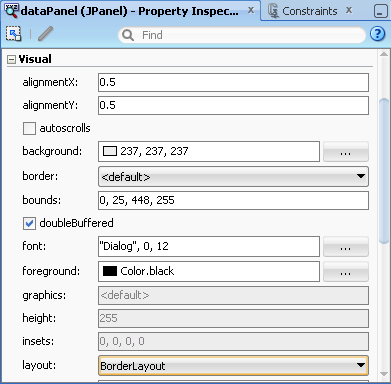
North or South: Components in North and South are given their preferred height and are stretched across the full width of the container.
East or West: The components in East and West are given their preferred width and are stretched vertically to fill the space between the north and south areas.
Center: A component in the Center expands to fill all remaining space.
In the Structure window, select panelOrdersView1Helper1 (which is under the expanded dataPanel).
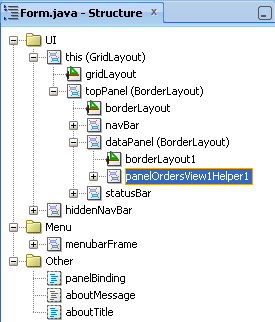
Click the Constraints tab (next to the Property Inspector tab) to bring the Constraints property visual editor forward. In the Constraints property visual editor, select the topmost box.
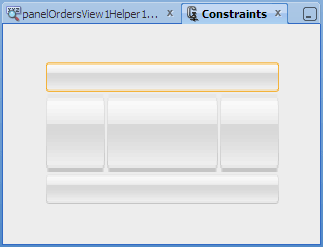
Click
 Save All to save the files.
In the Application Navigator, double-click PanelOrdersView1Helper.java to open the source file for the edit form panel. In the editor window, click Design to use the Java visual editor.
In the Structure window, select dataPanel (FormLayout). In the Java visual editor, right-click the first cell in the first column and choose Column Properties. In the Column Properties dialog, select the following options, then click OK.
Option Value Alignment Fill Size Component Size Default Resize None 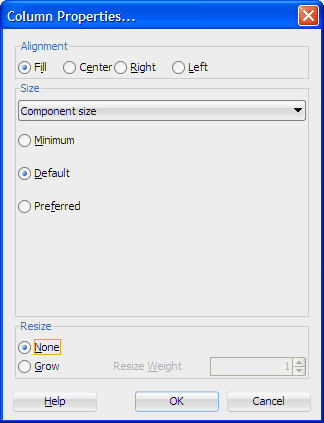
In the editor window, click the Form.java tab at the top to bring the client form forward. Click
 Rebuild
to rebuild the View project.
When you complete the steps for creating a master form in ADF Swing form, the form in the Java visual editor should look similar to this: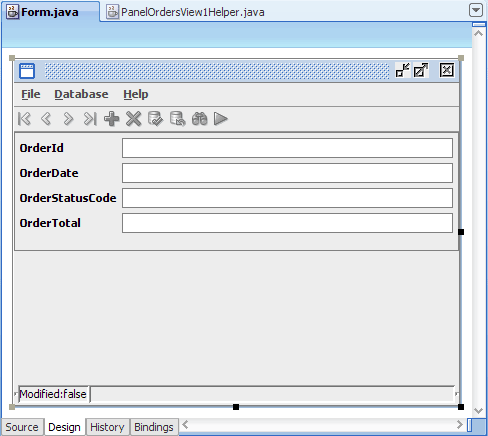
 Read more...
When you create master-detail forms and tables using those view objects, end users will be able to drill down from a master
collection to view (and optionally edit) the related data objects in the detail collection.
In the example, you will use Oracle ADF Swing and ADF Business Components to create a master form, detail table. ADF Swing, which is fully compatible with Java Swing, adds a thin layer to the client application so that standard Java components can work with ADF data binding libraries. Applications using ADF Swing and ADF Business Components do not need to implement data access and update logic. Instead, ADF Swing and ADF Business Components cleanly separate data access code from UI code resulting in thin clients without the burden on the view layer.
To design a simple master form, detail table for a Java application, you will use a single window comprising one ADF Swing form that will contain the panels for both the master portion and detail portion. The ADF Swing form will also contain the ADF-specific code for enabling ADF data binding in your Java client application.
 Read more...
JDeveloper also generates the code needed to initialize the ADF Swing form for data binding, and displays the initial client form
in the Java visual editor.
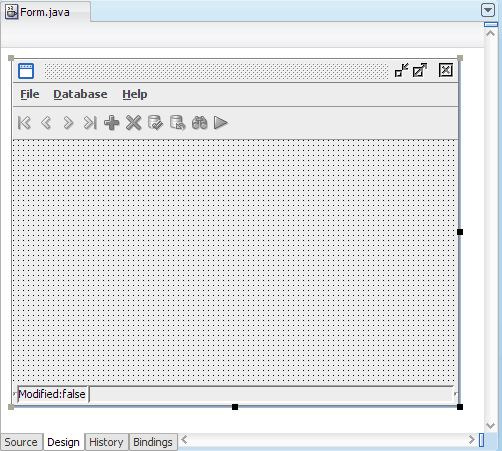
Using JDeveloper's Java visual editor, you can quickly and easily assemble the elements of a graphical user interface (GUI) for a Java application using Swing components from the Component Palette.
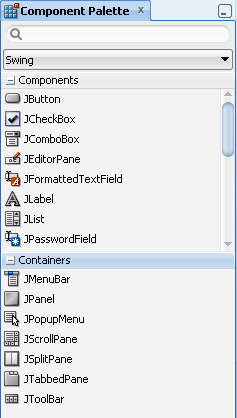
You construct the GUI with JavaBeans (such as buttons, text areas, lists, dialogs, and menus) by dragging and dropping selected components from the Component Palette. You set the values of the component properties and attach event-handler code to the component events in the Property Inspector.
The initial client form in the visual editor is empty because it contains no databound UI components. When you use the Data Controls panel to lay out the databound UI with ADF Swing components, the code that binds the UI components to ADF Business Components view objects will be added for you.
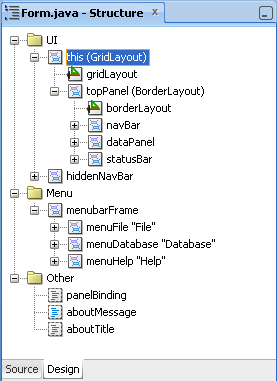
In the Structure window you will see a hierarchical view of all the components in your client form, and their relationships. Non-menu GUI items for the object appear under a node labeled UI. The dataPanel component is the container that will hold the databound UI components that you will add later. Any menu items appear under a node labeled Menu. Any non-GUI items appear under a node labeled Other.
 Read more...
The Data Controls panel affords the UI designer a hierarchical view of those business services that the application
developer has registered with an instance of an Oracle ADF data control.
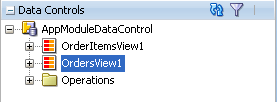
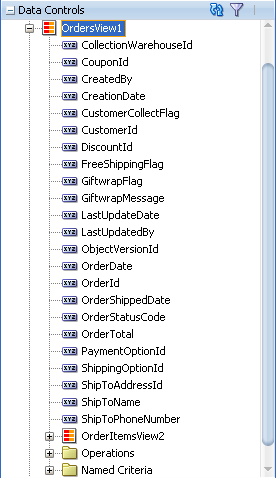
In the example, the name of the data control you will be using is AppModuleDataControl. The data control captures the master-detail relationships exposed by business service collections, and the Data Controls panel displays those relationships as parent and child nodes in the hierarchy. To view the available detail collections, expand a parent node in the hierarchy. In the example, OrdersView1 is the master collection; OrderItemsView2 that is under OrdersView1 is the detail collection. Under a collection, you will see the available attributes of the collection as child nodes.
 Read more...
A layout manager automatically arranges the components in the container according to a particular set of rules specific to that
layout manager. Layout managers allow you to specify rules and constraints for the layout of your UI in a way that will be
portable across platforms.
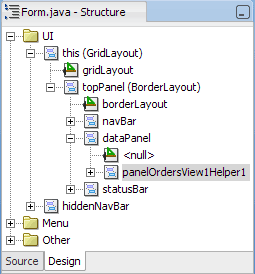
Initially the dataPanel container in the client form does not include a layout manager, as shown by <null> in the Structure window of
Form.java with dataPanel
expanded:
The
BorderLayout layout manager arranges a container's components in one of five areas within a BorderLayout, based on the
constraints property of the component. You can set the constraints property for the component in the Property
Inspector to one of the five following values:
 Read more...
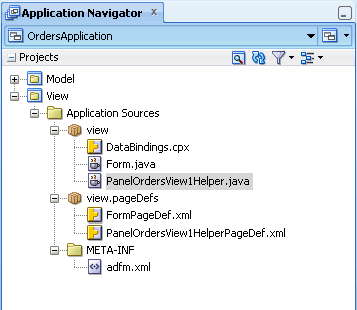
Double-click DataBindings.cpx, FormPageDef.xml and PanelOrdersView1HelperPageDef.xml to open each file in the overview editor. If necessary, click Overview in the editor window to view the file in the overview editor.
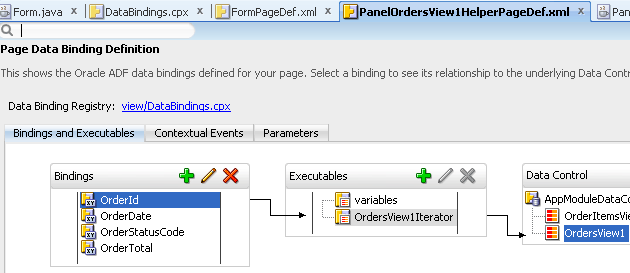
The PanelOrdersView1HelperPageDef.xml file is the page definition file for the Orders edit form panel. It defines the interaction between the UI components added to the form or panel and the business service components in the Model project. A page definition file defines the ADF binding container for each form or panel (page) in an application's view layer. The binding container provides runtime access to all the ADF binding objects for a page.
-
In the Application Navigator, right-click the View project and choose New > Client Tier > ADF Swing > Empty Panel, then click to open the Create ADF Swing Empty Panel dialog.
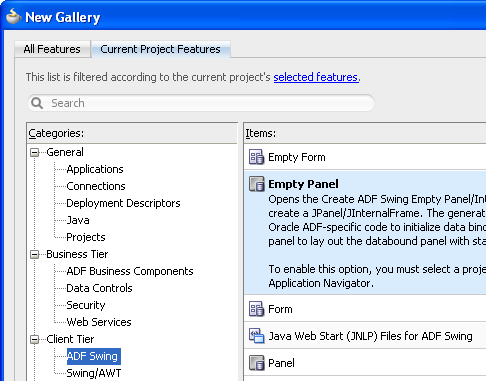
-
Enter
OrderItemsPanelas the panel name, and acceptviewas the package name. Confirm that Panel, and both optional attributes are selected, then click OK.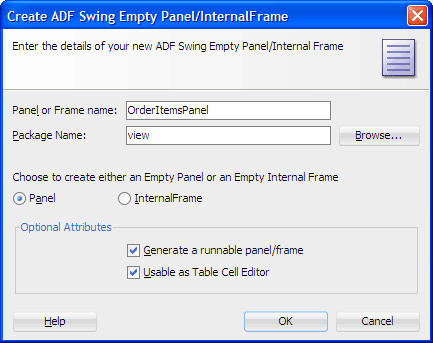
-
Creates the panel source file,
OrderItemsPanel.java -
Creates the page definition file for the panel,
OrderItemsPanelPageDef.xml -
Adds an entry for the panel source file in
DataBindings.cpx -
Displays the empty panel in the Java visual editor
-
If necessary, click the Property Inspector tab to bring it in front of the Constraints property editor. In the Property Inspector, Visual section, select BorderLayout from the layout dropdown list.
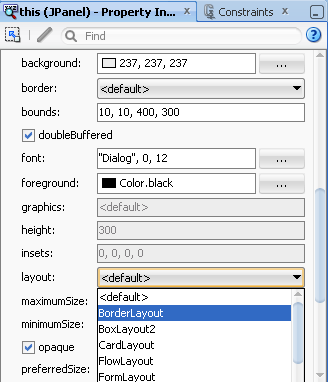
-
In the Application Navigator, expand the Data Controls panel and the AppModuleDataControl node. Then expand the same master collection of objects that you used previously, OrdersView1.
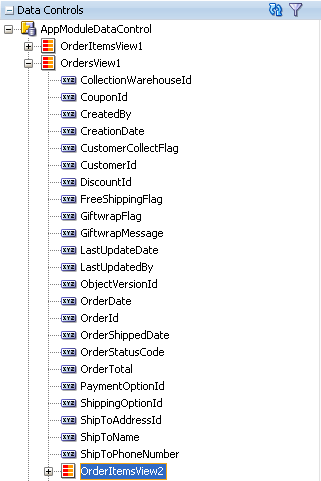
-
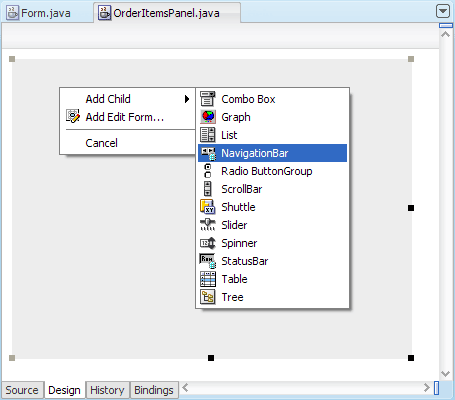
Drag and drop the detail collection OrderItemsView2 in the top left corner of the empty panel in the visual editor. Choose Add Child > NavigationBar from the context menu.
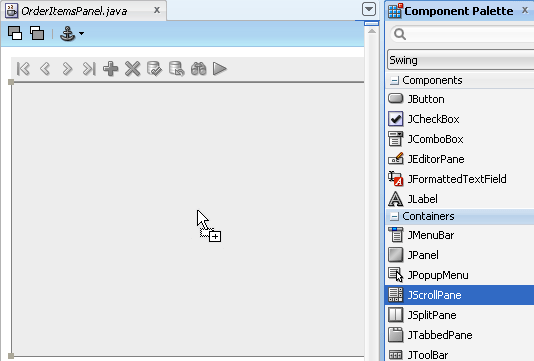
In the Component Palette, Swing page, Containers panel, drag
 JScrollPane and drop it in the center of the remaining empty panel space in the visual editor.
-
In the Data Controls panel, drag the same detail collection of objects, OrderItemsView2, and drop it into the empty JScrollPane you just added.
-
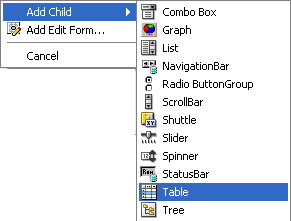
From the context menu, choose Add Child > Table to display the data objects of the detail collection in table format.
-
Click
 Save All
to save the files.
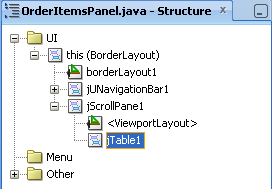
When you complete the steps for creating a detail table in ADF Swing Panel, the panel in the Java visual editor should look similar to this: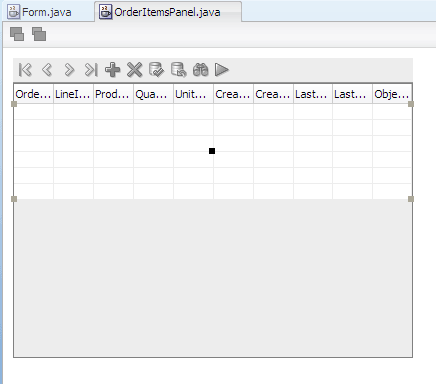
-
OrderItemsPanel.java: The source file for detail panel.
-
OrderItemsPanelPageDef.xml: The page definition file for the detail panel. Defines the ADF binding container for the detail panel, and the interaction between the UI components added to the panel and the business service components in the Model project.
 Read more...
The detail portion of the client form requires its own panel and layout manager, and can include a navigation bar
for browsing objects in the detail collection.
By creating the detail panel separately and then adding it to the client form, you can reuse the panel in other forms if you wish. To design the detail portion for inclusion in the client form, you will use an ADF Swing panel. In the Create ADF Swing Empty Panel dialog, you will enter a panel name and accept all other default values. The generated ADF Swing empty panel will also be initialized with ADF data binding code. Because the detail panel generally displays many data objects for the user to view together, the UI typically relies on a table control for this purpose and a navigation bar to permit browsing of the table's displayed data objects.
main statement to the Java class and generates a standard JPanel Swing container that is made runnable by
the creation of a test frame in which to execute the panel.
 Read more...
This allows you to test your ADF Swing panel individually (without the use of a frame that contains the ADF Swing bootstrap code).
When you click OK, JDeveloper does the following:
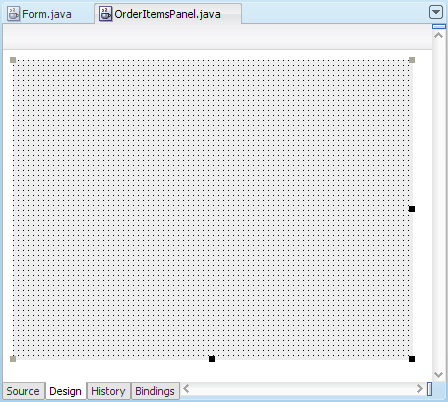
The initial panel in the visual editor is empty because it does not yet contain databound UI components.
 Read more...
The data control captures the master-detail relationships exposed by business service collections, and the Data Controls panel displays
those relationships as parent and child nodes in the hierarchy. To create the detail portion of a master-detail page, always select a
collection that constitutes a child node of the master collection node. If these parent-child nodes are not shown, then the business
service that was registered with the ADF data control does not contain this relationship.
To view available detail collections in the Data Controls panel, you expand a parent node in the hierarchy. In the example, the master collection you used previously to create the master edit form is OrdersView1, so in the Data Controls panel you expand OrdersView1. Under OrdersView1, the detail collection you are using to create the detail portion of the client form is OrderItemsView2. When you select a detail collection from the Data Controls panel and drag it onto the empty panel in the visual editor, JDeveloper filters the list of available controls you can drop in the context menu that appears.
 Read more...
The table control is ideally suited for this purpose. Each row of the table corresponds to a single data object, such as an order
items record, where the attributes of each object correspond to the table columns.
The navigation bar control, which operates on all the data objects of the detail collection, will allow the user to browse the data objects in the table. To make sure the navigation bar is inserted at the top of the panel, you dropped the detail collection near the top left corner of the empty panel.
Before you add the table control, you will use the Component Palette to add JScrollPane, which will enable scrolling for the table. You will drop the scroll pane in the center of the space below the navigation bar.
 Read more...
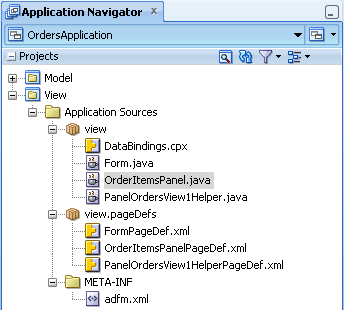
In the Application Navigator, the View project should look like this when fully expanded:
The files generated by the Create ADF Swing Empty Panel dialog are:
-
In the editor window, click the Form.java document tab to bring the client form forward.

-
In the Application Navigator, View project, drag OrderItemsPanel.java to the visual editor and drop it in the middle of the space below the master edit form.
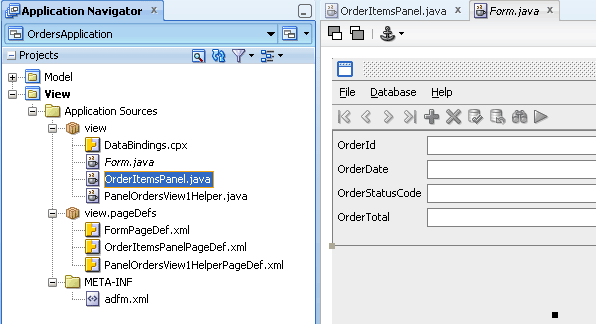
-
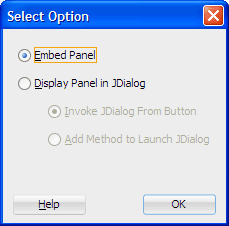
In the Select Option dialog, make sure Embed Panel is selected, then click OK.
-
In the Application Navigator, select Form.java.
-
In the Structure window for Form.java, Design tab, make sure orderItemsPanel1 is selected. Click the Constraints tab to bring it in front of the Property Inspector. In the Constraints visual property editor, confirm that the center box is selected.
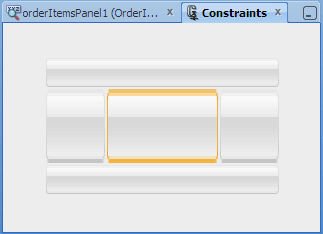
The
BorderLayoutlayout manager arranges a container's components in one of five areas within a BorderLayout, based on theconstraintsproperty of the component: North, South, East, West, and Center. -
Click
 Rebuild
to rebuild the View project.
The client form in the Java visual editor should look similar to this: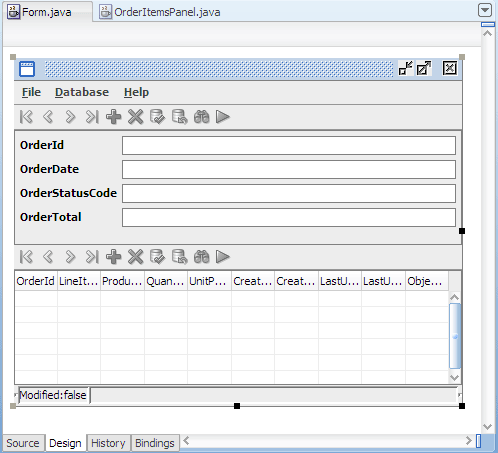
-
In the Application Navigator, right-click Form.java and choose Run.
When you run your application, the Log window opens in JDeveloper. Then you will see the application UI you have created without writing any code: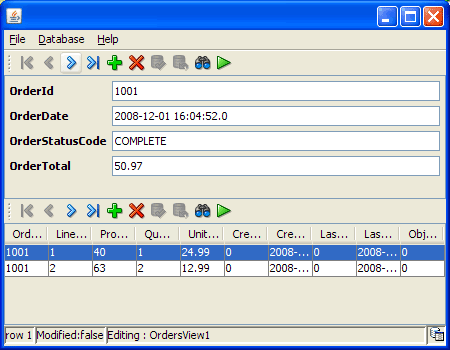
Click the navigation buttons and you will see ADF Swing manage data object currency between the master form and detail table. -
In the running application window, choose File > Exit to stop the application.
 Read more...
While it is possible to create a multiform application to display the master-detail forms and tables in separate windows,
relying on a single window to display the data objects of both the master and the detail collections ensures that the client
form shares a single panel binding instance. The process of creating a multiform application in ADF Swing, by contrast, requires
additional code to manage the panel binding instance between both windows.
At this point you have a completed, separate detail OrderItems panel, and your client form has a data panel that contains the master Orders panel (shown as panelOrdersView1Helper1 in the Structure window).

In this step you will complete the client form by inserting the detail OrderItems panel into the client form, placing it below the master Orders panel. By creating the detail panel separately and then adding it to the client form, you can reuse the detail panel in other forms if you wish.
 Read more...
The currency cursor is the way the iterator keeps track of which data object defines the start of the range of objects to display.
(The end of the range is determined by the
 RangeSize property of the iterator binding.)
In the completed client form, the master panel and the detail panel each use their own iterator binding. When the application is run, each panel creates an ADF binding context, which gets populated with the model binding objects from the panel's definition file. Each panel initializes the bindings with method calls like
component.setModel() that create ADF bindings appropriate
to each component. In the case of the navigation bar in the detail panel, an ADF iterator binding instance is created:
jUNavigationBar1.setModel(JUNavigationBar.createViewBinding(panelBinding,
 jUNavigationBar1,
 "OrderItemsView2", null, "OrderItemsView2Iterator"));
The navigation bar relies on the currency management capability of the iterator binding to update the current data object whenever the user clicks the navigation bar's Next, Previous, First, and Last buttons. When users click a navigation button in the master panel, they will see the updated values of the attribute-bound UI controls in the current data object. In the detail panel, by contrast, when users click a navigation button, the next set of data objects displays in the collection-bound UI control. Coordination between the master and detail is also handled by the iterator bindings.
The benefits of data object currency and master-detail coordination are provided by the Oracle ADF runtime and require no special code in your form's source.
-
In the Application Navigator, Model project, under Application Sources | model, double-click the OrdersView view object that defines the attributes for which you want to set control hints.
-
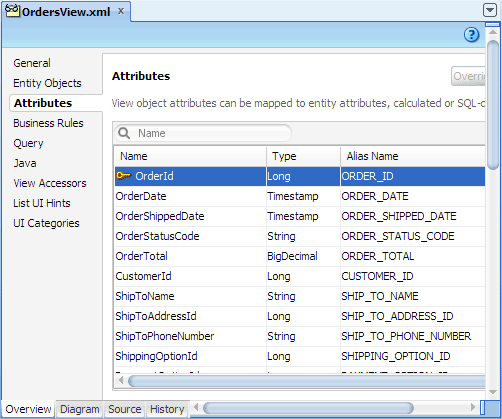
In the overview editor for view objects, select Attributes, then select OrderId.
-
If the Property Inspector is not visible, choose View > Property Inspector from the main menu.
In the Property Inspector for the selected attribute, expand the UI Hints section. EnterOrder Numberin the Label field.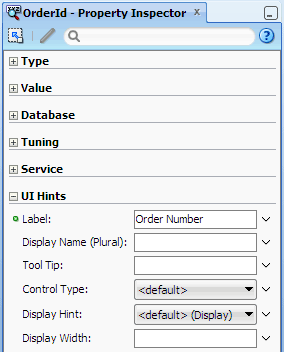
-
Display Hint: Determines whether the attribute will be displayed or not. In the ADF Swing design-time wizards, you can override this attribute.
-
Label: The text used in prompts or table headers that precede the value of a data item.
-
Tooltip: The text used in tooltips or flyover text. In web applications, it appears as the value of the HTML ALT attribute.
-
Format Type: Defines the formatter to use when the data item is displayed. Formatters are basically a collection of format masks that you can define in the
<JDeveloper_Home>/systemn.n.n.../formatinfo.xmlfile. -
Format: The particular format mask used by the selected formatter.
-
Control Type: The control type used to display the data item in the client UI: Edit makes the control editable, Date displays a calendar picker, and Default is interpreted by the client to select the most appropriate control.
-
Display Width: Defines the character width of the control that displays the data item.
-
Display Height: Defines the number of character rows of the control that displays the data item.
-
Form Type: Determines whether the attribute will be displayed in Detail or Summary mode. Detail mode produces a long form, Summary mode a short one. This property is supported for ADF Swing applications only; it is not available for Business Components web applications.
-
Field Order: Defines the numeric order in which you want the attribute to render within a category
-
Category: The identifier to be used by the dynamic rendering user interface to group attributes for display. The user interface will render the attribute with other attributes of the same category. You can use the category hint to aid the user interface to separate a large list of view object attributes into smaller groups related by categories. This control hint will be utilized by any dynamic rendering user interface that displays the attribute.
-
Auto Submit: Default is false.
-
Repeat the procedure to customize the control hint labels of the other attributes you have added to the master edit form, using the following label text.
Attribute Label Text OrderDate Date of OrderOrderStatusCode StatusOrderTotal Total Price -
In the Application Navigator, View project, right-click Form.java and choose Run.
When you run the application, the application window should now look similar to this:
 Read more...
This mechanism, known as control hints, permits application developers to centralize certain UI settings across clients
and thereby to control many aspects of the way the UI interacts with the data item. Because they are set at the level of the
business service, using control hints can also reduce the amount of UI coding in the Swing client.
To begin customizing a form with ADF control hints, you will open the overview editor for view objects. The UI Hints section of the Attributes tab in the overview editor provides a centralized location to apply the desired control hint to the chosen data item. For example, you can customize label text and format type for a view object attribute. Alternatively you can use the Property Inspector to apply control hints.
 Read more...
 Read more...
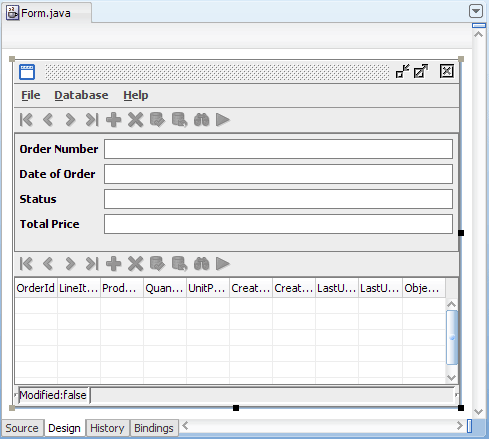
If you don't see the label text, close and reopen the View project, then open Form.java.
 Read more...
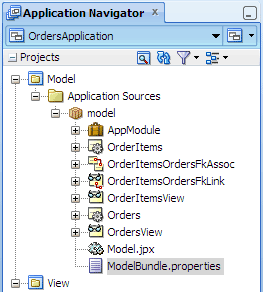
When you define attribute control hints for a Business Components object in the Model project, by default JDeveloper creates a project-level resource bundle file in which to store them. The hints that you define can then be used by generated forms and tables in associated view clients. The resource bundle option JDeveloper uses to save control hints is determined by the Resource Bundle page of the Project Properties dialog. By default JDeveloper sets the Resource Bundle Type option to Properties Bundle, which produces a
.properties file.
The first time you customize a control hint in the project, JDeveloper created the ModelBundle.properties file. The ModelBundle.properties file contains translatable key strings for the control hint definitions you added. For example, you should see the following:
#
model.OrdersView.OrderId_LABEL=Order Number
model.OrdersView.OrderDate_LABEL=Date of Order
model.OrdersView.OrderStatusCode_LABEL=Status
model.OrdersView.OrderTotal_LABEL=Total Price OrderId:
<Properties>
  <SchemaBasedProperties>
    <LABEL
      ResId="model.OrdersView.OrderId_LABEL"/>
  </SchemaBasedProperties>
</Properties>- Use JDeveloper wizards and dialogs to create an application and database connection.
- Create the business components from tables to provide access to data and implement the business logic.
- Create ADF Swing forms and panels that contain code for enabling Oracle ADF data binding in an application.
- Add meaningful labels for attributes displayed on the form.
- Compile and run the application to see how the master-detail client form displays.
- Building a Java Swing Application
- Getting Started with the JDeveloper IDE
- User's Guide for Oracle JDeveloper
- Fusion Developer's Guide for Oracle ADF

