
 Read more...
First you will use a wizard to quickly create an application
and a project. To design the page flow you will use the navigation diagrammer to add three pages and define two possible
ways to navigate from one of the pages to the other two pages.
Then you will create the JSF pages and add some simple UI components. On one of the pages you will add an input text
field and a button. You will write a method that takes the value entered in the input field to determine the page to
navigate to when the button is pressed. To hook up the method to the button on the page, you will create a managed bean
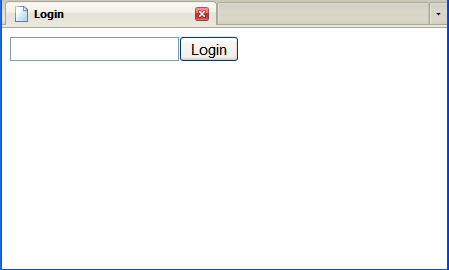
and register the method on the button. When you test run the page, the page in the browser will look like this:
| Purpose | Duration | Application |
|---|---|---|
This tutorial shows you how to build page navigation in JSF. To see the complete application you will create, click the Download button to download a zip of the final application, and then unzip it in your JDeveloper mywork folder. |
20 minutes |  |
-
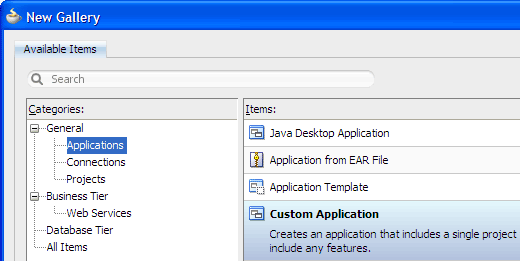
From the main menu, choose File > New. In the New Gallery, expand the General category and select Applications. Then in the Items list, select Custom Application and click OK.
-
To follow along with the example, enter
JSFNavigateAppas the application name.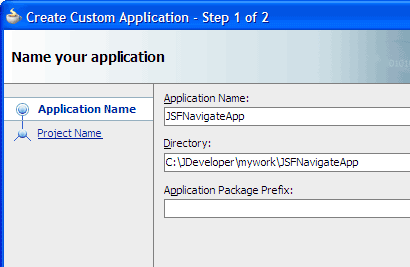
Accept the defaults and click Finish.
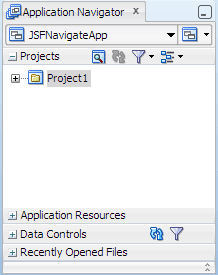
The Projects panel in the Application Navigator should look like this:
Read more...
Based on prebuilt templates, a JDeveloper application allows you to specify a predefined type of environment, depending on the type of application you want to create (web application, Java application, and so on). Application templates provide you with a quick way to create the project structure for standard applications with the appropriate combination of features already specified. The application template also filters the work you do in JDeveloper such that the choices available are focused only on the features you are working with.
In this tutorial, you will use the Custom Application template, which makes available objects associated with all the features that JDeveloper supports in a single project.
Once you have created an application using a suitable template, you can still add new projects to the application and specify what features are to be included. To do this, in the Application Navigator, right-click the application name and choose New Project. In the New Gallery, you can select any type of project in the Items list.
Read more...
A JDeveloper project, which is used to logically group files that are related, keeps track of the source files, packages, classes, images, and other elements that your program may need. Projects manage environment variables such as the source and output paths used for compiling and running your program. Projects also maintain compiler, runtime, and debugging options so that you can customize the behavior of those tools per project.
You can add multiple projects to your application to easily access, modify, and reuse your source code. Different projects might contain files representing different tiers of a multi-tier application, for instance, or different subsystems of a complex application. These files can reside in any directory and still be contained within a single project.
Read more...
Projects are displayed as the top level in the hierarchy in the Application Navigator. The Custom Application template
that you used for your application creates one project using a default project name (or the project name you entered).
In the Application Navigator you can collapse and expand any panel. You adjust the size of panels by dragging the splitter between two panels. To group and sort items in the Projects panel, use the
JDeveloper has the capability of recognizing many different file types, displaying each in its appropriate viewer or editor when you double-click the file in the Application Navigator. Closing an application or project closes all open editors or viewers for files in that application or project and unloads the files from memory.
Note: Nodes in italics in the Application Navigator mean that the elements have not yet been saved. A project node is bold when a file in the project is selected.
From the main menu, choose Application > Show Overview. The Application Overview window opens in the editor window area.
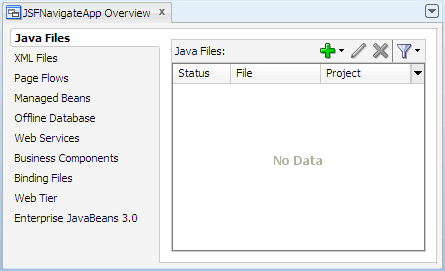
All objects that you create within JDeveloper appear in the Application Overview file summary pages, arranged by object type. As you create new files and artifacts, you can view them filtered by status and project.
You can optionally close the Application Overview window, since you will not be using it to create objects for this application.
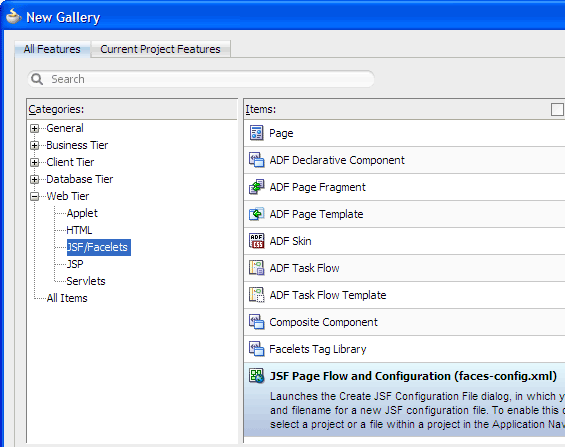
In the Application Navigator, right-click the project you just created and choose New > Web Tier > JSF/Facelets > JSF Page Flow and Configuration (faces-config.xml), then click OK.
-
In the Create JSF Configuration File dialog, accept the default file name
faces-config.xmland click OK.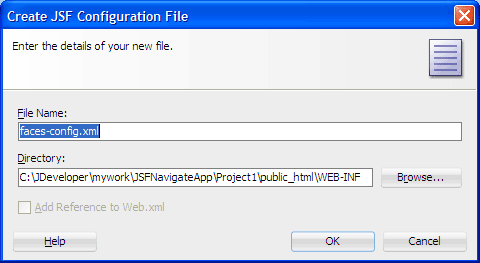
-
In the editor window, make sure the Diagram tab is selected.
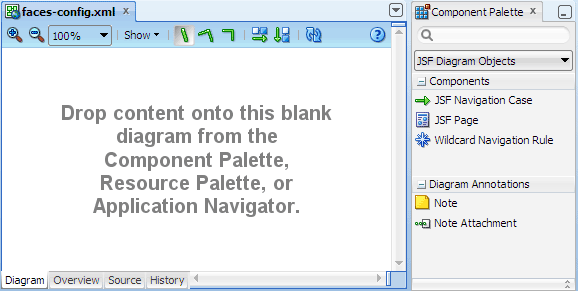
Diagram to use a JSF navigation diagram to plan out the pages in your JSF application, and define the navigation rules for users to navigate between the pages.
Overview to use the overview editor and dialogs to add and edit configuration elements.
Source to use the XML editor to edit the XML code, if you are familiar with the configuration element names.
-
In the Component Palette, JSF Diagram Objects page, Components panel, click and drag
 JSF Page to the diagrammer, then drop it on the canvas to add an icon that represents an
application page. Accept the default page name.
JSF Page to the diagrammer, then drop it on the canvas to add an icon that represents an
application page. Accept the default page name. 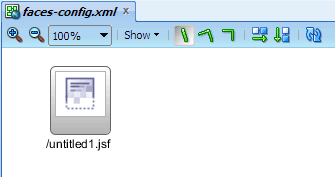
If you have already created the JSF pages, drag them from the Application Navigator and drop them on the diagram.
-
If you have not created the JSF pages, use JSF Diagram Objects from the Component Palette to draw the page representations on the diagram.
-
Repeat the procedure in step 4 to add two more page icons.
-
In the Component Palette, click
 JSF Navigation Case. Then on the diagram, click the first page icon you created and then click the second page icon. Accept the default case label.
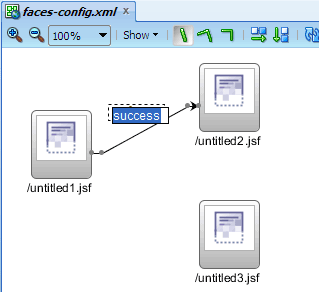
-
In the Component Palette, click
JSF Navigation Case again. Then on the diagram, click the first page icon and then click the third page icon. -
On the diagram, click on the case1 navigation case label between the first and third page icons and change the label to
failure. -
Click
 Save All to save your work.
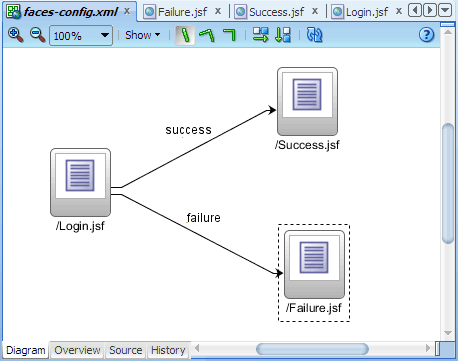
The JSF navigation diagram should look similar to this: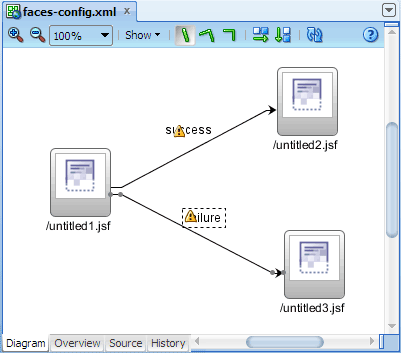
Read more...
The navigation rules are defined in the JSF application's configuration resource file, which is
named faces-config.xml by default.
All JSF applications have a
faces-config.xml file. The JSF configuration file contains details of your application,
such as the locales you are supporting and the rules for navigating between application pages. The configuration file also holds
details of the resources needed by your application, such as managed beans, custom message bundles and custom validators and
converters.
Read more...
Read more...
Read more...
A JSF configuration file can contain a number of navigation rules, and a number of navigation cases for each rule. Each navigation rule file defines what the destination should be for one or more links from a single page. For each different link on that page, you need a separate navigation case of the rule. For example a page that has two buttons or links would use one navigation rule with two navigation cases. A label or outcome string is associated with each case, to be used to distinguish the different cases from a single page. The outcome specifies that the navigation case is to be followed only if the specified string is returned.
When you draw navigation rules on a JSF navigation diagram, the required elements for navigation rules and cases are added to the
faces-config.xml file for you.
For example:
<navigation-rule>

  <from-view-id>/Page1.jsf</from-view-id>

  <navigation-case>

    <from-outcome>success</from-outcome>

    <to-view-id>/Page2.jsf</to-view-id>

  </navigation-case>

</navigation-rule>
The navigation rule specifies how to navigate from the
Page1.jsf page to the Page2.jsf page.
Read more... To see the navigation rule and navigation cases that JDeveloper has added to the JSF configuration file, click the tab to switch to the overview editor and then select from the element list on the left and select a page on the right:
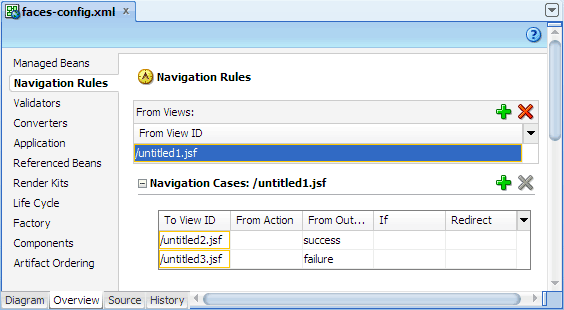
You can see the same navigation rule and cases in XML by clicking the Source tab in the editor window:
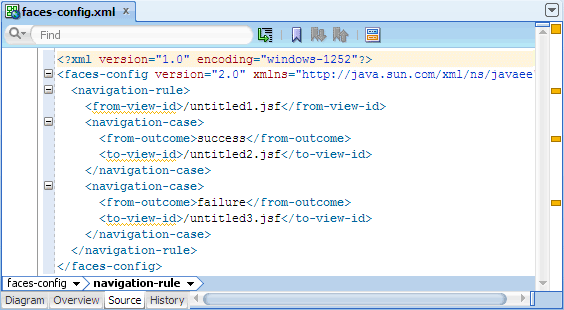
The navigation rule specifies how to navigate from the
untitled1.jsf page to the other two
pages, untitled2.jsf and untitled3.jsf. In other words, the navigation rule has two navigation cases
or two possible outcomes. The warnings in the code and on the diagram indicate that the referenced page files have not been
created yet. When you will create the actual files for the pages, the page icons on the diagram will change to indicate that
physical files are associated with the icons and the warnings will be removed.
If necessary, click the Diagram tab at the bottom of the editor window to switch back to the diagrammer.
-
On the JSF navigation diagram, double-click the untitled1.jsf page icon to open the Create JSF Page dialog.
Enter
Login.jsfas the file name. Make sure Facelets is the selected document type.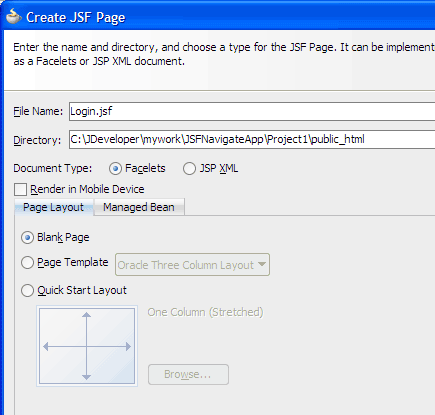
The New Gallery
The JSF navigation diagrammer
The ADF task flow diagrammer (available only in the Studio edition of JDeveloper)
On the Page Layout page, select Blank Page. On the Managed Bean page, select Do Not Automatically Expose UI Components in a Managed Bean and click OK.
In the editor window, select the faces-config.xml tab at the top to bring the navigation diagram forward.
-
Repeat steps 2 through 5 on the untitled2.jsf and untitled3.jsf page icons. Use the following file names to create the second page and third page, respectively:
Success.jsf
Failure.jsf
By default JDeveloper displays a new JSF Facelets page in the visual editor. You should now have four documents open in the editor window: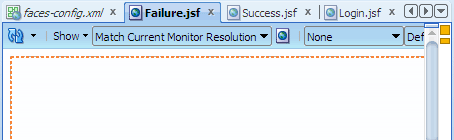
Web Content folder: Contains the pages you created, along with other files that must be visible to the client browser (such as stylesheet files and images) for your application.
/WEB-INF/ folder: Contains the required Web Application Deployment Descriptor (
web.xml) and the JSF configuration file (faces-config.xml).web.xml file: The web application deployment descriptor for your application. This is an XML file describing the components that make up your application, along with any initialization parameters and container-managed security constraints that you want the server to enforce for you.
faces-config.xml file: Where you register the JSF application's configuration resources, such as validators, converters, managed beans, and navigation rules.
jsf) or JSP documents written in XML syntax (which have file extension .jspx).
Read more...
You can create both types of JSF pages with the Create JSF Page dialog, opening it from:
Read more...
By default components are not exposed to managed beans. If you wish to bind components to managed beans, select one of the automatic binding options on the Managed Bean page in the dialog.

Note: The option to bind to an existing managed bean is enabled only if the application has a managed bean already configured.
If you choose to automatically expose UI components in a managed bean, JDeveloper automatically creates a backing bean for any new JSF page that you create. When you drop a component on the page, JDeveloper inserts a bean property for each component, and uses the
binding attribute to bind component instances to those properties, allowing the
bean to accept
and return component instances.
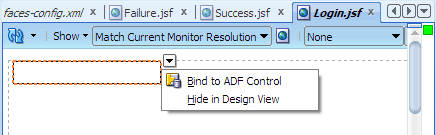
If you choose not to let JDeveloper use automatic component binding at page creation time, you can use the Property Inspector to manually bind any component on the page. For example, if you insert an input text component, click the
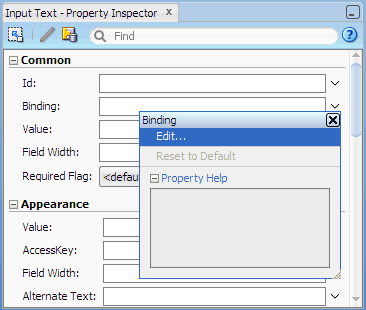
.jsf), JDeveloper automatically
creates a starter page structure with two xmlns attributes for the JSF Core and JSF HTML tag libraries.
Read more...
The other elements included in a starter file are elements for laying out a page,
specifically everything else within <f:view> and </f:view>. For example, the
following code is generated for the new Failure.jsf page:
<!DOCTYPE html PUBLIC "-//W3C//DTD XHTML 1.0 Transitional//EN"
 "http://www.w3.org/TR/xhtml1/DTD/xhtml1-transitional.dtd">
<f:view xmlns:f="http://java.sun.com/jsf/core"
        xmlns:h="http://java.sun.com/jsf/html">
  <html xmlns="http://www.w3.org/1999/xhtml">
    <h:head>
      <title>Failure</title>
    </h:head>
    <h:body>
      <h:form></h:form>
    </h:body>
  </html>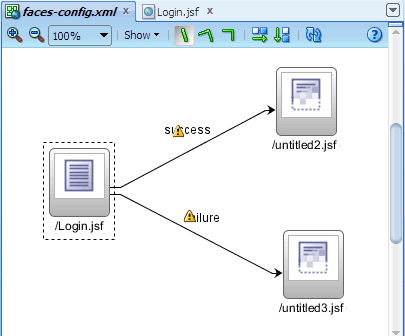
</f:view>faces-config.xml should now look similar to this, with page names under page icons, and navigation lines and labels displayed between page icons:
Notice that the warning icons have disappeared and the page icons have also changed, to indicate that the physical page files exist.
When you complete the steps for creating the JSF pages, the Application Navigator should look something like this:
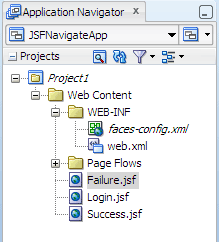
In the project, the folders and files that conform to the Java EE Web module directory structure are:
In the editor window, select the Login.jsf tab at the top to bring the page forward.
-
In the Component Palette, select the JSF page from the dropdown list, then expand the HTML panel.
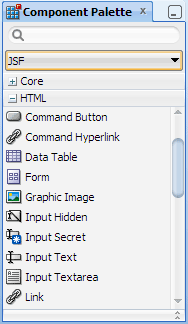
The JavaServer Faces HTML tag library, which contains tags representing common HTML user interface components.
-
The JavaServer Faces Core tag library, which contains tags that perform core actions such as event handling and data conversion.
-
Click and drag
 Input Text to the visual editor, then drop it on the blank page to add an input text field.
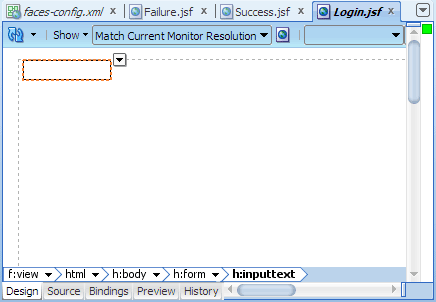
-
Click and drag
 Command Button to the page,
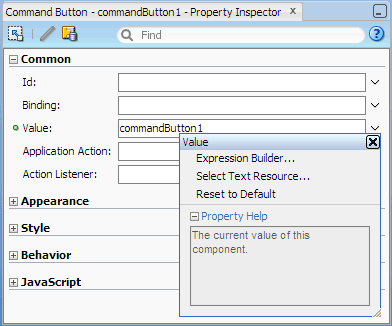
then drop it next to the input field you just added. In the Property Inspector, Common section, click in the Value field and change the default text to
Command Button to the page,
then drop it next to the input field you just added. In the Property Inspector, Common section, click in the Value field and change the default text to Login.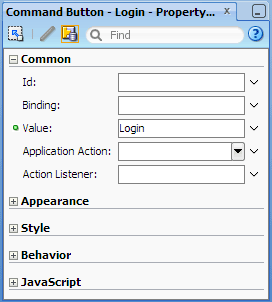
Common: Commonly used attributes, which varies from component to component. Also includes the attributes
idandbinding. Theidis the unique identifier of a component, which must be a valid XML name; you cannot use leading numeric values or spaces in the id name. Thebindingis the EL expression that binds a component instance to a property in a bean.Appearance: Basic attributes that control the visible parts, including
titleandaccessKey.Style: HTML style and presentation attributes such as
background,border,cellpadding,cellspacing,font,margin,style, andoutline. Most of the attributes that the HTML 4.01 specification declares for corresponding HTML elements are supported.Behavior: Basic attributes that control the component's behavior, including HTML pass-through attributes such as
disabledandreadOnly. Also includes an Internationalization section for HTML language translation attributes such aslanganddir.JavaScript: HTML event attributes (for associating client-side scripts with events) such as
onclick,onkeypress, andonmouseover.-
In the editor window, select the Success.jsf tab at the top to bring the page forward.
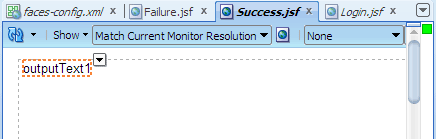
In the Component Palette, drag and drop
 Output Text on the blank page in the visual editor.
-
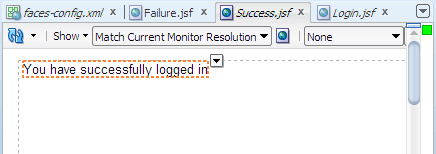
In the Property Inspector, Common section, click in the Value field and change the default text to
You have successfully logged in, then press Enter.
The visual editor forSuccess.jsfshould look similar to this after you have edited the output text value:
In the editor window, select the Failure.jsf tab at the top to bring the page forward.
In the Component Palette, drag and drop
Output Text on the blank page in the visual editor. Then in the Property Inspector change the output text value to Login has failed.-
Click
Save All to save your work.
In the editor window, select the Login.jsf tab at the top to bring the page forward.
TheLogin.jsfpage should have an input field in which a user can enter text, and a command button to which you will add code to control the page navigation.
Read more...
Read more...
The editor breadcrumb links show the path of links from the currently selected component or tag back to its root parent
component or tag.
When you click a component or tag in the editor breadcrumb links, JDeveloper shows the selected component or tag on the page with a dropdown menu icon at the top right corner of the selected item. When you click the dropdown menu, JDeveloper displays a context menu of actions that you can perform on the selected component or tag.
The visual editor is also fully integrated with the Structure window. While inserting, copying, or moving JSF components, you may select an insertion point on the page in the visual editor or in the Structure window in relation to a target page element. JDeveloper provides visual cues to indicate the location of the insertion point before, after, or contained inside a target component.
After inserting components, you can set the properties of the components either using a dialog displayed at the time you drop the component, if one is required, or later using the Property Inspector.
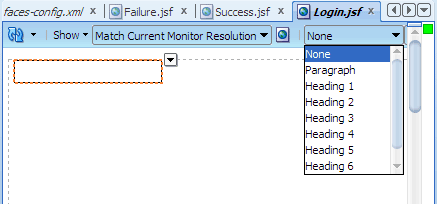
Your application pages can also use a style sheet, either one provided by JDeveloper or one of your own. You can add a style sheet to a page at the time you create it, or later, by editing the page. If you have added a style sheet to your page, you can set the text on the page, such as the heading text, to a style chosen from the dropdown list:
#{expression} using JSF
Expression Language (EL). For example, #{personData.username}.
Read more...
When you add a component to the JSF page, the Property Inspector displays the supported attributes for the component tag grouped in these categories:
Login.jsf page, you should see the code for the two components you added
within <h:form></h:form>:
Read more...
<h:form>

    <h:inputText/>

    <h:commandButton value="Login"/>

</h:form>
You will create a method and attach it to the button on the Login page. The method will capture the value entered by the user in the input field, then return the appropriate outcome value.
-
In the Login.jsf editor window, click the Design tab at the bottom to make sure the visual editor is in focus.
-
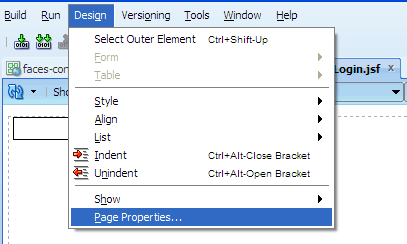
From the main menu, choose Design > Page Properties.
-
In the Page Properties dialog, select the Component Binding tab and select Auto Bind. Then click New next to the Managed Bean dropdown list.

-
In the Create Managed Bean dialog, enter the following values or select the option:
Field or Option Value Bean Name backing_loginClass Name LoginInfoPackage project1.backingExtends java.lang.ObjectScope request Registration Annotations application: The bean is available for the duration of the web application. This is helpful for global beans such as LDAP directories.session: The bean is available to the client throughout the client's session.request: The bean is available from the time it is instantiated until a response is sent back to the client. This is usually the life of the current page.none: The bean is instantiated each time it is referenced. This is helpful if the bean is referenced within another bean.Click OK to close the Create Managed Bean dialog.
You should see backing_login selected in the Managed Bean dropdown list.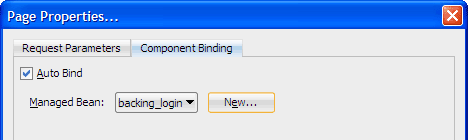
-
Click OK to close the Page Properties dialog.
JDeveloper displays the backing bean fileLoginInfo.javain the source editor. -
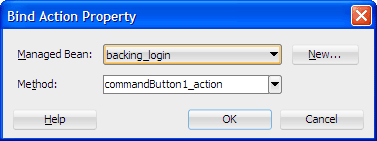
In the editor window, click the Login.jsf tab to bring the visual editor forward, then double-click the command button on the page.
-
An outcome specifies that this navigation case is to be followed only if the specified string is returned. This form of navigation is static navigation: Whenever a user clicks the button or link, a defined, fixed JSF page is always displayed. The button or link itself uses the
actionattribute to specify the string outcome. For example,<commandButton value="Click" action="success"/>. -
An action method specifies that a navigation case is to be followed only if the action method has handled the link. The action method performs some logic to determine the outcome and returns the outcome. The button or link itself uses the
actionattribute to specify the method expression that refers to the action method that returns the logical outcome. For example,<commandButton value="Click" action="#{somebean.somemethod}"/>. Using both an action method and an outcome specifies that this navigation case is to be followed only if the specified action method handles the link, and only if it returns the specified string outcome.
-
In the Bind Action Property dialog, ensure that backing_login is shown in the Managed Bean dropdown list. You should also see commandButton1_action populated in the Method dropdown box. Click OK.
-
In the LoginInfo.java source editor, enter code to perform navigation when the button is clicked.
Replace the code that was generated in the action method:
// Add event code here...
return null;
With this sample code, to set navigation from theLogin.jsfpage to either theSuccess.jsfpage orFailure.jsfpage: -
Creates a starter action method in the
LoginInfo.javasource file:
public Object commandButton1_action() {
// Add event code here...
return null;
} -
Binds the
actionattribute on the command button to the action method using a method expression:
<h:commandButton value="Login"
binding="#{backing_login.commandButton1}"
id="commandButton1"
action="#{backing_login.commandButton1_action}"/> -
In the Application Navigator, right-click Login.jsf, and choose Run.
If the Create Default Domain dialog displays, enter the default password, for exampleweblogic1, in the Password and Confirm Password fields, then click OK.
The page in the browser should look similar to this:
Starts Integrated WebLogic Server, if not already running.
Compiles and deploys the application to Integrated WebLogic Server.
-
Launches the application in your default browser using the following default address:
http://<your_machine_IP_address>:<http_port>/<your_application_name>-<your_project_name>-context-root>/faces/<path_to_the_page>
For example:http://127.0.0.1:7101/JSFNavigateApp-Project1-context-root/faces/Login.jsf
faces-config.xml or
has special managed bean annotations in the bean class.
Read more...
Either way, you use a symbolic name to identify the class to be used to instantiate the bean, and you use the symbolic name to refer to the bean's properties and methods. Because you are using a symbolic name rather than referring to the bean directly, the presentation is kept separate from the application logic, which means that you can change the model without affecting the view.
When automatic component binding is enabled on a page, JDeveloper automatically exposes UI components on the page to properties in a backing bean and uses the
binding attribute to bind component instances to those properties. A backing bean is a JSF managed bean that contains logic and properties for UI components specific to a page. The JavaBean can be
any existing class (such as a data transfer class), or it can be a class specific to a page only (hence it is called a backing bean).
Backing beans can act as the state holder of user input and the UI components' data, and they are useful for implementing
validation methods and event handler methods that invoke back end application
code with component values.
When you enable automatic component binding in the Page Properties dialog, you can choose to bind components to an existing managed bean or you can configure a new managed bean and then create the backing bean for the page.
You can turn off or turn on automatic component binding by deselecting or selecting the Auto Bind checkbox in the Page Properties dialog. For example, if you want JDeveloper to automatically generate properties and accessor methods for some components you are adding to a page, turn on automatic component binding just before adding the components, then turn it off after you're done adding.
Read more...
faces-config.xml. When you choose to use managed bean annotations, JDeveloper adds the annotations in the JavaBean class file. For example:
@ManagedBean(name="backing_mypage")

      @RequestScoped

      public class MypageInfo {

        ...


      }
If you choose to register JavaBeans in
faces-config.xml, you do so either by editing the XML in the configuration file manually or using
the configuration file overview editor, which provides creation dialogs and browse features for finding class file
references for your beans.
When you use the configuration file overview editor to create and configure a managed bean, JDeveloper adds relevant code in
faces-config.xml for you. For example:<managed-bean>
<managed-bean-name>backing_mypage</managed-bean-name>
<managed-bean-class>project1.backing.MypageInfo</managed-bean-class>
<managed-bean-scope>request</managed-bean-scope>
<!--oracle-jdev-comment:managed-bean-jsp-link:1Mypage.jsf-->
</managed-bean>
The comment line
<!--oracle-jdev-comment...--> tells you that the managed bean is the backing bean for
the Mypage.jsf page when automatic component binding is turned on.
Using managed bean annotations reduces the size and complexity of the
faces-config.xml file, which can grow quite substantially.
Read more...
@ManagedBean(name="backing_login")

      @RequestScoped

      public class LoginInfo {

        ...


      }
When automatic component binding is enabled, JDeveloper adds to the backing bean file a bean property and accessor methods for each UI component on the JSF page. For example:
private HtmlInputText inputText1;
public void setInputText1(HtmlInputText inputText1) {
  this.inputText1 = inputText1;
}
public HtmlInputText getInputText1() {
 return inputText1;
}faces-config.xml file manually.
When automatic component binding is enabled, in the JSF page JDeveloper uses the
binding attribute on a component to bind the component instance to the bean property. For example:
<h:inputText binding="#{backing_login.inputText1}" id="inputText1"/>
where
backing_login is the symbolic bean name.
In the source code for a page that uses automatic component binding, JDeveloper also inserts an auto binding comment line at the bottom of the page. For example:
<!--oracle-jdev-comment:auto-binding-backing-bean-name:backing_login-->
Login.jsf page, you can
specify an action method, an outcome, or both.
Read more...
if (inputText1.getValue().toString().equals("guest"))
    return "success";
else
return "failure";faces-config.xml to determine which page to display next.
Recall that the following navigation cases have already been created:
<navigation-rule>

  <from-view-id>/Login.jsf</from-view-id>

  <navigation-case>

    <from-outcome>success</from-outcome>

    <to-view-id>/Success.jsf</to-view-id>

  </navigation-case>

  <navigation-case>

    <from-outcome>failure</from-outcome>

    <to-view-id>/Failure.jsf</to-view-id>

  </navigation-case>

</navigation-rule>
So the event code that you add to the generated action method should return both "success" and "failure", to cover the two possible navigation case outcomes from the
Login.jsf page.
Read more...
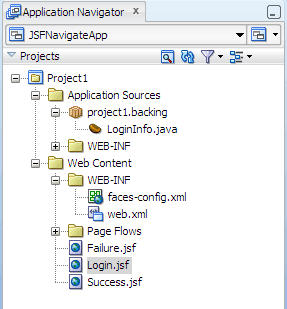
In the Application Sources folder under Project1, you should see
LoginInfo.java in the package project1.backing.
By default, JDeveloper automatically configures an integrated server named Integrated WebLogic Server that references a user-specific instance of Oracle WebLogic Server bundled with the IDE. Integrated WebLogic Server is a Java EE runtime service for packaged archive deployment. Based on zero-copy deployment, Integrated WebLogic Server lets you run and test an application and its projects as a Java EE application in a Java EE container. No special connection setup is required to use Integrated WebLogic Server. You can run the entire application, a project, or individual JSF pages.
When you run a JSF application in the IDE, JDeveloper automatically:
faces-config.xml is parsed and registered managed beans (if any) are made available. Also,
any JavaBeans marked by annotations become managed beans at runtime. Whenever a managed bean
is referenced (for example in an EL expression as a value for a component's tag attribute - called a value expression), the
Managed Bean Creation Facility instantiates the bean by calling the default constructor method on the bean. If any properties
are also declared, they are populated with the declared default values.
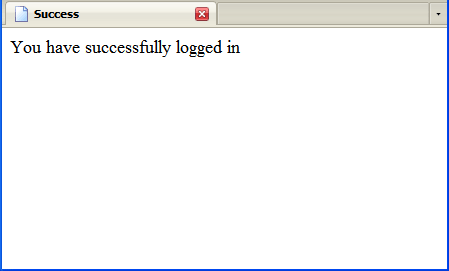
In the running application, when you enter
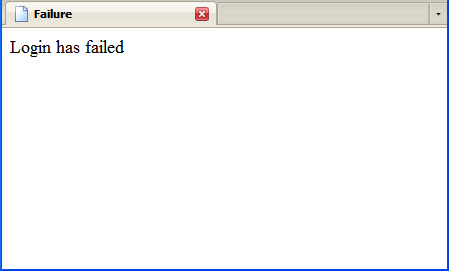
guest in the input field and then click the Login button, you should see the page with the message confirming that you are logged in.
When you enter anything else and then click the Login button, you should see the page with the message telling you the login has failed.
To stop the application, click
Note: Terminating the application stops and undeploys the application from Integrated WebLogic Server but it does not terminate Integrated WebLogic Server.
- Use JDeveloper wizards and dialogs to create applications and starter pages
- Use the JSF navigation diagrammer to add pages and add navigation rules
- Use the visual editor, Component Palette, and Property Inspector to create UI pages
- Use component binding to programmatically manipulate UI components on a page
- Use Integrated WebLogic Server to run a JSF application
- Building a Simple JSF Application
- Binding a JSF Page to a Managed Bean
- Web UI Developer's Guide for ADF