 Read more...
With continuous integration, the system completes a build, test, deploy, and integration in response to every single commit. If a developer in the web application group checks in code, Hudson kicks off a build, runs unit tests, deploys the code to a new server, and performs a set of integration tests. If this build fails or the tests encounter an unexpected condition, everyone is notified of this failure. With continuous integration, no one needs to drop everything and run a release build, these builds are generated every single day, and in the most mature environments, a fully tested and verified system can be deployed to production at any time. In other words, when you automate build, test, and verify using a tool like Hudson you can continue developing your applications without having to wait (or synchronize) on some manual build, test, verify process. Making these processes automatic has another important side-effect, it makes the development process more scaleable. When your teams don’t have to stop to actively test and collaborate with one another, it is much easier to add additional developers to a project. Without continuous integration you have to stop and synchronize release schedules. With continuous integration you reduce the risk associated with a particular software development cycle.
For more details about Hudson, you can refer to Hudson Documentation.
-
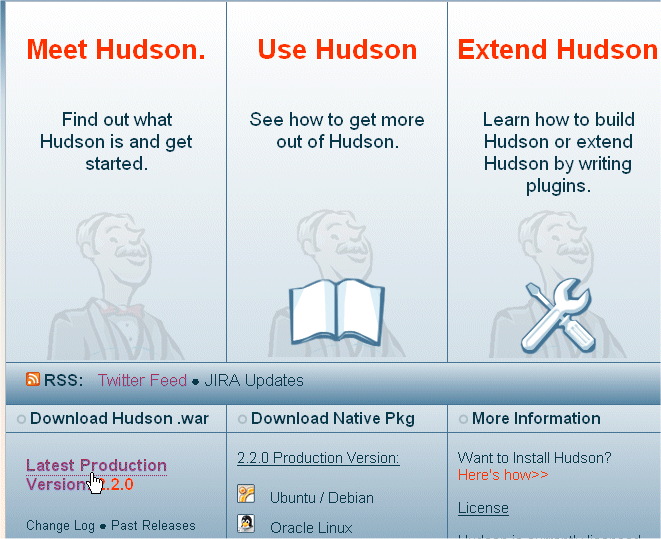
Download the latest hudson.war file from http://hudson-ci.org
-
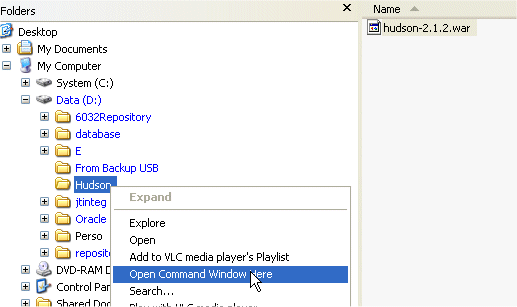
Open a command window from the folder where you downloaded the Hudson file.
-
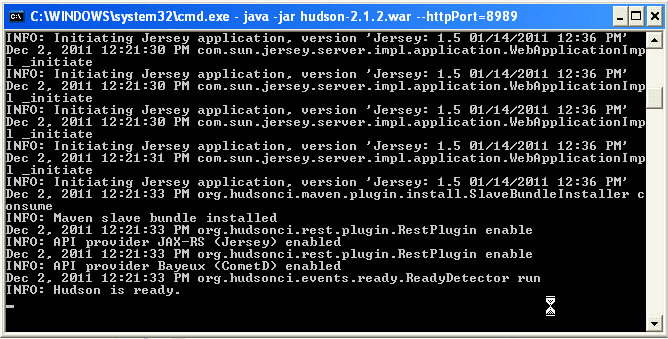
In the command window type: java -jar hudson-2.2.0.war --httpPort=8989 to install Hudson and run it on port 8989.

-
Wait for Hudson to finish initializing.
-
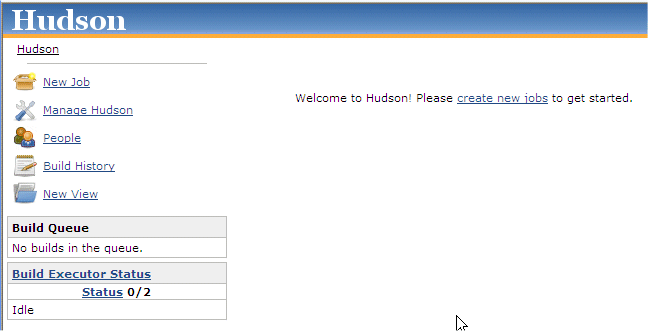
Open a browser window and type http://localhost:8989/ to launch the Hudson console. Wait for the Hudson dashboard page to load.
-
In the Hudson dashboard page, select the Manage Hudson link.
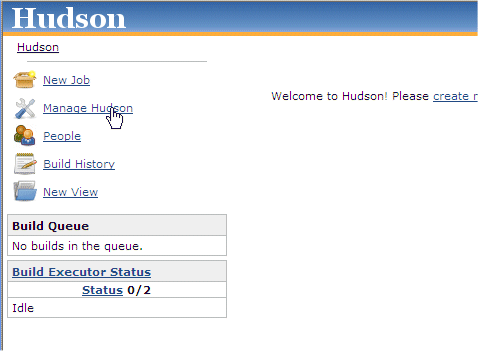
Notice that in Microsoft Windows environment, you can create a Windows service for Hudson and have the service start automatically. Refer to the following link for instructions on how to install Hudson as a Windows service.
-
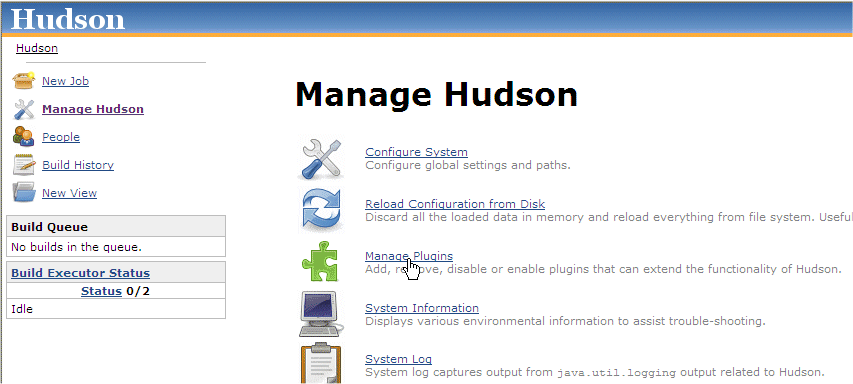
In the Manage Hudson page, select the Manage Plugins link.
-
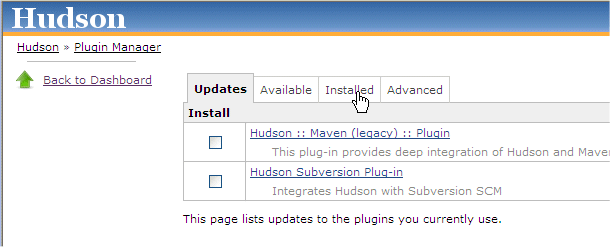
In the Plugin Manager, click the Installed tab.
-
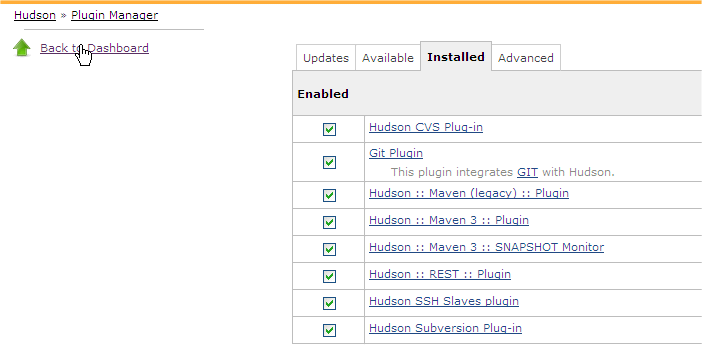
Note that the list of installed plugins includes the Hudson Subversion Plug-in. Click the Back to Dashboard link.
To indicate to Hudson that ojdeploy and Ant are used for building the test, perform the following steps:
-
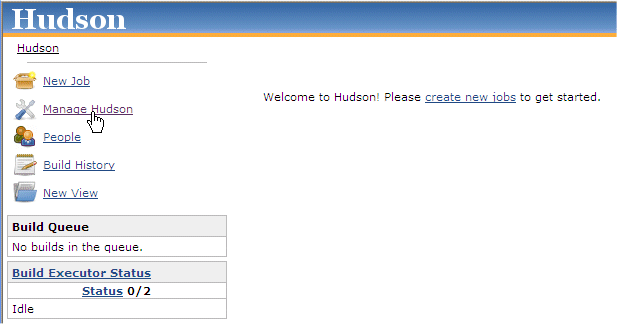
Back in the Hudson Dashboard page, click the Manage Hudson link.
-
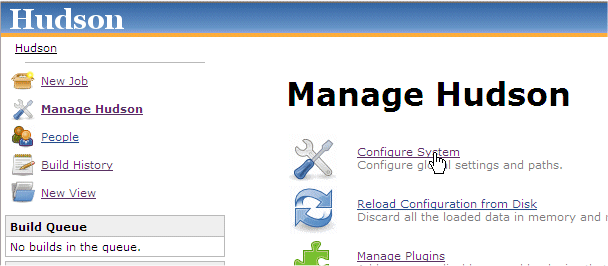
In the Manage Hudson page, click the Configure System link.
-
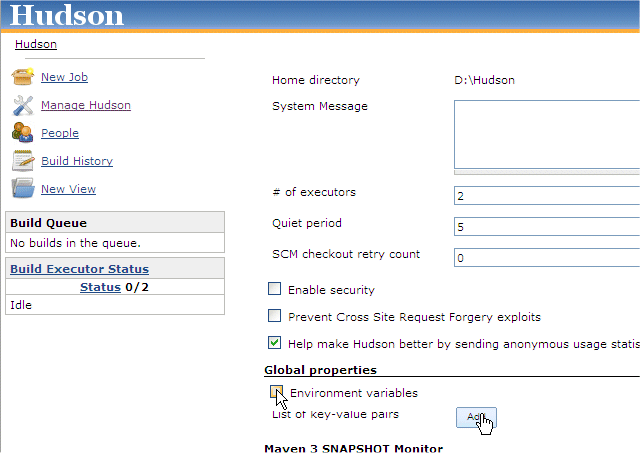
Select the Environment variables check box in the Global Properties section, then click the Add button to add a key-value pair to specify the location of the ojdeploy executable. In your case, you are not going to use the ojdeploy command, but you might need to use the command later if you choose to include packaging tasks in future builds. Therefore, it's a good idea to learn how to configure it now.
-
In the name field, type OJDEPLOY. Using Windows Explorer, locate the ojdeploy.exe file and copy its path in the value field.

-
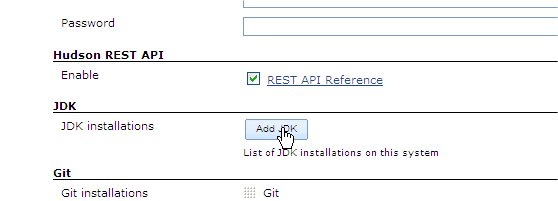
Scroll down to the JDK section to specify where it is located. Click the Add JDK button.
-
Type JDK as the JDK Name, and in the JAVA_HOME field, specify the path to the jdk folder.

-
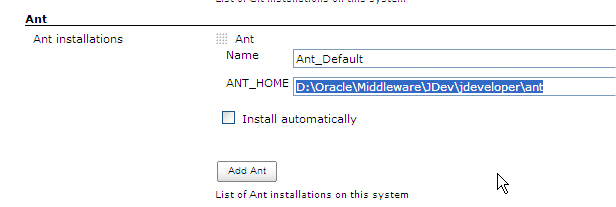
Scroll down the Manage Hudson page, and in the Ant section, click the Add Ant button.

-
In the Ant installations section, deselect the Install automatically check box, and then type Ant_Default as the Ant Name. Using Windows Explorer, locate the ant folder and copy its path in the ANT_HOME field.
-
Scroll down to the bottom of the page, and click the Save button.
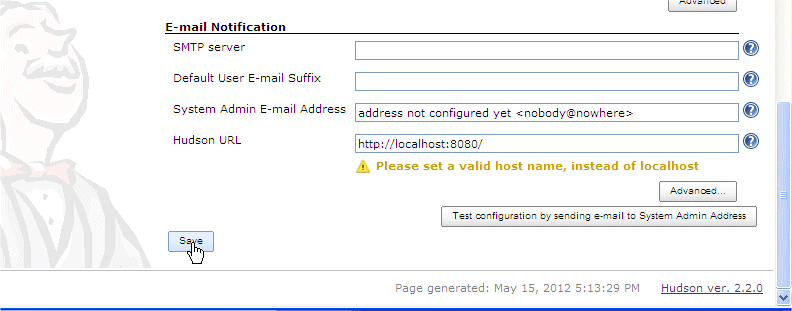
At this point, notice that you can set up an email notification. You learn how to do this later.
-
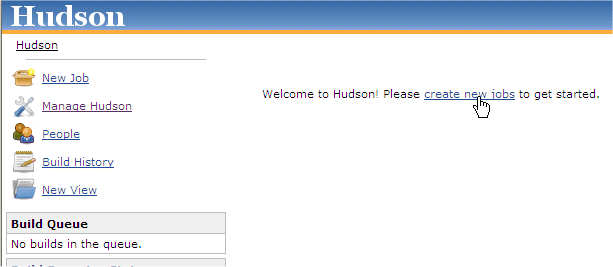
Back in the Hudson Dashboard, click the create new jobs link.
-
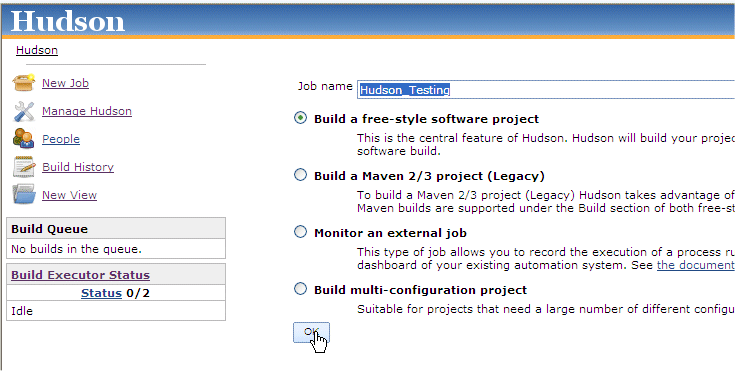
In the Job name field, type Hudson_Testing, select the Build a free-style software project option, and click OK.
-
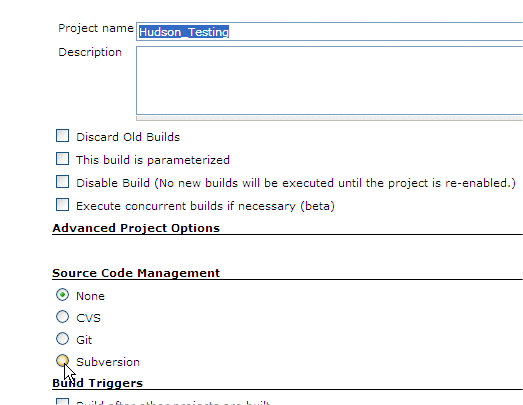
Because you are using Subversion as the repository tool in JDeveloper, you need to specify the location of the Subversion resource files. In the Project page, select Subversion in the Source Code Management section.
-
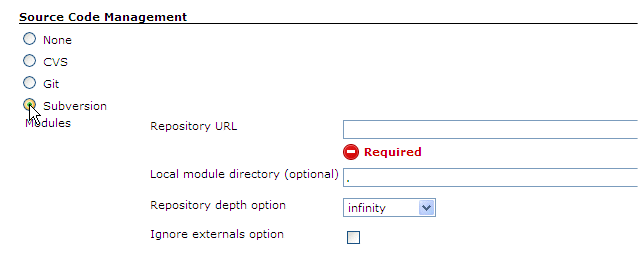
In the Repository URL field, type the URL of your repository.
-
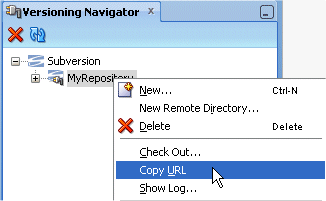
If you don't know the URL, you can copy it from the Versioning Navigator in JDeveloper. Right-click MyRepostory, and select Copy URL.
-
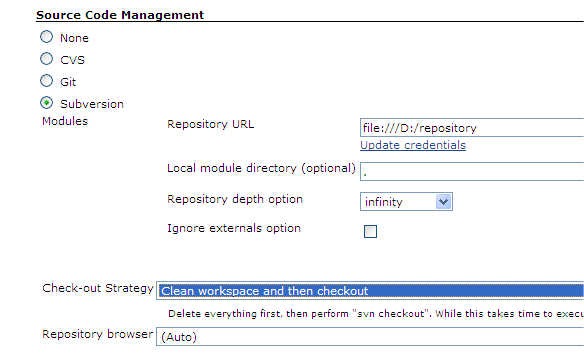
Paste the URL into the Repository URL field. In the Check-out Strategy field, select the Clean workspace and then checkout option from the list.
-
Scroll down and in the Build section, click the Ant build step button, and select the Invoke Ant option.
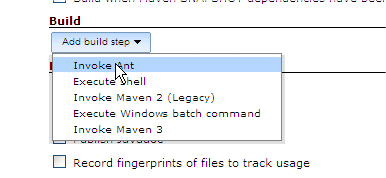
-
In the Build section under Invoke Ant, select Ant_Default for the Ant version. Type all in the Targets field.

Click the Advanced button
-
In the Build File field, type JUnitTests/build.xml to indicate the relative location of the build.xml file.
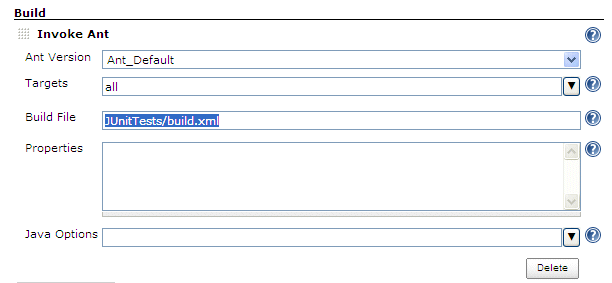
Click the Save button at the bottom of the page.
Now that your job is defined, you can run it.
-
In the Hudson_Testing project, click the Build Now link to run the test.
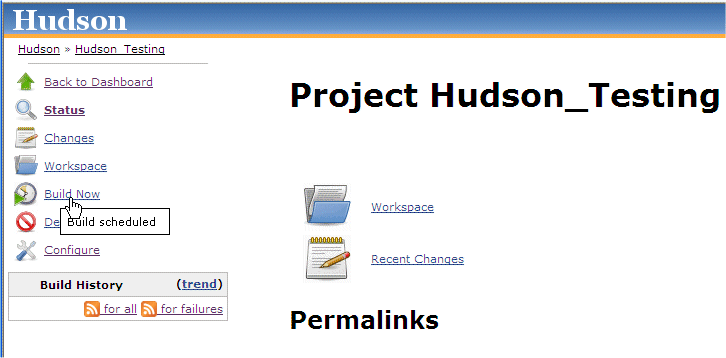
-
Wait for the build to end. Then click the Latest Console output link to see the status.
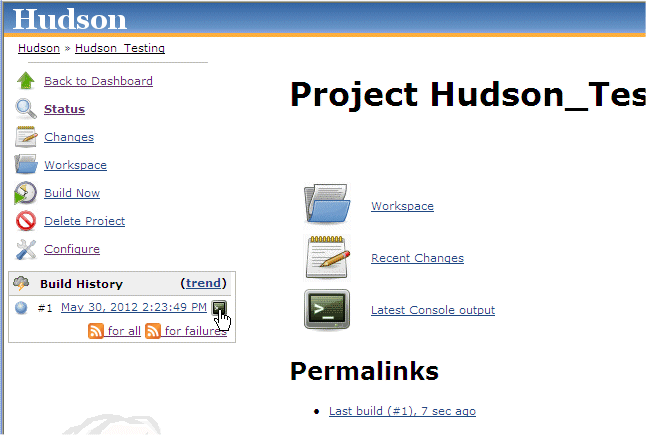
-
The Blue circle indicates a successful run. Notice the list of executed Ant targets in the bottom left section of the page.
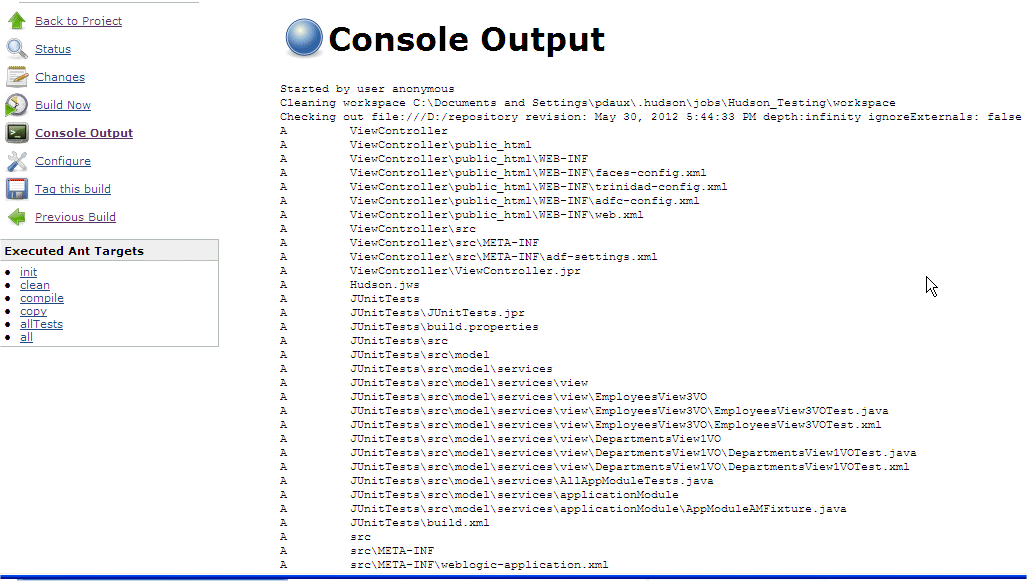
Scroll down to review all details.
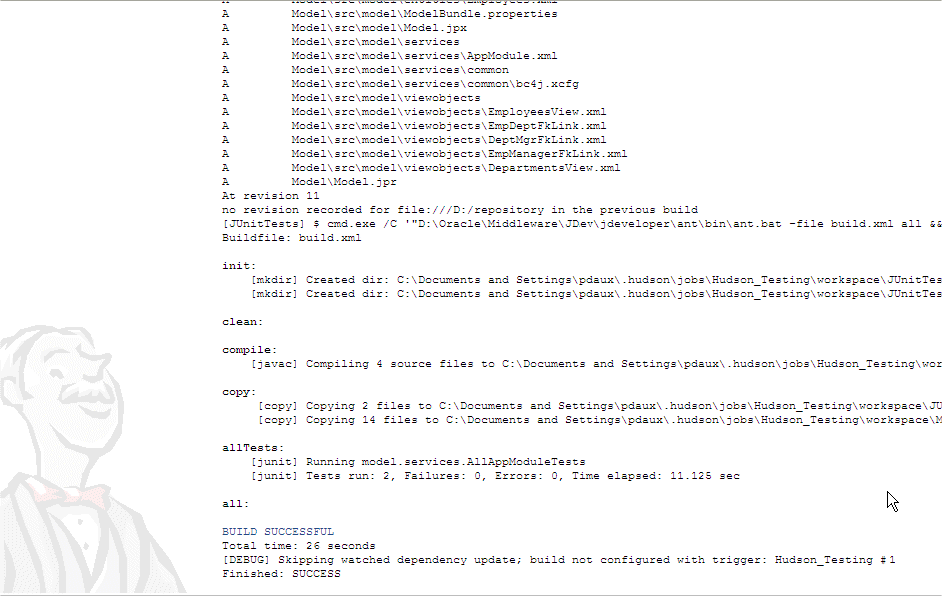
At this point, you have used Hudson to call and execute the all Ant target that you previously executed from JDeveloper.
To allow interaction between Hudson and TPC, you need to install the TPC plugin for Hudson. To install the plugin, perform the following actions:
-
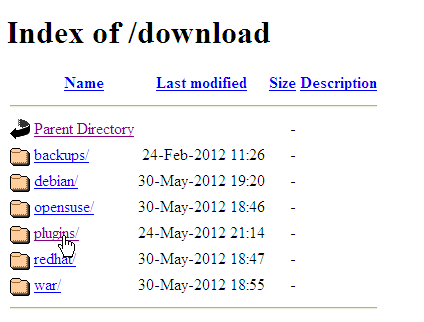
Go to the Hudson plugins site and click the plugins link.
-
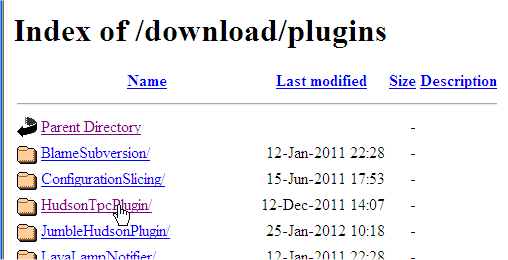
Select the HudsonTpcPlugin link.
-
Select the latest build folder.
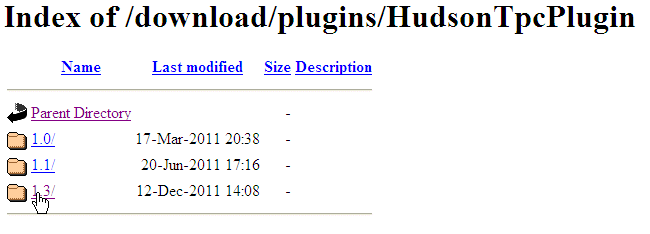
-
Right-click the HudsonTpcPlugin.hpi file, and select the Save Target As option. Download the file in the directory of your choice (Hudson/plugin in this case).
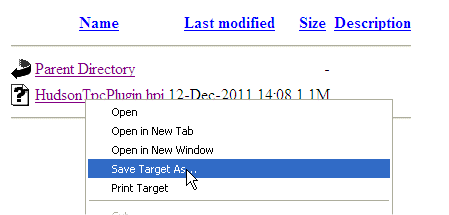
-
In the Hudson dashboard, click the Manage Hudson link.
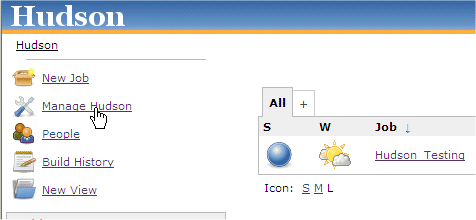
-
Click the Manage Plugins link.
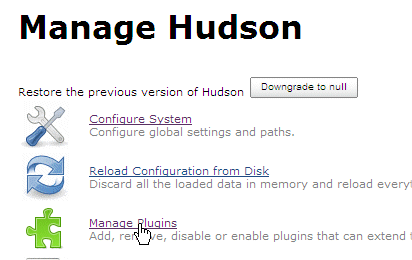
-
Click the Advanced tab in the Plugin Manager page.
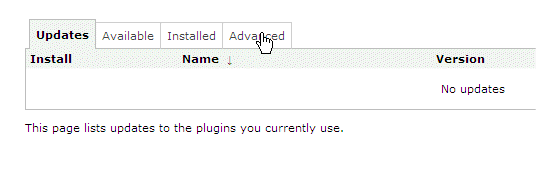
-
In the Upload Plugin section, indicate the location of the HudsonTpcPlugin.hpi file and click the Upload button.

-
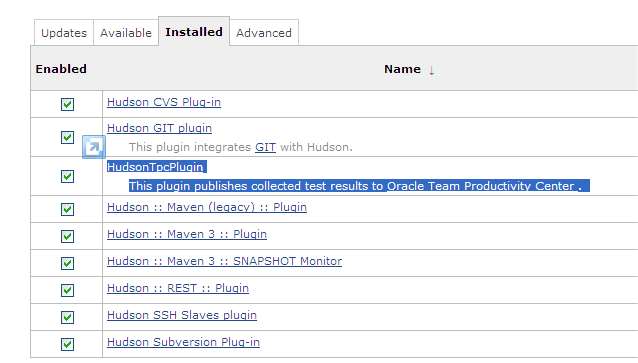
Click the Installed tab to see the status of the new plugin. Notice the warning indicating that you need to stop and restart Hudson to activate the plugin.
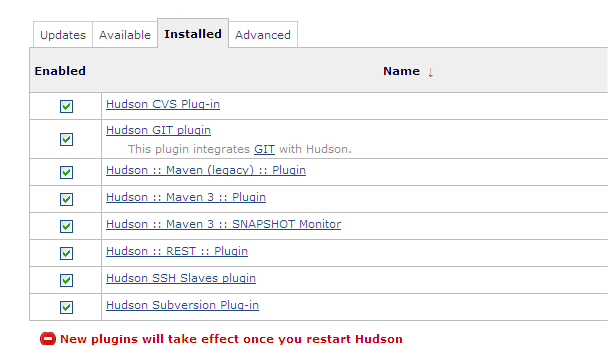
-
Click the Hudson link to go back to the Hudson dashboard, and click the Manage Hudson link.

-
Scroll down and click the Prepare for Shutdown link.

-
Go to the Command window where Hudson is running and stop it (press Ctrl + C).
-
Close your Hudson browser window, and restart Hudson from the command line by using the command java -jar hudson-2.2.0.war --httpPort=8989.
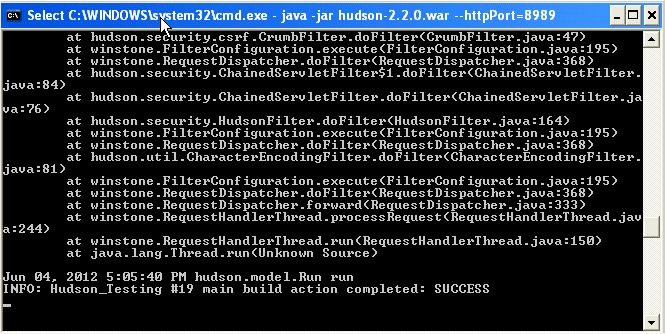
-
Restart the Hudson Console in a browser window by typing localhost:8989 as the URL, then click Manage Hudson and Manage Plugins.
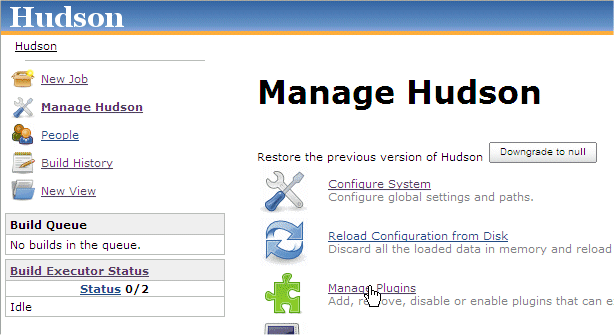
-
Click the Installed tab. The HudsonTpcPlugin should be present and ready for use.
You can configure Hudson to send an email to a specific email address when a build failure occurs.
-
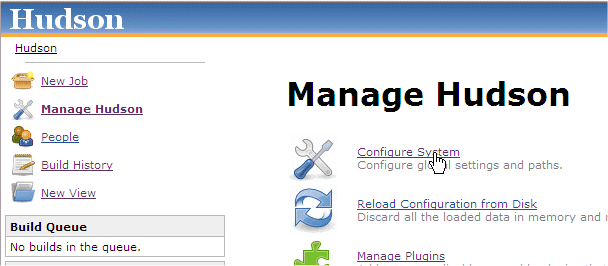
Back in the Hudson dashboard, click the Manage Hudson link and then the Configure System link.
-
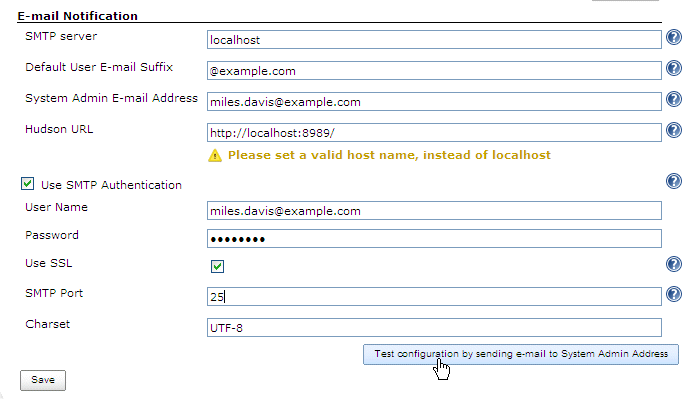
Scroll down to the E-mail Notification section, and specify the SMTP server address and other details about the notification. In this example, there is a local SMTP server installed. Click the Advanced button to specify additional properties.

-
Select the Use SMTP Authentication check box, and specify additional information to use SMTP authentication. Click the Test configuration by sending e-mail to System Admin Address button.
-
Click the Save button.

-
Open your email to verify that you received the notification.

-
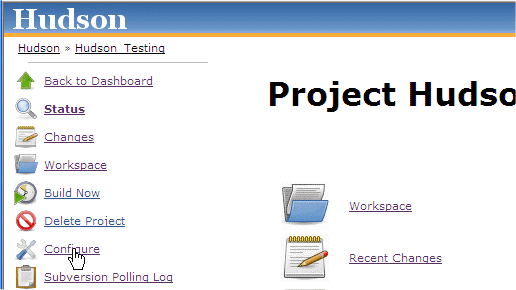
Return to the Hudson dashboard and select the Hudson_Testing project. Click the Configure link.
-
Scroll down to the Post-build Actions section, and select the E-mail Notification check box. By default Hudson notifies the indicated users only when the build operation fails. If you want to get notified on success, you need to install the Hudson Email Extension Plugin.
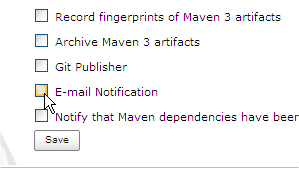
-
In the Recipients field, type the email addresses of the persons in the team: miles.davis@example.com, john.coltrane@example.com, nat.adderley@example.com. Select the two check boxes to send alerts in both scenarios.

Click the Save button.
You can configure Hudson to use TPC to deliver information about test results to JDeveloper.
-
In the Hudson_Testing page, click the Configure link to refine the project.
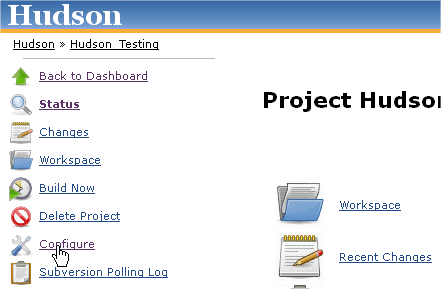
-
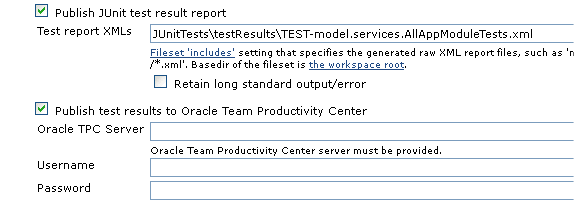
Scroll down to the Post-build Actions section, and select the Publish JUnit test result report check box.
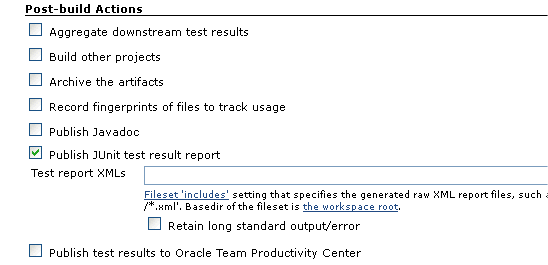
-
Specify the Hudson relative path and the file name of the report file. For example: JUnitTests\testResults\TEST-model.services.AllAppModuleTests.xml.
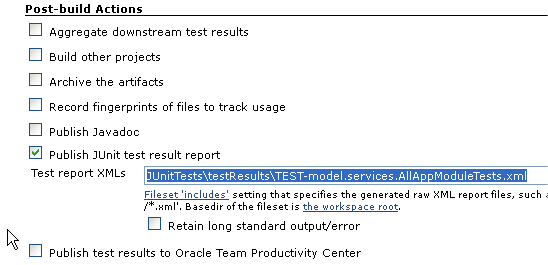
-
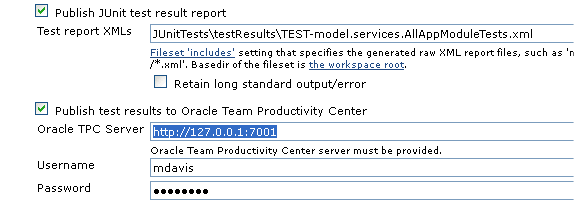
Select the Publish test results to Oracle Team Productivity Center check box.
-
Type http://127.0.0.1:7001 as the URL of Oracle TPC Server and enter mdavis/Welcome1 as the TPC username/password of the user you want to inform.
-
Click the Test Connection button to validate the connection.

Scroll down and click the Save button.
-
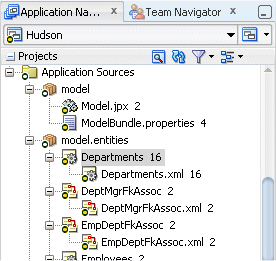
Switch to JDeveloper. In the Hudson Model project under model.entities, open the Departments entity.
-
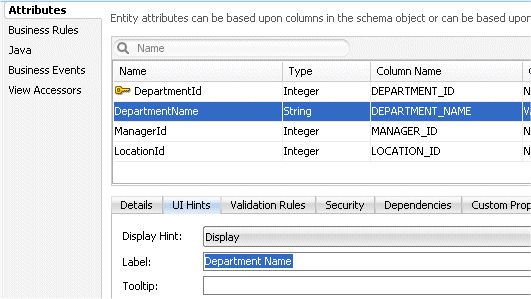
Click the Attributes tab, and select the DepartmentName attribute. In the UI Hints tab, type Department Name as the label.
-
Click the Save All
 icon on the
JDeveloper menu bar, or select File >
Save All from the main menu.
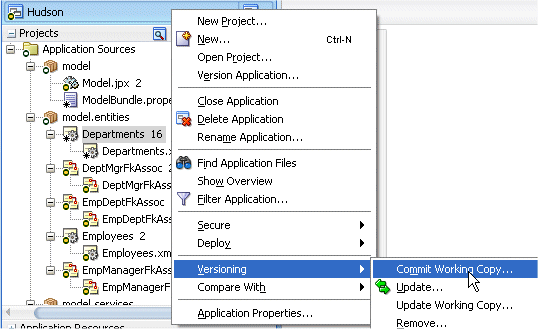
 Right-click in the Hudson Application and select Versioning > Commit Working Copy.
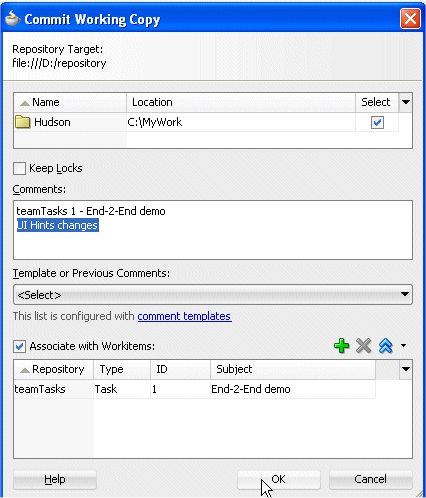
In the Commit Working Copy dialog, type UI Hints changes and click OK.
Next, you run a build and see how JDeveloper receives information about the build from Hudson.
-
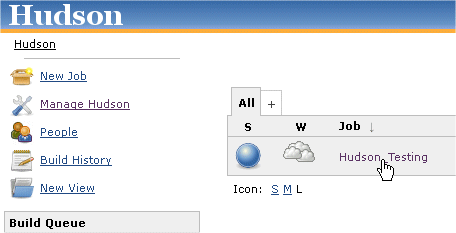
Return to the Hudson page and click the Hudson_Testing link to reopen the job.
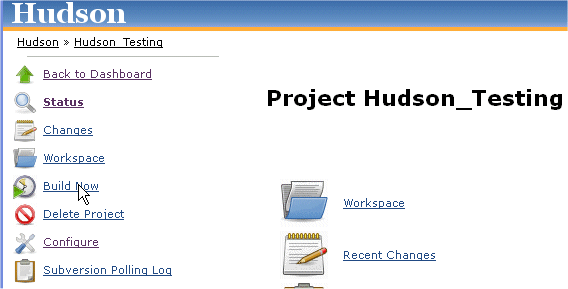
Click the Build Now link to launch the job.
-
When the build is complete, click the Latest Console output link and scroll down to see the execution report.
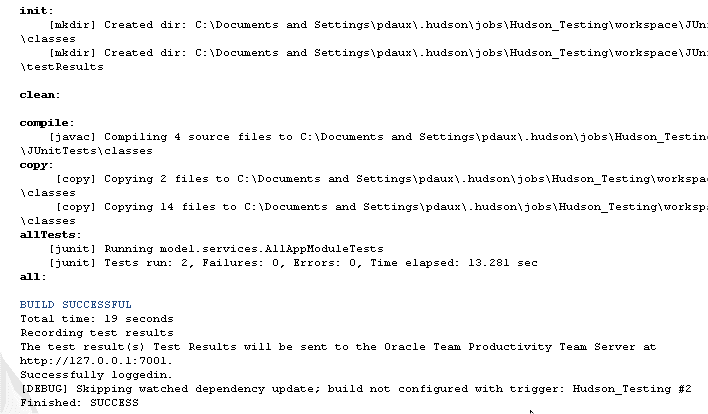
Notice the message indicating that the result will be sent to Oracle Team Productivity Server. Because the build was successful, no email notifications are sent.
-
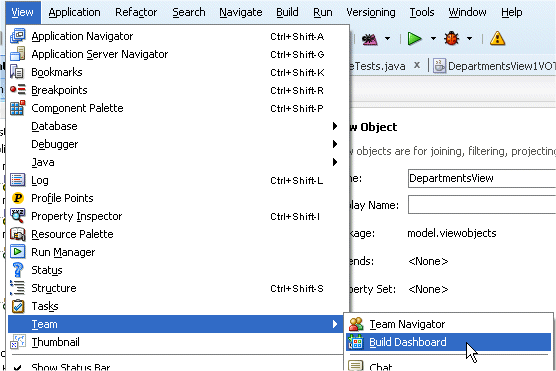
Go back to JDeveloper, and from the main menu select View > Team > Build Dashboard.
-
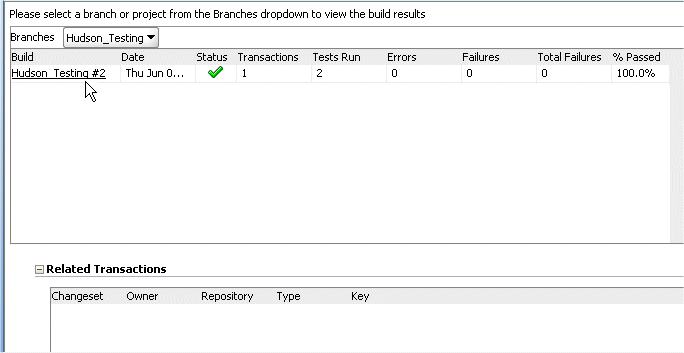
In the Build Dashboard pane in JDeveloper, click the Hudson_Testing link.
-
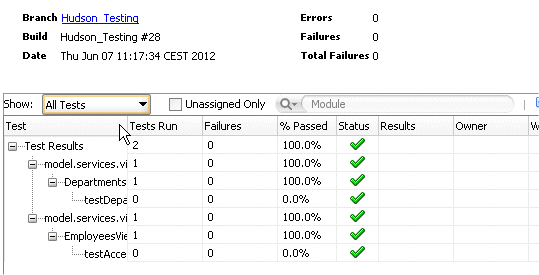
The Hudson_Testing report shows details about the execution.

-
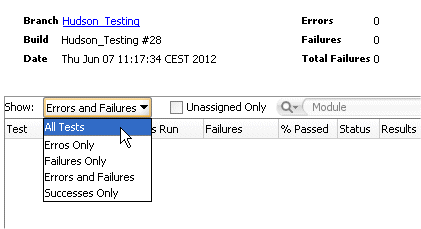
From the Show drop-down list, select All Tests.
-
See the detailed status at each step of the build.
-
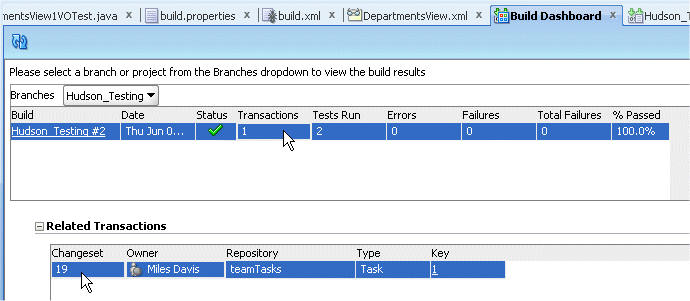
Click the Build Dashboard tab and then click the Hudson_Testing row to activate the Related Transactions pane. The Related Transactions pane indicates the versioning number (19 in this example) of the latest versioned element.
-
Now that the connection between Hudson, TPC, and JDeveloper is established, you receive alerts each time Hudson executes a new build.

You've successfully completed this tutorial, which illustrates how to implement a continuous integration process.
- Install the various pieces of software required for this continuous integration tutorial
- Build a basic Fusion Web application
- Version your application using Subversion
- Connect JDeveloper to TPC
- Create users, teams, and task rules
- Install JUnit extensions in JDeveloper and create a JUnit test project
- Run the JUnit project
- Configure Ant and build a Ant test
- Install and configure Hudson server
- Create a project to run the build job
- Install the TPC plugin in Hudson
- Automate an email alert system
- Send Hudson feedback to JDeveloper
- JDeveloper and Application Development Framework
- Apache Ant documentation
- JUnit documentation
- Hudson documentation

 Part 1: Starting WebLogic Server, Setting up TPC, and Versioning your Application
