| Sun Blade 6000 Disk Module Product Notes |
| C H A P T E R 2 |
|
Hardware Issues |
This chapter describes hardware issues related to the Sun Blade6000 disk module. The following issues are described:
When a RAID resync is in progress, the disk drive’s green LED blinks in a regular pattern. It should stop blinking and stay lit after the resync completes. However, when a faulty disk in a RAID 1 mirror is replaced (in the same slot) the LED continues to blink in some cases, indicating the resynch is still in progress.
The resync status of a RAID volume can be observed using the MegaRAID Storage Manager (MSM) software in Windows and Linux, raidctl in Solaris, or the LSI BIOS Configuration Utility. These are all documented in the Sun LSI 106x RAID User’s Guide (820-4933).
The green LED can be reset to the normal condition (solid green) by power cycling the Sun Blade 6000 Modular System Chassis and then removing and re-inserting the Sun Blade 6000 Disk Module.
In the SAS Topology screen of the LSI BIOS Configuration Utility, there is a mechanism to turn on the disk amber LED of the disks in a RAID volume to locate them. This locate feature is not functional for directly attached disks in host server blade disk bays.
In the SAS Topology screen, you can select Direct Attach Devices to view direct attached disks on host server blades.

The bay number next to the disk shown as a member of the RAID volume corresponds to the silk-screen number on the host server blade’s bays. In the case above, the disk that is a member of the RAID volume is in the disk bay with silk-screen label 1.
The following pair of warning messages may appear repeatedly upon insertion of HDDs and upon powering on Sun Blade 6000 Disk Module or Sun Blade 6000 Multi-Fabric Network Expansion Module:
scsi: WARNING: /pci@7c0/pci@0/pci@2/LSILogic,sas@0 (mpt0):
mpt_handle_event_sync: IOCStatus=0x7, IOCLogInfo=0x0
These warning messages are benign and can be ignored.
After creating a RAID 1E volume, one or more of the member disk drive’s amber service LEDs may turn on, even though there is no HDD fault.
If you create a RAID 1E volume, ignore the amber service LEDs on the disk drives. Instead, view the disk drive’s status using the MegaRAID Storage Manager (MSM) software in Windows and Linux, raidctl in Solaris, or the LSI BIOS Configuration Utility. These are all documented in Sun LSI 106x RAID User’s Guide (820-4933).
Only one RAID volume at a time can resynch. When volume B needs to resynch, but volume A is resynching, volume B must wait to resynch until the volume A resynch is completed.
If a disk in an LSI RAID volume B fails while another RAID volume (volume A) is resynching, the resynch light on the hot-spare for volume B starts blinking even though volume B has not begun to resynch.
This is expected behavior. One volume is resynching and the other is in queue to resynch. You can view the status of each RAID (A is resynching and B is degraded) using the MegaRAID Storage Manager (MSM) software in Windows and Linux, raidctl in Solaris, or the LSI BIOS Configuration Utility. These are all documented in Sun LSI 106x RAID User’s Guide (820-4933).
When you change your storage hardware configuration, you may see the following Solaris message:
mpt0: unknown event 1b received
The message is harmless and may be safely ignored.
Ignore the message. Check for the availability of a patch for this defect.
When a Sun Blade 6000 Disk Module is connected to a Sun Blade RAID 5 Expansion Module (X4620A) and you build a RAID volume that includes disks in slot 4 and/or slot 6, the LEDs on these disk will not blink during RAID initialization, rebuilding or verification.
Use the Sun RAID Manager interface to confirm that disks four and/or six are part of the RAID volume. Alternatively, use the Sun Blade G2 RAID 0/1 Expansion Module (X4607A).
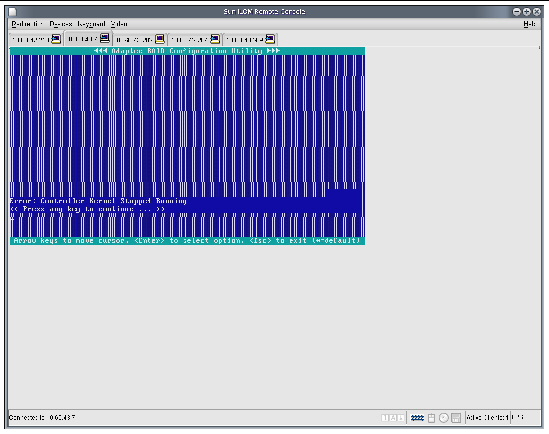
When a Sun Blade 6000 Disk Module is connected to a Sun Blade RAID 5 Expansion Module (X4620A) and you attempt to connect to the BIOS through the SP the screen will be obscured by scrolling "5;00H" characters.
FIGURE 2-1 Scrolling Characters in Adaptec BIOS Main Menu

1. Don’t use the SP. Connect to the host blade directly.
2. Use the Sun Blade G2 RAID 0/1 Expansion Module (X4607A).
When power is removed from the Sun Blade 6000 Disk Module, whether by power cycling the blade itself or the entire chassis, the power state shown by the CMM command show /CH/ will show the blade as powered off when it is actually powered on
Run the start /CH/ command from the CMM.
When resetting the Sun Blade 6000 Disk Module though the CMM, the power state shown by the CMM command show /CH/ will show the blade as powered off when it is actually powered on.
Use the start /CH/ and stop /CH/ command from the CMM instead of the reset command.
The HBA hangs during system reboot or boot up.

The HBA crashes in the Adaptec BIOS RAID manager.
1. Shut down the CPU blade by pressing the power button in the front panel.
2. Eject the Sun Blade 6000 away from the chassis backplane.
3. Eject all internal HDDs from the backplane (if any).
5. Press <Ctrl-A> at the RAID BIOS to enter BIOS CU. Make sure that there is no disk in the system.
6. Press <Esc> to exit RAID BIOS and reboot the system. Repeat Step 5, and continue to step 7
7. Press the CPU blade power button to shut down the system.
1. At the power off, insert Vela back to the same slot configuration.
2. Insert all internal hard disk drives back to their own slots (If any)
If a server module with a SAS-2 REM is inserted into a Sun Blade 6000 Modular System chassis that has SAS-1 NEMs, or SAS-1 NEMs and Sun Blade 6000 Disk Module, the server’s SAS-2 REM might hang. To prevent this, you need to upgrade the firmware of your SAS-1 NEMs and Sun Blade 6000 Disk Modules to a firmware version that supports SAS-1/SAS-2 coexistence. The minium SAS expander firmware required for SAS-1 NEMs and the Sun Blade 6000 Disk Module is 5.04.03. This upgrade must be done before you insert a SAS-2 server blade into the chassis.
Available SAS-1 NEMs and disk modules that would require this upgrade include:
An example of a SAS-2 server module is the Sun Blade X6270 M2. This server includes a SAS-2 REM. Available SAS-2 REMs include:
Refer to your product documentation to find out if your server blade includes a SAS-2 REM.
For detailed instructions on performing the upgrade, refer to the SAS-1/SAS-2 Compatibility Upgrade Guide for the Sun Blade 6000 Modular System (821-1800) which can be found in:
http://docs.sun.com/coll/blade6000dskmod
| Sun Blade 6000 Disk Module Product Notes | 820-1709-14 |
Copyright © 2010, Oracle and/or its affiliates. All rights reserved.
 To reset the controller: