Installing the Administration Software
To Install the Software on the Administration Station
-
Insert the Solaris Easy Access CD-ROM into the CD-ROM drive.
A File Manager screen appears listing the CD contents.
-
Navigate to the SunScreen directory.
-
Add the software by double-clicking on the SunScreen installer icon.
Enter the root password for your system when prompted.
-
After the installer wizard's Welcome window appears, click Next to continue.
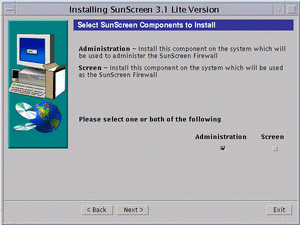
The Select SunScreen Components to Install window appears (as shown in the following figure). Make sure that you select the Administration box only.
Figure 4-1 Select SunScreen Components to Install Window

-
Click Next to continue.
The Select Type of Install window appears. You have two choices: Typical Install or Custom Install. You should use the Typical install.
-
When the Ready to Install window appears, click Install Now to continue.
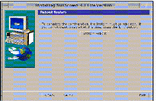
The installation process continues until you see the Reboot System window.
Figure 4-2 Reboot System Window

-
Select System Reboot to complete the installation process.
The installer wizard disappears.
-
Set the PATH and MANPATH by editing your shell initialization file (such as .profile or .login file).
PATH=/opt/SUNWicg/SunScreen/bin:$PATH export PATH MANPATH=$MANPATH:/opt/SUNWicg/SunScreen/man export MANPATH
To Install SKIP Upgrades
By default, SunScreen 3.1 Lite comes with the Global version of SKIP, which supports the RC2, RC4, and DES cryptography modules and key lengths up to 1024 bits. If the security profile at your site requires additional cryptography packages and greater key lengths, you have to add these packages from the SunScreen Domestic CD. For more information, see "Upgrading Cryptography Modules."
What Is Next?
The required software packages have been installed. Now, you continue the installation process on the Administration Station by adding a certificate.
- © 2010, Oracle Corporation and/or its affiliates
