Installing the Software on the Screen
The next step is to install the SunScreen 3.1 Lite software on the Screen. If you have a monitor and a keyboard attached to your Screen, you can use the installer wizard. If you are operating the Screen without a monitor, you must either temporarily attach a monitor, or install the software through the command line (see "Command Line Installation").
Note -
Before starting this next step, make sure that all network interfaces you plan on using are configured. For details on Solaris network configuration, see the Solaris operating environment documentation.
To Install Screen Software
Note -
In this procedure, you need the Administration Station's certificate ID (MKID) from the "To Install a Self-Generated Certificate."
-
Insert the Solaris Easy Access CD-ROM into the Screen's CD-ROM drive.
A File Manager screen appears listing the CD contents.
-
Navigate to the SunScreen directory.
-
Add the software by double-clicking on the SunScreen installer icon.
Enter the root password for your system when prompted.
-
After the installer wizard's Welcome window appears, click Next to continue. If you are not logged on as root, you are prompted for the root password.
-
Proceed through the installation windows accepting the default choices, until the Select Administration Type window appears.
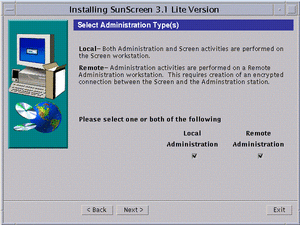
In this window (as shown in the following figure), you are given the choice of Local Administration or Remote Administration with Local Administration as the default. Select Remote Administration.
Figure 4-4 Select Administration Type(s) Window
-
Select Remote Administration and click Next.
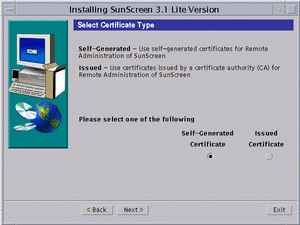
Click next to proceed through the installation until the Select Certificate Type window appears (as shown in the following figure). Self-Generated Certificate is the default. You have to make a choice at this point whether you are going to use self-generated certificates or issued certificates.
Figure 4-5 Select Certificate Type Window
-
If you are using self-generated certificates, follow instructions a-i through iii then go to Step 8. If you are using issued certificates, follow instructions b-i through iv then go to Step 8.
-
Self-Generated Certificates Only
Accept the default (Self-Generated Certificate) and click Next.
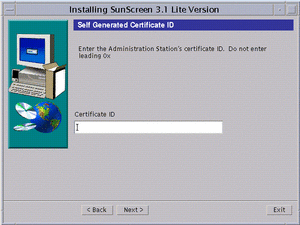
The Self-Generated Certificate ID window appears (as shown in the following figure).
Figure 4-6 Self Generated Certificate ID Window
-
Type the Administration Station's 32-character certificate ID (MKID) obtained in the previous procedure ("To Install a Self-Generated Certificate"). Do not enter the leading two characters: 0x. After you type the ID, click Next.
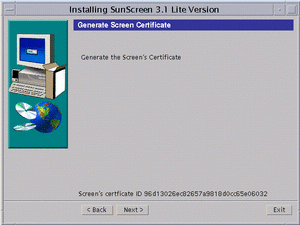
The Generate Screen Certificate window appears. Wait while the Screen's certificate ID generates. When completed, the Screen's 32-character certificate ID appears at the bottom of the window, as shown in the following figure.
Figure 4-7 Generate Screen Certificate Window With Screen's Certificate ID
-
Write down the Screen's 32-character certificate ID (MKID) that appears at the bottom of the window. You need this ID to complete the Administration Station's installation.
-
Go to Step 8.
-
-
Issued Certificates Only
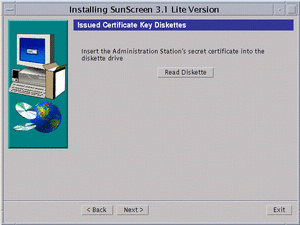
From the Select Certificate Type window, select Issued Certificate and click Next. The Issued Certificate Key Diskettes window next appears (as shown in the following figure).
Figure 4-8 Issued Certificate Key Diskettes Window
-
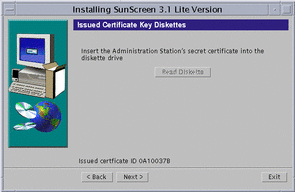
Insert the Administration Station's Key and Certificate diskette and click Read Diskette. Wait until the issued certificate ID appears at the bottom of the window (as shown in the following figure).
Figure 4-9 Issued Certificate Key Diskettes Window With Issued Certificate ID
-
Write down the Administration Station's eight-character certificate ID, and click Next.
The Issued Certificate Key Diskettes window re-appears, and prompts you to use the Screen's certificate ID diskette.
-
Insert the Screen's Certificate ID diskette into the floppy drive and click Read Diskette.
The Issued Certificate ID for the Screen appears at the bottom of the window.
-
Write down the Screen's eight-character certificate ID then go to Step 8.
-
-
-
Click Next to continue.
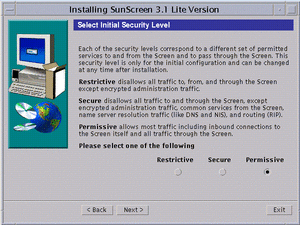
The Select Initial Security Level window appears (as shown in the following figure).
-
Select the level of security you want.
When in doubt, select Permissive as your initial security level. You can change this level later as needed. See "Deciding on Your Initial Security Level," if you need more information.
Figure 4-10 Select Initial Security Level Window
-
Click Next.
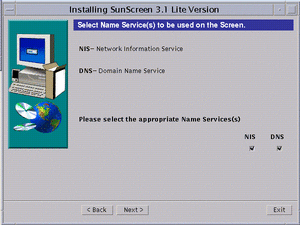
The Select Name Service(s) to be used on the Screen window appears (as shown in the following figure). The default entry is to use both NIS and DNS. You can deselect either one or if you do not want to use a name service, you can deselect both.
Figure 4-11 Select Name Service(s) to be used on the Screen Window
-
Select the appropriate Name Service(s), and click Next.
The Screen Configuration window appears with the message: Configuring Screen. The message changes when the Screen successfully configures.
-
Click Next to continue.
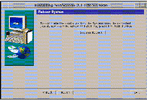
The Reboot System window appears (as shown in the following figure).
Figure 4-12 Reboot System Window
-
Click System Reboot to finish the installation.
The installer wizard disappears.
Note -You must reboot the machine at this time in order to complete the installation process. If you wish to delay rebooting your machine, click Next instead of Reboot Screen. An Installation Summary window appears from which you can exit the install.
Finishing the Installation
The software is installed on the Screen. To finish the installation you need to:
-
Set the PATH
-
Install SKIP upgrades (if needed)
-
Display the AdminSetup.readme file
To Set the PATH
-
On the Screen, open a terminal window and become root, if not already.
-
Set the PATH and MANPATH by editing your shell initialization file (such as .profile or .login file).
PATH=/opt/SUNWicg/SunScreen/bin:$PATH export PATH MANPATH=$MANPATH:/opt/SUNWicg/SunScreen/man export MANPATH
To Install SKIP Upgrades
By default, SunScreen 3.1 Lite comes with the Global version of SKIP, which supports the RC2, RC4, and DES cryptography modules and key lengths up to 1024 bits. If the security profile at your site requires additional cryptography packages and greater key lengths, you have to add these packages from the SKIP Domestic CD. For more information, see "Upgrading Cryptography Modules."
To Display the AdminSetup.readme File
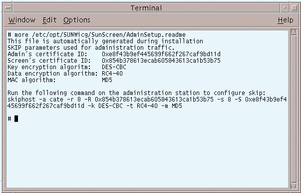
To display the AdminSetup.readme file, in a terminal window, type:
# more /etc/opt/SUNWicg/SunScreen/AdminSetup.readme |
The AdminSetup.readme file contains the Screen's certificate ID as well as the command you run in order to give the Administration Station the Screen's certificate ID (as shown in the following figure). Write the command down for later use, which begins with skiphost -a.
Figure 4-13 AdminSetup.readme File
Note -
If you trust that the network between the Screen and the Administration Station is secure, you can ftp the AdminSetup.readme file from the Screen to the Administration Station. This saves you the task of writing down the information that is required in the next procedure.
What Is Next?
You now return to the Administration Station to complete SKIP configuration. Proceed to "Completing SKIP Setup on the Administration Station."
- © 2010, Oracle Corporation and/or its affiliates
