| C H A P T E R 2 |
|
Installing the Hardware |
This chapter describes how to mount the Sun Fire V125 server into a rack and attach the cables. It includes the following sections:
The rackmount kit consists of the following components:
The slide rail kit enables you to mount the server into a Sun rack. For a complete listing of compatible racks, go to:
Perform the procedures in this chapter, in the order they are listed, to install your server into a 4-post rack using the slide rails. These slide rails are compatible with a wide range of equipment racks that meet the following standards:
The procedures in this section contain instructions to install the slide rail assemblies to the rack and then the server chassis, with mounting brackets, into the slide rail assemblies that are mounted to the rack.
|
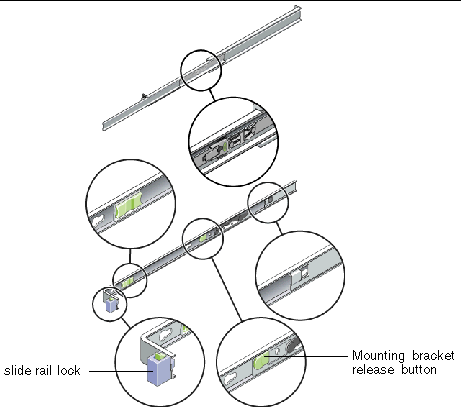
2. Locate the slide rail lock at the front of one of the slide rail assemblies, as shown in FIGURE 2-1.
3. Squeeze and hold the tabs at the top and bottom of the lock while you pull the mounting bracket out of the slide rail assembly, until it reaches the stop.
See FIGURE 2-1.
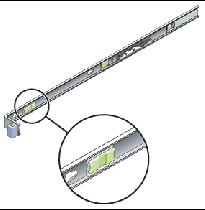
4. Pull the mounting bracket release button toward the front of the mounting bracket, as shown in FIGURE 2-1, and simultaneously withdraw the mounting bracket from the slide rail assembly.
5. Repeat for the remaining slide rail assembly.

|
1. Position a mounting bracket against the chassis so that the slide rail lock is at the server front and the three keyed openings on the mounting bracket are aligned with the three screw holes on the side of the chassis.
2. Attach the slide rail onto the server with the supplied screws.
3. Repeat Steps 1 and 2 to install the other slide rail.
|
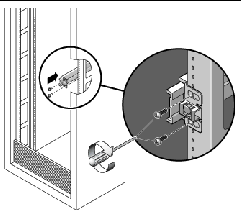
1. Position a slide rail assembly in your rack so that the brackets at each end of the slide rail assembly are on the outside of the front and rear rack posts (as depicted in FIGURE 2-2).
2. Attach the slide rail assembly to the rack posts.
The method used to attach the slide rails varies depending on the type of rack:

3. Repeat for the remaining slide rail assembly.
|

|
Caution - This procedure requires a minimum of two people because of the weight of the server. Attempting this procedure alone could result in equipment damage or personal injury. |
1. Push the slide rails into the slide rail assemblies as far as possible.
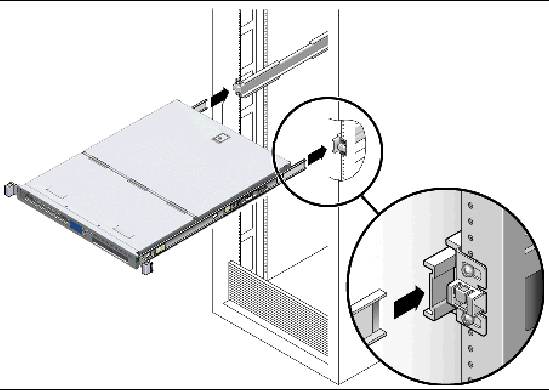
2. Raise the server so that the rear ends of the mounting brackets are aligned with the slide rail assemblies that are mounted in the equipment rack (see FIGURE 2-3).
3. Insert the mounting brackets into the slide rails, then push the server into the rack until the mounting brackets encounter the slide rail stops (approximately 12 in. or 30 cm).

4. Simultaneously, pull and hold the slide rail release buttons on each mounting bracket while you push the server into the rack (see FIGURE 2-3).

5. Continue pushing until the slide rail locks on the front of the mounting brackets engage the slide rail assemblies.

|
Caution - Verify that the server is securely mounted in the rack and that the slide rails locks are engaged with the mounting brackets before continuing. |
Copyright © 2006, Sun Microsystems, Inc. All Rights Reserved.