| Sun ONE Application Server 7 Installation Guide |
Chapter 3
Installing for DevelopmentThis chapter provides instructions for installing the Sun™ Open Net Environment (Sun ONE) Application Server 7 product for development and operational purposes. You can install this non-evaluation version of the product interactively or you can use silent mode to replicate an installation scenario on multiple machines.
The following topics are addressed here:
You should be familiar with the information in "Preparing to Install" before beginning the tasks in this chapter.
For any late-breaking updates to these instructions, check the Sun ONE Application Server Release Notes. For more information about configuring your application server after installation, refer to the Sun ONE Application Server Administrator’s Guide.
The following locations contain product downloads in addition to other useful information:
What You’re InstallingIn general, you are installing the basic components that provide the functionality of the Sun ONE Application Server product. You can choose not to install some of the components (indicated as optional below). Later, if you want to add a component that you initially chose not to install, you can do an incremental installation. This allows you to add a component to your installation.
Only one Sun ONE Application Server installation can reside on a single machine for a non-evaluation installation. If an installation of the Sun ONE Application Server already exists on your system, the installation program will not overwrite it, but the pre-existing installation will be detected and you will not be allowed to proceed with the installation. For instructions on removing the product from your system, refer to “Uninstalling the Sun ONE Application Server Software” on page 75.
The following installation components are included with the Sun ONE Application Server product:
- Sun ONE Application Server, including its graphical and command-line administrative tools
- Sun ONE Application Server Administration Client (command-line tool only)
- Sun ONE Message Queue 3.0.1
- Java 2 Software Development Kit (J2SE), Standard Edition 1.4.1_01
- PointBase Database Server and Type 4 JDBC driver (Not available in the Solaris 9 bundled version of Sun ONE Application Server.)
- Sample Applications
- Support for Sun ONE Studio 4.0, Enterprise Edition for Java
See "Installation Components" for descriptions of the Sun ONE Application Server components.
Downloading from the WebThis section provides instructions for downloading the Sun ONE Application Server installation files from the web site.
Downloading for UNIX
- Select the download from the following Sun ONE Application Server download site and save it in a temporary directory on your UNIX machine.
http://wwws.sun.com/software/download/app_servers.html
- Navigate to the directory where you downloaded the file. For example:
cd /temp_dir/as7download/
- Unzip the .gz file using the gunzip command in this format:
gunzip filename.tar.gz
- Untar the unzipped file using the tar -xvf command in this format:
tar -xvf filename.tar
This process may take a little time. When the files are unpacked, you will see the sun-appserver7 directory, which contains the setup file and the pkg directory.
Downloading for Microsoft Windows
The development version of Sun ONE Application Server is only available on CD for Microsoft Windows.
However, you can upgrade your evaluation license either during installation of the Microsoft Windows evaluation version, or after installation by following the instructions in “Restart the Sun ONE Application Server software.” on page 115.
Installing the Development ProductThe section provides instructions for installing the Sun ONE Application Server software using graphical-interface. If you choose to use the command-line interface, the steps are identical. However, in place of graphics-based installation screens, text-based screens are displayed.
Note
You must have superuser privileges to install the non-evaluation version of the Sun ONE Application Server 7 software.
The following steps apply to all platforms:
- Verify that you have superuser privileges and that system requirements have been met. See "System Requirements" for information on requirements.
- Start all the processes on your system that use ports and are expected to run at the same time as the Sun ONE Application Server software. This allows the installation program to detect what ports are in use and avoid assigning them for other purposes.
- If you are not in the directory already, navigate to the directory where you unpacked the installation files. You will see the setup.exe file.
- Select your installation method as follows:
- To run the installation using the graphical interface, type the following at the command prompt (in Microsoft Windows, you can double-click the setup.exe file):
./setup
- To run the installation using the command-line interface, type:
./setup -console
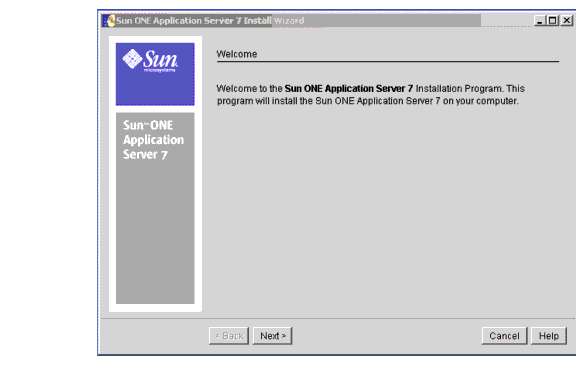
The Welcome page of the installation program is displayed as follows.
- Read the Welcome page and click Next.
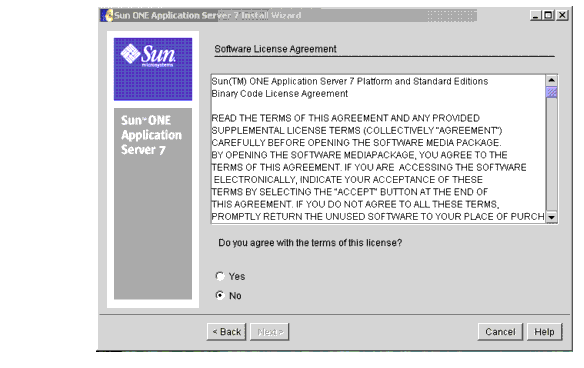
The following License Agreement page is displayed.
- Read the License Agreement and click Yes to agree to the terms of the license, then click Next (or type Yes at the command line).
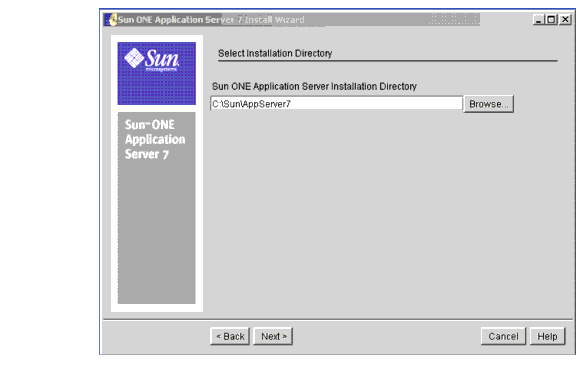
After you accept the License Agreement, the following Select Installation Directory page is displayed.
- Specify the path to your Sun ONE Application Server installation directory.
- Choose from the components listed on the component selection dialog box (or type Yes or press Enter to accept a component from the command line).
- Choose to install Sun ONE Message Queue 3.0.1, or use a preinstalled version.
On Microsoft Windows—The required version of the Sun ONE Message Queue is always installed even if you already have another version of Sun ONE Message Queue on your system.
On Solaris—The installation program will detect if you have the correct version of the Sun ONE Message Queue preinstalled in your system and present you with one of the following actions:
- If the correct version of the package-based Sun ONE Message Queue is installed, it will be reused. The installation program will proceed to the next step.
- If there is no package-based Sun ONE Message Queue installed, you can choose to let the installation program install the Sun ONE Message Queue packages automatically
- If an incorrect version of the package-based Sun ONE Message Queue is found, a message is displayed, asking if you want to upgrade your current version or cancel. Choose one of the following options:
- Choose to install J2SE 1.4.1_01 or use a preinstalled J2SE.
On Windows—The installation program detects if you have the correct version of the J2SE preinstalled in your machine.
- If the correct version of the J2SE is installed, it will be reused or you can enter the path to another correct version. The installation program proceeds to the next step.
- If there is no J2SE installed, you can choose to let the installation program install the J2SE package automatically or reuse an existing J2SE installation.
On Solaris—The installation program detects if you have the correct version of the J2SE preinstalled in your machine and present you with one of the following actions:
- If the correct version of the package-based J2SE is installed, it will be reused or you can enter the path to another correct version. The installation program proceeds to the next step.
- If there is no package-based J2SE installed, you can choose to let the installation program install the J2SE package automatically or reuse an existing J2SE installation.
- If an incorrect version of the package-based J2SE is found, a message is displayed asking if you want to upgrade your current version or cancel. Choose one of the following options:
- To have the installation program update your current J2SE version, click Upgrade (or type 1 at the command line).
- To exit the installation program, click Cancel (or type 2 at the command line).
Before continuing with the installation, you must uninstall the J2SE currently located in /usr/j2se or upgrade it to J2SE 1.4.1_01. Then restart the Sun ONE Application Server installation. Instructions for uninstalling can be found in “Uninstalling the Sun ONE Application Server Software” on page 75.
Note
On UNIX—If your J2SE requires an upgrade, you will need to reboot your machine after completing the Sun ONE Application Server installation.
- On UNIX only—Identify your server configuration directory.
Enter the path to your Sun ONE Application Server configuration installation directory.
- Click the ellipsis (...) to browse for a directory (or press Enter at the command line to accept the default installation directory).
- If the directory does not already exist, the Create New Directory? dialog is displayed.
- Click Create Directory (or type 1 at the command line). You can also click Choose New (or type 2 at the command line) to select an existing directory.
- On UNIX only—Identify your server domains directory.
Enter the path to your Sun ONE Application Server domains installation directory.
- Click the ellipsis (...) to browse for a directory (or press Enter at the command line to accept the default installation directory).
- If the directory does not already exist, the Create New Directory? dialog is displayed.
- Click Create Directory (or type 1 at the command line). You can also click Choose New (or type 2 at the command line) to select an existing directory.
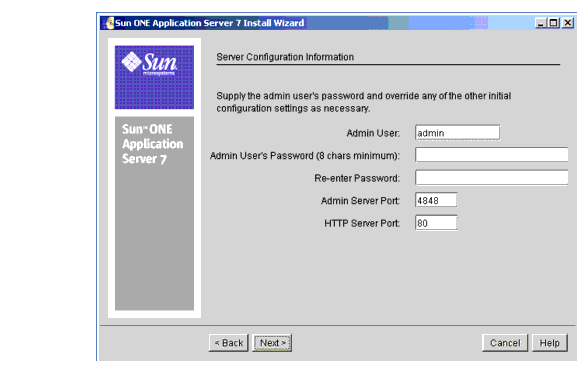
The following Server Configuration Information page is displayed.
- In the Server Configuration Information page (or at the command line), enter the following:
- Admin User—Name of the user who administers the server (for example, admin).
- Admin User’s Password—Password to access the Admin Server. Minimum number of characters is 8. For example, adminadmin. Re-enter the password to confirm your choice.
- Admin Server Port—Port number to access the Admin Server.
A default port number is displayed (for example 4848, if that port is not in use on your machine). Change the default number if necessary. The installation program will check port numbers for validity and availability when you click Next.
- HTTP Server Port—Port number to access the default server instance.
A default port number is displayed (for example 1024, if that port is not in use on your machine). Change the default number if necessary. The installation program will check port numbers for validity and availability when you click Next.
- Enter the path of your preinstalled Sun ONE Studio 4.0, if applicable.
- Click Next.
The installation program proceeds to verify that you have enough disk space to install the product. The Checking Disk Space progress indicator bar is displayed.
- If you do not have enough disk space, an error message is displayed.
You will need to exit the installation program, create enough space, and restart the installation. Information on space requirements is contained in "Platform Requirements".
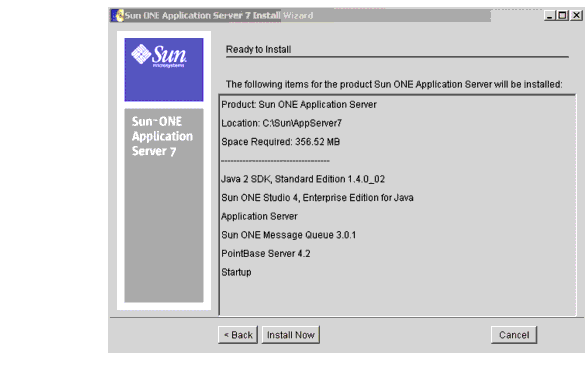
- If you have enough disk space, a Ready to Install page similar to the following is displayed.
- You have the following choices:
- Click Back if you want to return to the Server Configuration Information page. Disk space is rechecked if you do this.
- Click Install Now (or type 1 at the command line) to start the installation process.
- Click Cancel to exit the installation program.
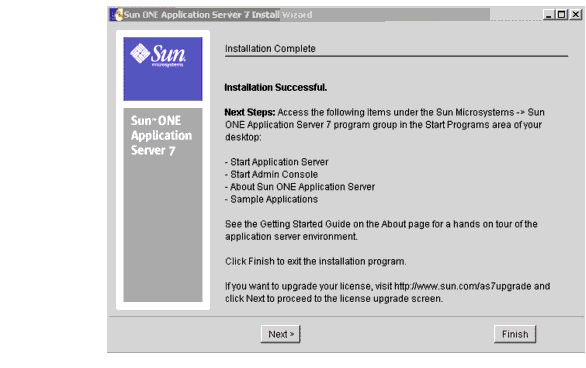
An Installation progress indicator bar is displayed.
When installation finishes, an Installation Complete page similar to the following is displayed.
You can now decide to transition (upgrade) your license.
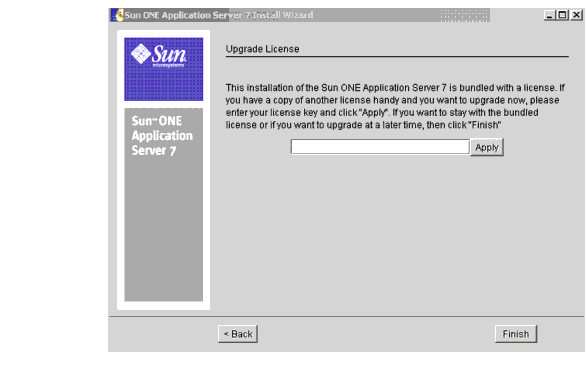
- Click Next to display the following Upgrade License page.
If you change your mind about upgrading the license now, click Back to return to the previous screen.
Note
You can upgrade your license later by following the instructions in “Transitioning a License” on page 112.
- To upgrade your license, enter the license number and click Apply.
The License Upgrade Successful dialog displays.
- Click OK.
- Click (or type) Finish to complete the installation.
The About Sun ONE Application Server page is displayed.
- Set the PATH environment variable.
You will need to configure your environment to include the bin directory of the Sun ONE Application Server. Instructions for doing this are contained in “Setting the PATH Environment Variable” on page 91.
- For Solaris 9 bundled only—There are additional tasks required for this type of installation. Refer to “Completing a Solaris 9 Bundled Installation” on page 69.
- The Sun ONE Application Server environment is not automatically started, so you will need to start it to verify that installation was successful. Instructions for various methods of starting the server are contained in “Starting and Stopping the Server” on page 95.
Under the Sun Microsystems, Sun One Application Server program group in the Start Programs area of your desktop, do the following:
- Start Application Server.
A screen similar to the following indicates that the Sun ONE Application Server has started:
- Start Admin Console.
When Administration interface (also known as the Admin Console) has been started, the initial page of the Sun ONE Application Server graphical interface is displayed.
- You can determine whether the Sun ONE Application Server has started successfully by accessing the application server instance's HTTP server listener. Using a browser, access the following location:
http://host_name:port_number
where port_number is the HTTP server port number specified during installation. The default HTTP server port number is 80, but it may be different based on the ports in use during installation.
Refer to for information on resolving problems.
Installing in Silent Mode (Non-Interactive)If you choose to install the Sun ONE Application Server software in silent mode, the installation program runs without any user input. This is made possible when the installation program accesses a text file that provides the installation program with the configuration information it needs.
The following topics are discussed in this section:
How the Configuration File Is Created
The configuration file is automatically created in the installation directory during a standard interactive installation. Your user input is collected. This forms the model for the silent installation which you can use later to install the product on one or more machines.
After a standard installation is complete, a configuration file similar to following exists:
# Wizard Statefile created: Tue Sep 03 11:03:27 PDT 2002
# Wizard path: /temp_dir/sun-appserver7//temp_dir/sun-appserver7/appserv.class
#
# Wizard Statefile section for Sun ONE Application Server
#
[STATE_BEGIN Sun ONE Application Server 808daad84da2817ce79da504cae4c78ffb57d50e]
defaultInstallDirectory = /opt/SUNWappserver7
currentInstallDirectory = /opt/SUNWappserver7
SELECTED_COMPONENTS = Java 2 SDK, Standard Edition 1.4.0_02#Application Server#Sun ONE Message Queue 3.0.1#Sample Applications#PointBase Server 4.2#Uninstall#Startup
USE_BUNDLED_JDK = TRUE
JDK_LOCATION = /usr/j2se
JDK_INSTALLTYPE = PREINSTALLED
AS_INSTALL_DEFAULT_CONFIG_DIR = /etc/opt/SUNWappserver7
AS_INSTALL_CONFIG_DIR = /etc/opt/SUNWappserver7
AS_INSTALL_DEFAULT_VAR_DIR = /var/opt/SUNWappserver7
AS_INSTALL_VAR_DIR = /var/opt/SUNWappserver7
DOMAINS_DIR = /var/opt/SUNWappserver7/domains
INST_ASADMIN_USERNAME = admin
INST_ASADMIN_PASSWORD = password
INST_ASADMIN_PORT = 4848
INST_ASWEB_PORT = 80
AS_INSTALL_DEFAULT_STUDIO_DIR = /
AS_INSTALL_STUDIO_DIR = /
INSTALL_STATUS = SUCCESS
[STATE_DONE Sun ONE Application Server 808daad84da2817ce79da504cae4c78ffb57d50e]
Installing in Silent Mode
To install the Sun ONE Application Server software in silent mode, perform these steps:
- With a text editor, examine the current installation configuration file (called statefile) and verify that it contains what you want to use for your silent installation. You can save this file with any name. For example:
cp statefile silent_config
- Copy the Sun ONE Application Server installation files to each machine where you plan to install the Sun ONE Application Server software.
- Copy your silent mode configuration file to each machine where you plan to install the Sun ONE Application Server software.
- If you are not in the directory already, navigate to the directory where you copied the installation files and your silent mode configuration file.
- As superuser, start silent installation at the command line using the following command format:
./setup -silent config_file_name
The installation program reads the specified config_file_name, checks for adequate disk space, then installs the product based on the data in config_file_name.
When the prompt is returned, the silent installation is completed.
- Set the PATH environment variable.
You will need to configure your environment to include the bin directory of the Sun ONE Application Server. Instructions for doing this are contained in “Setting the PATH Environment Variable” on page 91.
- Start the Sun ONE Application Server software.
The Sun ONE Application Server is not automatically started during installation. Use the instructions on “Starting and Stopping the Server” on page 95 to start the server.
When the Admin Console has been started, the initial page of the Sun ONE Application Server graphical interface is displayed.