Creating External Resources
After configuring the external resource data store and provisioner notifications, you can create a new external resource.
Note –
You must have the Resource Administrator capability to create new external resources.
-
From the main menu bar, select the Resources tab. The List Resources tab is displayed by default.
-
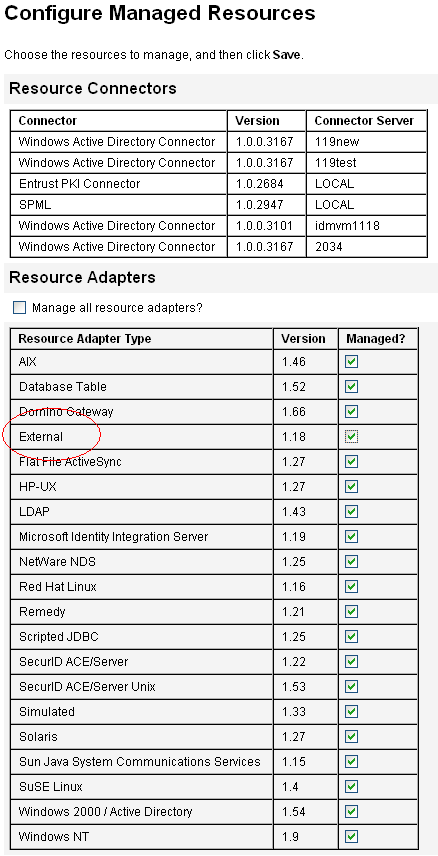
Click the Configure Types tab to open the Configure Managed Resources page.

-
Review the Resource Adapters table to verify that the External resource type is available.
-
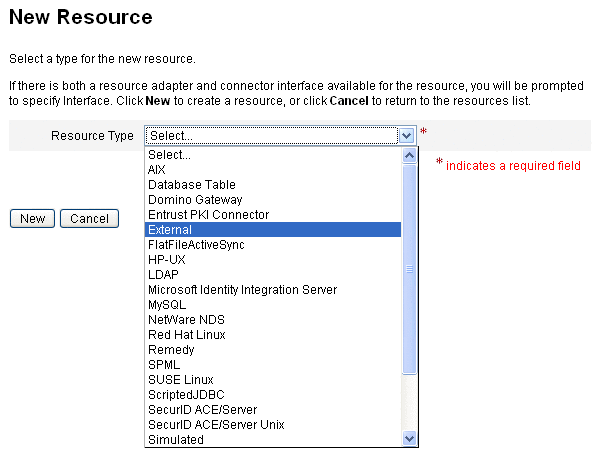
Return to the List Resources tab and choose New Resource from the Resource Type Actions menu.
-
When the New Resource page displays, choose External from the Resource Type menu, and click New.

-
The Create External Resource Wizard Welcome page displays. Click Next.
A read-only view of the Data Store Configuration page displays and shows the connection and authentication information you defined earlier.
As mentioned previously, you generally configure this data store only once because the configuration applies to all external resources. If you want to change any of this information, you must go back to the Configure -> External Resources tab.
Note –You can click Test Configuration, located at the bottom of the page, if you want to retest the current data store configuration before you proceed.
-
Click Next to open the Provisioner Notification Configuration page, which is identical to the one you configured on the Configure -> External Resources tab.
-
Review the current Provisioner Notification settings and make any necessary changes for the new resource.
Note –If necessary, refer back to the configuration instructions in Configuring Provisioner Notification. Any changes made to this page will only affect this resource.
-
Click Next.
From this point, the process for creating an external resource is the same as that used to create any other resource. The Wizard takes you through several more pages:
-
Account Attributes page. Use this page to define optional account attributes for the resource and map Identity system attributes to the new resource account attributes. For example, if you are creating an external resource called “laptop,” you might want to add attributes for model and size.
Note –No defaults are specified for this page.
-
Identity Template page. Use this page to define account name syntax for users created on this external resource. You can use the default identity template, $accountId$, or specify a different template.
-
Identity System Parameters page. Use this page to configure identity system parameters for external resources. For example, you can disable policies, configure retries, or specify approvers.
See To Create a Resource for more information about these pages and for the instructions you need to finish configuring this resource.
-
-
When you finish configuring the Identity System Parameters page, click Save. Now you can assign this resource to a user, just as you would any other resource.
To create a new external resource, use the following steps:
- © 2010, Oracle Corporation and/or its affiliates
