| Skip Navigation Links | |
| Exit Print View | |

|
Sun Fire X4640 Server Windows Installation Guide Sun Fire X4640 Server Documentation Library |
| Skip Navigation Links | |
| Exit Print View | |

|
Sun Fire X4640 Server Windows Installation Guide Sun Fire X4640 Server Documentation Library |
About This Documentation (PDF and HTML)
Introduction to Windows Installation
Sun Installation Assistant (SIA)
Getting Started With Windows Server 2008 Installation
Supported Windows Operating Systems
Windows Installation Considerations
How to Download Server Software
Selecting a Media Delivery Method
Windows Media Delivery Methods
How to Set Up the JavaRConsole System
Installing Windows Server 2008
Updating Critical Drivers and Installing Supplemental Software
How to Update the Server-Specific Drivers
How to Install Supplemental Software
Additional Information for Supplemental Software
Incorporating Sun Fire Drivers Into a WIM Image
How to Add Drivers to a WIM Image
How to Deploy a WIM Image to Your Server
Identifying Network Interfaces in Windows
To Determine the Server's Active Network Data Ports
Confirm Physical Port MAC Addresses and Match Them to Windows Device Names
Before You Begin
Before beginning the operating system installation, make sure that the following requirements are met:
If you want to configure your boot drive for RAID1 (mirroring), you need to do so using the LSI Logic integrated RAID controller’s setup utility (accessible by pressing Ctrl+C when prompted during server boot) before you install the Windows operating system. For more details, refer to the Sun LSI 106x RAID User’s Guide.
For your chosen Windows media delivery method, refer to the following requirements table.
|
If you are using the Windows Remote or Windows Image method, you can do this through ILOM.
The BIOS POST process begins.
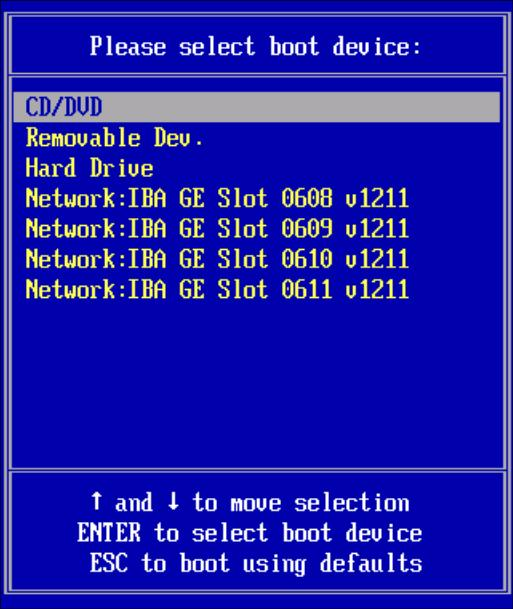
The BBS POPUP menu allows you to select a boot device.
Note - BIOS POST messages, including the prompt for the BBS Popup menu, can go by quickly and you might miss them. If so, power cycle the server and hold down the F8 key during boot until the BBS Popup menu (shown in Step 3) appears.


If prompted with Press any key to boot from CD, quickly press any key.
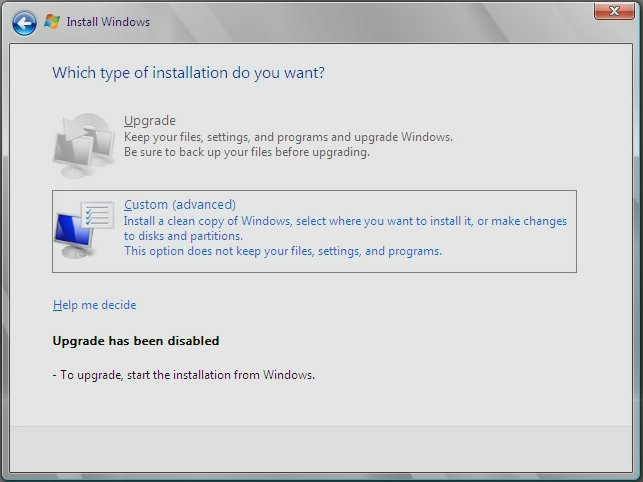
The Windows installation wizard starts.


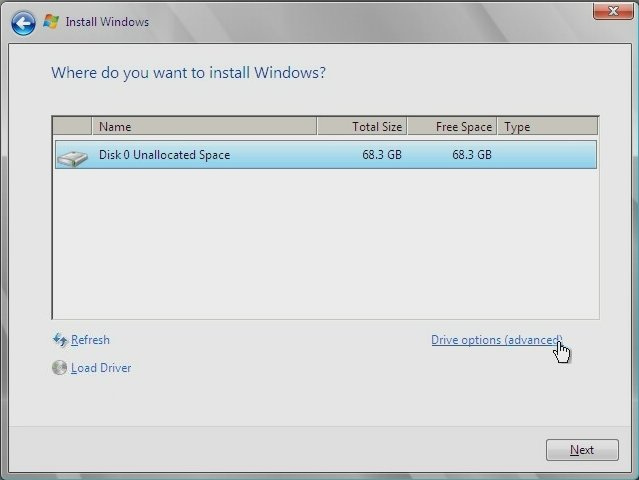
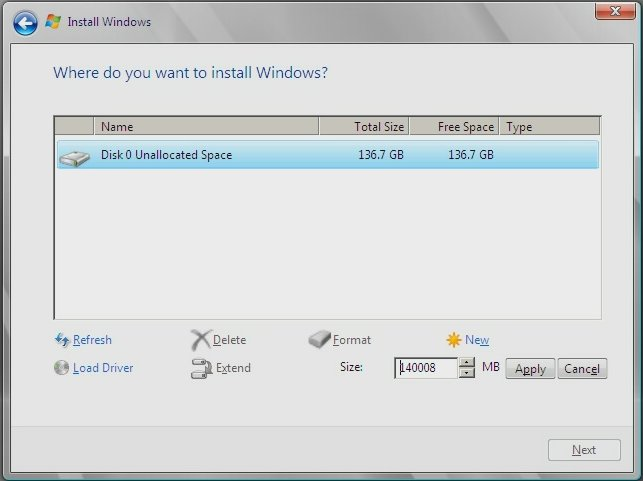
 | Caution - Formatting or re-partitioning a pre-existing partition destroys all data on the partition. |

The server will reboot multiple times during the installation process.
Note - Windows Server 2008 enforces stronger password schemes for user accounts. Password standards include restrictions on length, complexity and history. If you need more details, click the Accessibility link at the account creation page.
Once you have created your initial account, the Windows Server 2008 desktop is displayed. The Windows Server 2008 interface is new; review the Microsoft documentation to familiarize yourself with the changes.
Next Steps
Proceed to Updating Critical Drivers and Installing Supplemental Software.