Chapter 7 User Management for the Evaluation Solution
This chapter describes the steps you take to complete the configuration of your LDAP directory and to add a test user account that is authorized to use the messaging, calendar, and portal services. As described in the installation and configuration plan, you begin by configuring an instance of Delegated Administrator, after which you use Delegated Administrator to add the test end user account. This chapter covers the user management steps in the following sections:
For a summary of the configuration and verification steps, see Developing the Installation and Configuration Plan. For an explanation of the configuration values you input and the commands you run, see Delegated Administrator Configuration Wizard Details, and Delegated Administrator Command Line Details.
Configuring the Delegated Administration Utility
This section describes configuring the Delegated Administration Utility. Configuring the Delegated Administration Utility does the following:
-
Specifies the Directory Server instance that you want Delegated Administrator to use. For the evaluation solution, you configure Delegated Administrator to use your default Directory Server instance.
-
Specifies the location for user and group data created by Delegated Administrator. For the evaluation solution, you configure Delegated Administrator to add user and group data to the o=examplecorp.com,o=examplecorp organization.
-
Supplies the administrator ID and password that Delegated Administrator needs to interoperate with your default Directory Server instance.
 To Configure the Delegated Administration Utility
This procedure describes how to configure a Delegated Administrator instance for the evaluation solution. For a summary of the input values, see Delegated Administrator Configuration Wizard Details.
Steps
-
Change directory to the Delegated Administration Utility directory:
cd /opt/SUNWcomm/sbin
-
Run the command that starts the configuration wizard:
./config-commda
The configuration wizard’s Welcome page is displayed.
-
Click Next.
The Select Directory to Store Configuration and Data Files page is displayed.
-
Click Next to accept the default directory.
The Create New Directory dialog box is displayed.
-
Click Create Directory.
The Select Components to Configure page is displayed.
-
Confirm that all three components, Delegated Administrator Client, Delegated Administration Server, and Delegated Administration Console, are selected. Click Next.
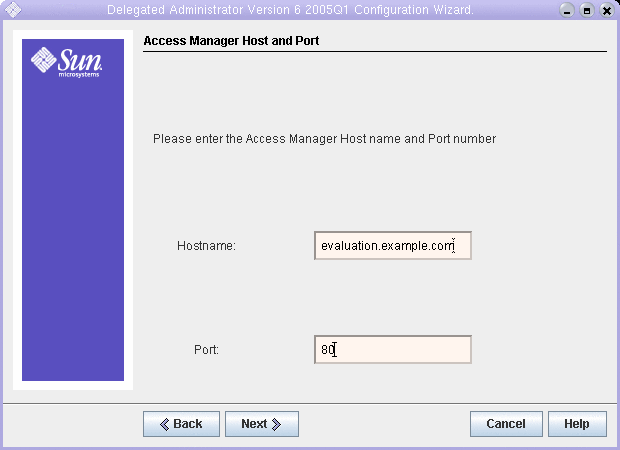
The Access Manager Host and Port page is displayed.
Figure 7–1 Access Manager Host and Port Page
-
Do the following to specify the Access Manager instance on your evaluation_host.
-
In the Hostname text field, confirm that the default value is evaluation_host.
-
In the Port text field, type 80.
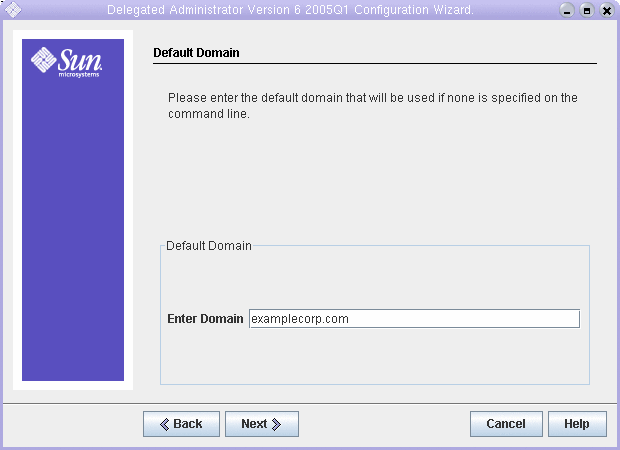
Click Next. The Default Domain page is displayed.
Figure 7–2 Default Domain Page
-
-
In the Enter Domain text field, type examplecorp.com.
Click Next. The Default SSL Port for Delegated Administration Client page is displayed.
-
Click Next to accept the default value (443).
The Web Container page is displayed.
-
Confirm that the default value is Web Server. Click Next.
The Web Server Configuration Details page is displayed.
-
Confirm that the default values identify your default Web Server instance:
-
In the Server Root Directory text field, confirm that the default value is /opt/SUNWwbsvr.
-
In the Server Instance Identifier text field confirm that the default value is evaluation_host.
-
In the Virtual Server Identifier text field confirm that the default value is https-evaluation_host.
-
In the Server HTTP Port text field, confirm that the default value is 80.
Click Next. The Default Domain Separator page is displayed.
-
-
Click Next to accept the default value (@).
The Access Manager Base Directory page is displayed.
-
Click Next to accept the default value.
The Web Server Configuration Details page is displayed.
-
Confirm that the default values identify your default Web Server instance:
-
In the Server Root Directory text field, confirm that the default value is /opt/SUNWwbsvr.
-
In the Server Instance Identifier text field confirm that the default value is evaluation_host.
-
In the Virtual Server Identifier text field confirm that the default value is https-evaluation_host.
-
In the Server HTTP Port text field, confirm that the default value is 80.
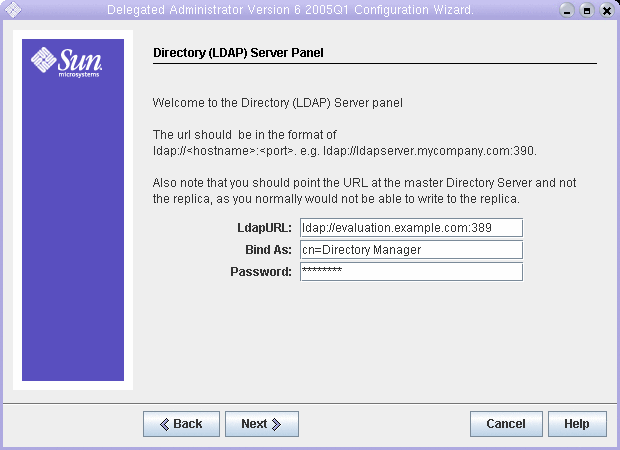
Click Next. The Directory (LDAP) Server page is displayed.
Figure 7–3 Directory (LDAP) Server Panel Page
-
-
Do the following to specify your default Directory Server instance:
-
In the LdapURL text field accept the default value of ldap://evaluation_host:389.
-
In the Bind As text field accept the default value of cn=Directory Manager. There must be a space between Directory and Manager.
-
In the Password text field, type password.
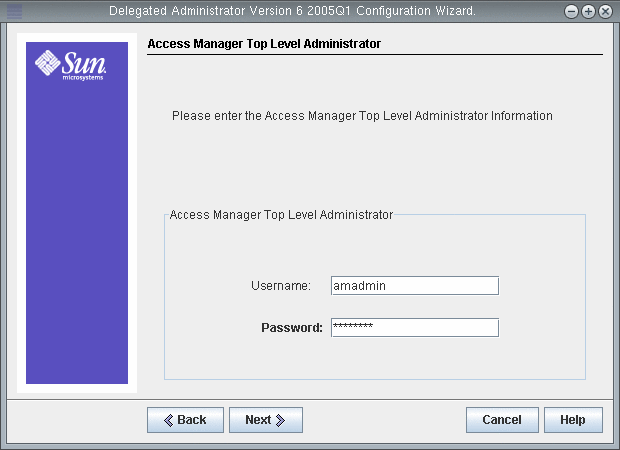
Click Next. The Access Manager Top Level Administrator page is displayed.
Figure 7–4 Access Manager Top Level Administrator Page
-
-
Do the following to identify the top level administrator for your Access Manager instance:
-
In User Name text field, accept the default value of amadmin.
-
In the Password text field, type password.
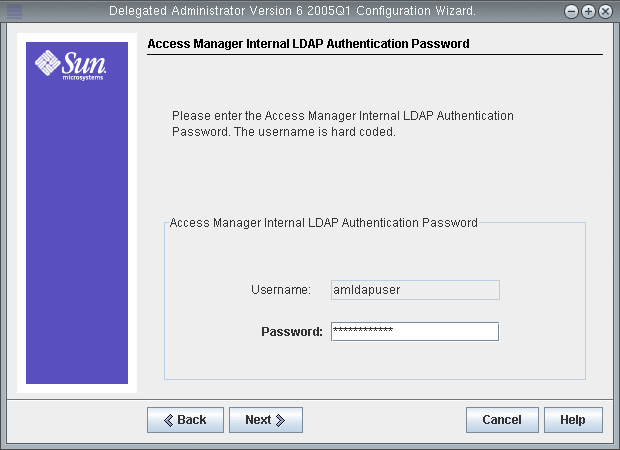
Click Next. The Access Manager Internal LDAP Authentication Password page is displayed.
Figure 7–5 Access Manager Internal LDAP Authentication Password Page
-
-
Do the following to specify the internal user for your Access Manager instance:
-
In the Username text field, accept the default value of amldapuser.
-
In the Password text field, type ldappassword.
Click Next. The Organization DN for the Default Domain page is displayed.
-
-
Confirm that the default organization DN specifies o=examplecorp.com,o=examplecorp.
Tip –The organization DN specifies the LDAP organization (and the associated mail domain) you created with the Messaging Server configuration wizard.
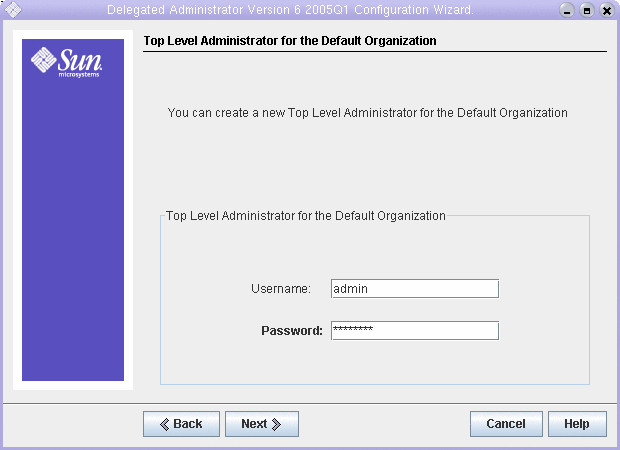
Click Next. The Top Level Administrator for the Default Organization page is displayed.
Figure 7–6 Top Level Administrator for the Default Organization Page
-
Do the following to create a top level administrator for the Delegated Administrator utility:
-
Accept the default admin user ID.
-
Type password for the admin password.
Click Next. The Service Package and Organization Sample page is displayed.
-
-
Do the following:
-
Confirm that Load Sample Service Packages is selected.
-
Confirm that Load Sample Organizations is selected.
-
In the Preferred Mailhost for Sample text field, confirm that the default value is evaluation_host.
Click Next. The Ready to Configure page is displayed.
-
-
Review the configuration summary.
Click Configure Now. The Starting Task Sequence page is displayed. When configuration is complete, the Sequence Complete page is displayed.
-
Review the messages and confirm that the Delegated Administration Utility is successfully configured. You see the following message:
All Tasks Passed
Click Next. A Web Server Restart dialog box is displayed.
-
Click OK.
The Default Domain Post Configuration Task dialog box is displayed.
Tip –This document contains the post configuration tasks for the evaluation example.
-
Click OK.
The Installation Summary page is displayed.
-
Review the installation summary.
Click Close. The configuration wizard closes.
-
Change directory to the Web Server default instance directory.
The directory name includes the fully qualified name of the system on which you installed Web Server.
cd /opt/SUNWwbsvr/https-evaluation_host
-
Run the command to restart Web Server:
./stop; ./start
The Web Server displays a sequence of startup messages. The startup process might take a few moments. When startup is complete, the following message is displayed:
startup: server started successfully
Delegated Administrator is now configured to interoperate with your default Directory Server instance.
Configuring Your LDAP Organization for Mail and Calendar Services
When a user attempts to log in to a Java ES service, the service performs LDAP authentication to determine whether the user is authorized to use the service. LDAP authentication examines the user’s LDAP data for the specific object classes and attributes that indicate that the user is authorized to access the service.
-
If the user’s LDAP data contains those specific object classes and attributes the user is logged in.
-
If the user’s LDAP data does not contain those object classes and attributes, the user’s login is rejected.
Each Java ES service has its own set of object classes and attributes for authentication.
Adding attributes and object classes is known as extending the schema. For the evaluation solution, the LDAP object classes and attributes used to authenticate mail and calendar services are added to the o=examplecorp.com,o=examplecorp organization before a test user account is created in the organization.
This section describes how to extend your LDAP organization’s schema with the object classes and attributes used to authenticate messaging, calendar, and portal services.
 To Extend Your LDAP Organization’s Schema for Messaging
and Calendar Services
This procedure shows you how to add the LDAP attributes and object classes needed for mail and calendar authentication to the o=examplecorp.com,o=examplecorp organization. For a summary of the command syntax, see Delegated Administrator Command Line Details.
Steps
-
Change directory to the Delegated Administration Utility directory:
cd /opt/SUNWcomm/bin
-
Use the commadmin domain modify command to extend your LDAP organization:
./commadmin domain modify -D admin -w password -d examplecorp.com
-S mail -H evaluation_host -S cal -B evaluation_host -P allowProxyLogin:yes
-T America/Los_Angeles
-
You might be prompted to Enter DNS Domain Name. If this happens, type your evaluation_domain and press Enter.
Provisioning an End User Account
This section describes how to use the Delegated Administration Utility console to provision a test user account. You give the test account access to the evaluation solution's portal, mail, and calendar services. For a summary of the command syntax, see Delegated Administrator Command Line Details.
In a production system, Java ES administrators manage users. User management tasks not demonstrated in this chapter include LDAP organizational planning, LDAP database management, and delegated administration.
 To Create a Test End User Account
Steps
-
Change directory to the Delegated Administration Utility directory:
cd /opt/SUNWcomm/bin
-
Run the command that creates the test user account and provisions it for messaging and calendar services:
./commadmin user create -D admin -w password -l TestUser -F Test -L User
-W password -S mail -H evaluation_host -E test.user@examplecorp.com -S cal
-B evaluation_host -J 0 -T America/Los_Angeles -k legacy
-
Run the command that additionally provisions your new account for portal services:
./commadmin user modify -D admin -w password -l TestUser
-A +objectclass:sunssoadapterperson
-A +objectclass:sunportaldesktopperson
You have created a user account and provisioned it for the messaging, calendar, and portal services.
 To Verify Your Test End User Account
This procedure shows you how to verify your test end user account by logging in to Instant Messaging.
Steps
-
In your web browser, open the following URL:
http://evaluation_host/im/en/im.jnlp
The Java Web Start dialog bog is briefly displayed. The Instant Messaging Login page is displayed.
-
Type these values:
-
User ID: TestUser
-
Password: password
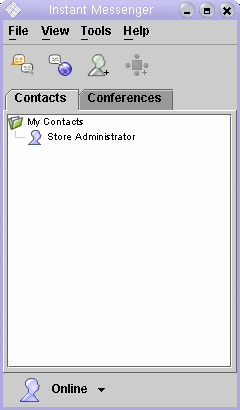
Click Login. The Instant Messaging main window is displayed. This confirms that your test account is correctly provisioned.
Figure 7–7 Instant Messaging Main Window
-
-
Click Logout, in the upper right corner of the main window.
Tip –To evaluate the features of Instant Messaging, create additional test user accounts. Log in to several test accounts at the same time and send messages between the test accounts.
- © 2010, Oracle Corporation and/or its affiliates
