Creating the OTDs
The Database OTD Wizard generates Object Type Definitions (OTDs) by connecting to external data sources and creating corresponding OTDs. The sample project requires three OTDs to interact with the DB2 Adapter.
These OTDs are:
-
DB2 Database OTD
-
Inbound DTD OTD
-
Outbound DTD OTD
The sample project ZIP file includes DTDs used to create the inbound and outbound DTD OTDs.
 Create the DB2 Database OTD
-
Right-click your new Project in the Project window, and select New -> Object Type Definition from the popup menu.
The New Object Type Definition Wizard appears.
-
In Step 1 of the wizard, select the wizard type. In this case, select DB2 Database as the wizard type. Click Next.
-
In Step 2 of the wizard, specify the database connection information.
The connection information fields are:
-
Host name
-
Port
-
Database
-
User name
-
Password
Once you have entered the correct information in the connection fields, click Next.
-
-
In Step 3 of the wizard, select the types of database object you want to include in your project
For this example, select the following:
-
Tables/Views/Aliases
-
Prepared Statements
Click Next.
-
-
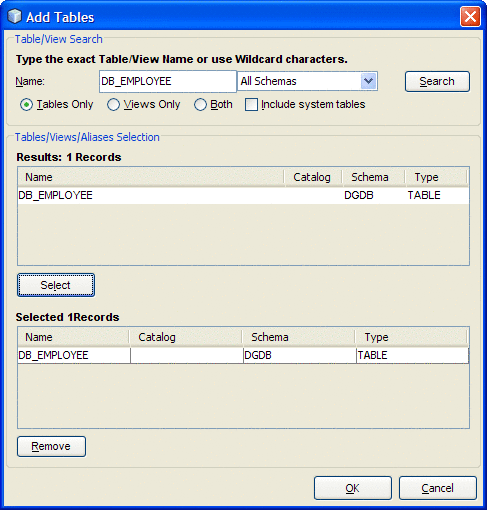
In Step 4 of the wizard, select the table for the project. Click Add. The Add Tables dialog box appears.
-
From the Add Tables dialog box, search for or enter the name of the database. For this example, use the DB_EMPLOYEE table. When the database appears in the Results selection frame, click Select, and click OK to close the Add Table dialog box.

-
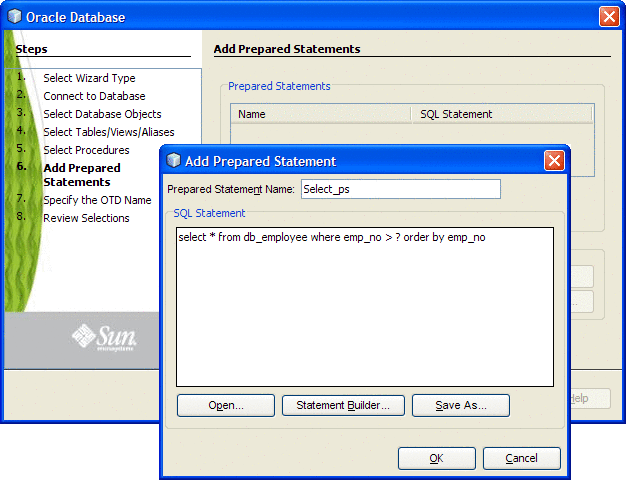
Click Next. The wizard proceeds to Step 6, Add Prepared Statements. Click Add.
The Add Prepared Statement dialog box appears.
-
In the Add Prepared Statements dialog box, enter Select_ps as the Prepared Statement Name, and enter the following as the SQL Statement:
select * from db_employee where emp_no > ? order by emp_no

Note –In this example, the SQL statement includes the ? placeholder for input. This placeholder represents the Where Clause.
-
Click OK to close the Add Prepared Statement dialog box, and then click Next.
-
In Step 7 of the wizard, enter a name for the OTD. In this example, use otdDB2. Click Next.
-
In Step 8 of the wizard, review your settings, then click Finish to create the OTD.
 Create the Inbound and Outbound DTD OTDs
-
To create the inbound DTD OTD, right-click your project in the NetBeans Projects window, and select New -> Object Type Definition from the popup menu.
The New Object Type Definition Wizard appears.
-
Select DTD as the wizard type, and click Next.
-
Browse to and select the otdInputDTD.dtd file that was extracted with the sample project. Click Select, and click Next.
-
In Step 3 of the wizard, select the otdInputDTD_DBemployees document element, and click Next.
-
In Step 4 of the wizard, accept the default option settings, and click Finish.
The new OTD, otdInputDTD_DBemployees, now appears under your project's otdALL node, in the Projects window.
-
To create the otdOutputDTD_DBemployees OTD, repeat steps 1–5 above, substituting otdOutputDTD.dtd for the DTD in step 3.
When you're finished, the project's otdALL folder now contains three OTDs: otdDB2, otdInputDTD_DBemployees, and otdOutputDTD_DBemployees.
Next Steps
For your next step, see:
-
Creating the Collaboration Definitions (Java) if you are creating the prjDB2_JCD Project.
-
Creating the Business Processes if you are creating the prjDB2_BPEL Project.
- © 2010, Oracle Corporation and/or its affiliates
