| Exit Print View | |
Sun Installation Assistant 2.3 through 2.4 User's Guide for x64 Servers |

|
About This Documentation (PDF and HTML)
Shell Prompts in Command Examples
Introduction to Sun Installation Assistant
Getting Started With Sun Installation Assistant
SIA Version 2.3 Through 2.4 Features and Benefits
Supported Servers and SIA Media Availability
Starting SIA and Preparing for Deployment or Recovery Tasks
Local and Remote Media Options
How to Start SIA and Prepare for Tasks Using Local or Remote Media
How to Delete a RAID Volume Using SIA
How to Install Windows With SIA Using Local or Remote Media
How to Install Linux With SIA Using Local or Remote Media
Using SIA to Upgrade System Firmware
How to Upgrade the System BIOS and ILOM Firmware
How to Upgrade Expander Firmware
Using SIA to Recover a Service Processor
How to Recover a Service Processor
Performing an SIA PXE-Based Attended Installation
Obtain the SIA PXE Image Files
How to Create the SIA Image and Prepare for PXE Boot
How to Boot SIA From a PXE Server for an Attended Installation
Performing an SIA PXE-Based Unattended Installation
Obtain the SIA PXE Image Files
Contents of the SIA State File
How to Prepare for an Unattended SIA Installation of Linux
How to Prepare for an Unattended SIA Installation of Windows Server
How to Prepare for an Unattended SIA Firmware Upgrade
How to Create the SIA Image and Prepare for PXE Boot
How to Boot SIA From a PXE Server and Perform an Unattended Installation
Observing an SIA PXE-Based Unattended Installation
Set Up Passwords for Root and Virtual Access
Using a Virtual Console or Secure Shell (SSH) Connection
Debugging Unattended Installation Problems
Creating a Bootable SIA USB Flash Drive
Setting BIOS Parameters and Booting Off the SIA USB Flash Drive
Identifying a Linux Boot Device on a Sun Fire X4500 Server
How to Identify a Linux Boot Device on a Sun Fire X4500 Server
How to Install Service Tags in Linux
You should have already started SIA and prepared it for tasks as described
in ![]() Starting SIA and Preparing for Deployment or Recovery Tasks.
Starting SIA and Preparing for Deployment or Recovery Tasks.
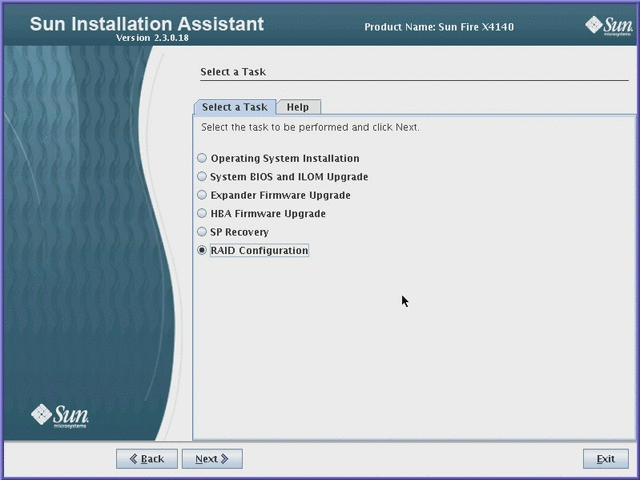
The Select a Task menu should be displayed.

Select the RAID Configuration task, and then click Next.
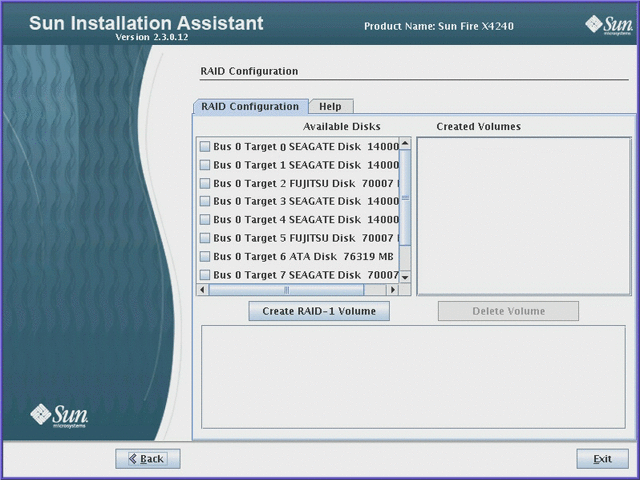
The RAID Configuration page appears.

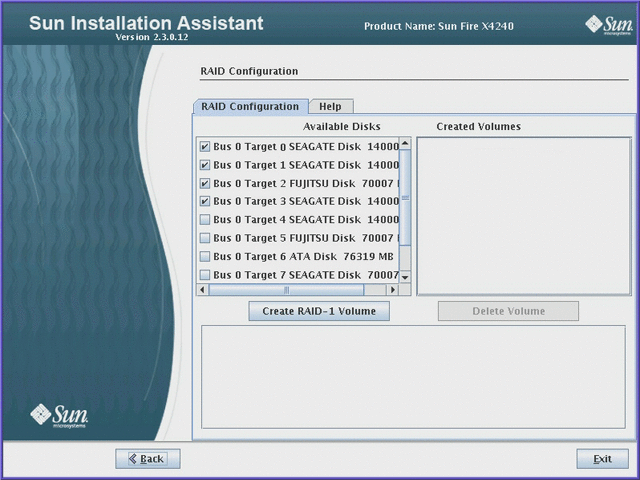
At the RAID Configuration page, select the disks to be included in the RAID volume from the Available Disks box.
For a RAID 1 or a RAID IM volume, select two disks.
For an integrated mirror enhanced (IME) volume, select from 3 to 10 disks.

Note - The interface will not allow you to select more disks per volume than is supported by your disk controller. If your controller does not support IME volumes, you will only be allowed to select two disks per volume.
Click the Create RAID-1 Volume button.
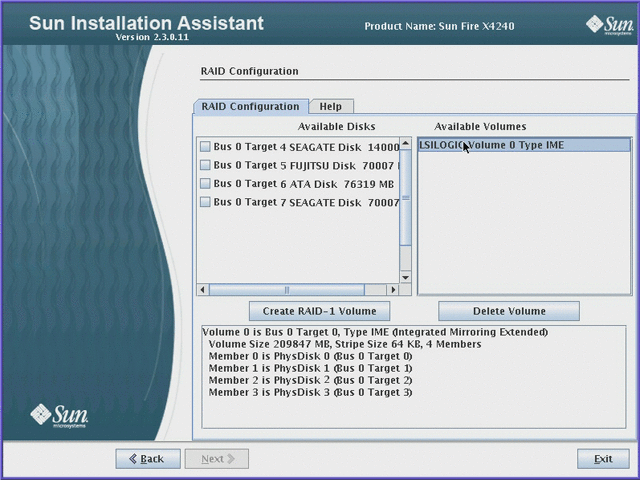
The volume is created and listed in the Created Volumes box. Click on the created volume to see additional details.

Note - Disks included in the RAID volume are no longer listed in the Available Disks box.
Once the RAID volume(s) are created, you can install an operating system on the boot volume.