|
|
 |
|
|
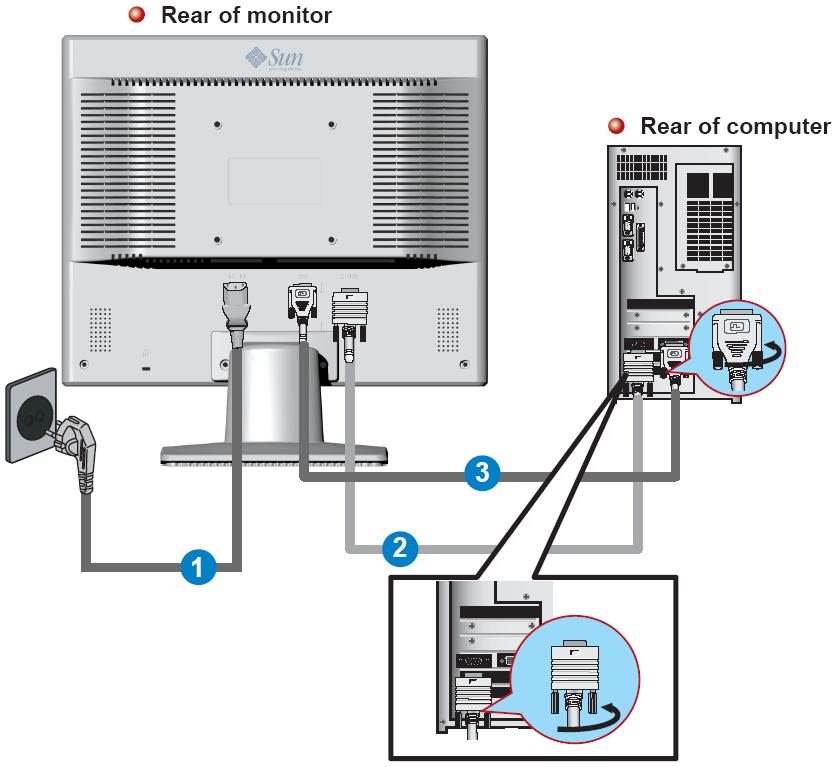
| 1. |
Connect the power cord for your monitor to the power
port on the back of the monitor.
Plug the power cord for the monitor into a nearby outlet. |
| 2. |
Using the D-sub (Analog) connector on the video card.
Connect the signal cable to the 15-pin, D-sub connector on
the back of your monitor. |
| |
 |
| 3. |
Using the DVI (Digital) connector on the video card.
Connect the DVI Cable to the DVI Port on the back of your
Monitor. |
| |
 |
| 4. |
Turn on your computer and monitor. If your monitor
displays an image, installation is
complete. |
|
| - |
If you connect both the D-sub and DVI cables to one
computer at the same time, you may get a blank screen,
depending on the type of video card you are using. |
| - |
If you properly connect your monitor using the DVI
connector but get a blank screen, check to see if the monitor
status is set to analog. Select Digital input source to have
the monitor double-check the input signal source. |
|
|