Optional Front Panel Icon Style
The icons that appear by default in the Front Panel have a slightly different appearance from File Manager icons. They appear to be etched into the surface. This gives the icons a more permanent look, because they cannot be dragged and dropped.
You do not have to provide size 48 icons with an etched appearance like the default icons in the desktop. It is not easy to determine if and when your icons will be used in the Front Panel; therefore, it is recommended you not design specifically for this usage, rather design for File Manager usage which will be more common.
If you decide to design Front Panel icons, the following are instructions on developing the etched look. It is strongly recommended that you work with a visual designer to implement this style.
Achieving the Etched Look
You must be familiar with dynamic colors to apply etching. Start with a size 48 icon that does not use the entire 48x48 space. The artwork should leave a few pixels on all sides for the etching.
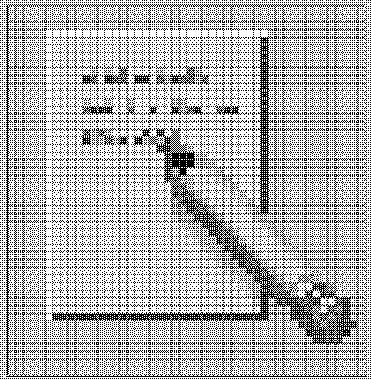
Figure 4-18 Example of an icon lighted from the top left edge

The icon has to be rendered with both light and dark colors, preferably grays. The icon must be lit from above and to the left. The upper and left edges must be light in color, while the lower and right edges must be dark in color. Figure 4-18 shows the desktop Text Editor icon before any etching has been applied.
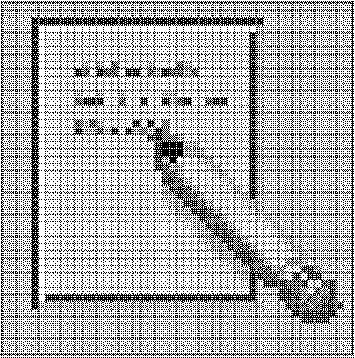
Figure 4-19 Applying the bottomShadow and topShadow colors

The etched effect is applied by drawing a single-pixel line of the bottomShadow color just outside the upper and left edges of the icon artwork, and by drawing a single-pixel line of topShadow color just below and to the right of the artwork.
The lighting model of the icon and of the etched shadow must be consistent or the effect does not work. If your icon is drawn with black lines, the etched look will be flawed by doubling the dark lines on the top and left edges.
The style of the icon is critical to making the etched effect look right and to making your icon blend in with other Front Panel icons. Study the Front Panel icons supplied with the desktop for guidance. Icons with perspective scenes, icons with black outlines, and icons on raised "slabs" will not work.
Evolving the Etched Look
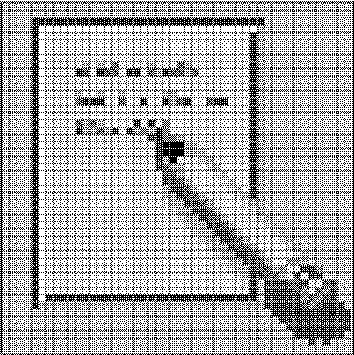
Etching is a way of making the icon appear to be part of the surface it is etched on. Not all the parts of an icon have to be etched into the surface. You can apply selective etching, making part of the object anchor itself in the panel and some of it lie on the panel or protrude from it slightly.
Figure 4-20 Example of anchoring page while letting pencil protrude from surface

The Help icon, for example, takes away the etch, made with the topShadow color, under and next to the right-hand book, and replaces it with a select color shadow. This makes it appear that one book is protruding slightly from the shelf. The printer icon has a protruding paper tray. In the Style Manager icon, the palette, letters, and mouse are above the etched-in window frame. The File Manager icon has gone the furthest, as only the edge of the opening is etched, while the drawer front and the cocked folder protrude and even have a shadow.
The principle is to have something in the artwork anchored, yet let the 3-D nature of the objects come out as well. The variable content in an icon, like the printer page or the mail envelopes in the Mailer icon, should not be anchored.
- © 2010, Oracle Corporation and/or its affiliates
